
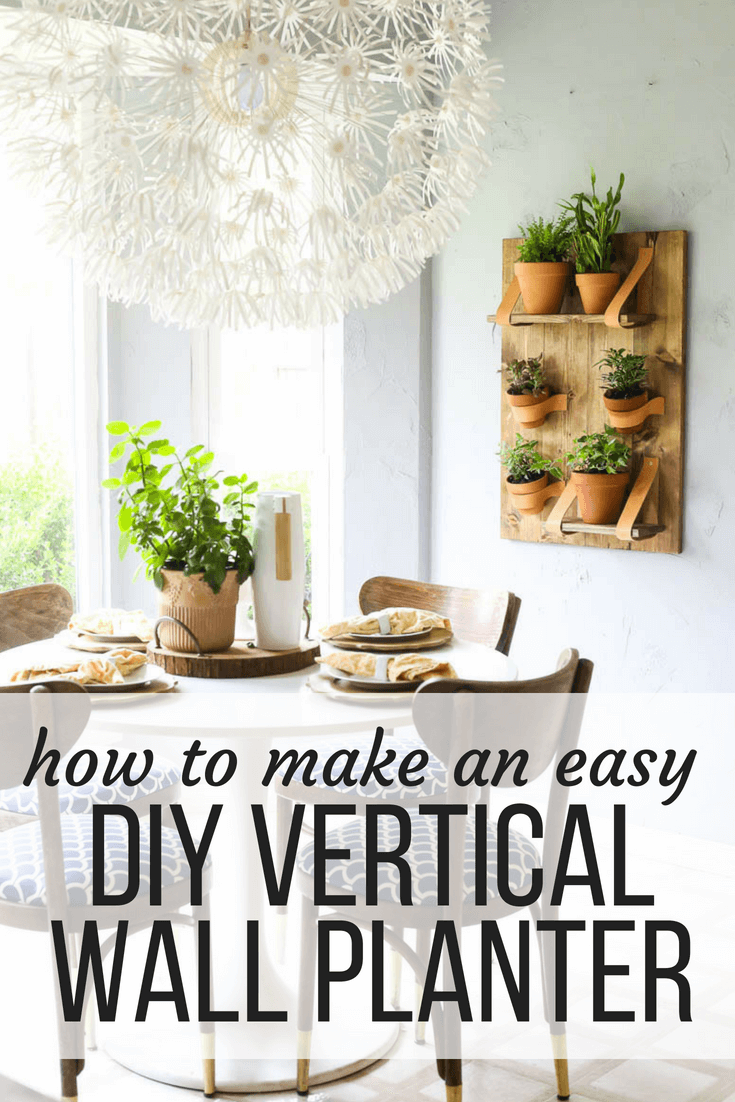
DIY Vertical Wall Planter
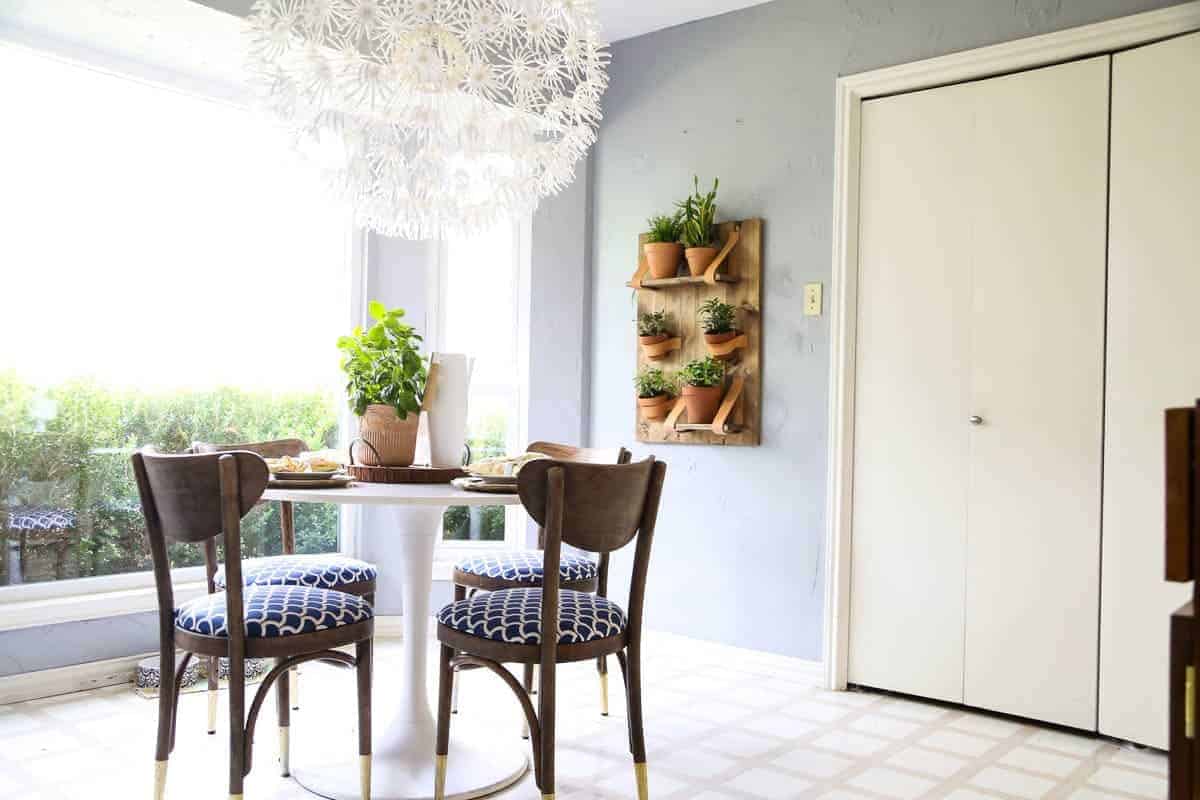
I recently built a simple DIY vertical wall planter for our kitchen and I’m obsessed with how it turned out! It’s such a simple project that makes a huge impact and is a great way to bring a little more green into your home. Learn how to make this easy plant wall shelf today!
Y’all – I’m so excited to share this DIY vertical wall planter with you because I did it all by myself. It involves power tools and drilling and creating pocket holes and I didn’t even ask for help once. In fact, I started on it after Corey left for work one morning and by the time he got home it was finished and hung on the wall.
I’m practically a pro now.
(Ummmm no. I’m not. Not even close.)
If you follow me on Instagram, you’ve already seen a few peeks at this beauty – I made it a few weeks ago and have just been behind on getting projects up on the blog. This is one of those projects that came together in a bit of a whirlwind – I wanted to build something, I didn’t know what I wanted to do, and so I just went into the garage and started working.
Sometimes you’ve got to dive in before you even know what you’re doing.
That’s kind of my motto in life.
(Which is basically a more flattering way to say that I never have any idea what I’m doing.)
Annnnyways. The planter. Let’s talk about it. Wanna learn how to make one?
(Side note: If you follow me on social media you may notice the old flooring – I took these photos before I replaced the flooring in the kitchen…I promise I’ll share those photos very soon!)
This post contains affiliate links. Click here to read my full disclosure policy.
How to Make an Easy DIY Vertical Wall Planter
Materials Needed:
- (4) 1X6 boards (I used whitewood), cut to whatever length you’d like, plus 1 extra for shelves
- Kreg Jig Pocket Hole System
- Pocket hole screws
- Drill + driver
- Ratchet bar clamps
- Wood glue
- Leather strips (I used 4 cut to about 22 inches and 3 cut to about 12 inches)
- Screws (I used brass)
- French cleat
- Stain + sealer
- Small and medium-sized terracotta pots
- Plants (I grabbed mine from the houseplant section of my hardware store)
How to Make Your Vertical Planter:
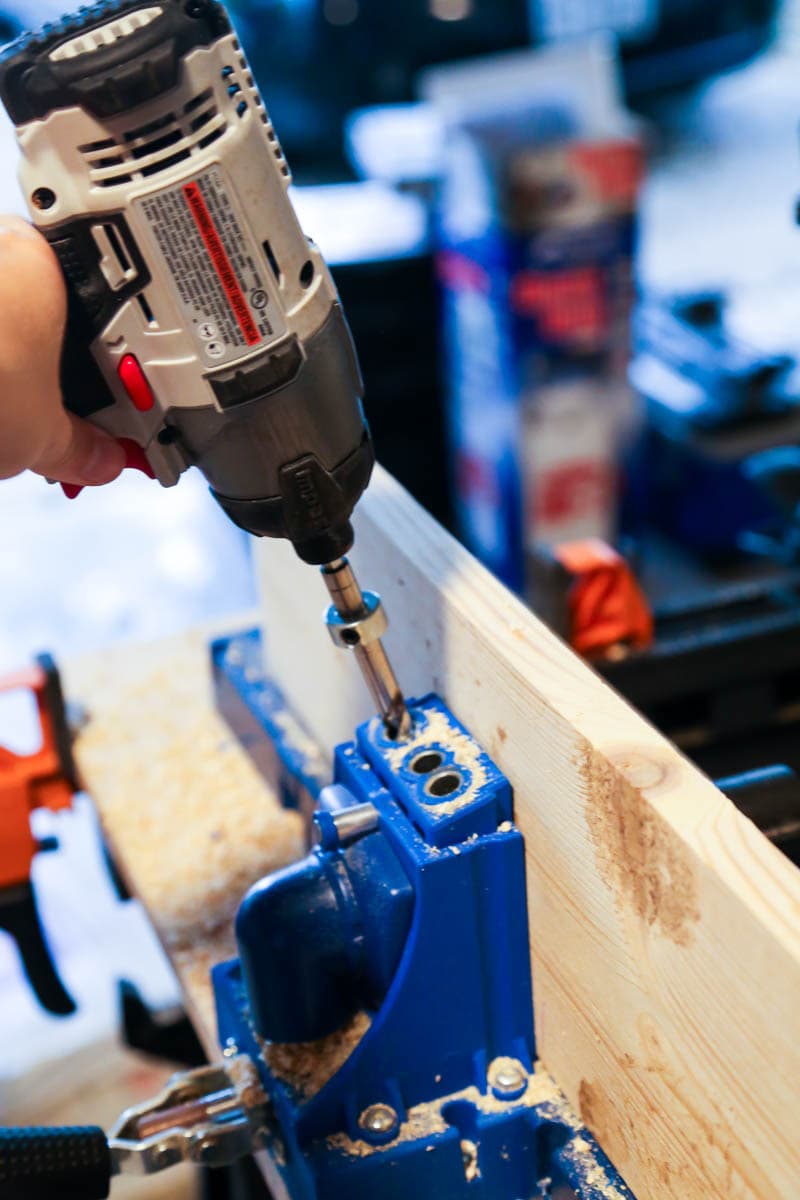
STEP ONE: Attach Boards Together
The first step is to attach your 1X6 boards together to create the backing for the vertical wall planter. I used pocket holes to do this – I’m planning on getting a post together with a video on how to use the Kreg Jig system, so be on the lookout for that!
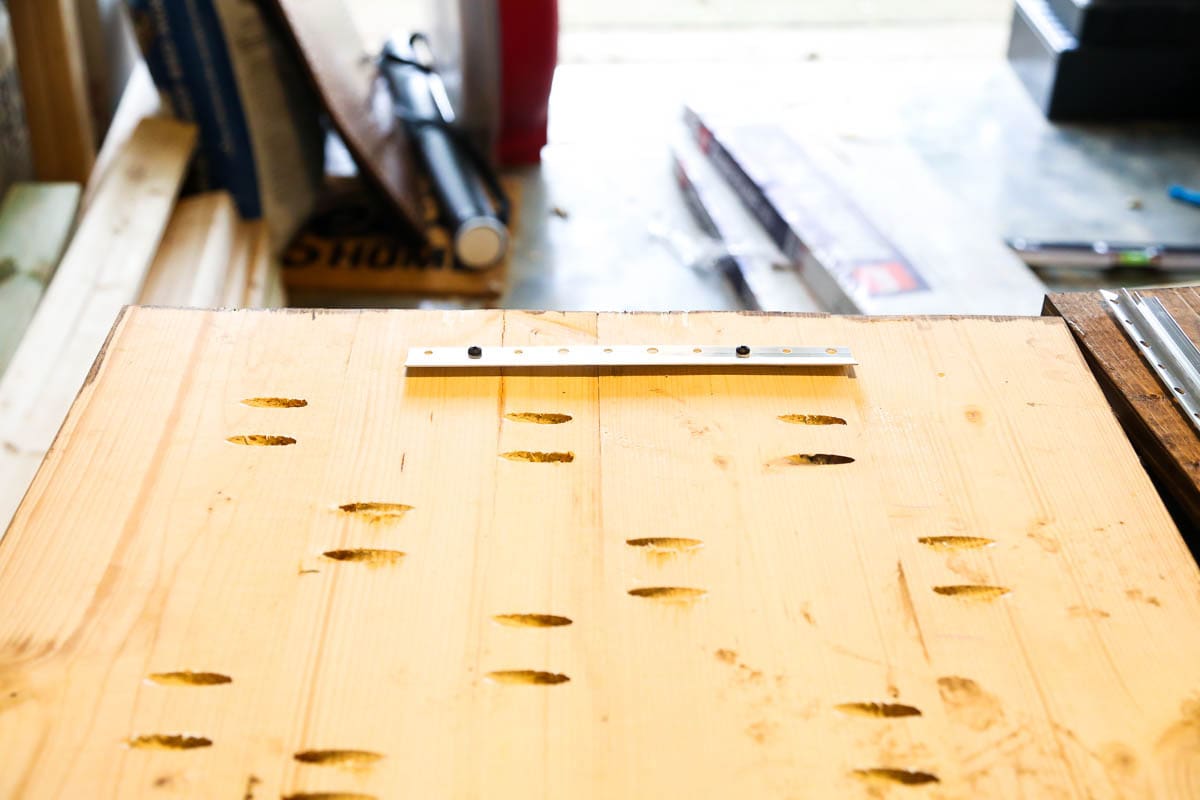
It’s a pretty simple process – I probably went a little overboard with my pocket holes, though. I did four sets on one side of each board and three on the other (so that they’d kind of alternate when you put them together). It’s definitely a sturdy piece, but I probably could have gotten away with, like, half as many screws.
Ah well, I’m nothing if not thorough.
(Also, I’m a total beginner and had no idea what I was doing. Shhhhh.)
I used a large ratchet bar clamp to hold the boards together while I was working. You may also notice that I neglected to use wood glue, which is kind of a no-no. Ideally, I would have spread some wood glue on the sides of each board prior to attaching them together. But I didn’t.
Again, beginner. Hot mess. Whatever you want to call it.

STEP TWO: Stain Your Vertical Planter
Once all four boards are attached, you’re ready to stain. Don’t forget to stain both the backing for the vertical wall planter and also the wood for the shelves.
Obviously, you could paint it, leave it bare, or whatever. I wanted to bring some wood tones into my kitchen, so I went with a stain. While I was working, I also hopped onto Facebook to do a live video of my process for staining. I get questions about it all the time, so I wanted to show what I do.
Fair warning, I’m not a pro, which means I don’t use professional techniques.
(Remember? Hot mess.)
But, it works and it has worked for me for years and years, so I’m not complaining. Also, there’s a bonus “real life” moment in the video where I have to step away to tell my child to calm the heck down so I can keep filming. #momwin
Pretty sure I’ve had to do that on every Facebook live video I’ve done so far. Real life at its finest, my friends.
Anyways. Once your wood is stained and dried go ahead and attach your french cleat to the back of your board.
Oh, and side note – I mentioned in the Facebook video that I wasn’t going to seal it, but I ended up deciding to do it anyway. Once I thought about it, I realized the wood may get wet from watering the plants and it was probably best to have some sort of barrier to protect it. I used this polycrylic (which is what I use on just about everything).
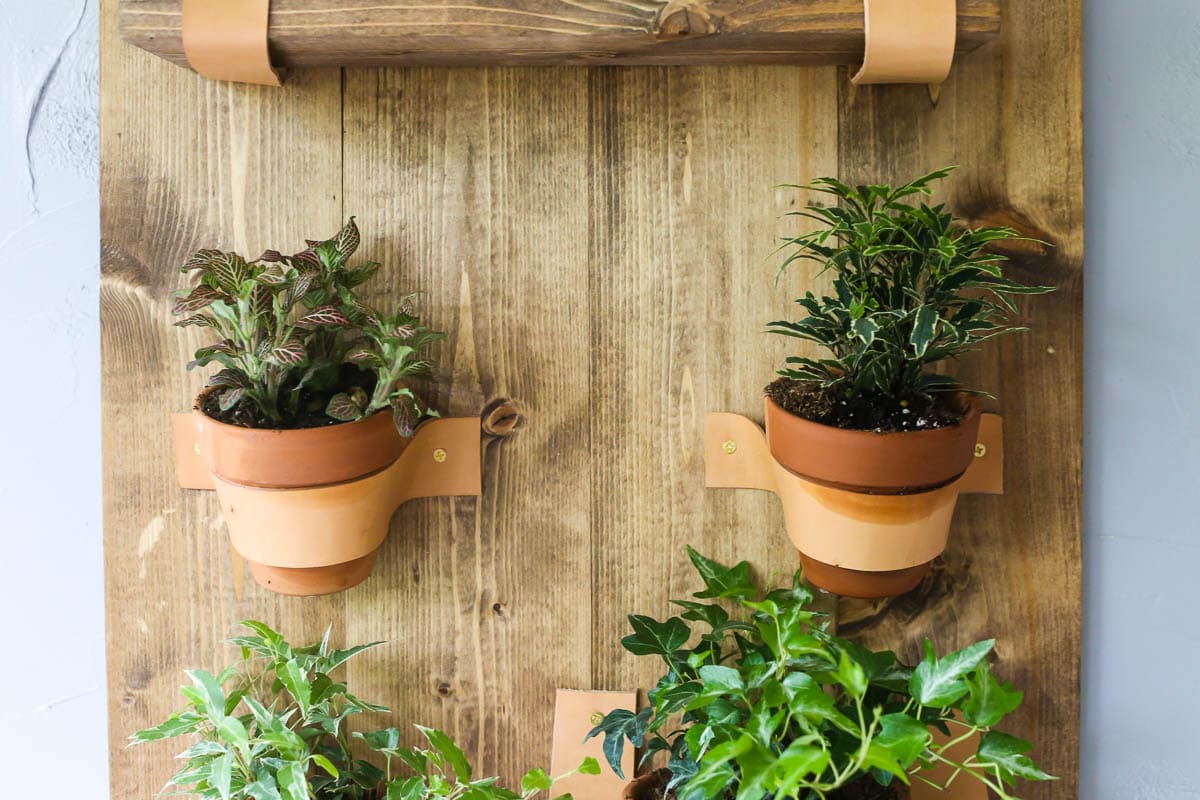
STEP THREE: Attach Leather Straps & Shelves
Now comes the fun part.
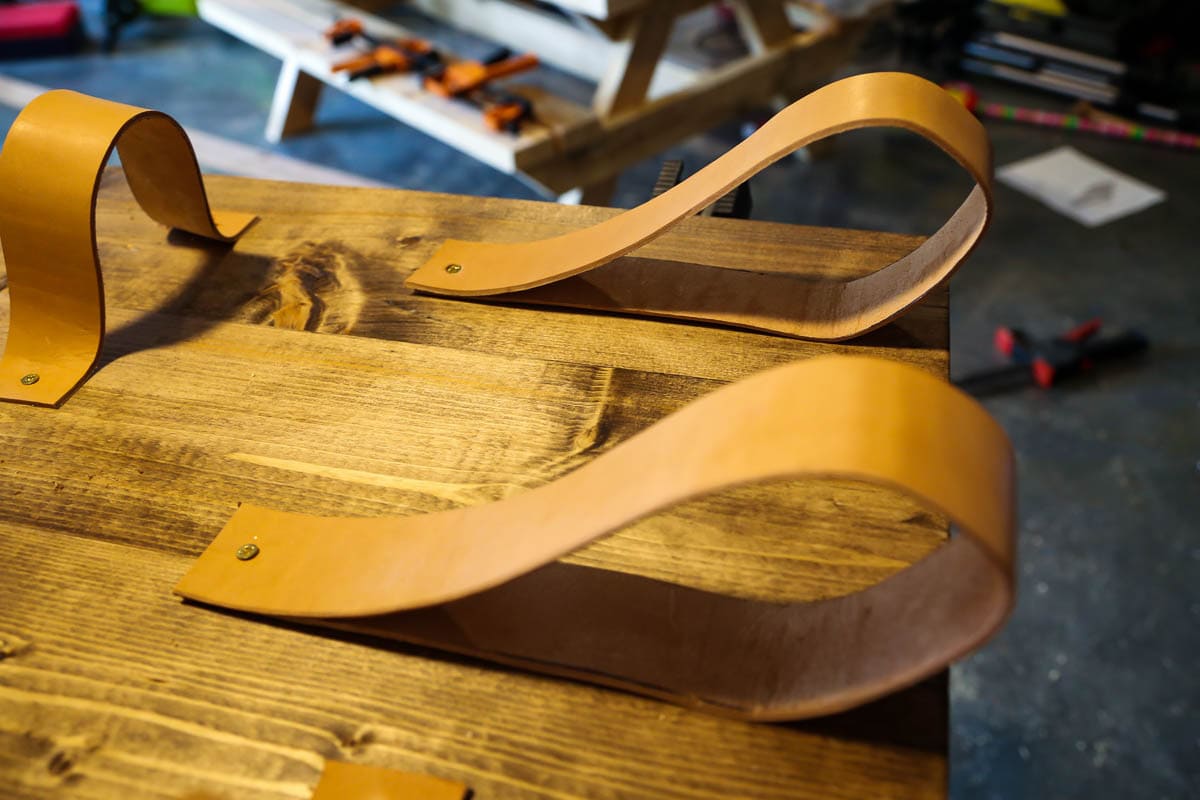
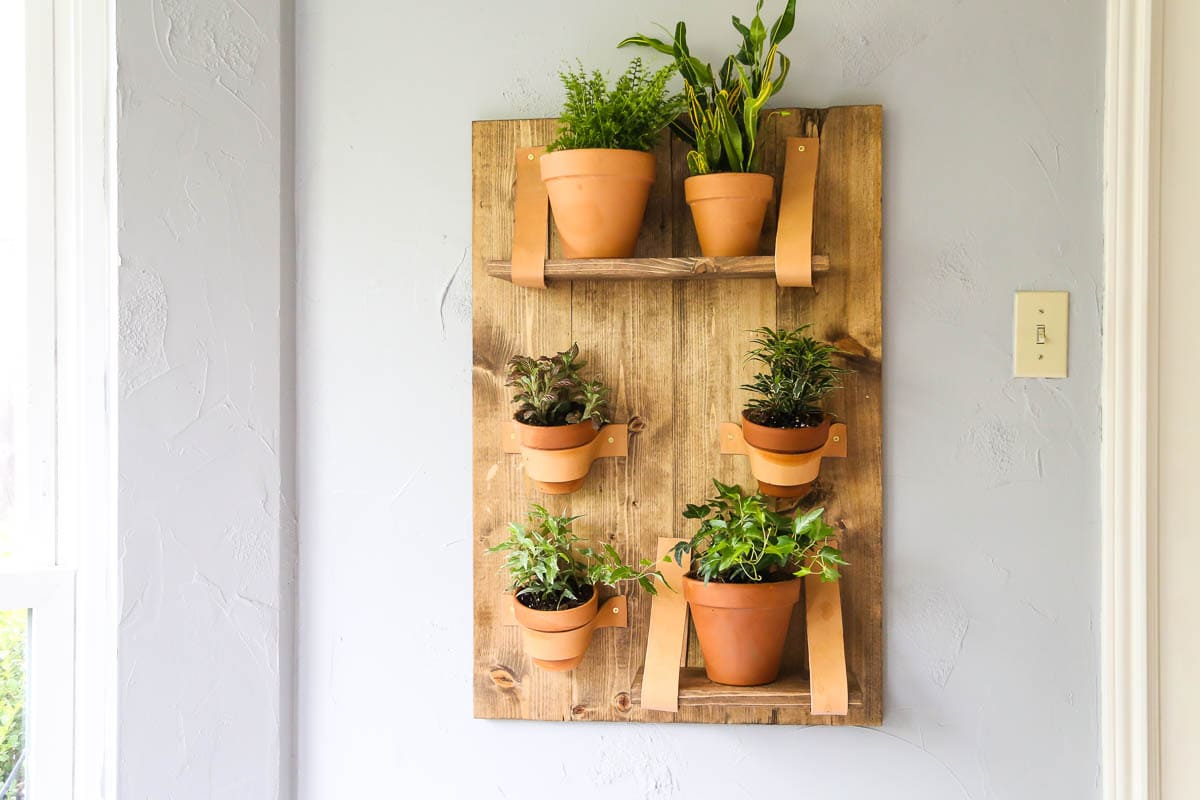
I created some leather straps for both the shelves and the planters to give it a more unique look. My original thought was to use two-hole straps from the plumbing section of the hardware store for the planters, but once I got there I realized they don’t sell any big enough to actually hold a planter. I did some quick brainstorming in the middle of Lowe’s (as one does) and came up with the plan to use leather instead.
Sometimes the very best ideas come to you because something goes wrong.
To make the leather straps, I used basically the exact same process I used for our DIY leather drawer pulls, except I didn’t dye the leather this time. I won’t go through it again here, but just know that if you have a couple of old leather belts lying around they will accomplish the exact same purpose with a lot less work.
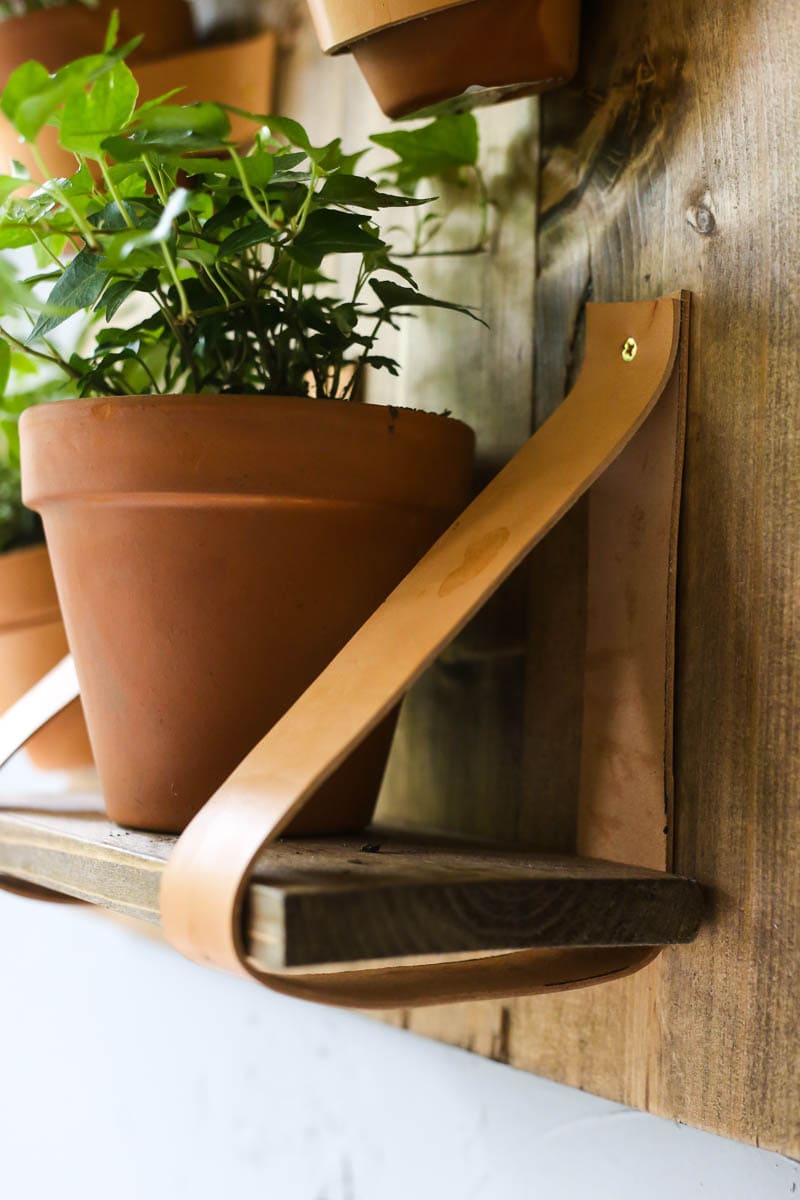
I really just did a lot of trial and error with the length of the straps. For the shelf supports, I grabbed my shelf board and created a little mock-up to see how long I wanted the straps to be. You could easily create yours longer or shorter than mine, it would just affect how high up the supports go on the backing. For the planter straps, I just estimated a length and then tested it and adjusted on the board as I was attaching it to make sure it would fit the planter.
Basically, what I’m saying is it’s a little like cooking. Do a little of this and a little of that and keep adjusting until you find something that tastes good. I mean, looks good. Don’t eat the leather – no matter how good it smells.
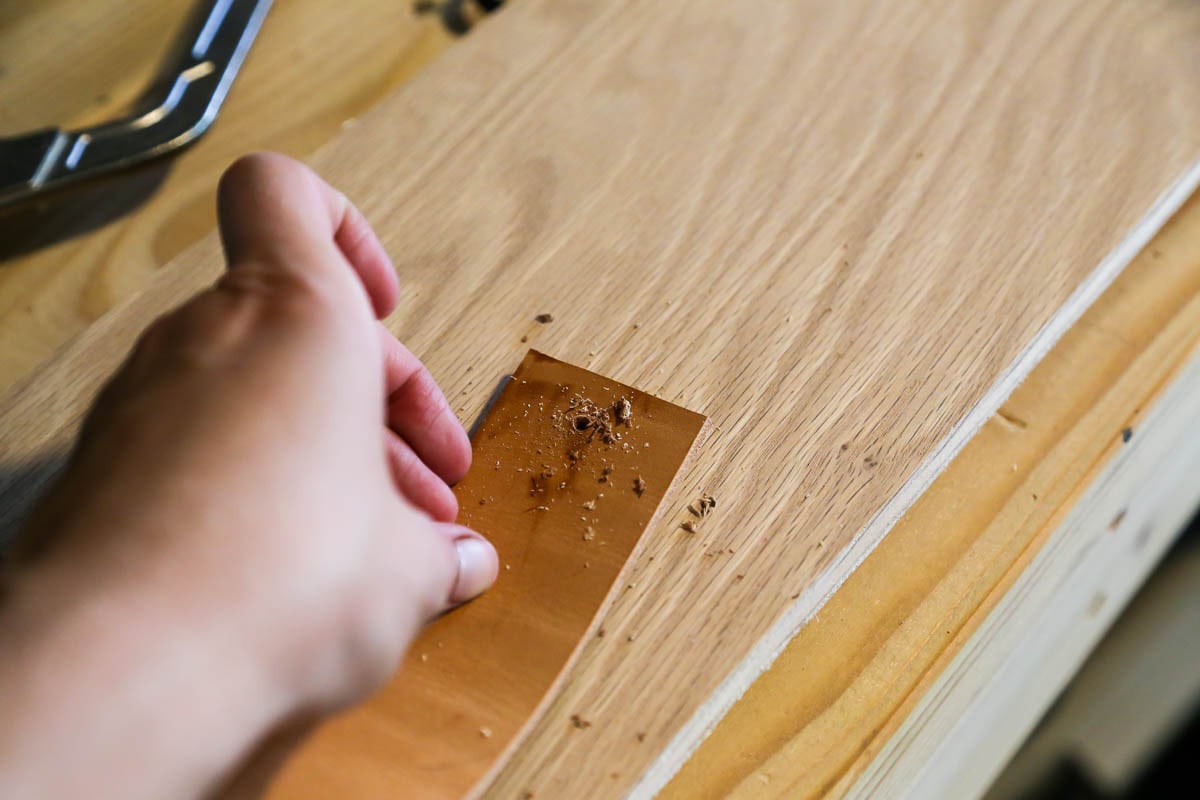
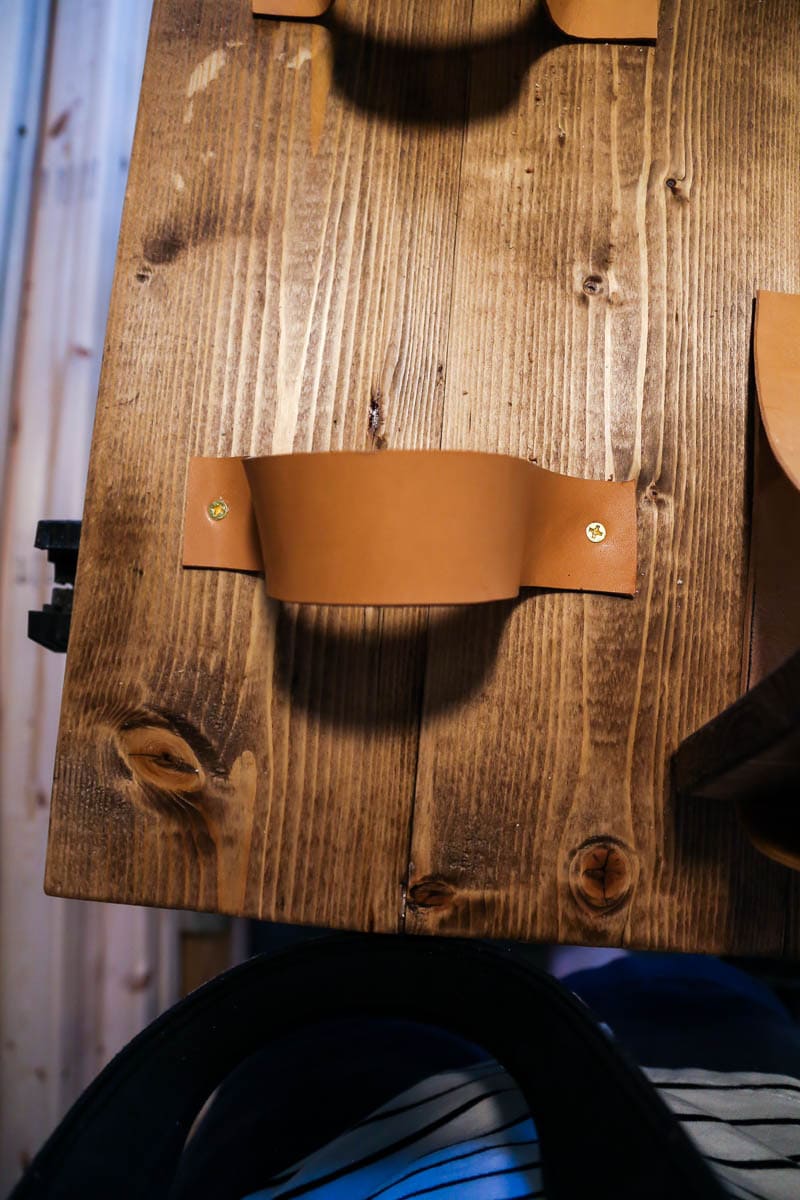
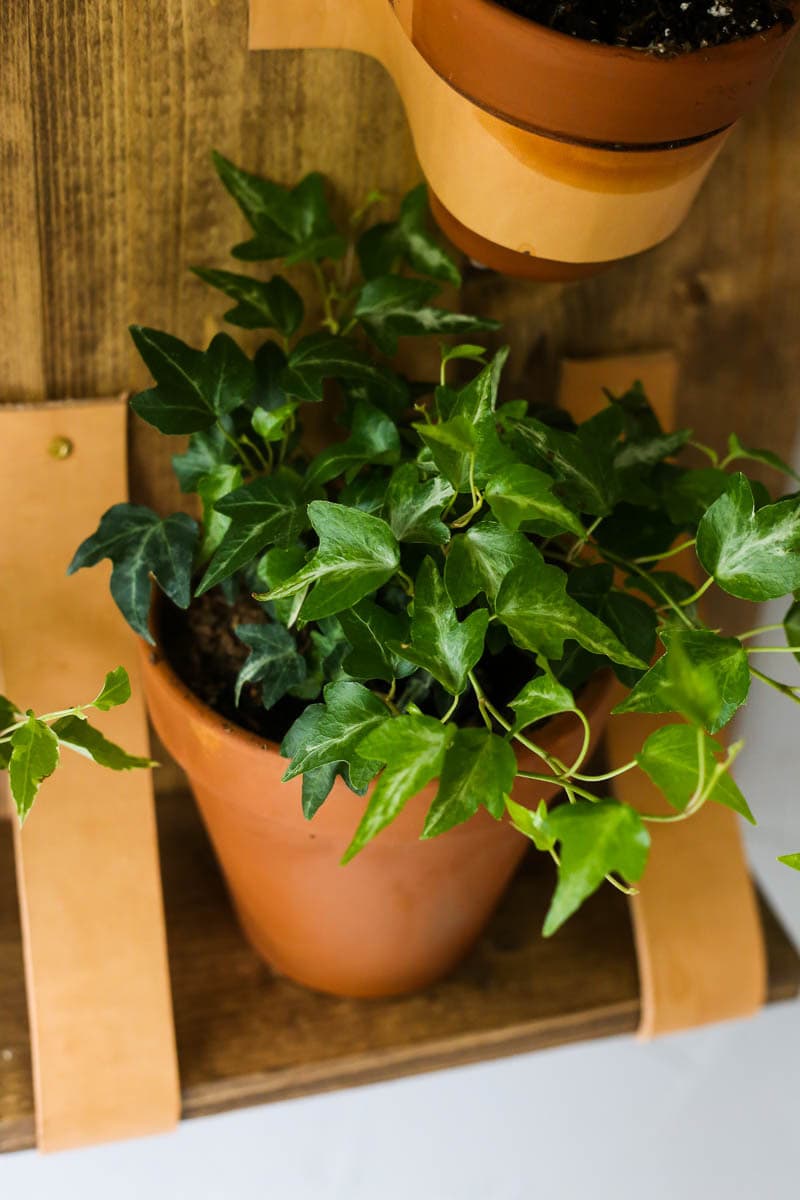
To attach the leather, just pre-drill a hole that’s approximately the same size as your screw, then screw it into the backing for the vertical wall planter.
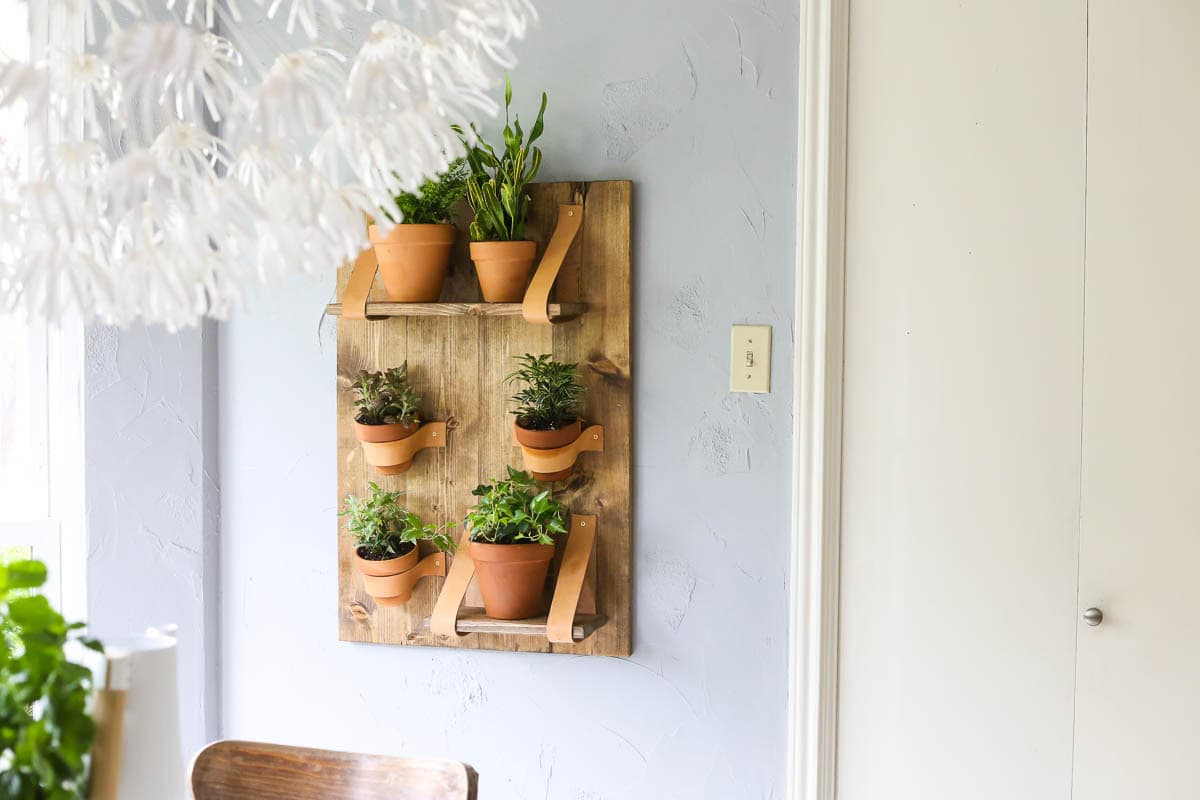
Again, there’s no science to how you lay it all out on the wood. I did a little measuring and playing around with where the shelves would land (for instance, I made sure the top shelf was centered, and I made sure everything else was at least level with each other) but I didn’t spend too much time on it.
STEP FOUR: Attach French Cleat & Hang
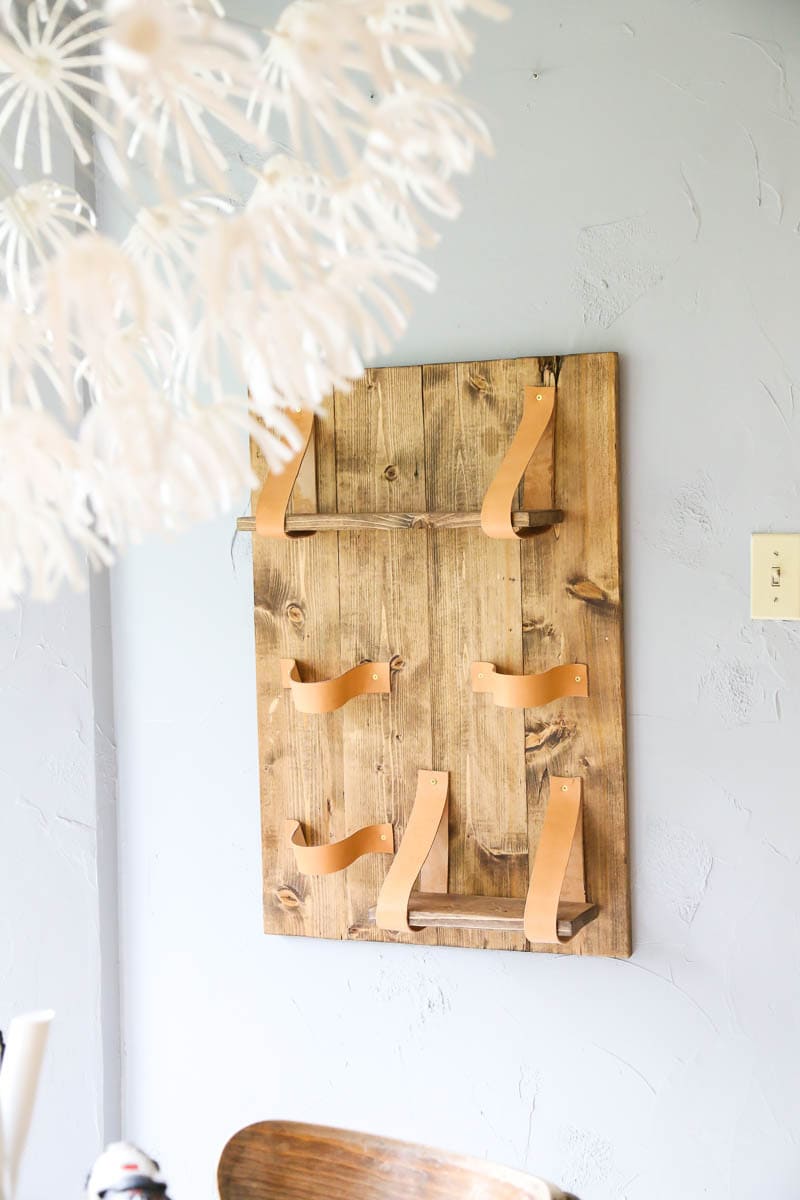
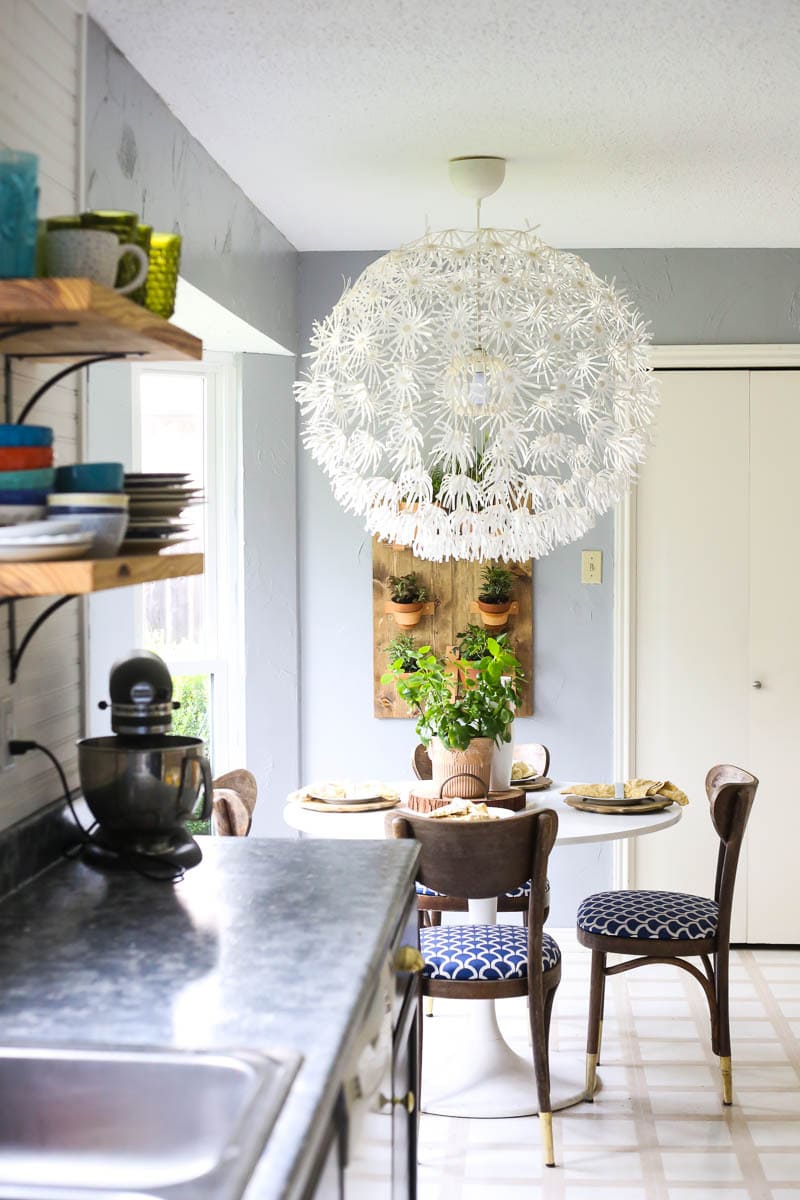
Once I was all done, I hung the other side of the french cleat on the wall in my kitchen and popped it into place.
Here’s what it looked like before I added anything to it:
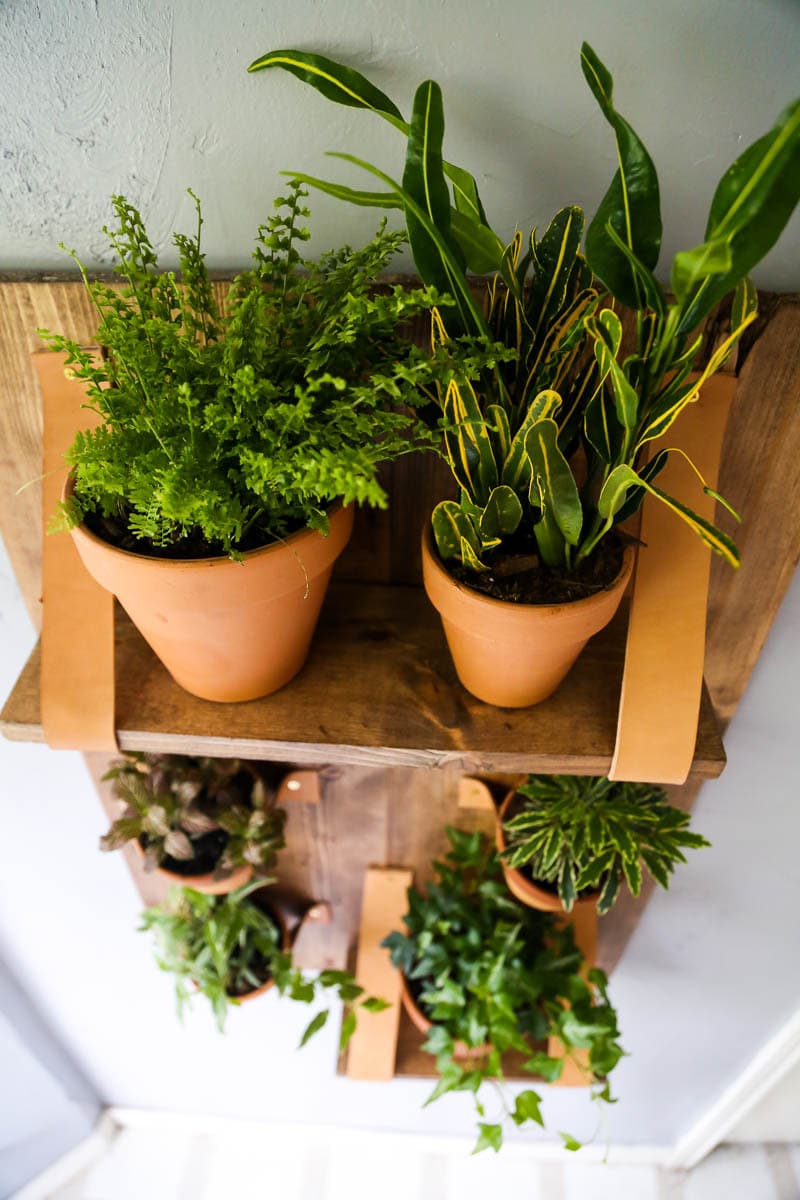
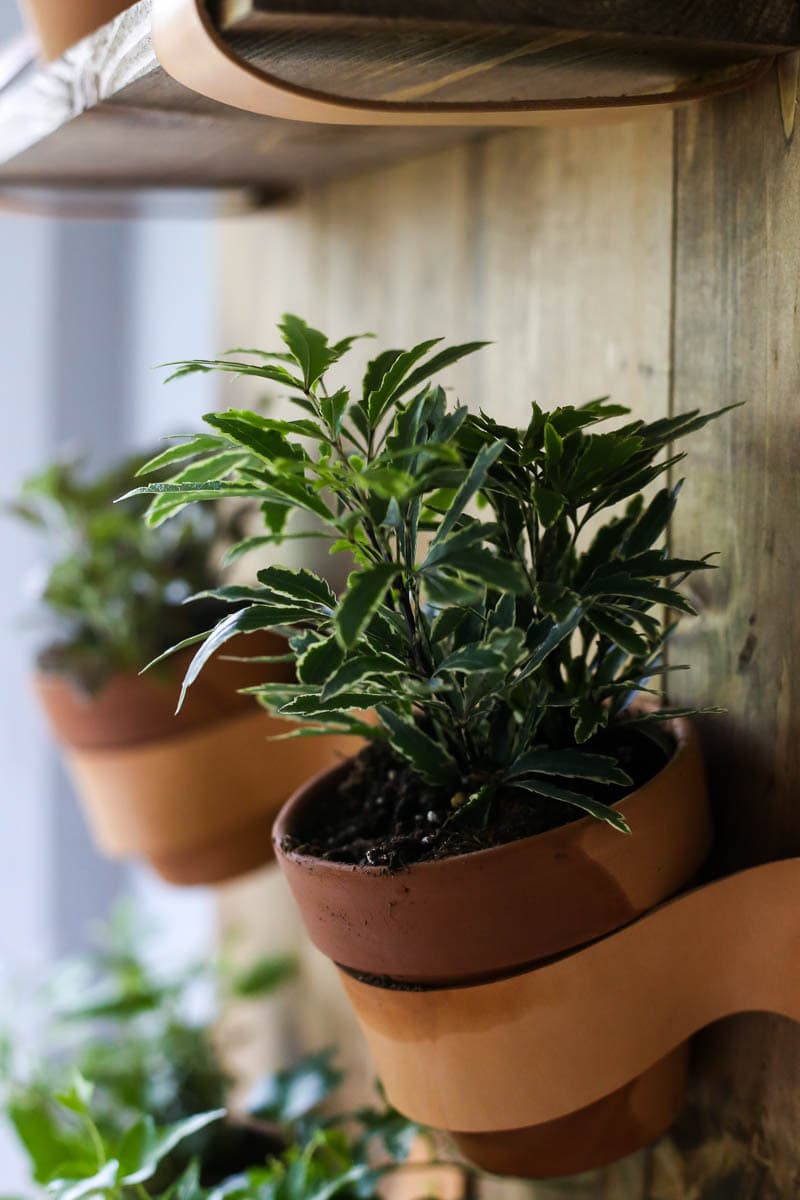
And then? Fill ‘er up.
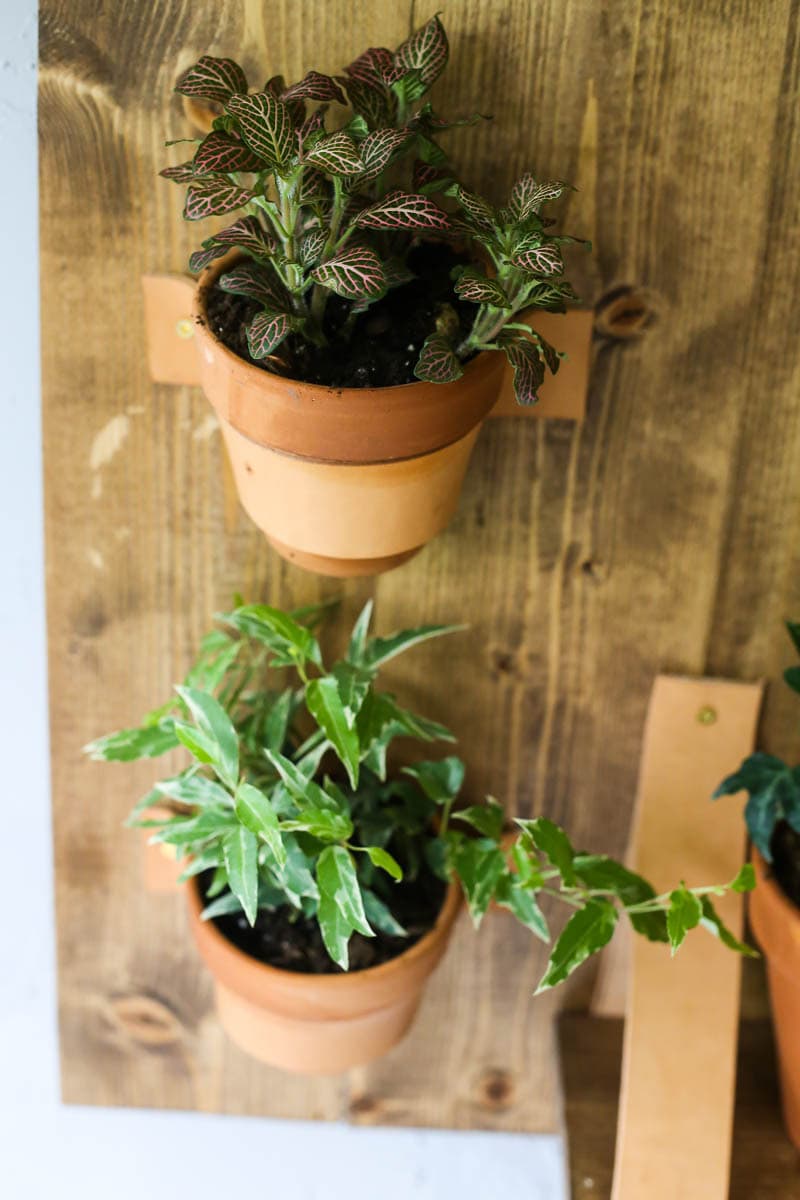
I have no idea what all of the plants I planted are (but I did save the little cards, so if anyone wants to know about a specific one I can get the answer for you!) but they’re all so cute. Basically, I just went to the houseplant section of Lowe’s and picked out a ton of small and medium-sized plants that I liked. The smaller ones were only $3.50 and the larger ones were about $6.
Keep your fingers crossed for me that I’m able to keep them all alive. According to their little cards, all of these plants need to stay pretty well-hydrated, which is not my forté. We’ll see what happens.
Oh, and I went back after I took these photos and added in some of the little plates under the plants on the shelves to catch any excess water. I’m hoping that if water drains from the other planters it’ll just drop into the plant below it.
I’m kind of winging it here. As usual.
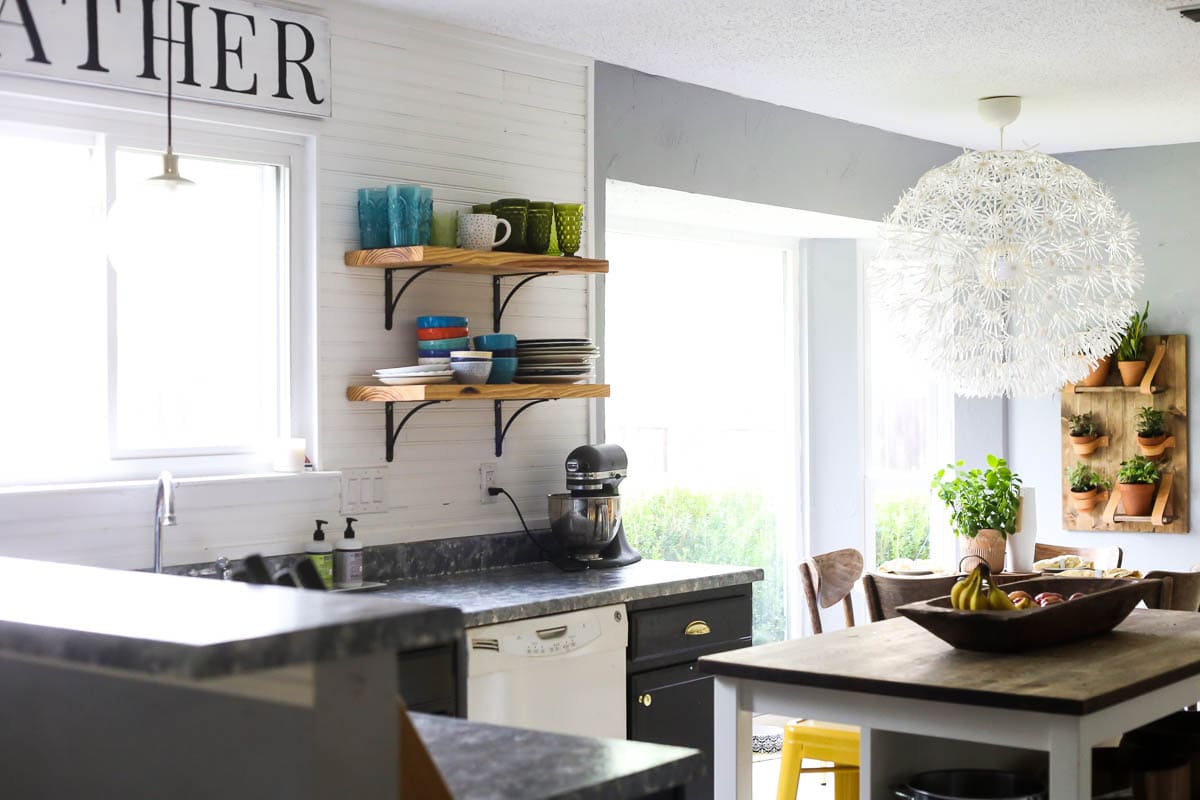
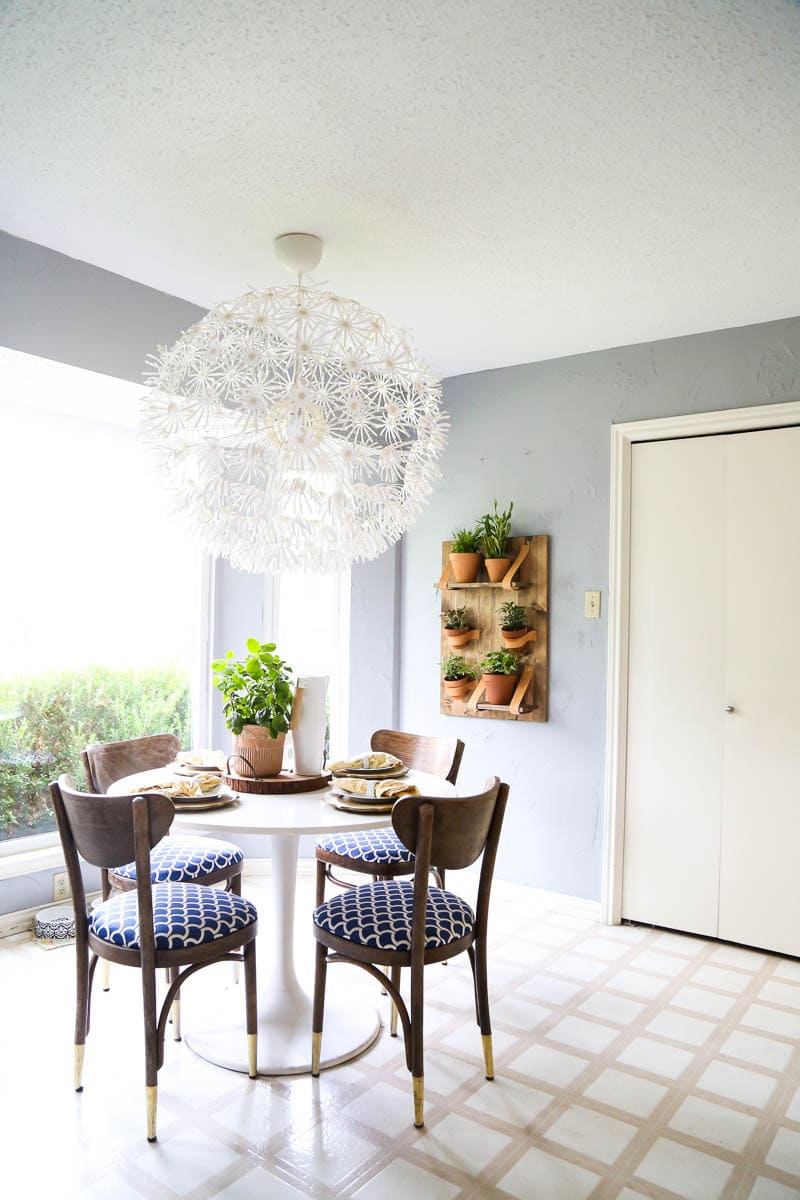
I can’t get over how well it turned out, and I’m so glad this little corner of the kitchen finally feels complete. That wall has been the bane of my existence for as long as we’ve lived here, and I’ve had the hardest time figuring out how to fill it up. We have a lot going on in the rest of the kitchen and in the other rooms it opens up to, so I didn’t want anything too busy or distracting (like a piece of art or a sign with words on it). Corey and I played around with the idea of a plate display, but I wanted something with a little more life (pun intended), and this is really the perfect solution.
I think I’ve officially achieved crazy plant lady status, no?
I’ve been working my butt off on the flooring in the kitchen and it’s finally done. I’ll be sharing photos of that soon, and then we’ll need to do baseboards throughout the downstairs. We also still need to replace the counters in here, and then I can call the kitchen done.
Update: We replaced the flooring in the kitchen! See all of the details of our vinyl plank flooring here, and see the official before and after photos of our kitchen right here.
Or, at least, as done as it’s going to get before we move. There are still a zillion things I’d love to do in here, but it’s time to move on. It’s equal parts thrilling and heartbreaking – I’ll never know what this kitchen will look like with coffered beadboard ceilings, recessed lighting, and a tile backsplash all the way up to the ceiling.
Sigh.
I mean, if I’m gonna have to stop doing DIY projects for my kitchen, this is probably a good way to finish it out with a bang, right?!
If you want to see more DIY planter ideas, here’s some more inspiration for you!
- DIY vertical ladder garden
- How to turn tomato cages into backyard plant stands
- Create a DIY cinder block plant shelf
- How to hang planters from your ceiling
- DIY gardening and planter ideas
- How to make DIY succulent centerpieces
Have you ever made a DIY wall planter for your home?
Wow, it looks amazing! I love it. Thank you for sharing.
Hi there! Loving the wall planter, but I gotta know – where did you get that dandelion-esque chandelier?? I love it!!
Hi Kelly! Thanks – we love it too! It’s from IKEA. It’s the MASKROS (here’s an Amazon Affiliate link with more info about it).
Thank you!!
You go girl 😀 That looks amazing Amanda. The leather straps and the wood work so well together. You done good
Thank you, Michelle!
This is just gorgeous! I hope you’ll come by and link this up at Talk of the Town at Knick of Time – I’d love to feature it!
Angie at http://www.knickoftime.net
Thank you, Angie!
This is lovely, I really love adding the leather! Found you at the inspiration link up x
Thanks, Sophie!
I love what a statement this makes on your kitchen wall, and I think the leather straps are a great detail – the extra texture is awesome!
What a fun way to display plants…and I LOVE the warmth and texture it brings!!