
It’s a Media Room!
We still haven’t quite landed on what to call our garage-turned-media-room. For now we’re still referring to it as “the garage,” but that doesn’t feel quite right. Media room sounds too fancy, and nothing else seems to stick. Hopefully we’ll land on something soon, but for now we’ll just keep calling it the garage.
So, um, are you ready to see what the garage looks like?!
We’ve finally officially turned it into a room, and I’m super excited about it. Last time you saw it, it looked like this:
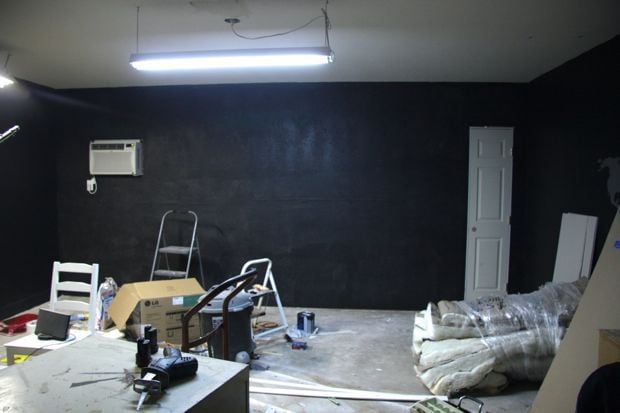
Almost there, but not quite.
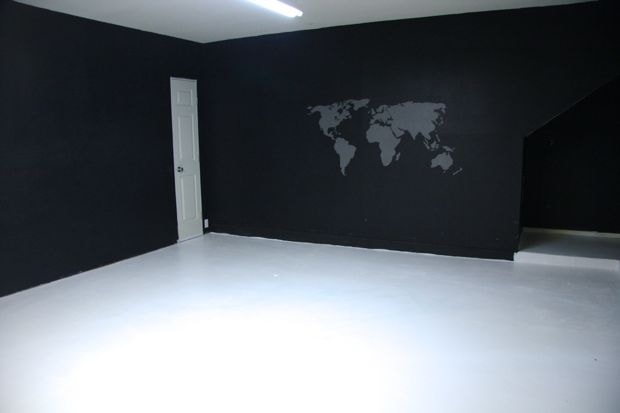
Well, we finished up the painting, tried out a stencil on one wall, decided we hated it, and painted back over it (don’t you love it when that happens?). So, now that the walls were all finally done, it was time to handle the floor.

Now, let’s talk about this for a second, because I feel like I need a disclaimer. The original plan for the flooring in here was carpet. We plan on having wood (or, wood-looking) floors everywhere else, but we thought a super plush carpet would be nice in this room, so that was the plan. Well, then we actually started working on the room and realized that with our budget, we could do carpet and have a completely empty room, or we could skip the carpet and actually have a sofa and rugs.
I’ll just let you guess which one we went with.
Obviously the carpet was out, so we decided that painting the concrete would be a good choice. Incredibly cheap, simple, and okay-looking-enough to tide us over until we can do something else.
I’ll just preface the rest of this post with this: I don’t love the painted concrete. I thought I would, but I don’t. In fact, I kind of actively don’t like it. But that’s the risk you take when you’re doing a big project like this, especially when you try to save a little bit (or a lot) of money.
But the good thing is, the painted concrete has always been just a temporary solution. And I can definitely live with it until we save up and do something else – which we’re thinking will probably now end up being the same floor we’re doing throughout the rest of the house.
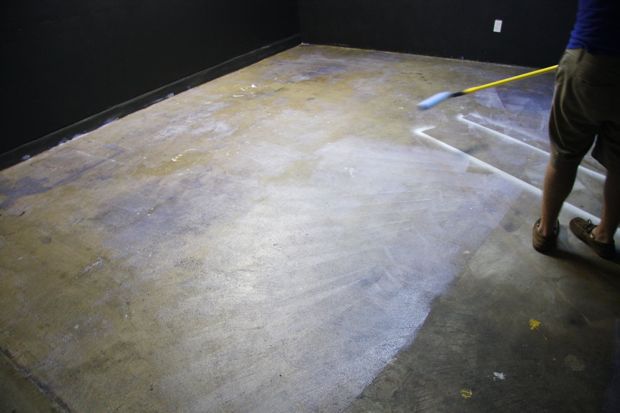
So, with that little disclaimer out of the way, let’s chat about painting the concrete. The first step was cleaning it, which was the most annoying part. It consisted of vacuuming, then mopping, then vacuuming, then mopping, then…you get the point.
Once the floors were nice and gleaming, it was time for primer. We almost skipped this step, but I’m so glad we didn’t – it really sealed up the floors and made them feel less like a garage floor and more like a concrete floor – does that make sense? The fun part about this is you don’t even have to use a tray…you just dump the stuff out on the ground and use a roller to spread it out.
I was concerned at first because it was very…purple…
But it dried nice and clear, and ready for paint!
Next up was painting. Just like painting a wall, except more fun because you don’t have to worry about dripping on the floor. Here’s what it looked like after two coats:
We honestly probably should have done a third coat, but I was over it at this point, and I already knew I didn’t love it and would want to be changing it up sooner rather than later, so we decided to just skip it. You could really only tell it needed a third coat because of the harsh lighting in there (which we knew wasn’t going to be there long!), and the majority of the floor was going to be covered with a rug, anyways, so we decided to let ourselves be lazy.
Now, this is the point where I kind of wish we would have stopped. We had actually considered skipping the sealer step because we’ve seen a few bloggers do so successfully, but we decided to be safe and seal it.
Well, apparently some stain that was on our floor from before (we think it was a spray paint stain) did not play well with the sealer, and once it dried we had giant blue spots on our floor.

You can’t really see them in the photo, but trust me – they were very noticeable in person.
Luckily for us, we already had a big ol’ rug picked out that would cover these spots perfectly, but we would have been very unhappy campers if we had planned on leaving it uncovered.
Once the sealer finished drying (two torturous days), I was more than a little antsy to get the rugs in there. I wasn’t loving how the room was looking, and I was terrified that we had poured so much work (and money!) into this room for nothing.
So, when Corey got home from work the day that the floors were “officially” dry, we rushed into the garage to lay out our rugs. We decided to go for a layered look, partially because we love the way it looks, and partially because we could only find plain jute rugs in our budget that were as large as we needed for this room, and we wanted some pattern. So, the first rug we laid out was this super-thick-weave jute beauty. We snagged it from Rugs USA when it was on a steep sale – we paid about $300 for the 9X12 size.
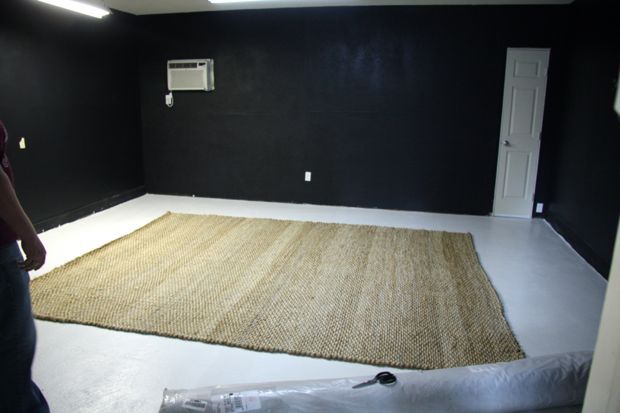
There are no words for how in love with this rug I am. It is incredibly soft (which was a shock – we were expecting rough!), huge, and just gorgeous. I kind of want to sleep on it.
But we weren’t stopping there – next up was this equally fabulous blue zebra-print rug. We also got it from Rugs USA and it was on some insane sale as well- we paid a little less than $400 for the 8X10 rug.
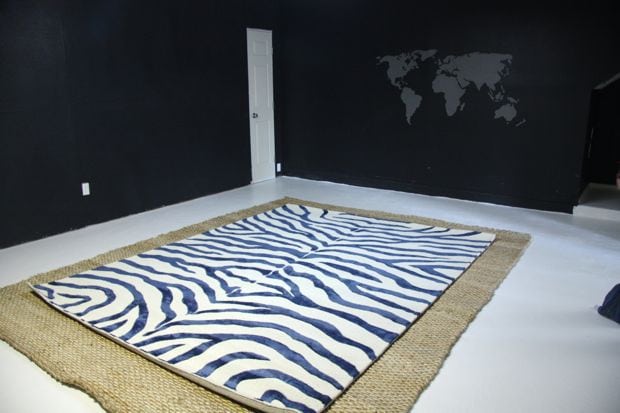
Fun, right? We loved the zebra pattern, and it brings some much-needed color into the room.
Cullen really likes it, too.
I’m obsessed with how these rugs look together, and I think once the rest of the furniture and accessories make their way into the room, it’ll look fantastic. And thankfully, they cover up enough of that concrete floor that I can mostly ignore it. Until we get around to fixing it, that is.
So that’s where the room is at for now. Next up we’ll chat furniture and lighting, then we’re installing some curtains to hide the ugly water heater and water softener!
Have you ever finished a big DIY project, only to realize you didn’t love the end result?
We used Nafco flooring. They have product that looks like plank wood flooring. It’s really thick vinyl. It really does look like wood without the scratching from pets, it’s softer for the kids yet it easily cleans up like wood (easier). I still have carpet left in two spare bedrooms and can’t wait to replace them. I use a vacuum on it before I mop and swiffer pet hair up in between times to keep it clean. I have area rugs in the family and living room to add a little softness around. Good luck.
Oh and what about “rec room?” I feel like it’s quicker to say than media room?
There’s something so scary about a bare, painted room when it’s a bolder color. Until you get rugs and furniture in, and stuff on the walls, it’s like “WHAT DID WE DO!?” haha! So I get that, but like you said even the rug improves it. I can’t believe the first one isn’t rough!!!! With our dogs I’ll never spend any “real” money on a rug (I consider $100 or more real money because I’m cheap) but I must say I’m jealous!
“The Den” is a good idea….
I think the layered look is cool, but it’s a shame that you have $700 worth of rugs laying on top of one another and you can’t even see the bulk of the jute rug. To me, that’s like spending thousands on genuine hardwood then covering it up with an area rug. Just my opinion though – if you’re happy with it, that’s all that matters!
Maybe you could call it The Den? The Great Room? The (Wo)Man Cave?
I like the layered rugs. I think they really soften the space up. And you’re not the only one to ever finish a project and say, “Nope, don’t like it.” My guest room is the same way. Actually, so’s my living room. But I like to tell myself that it’s because they’re just not finished yet, despite what I’ve told my husband. 😉 Your media room (or whatever you decide to call it) is just a work in progress. You can always change the floor later! And who knows, once it’s all filled in with furniture, it might not be as bad as you think.
Nice job so far!
This is a pretty unique and bold project. You deserve a pat on the back for all the work. I agree with Allie that furniture will soften it up a lot. Keep up the good work.
I think maybe the white is just so jarring against the black walls? I’m sure it’ll look fine once all the furniture is in though, but I get why you’re not crazy about it.
Still, I’m impressed how different the room looks already!