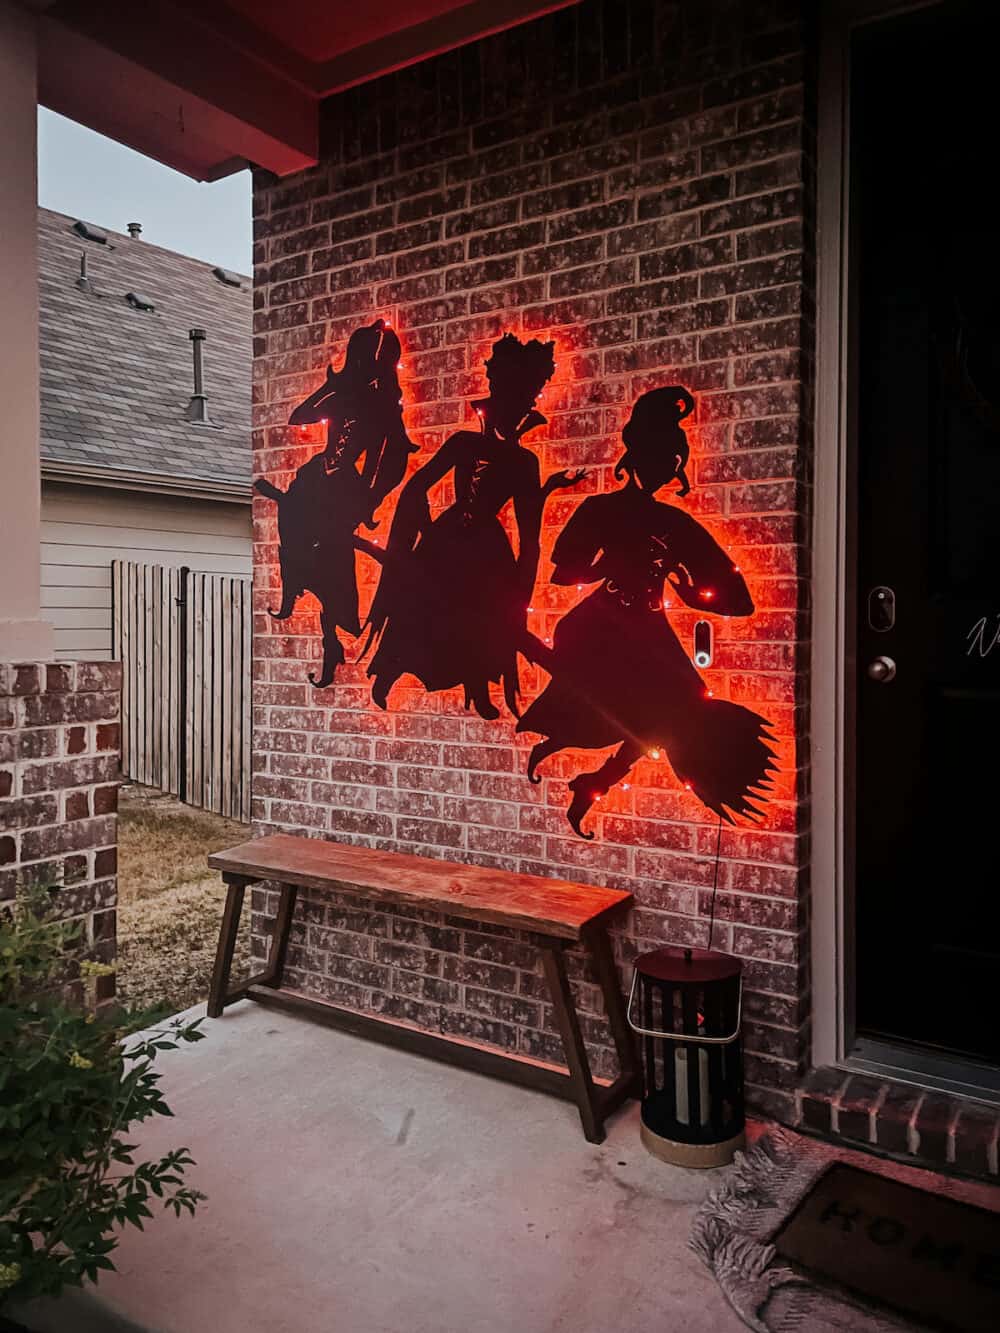
My New Favorite Halloween Decoration
The level of excitement I feel to be revealing this project to you today is unreal. I’ve been thinking about this DIY Halloween decoration for over a year now, and the fact that I now have it completed is bringing me so much joy. I’m talking about my new Sanderson Sisters silhouette cutout, of course!
Prepare yourself, because it’s epic.
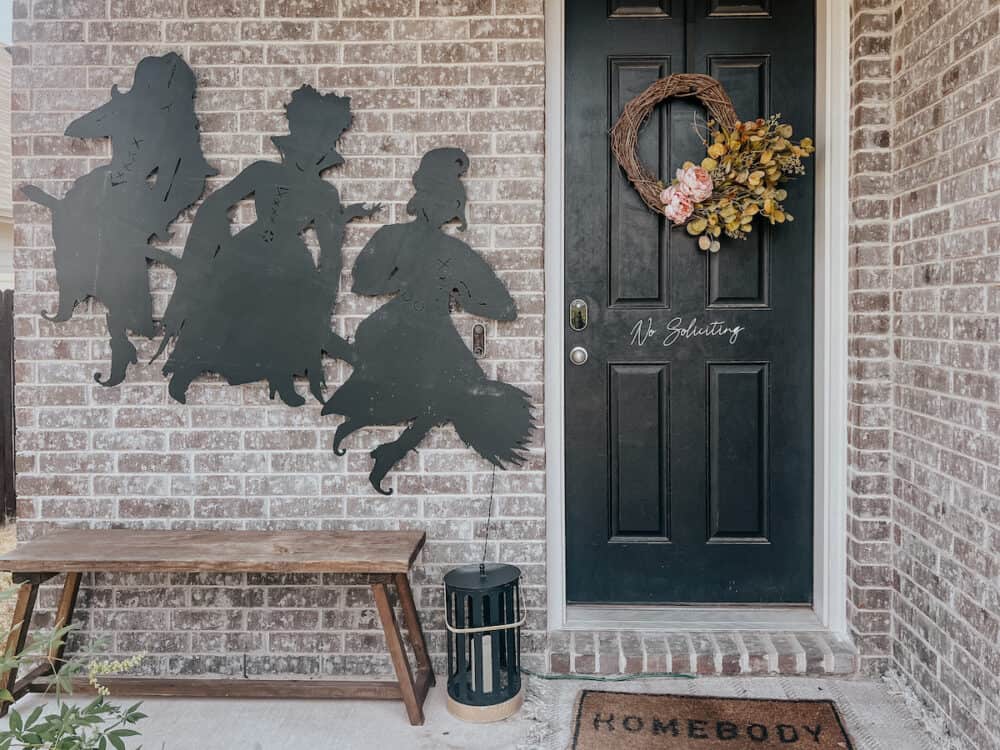
I honestly have to laugh at myself sometimes when it comes to my level of excitement for Halloween decor, because I used to be completely and utterly indifferent. I always said I wasn’t really a Halloween person (!!!), and I never decorated at all. But, in the last few years I’ve decided to start having some fun with it and oohhhhh boy am I ever having fun.
I’m really proud of how this little DIY project turned out, and I’m here to tell you – it’s honestly SO EASY! If you have a relatively steady hand and a router, you’re good to go.
So, let’s dive in to how you can re-create this little masterpiece at your home. Because everyone needs one. And if you aren’t a Halloween person yet, consider giving it a shot. You might be surprised at how much happiness it brings you!
DIY Hocus Pocus Sanderson Sisters Silhouette {Easy Halloween Decor}
I’ll note that the directions that come with the template on Etsy are incredibly thorough and detailed! This is just meant to be a general overview to give you an idea of if you want to try to tackle the project yourself. If you do decide to dive in (and you should!), be sure to reference the directions included with the template!
Prepping the Silhouette
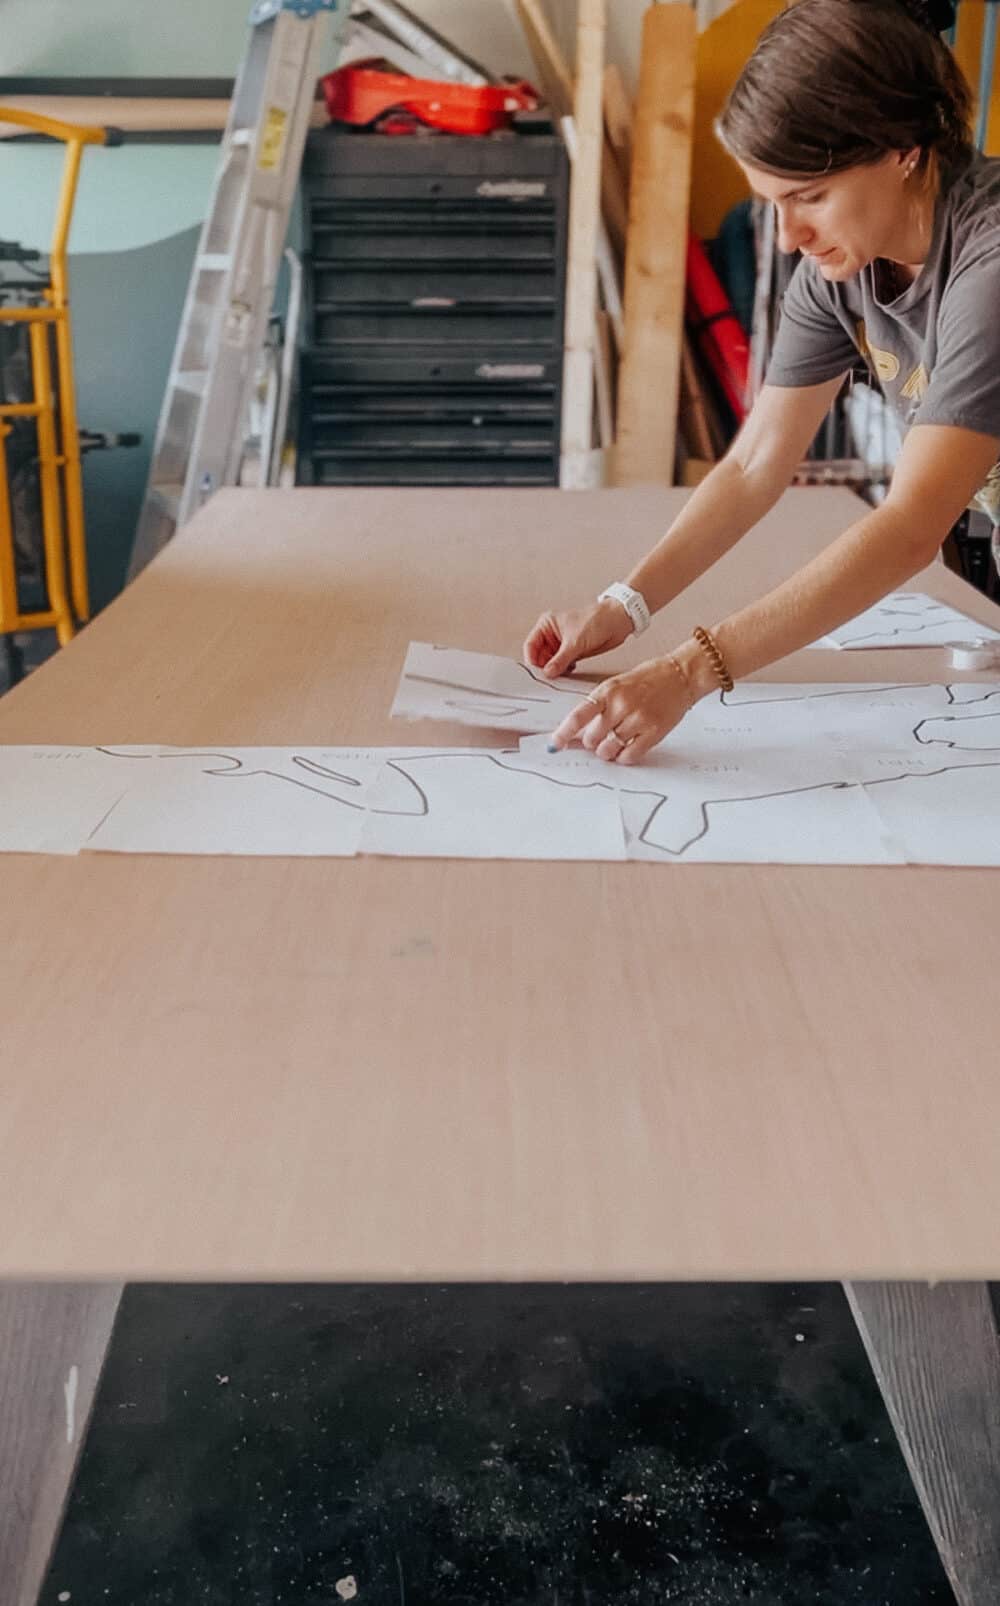
You’ll start off by printing out the silhouette and laying it out on your plywood. I just taped it together with regular ol’ tape – it comes together really quickly and easily. From there, you have a few options.
- You can cut out the template and then trace it with a pencil (this is what I did)
- You could lay out the template and use a ballpoint pen to trace around it, pressing really hard. This will create an indent on the wood that you could then use to draw the outline.
- Or, if you have carbon paper or a tool like this, you could use one of those to help transfer the lines!
I felt like it was pretty simple to just cut it out beforehand, and I didn’t mind doing it that way. But, it was definitely more work than some of the other options, so keep that in mind!
After I cut it out, I traced it first with a pencil and then with a Sharpie. Again – it’s an extra step to trace it twice but I wanted to be precise with the pencil (and be able to erase if needed), and then get a clearer line with the Sharpie.
Cutting Out the Silhouette
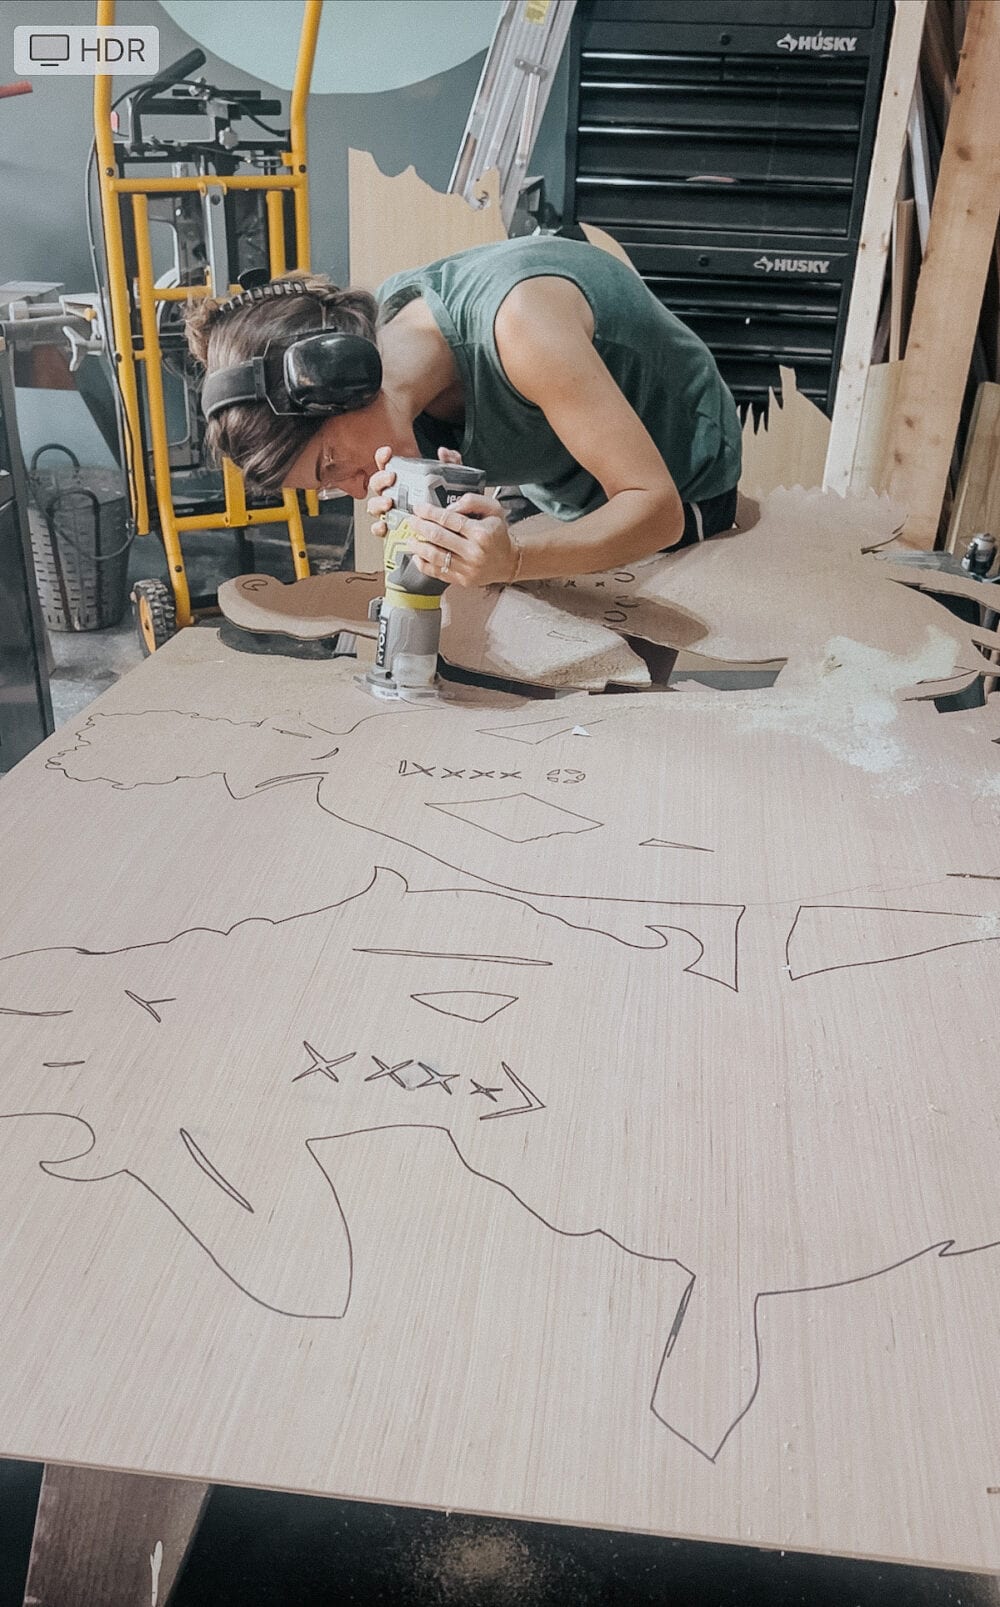
Once your template is fully traced onto your plywood, it’s time to cut it out! I used my Ryobi router for this. The directions mention using a Dremel, but I had nothing but trouble when I tried that. I don’t know if my Dremel is an older model and just not powerful enough, but it kept skipping and would eventually lose the bit. When I swapped over to the router, I didn’t have a single issue.
Start to finish, it took me probably 45 minutes to cut out the silhouette, including the detail cuts on the inside. I honestly thought it would take at least twice that long, so I was really pleasantly surprised!
Painting & Finishing
And then, all that’s left is to sand off the rough edges and paint it! I had some leftover black Porch & Floor Paint, so I used that. Basically, anything rated for outdoors will be fine!
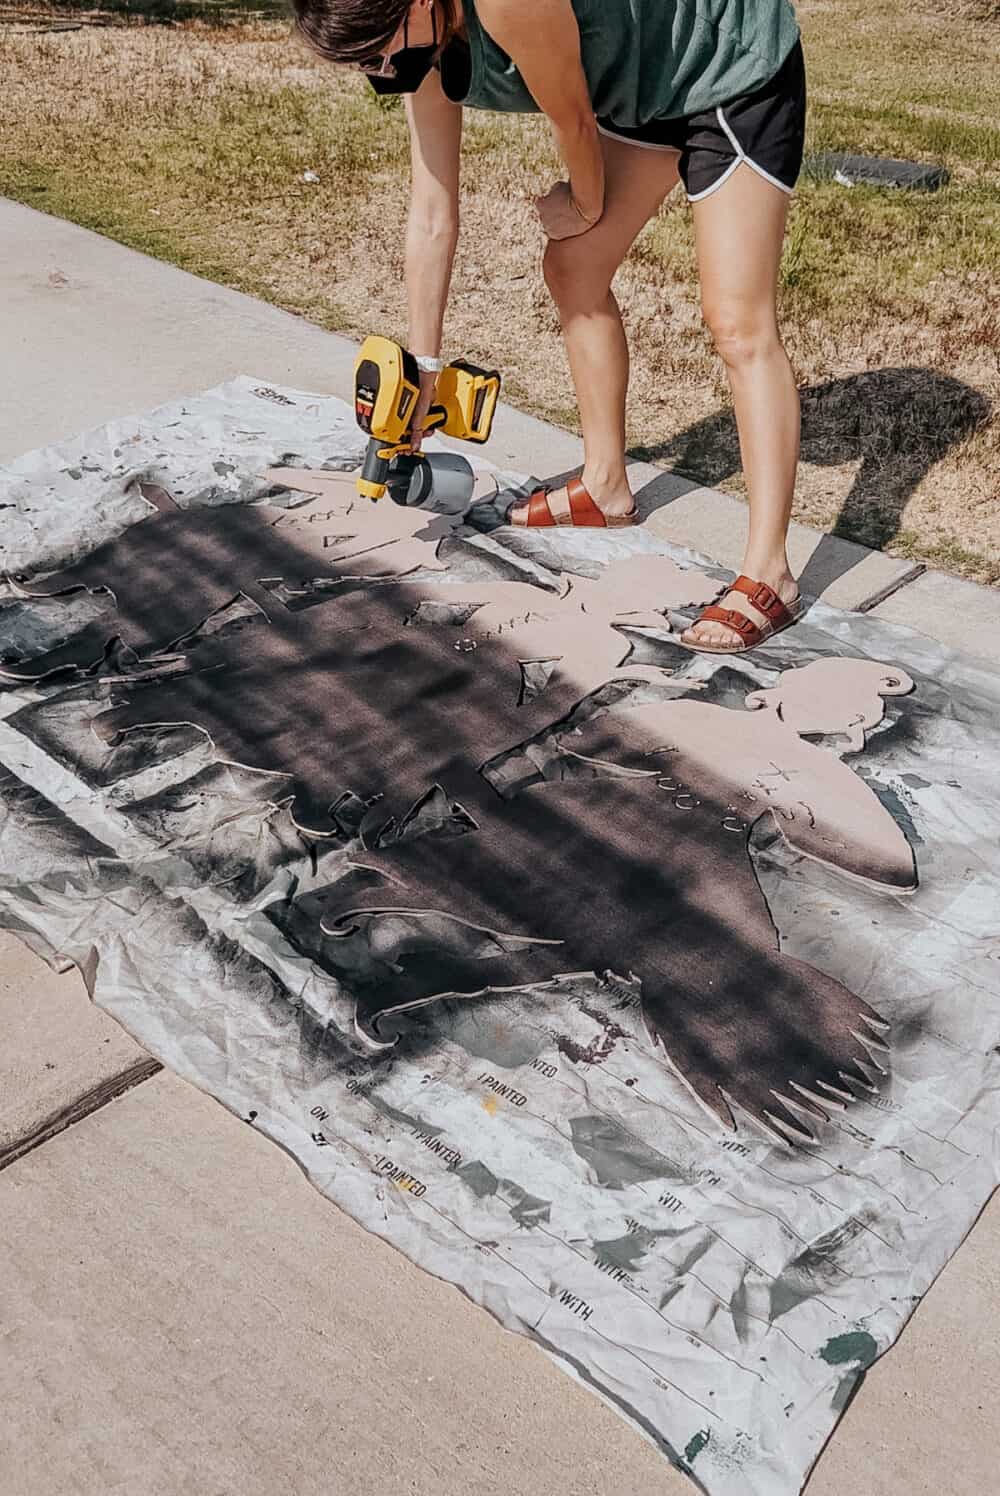
Be sure to also seal it. Plywood isn’t meant to be out in the elements, but it’ll handle it just fine as long as you paint the entire thing (both sides + edges!) and seal it with an outdoor sealer, like Spar Urethane.
Hanging It Up!
Once it’s all dry, you’re ready to hang it. I debated a lot of different options for where I was going to put this, but my preferred choice was on the big wall by our front door. At first I wasn’t sure if it would work (it’s a few inches longer than the space), but putting it at a slight angle let it fit perfectly!
I put a few pieces of scrap wood on the back (so it sits away from the brick), and added claw-style picture hangers. Then, I just used my favorite brick hangers to get it up there. It worked like a charm!
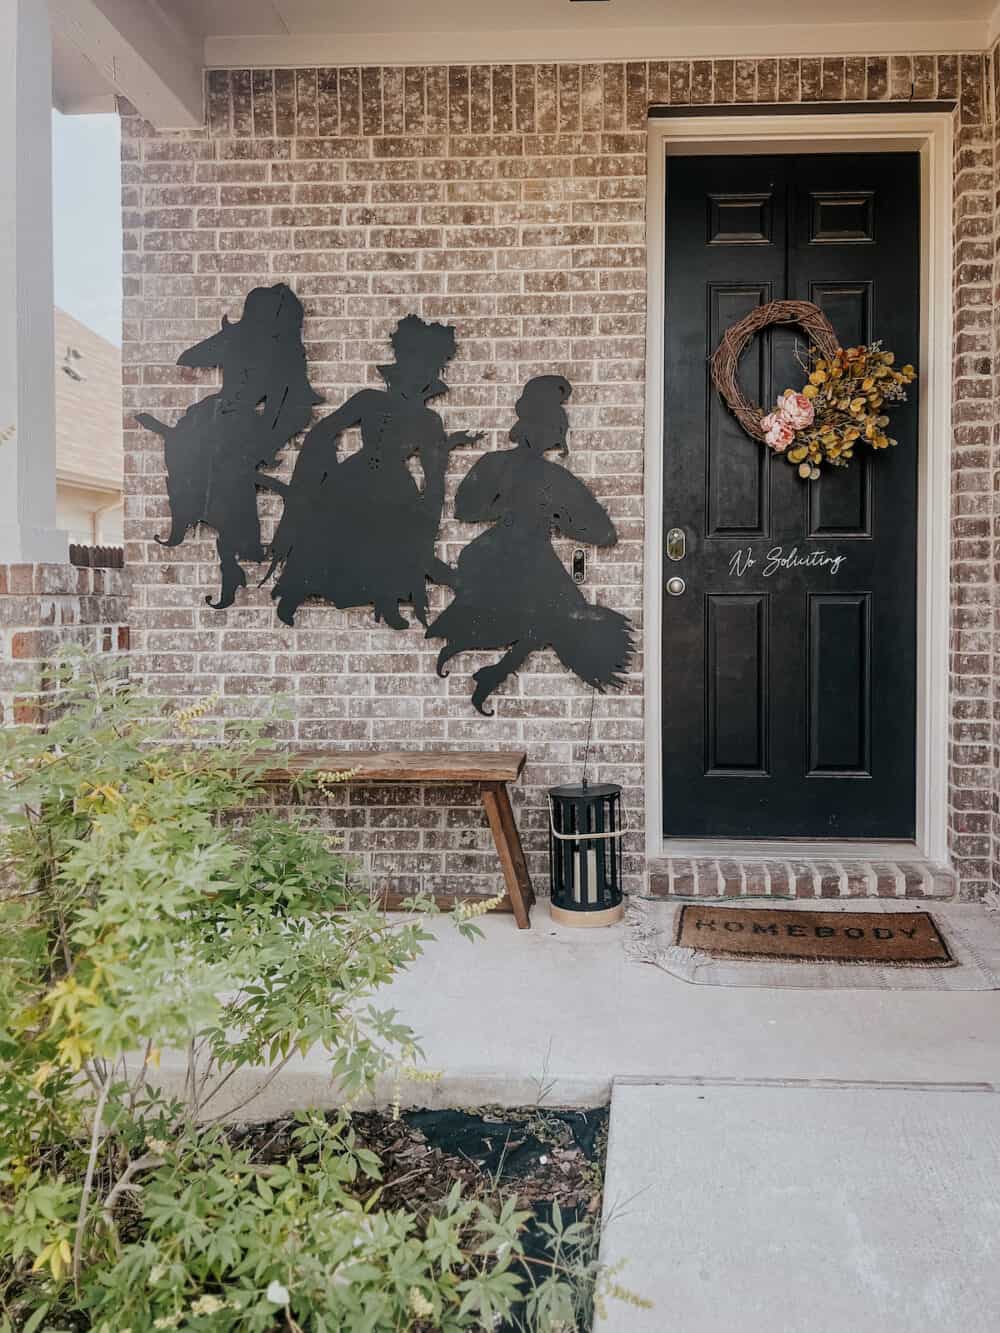
Of course, you have to add some spooky lights! I grabbed a pack of these (purple felt like the only appropriate option for the sisters), and I used a staple gun to attach the strand all around the back of the silhouette. It plugs in by the front door and every night it turns on and makes me SO HAPPY I CAN’T STAND IT.
Sorry. I didn’t mean to yell, I’m just a little excited.
The sisters are just step one in our plan for the front porch this year. I’m trying to take it up a notch every year, so I’m just getting started! I’ll be sharing the full Halloween porch reveal next week, so stay tuned for the rest.
But for now, let’s just bask in the (purple) glow of these three lovely ladies.
