
Our Home All Decked Out for Halloween
Last updated on March 1st, 2023 at 05:27 pm
Haaaaaappy October! It’s spooky season, y’all!
I have a confession – it might surprise you. Despite being obsessed with all things fall, loving spooky movies and books, and having the biggest sweet tooth around….I’ve never been that into Halloween. I’m not sure why. Dressing up in costumes isn’t really my thing, I guess. And, up until last year, I mostly resisted everything Halloween except for the big day itself.
But, last year was really rough for our family because my mom was in the hospital, and we all needed a little cheering up. So, I decided to go for it. We gathered up some Halloween decorations and decorated our home for Halloween for the first time ever. And you know what? It was so fun.
I have no idea why I resisted it for so long, but now that I’ve started, I’m hooked. We’re still a little light on Halloween decorations because it’s only our second year doing it. And, despite my intense desire to go out and buy all the decorations so I can go crazy, I know a slow and steady approach is better. So, here’s a peek at how Halloween looks in our house on year two of decorating!
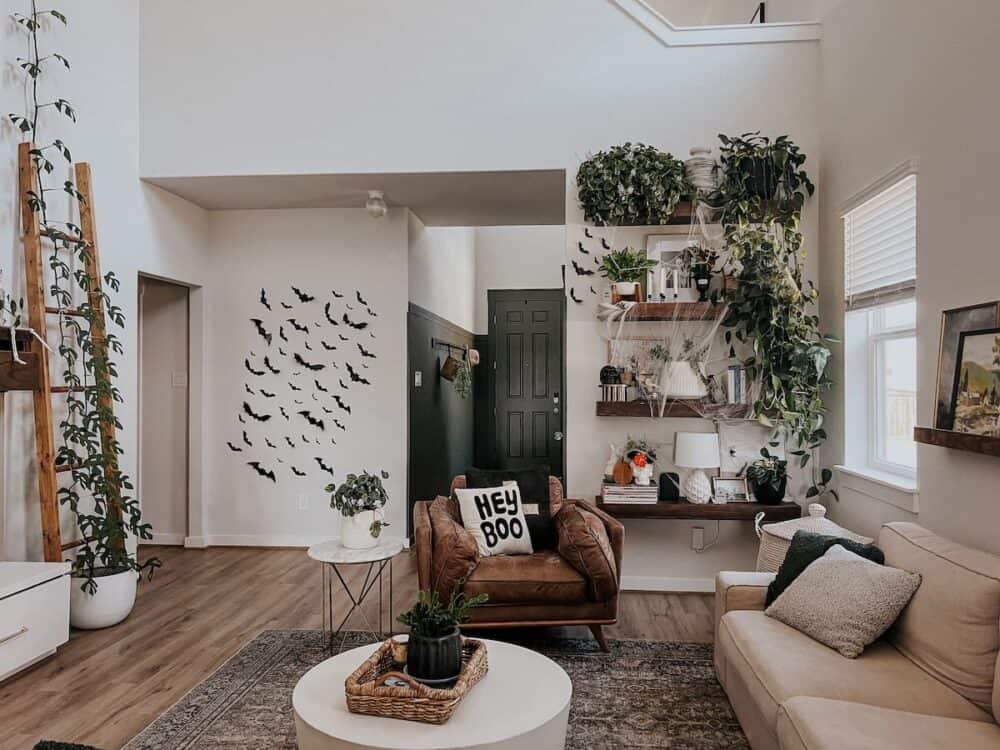
For all holidays other than Christmas, I mostly focus my decorating on a few vignettes in our living room. I find it makes a big impact without too much effort, and keeps things from feeling too chaotic. This year, I decorated the plant shelves and the mantel, and I did a bat wall on our big empty wall (we love to decorate it seasonally like this).
My decorations are really heavy on the plants and really heavy on the skeletons. I love it all, but when I purchase next year I’m going to try to remember to branch out a bit.
Let’s start with the plant shelves and take a gander.
halloween-themed shelves
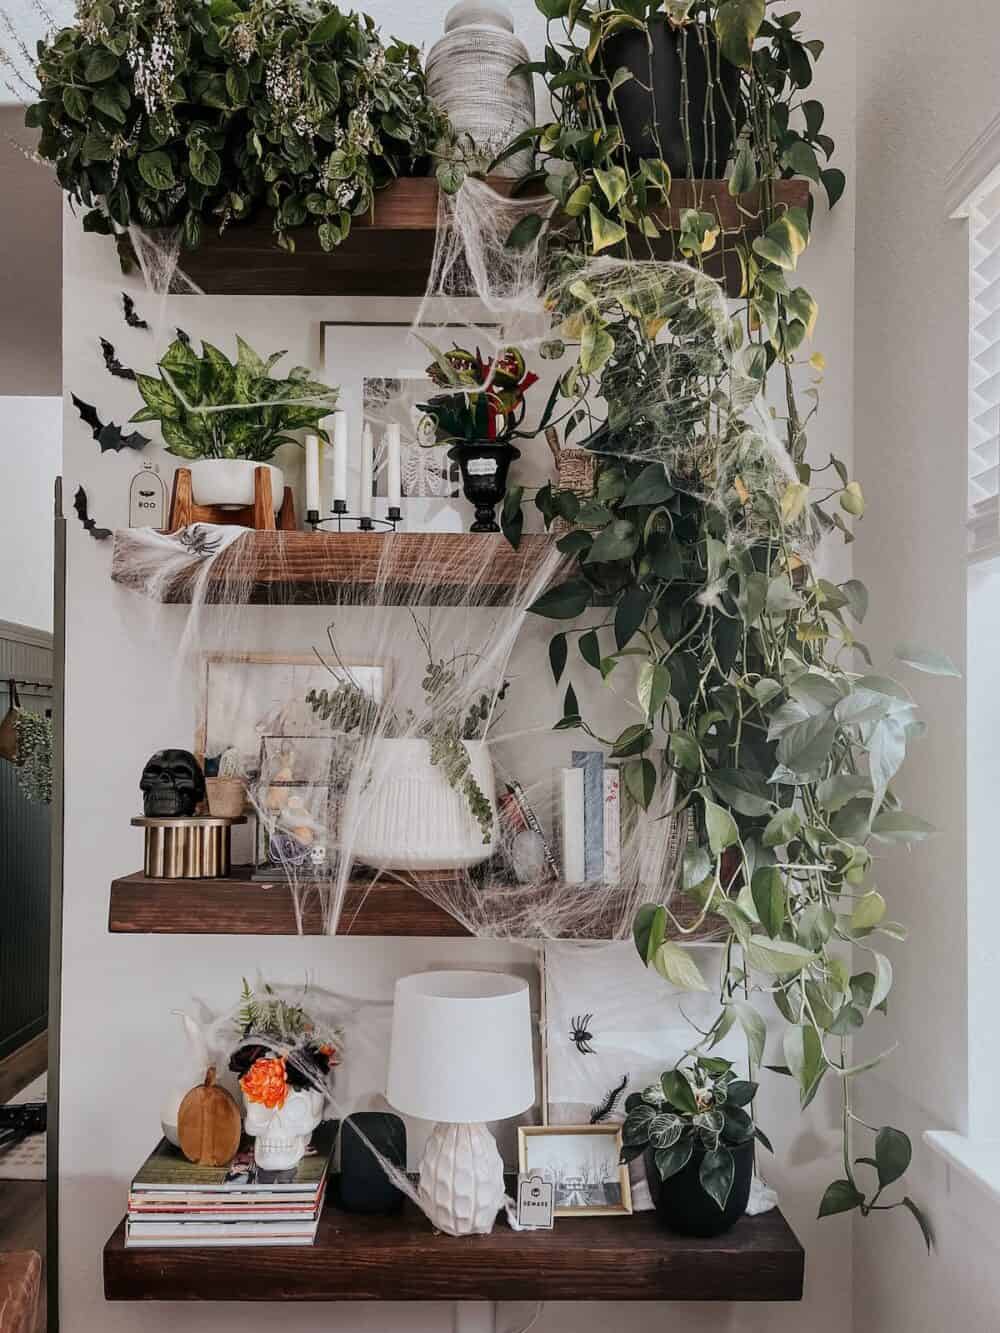
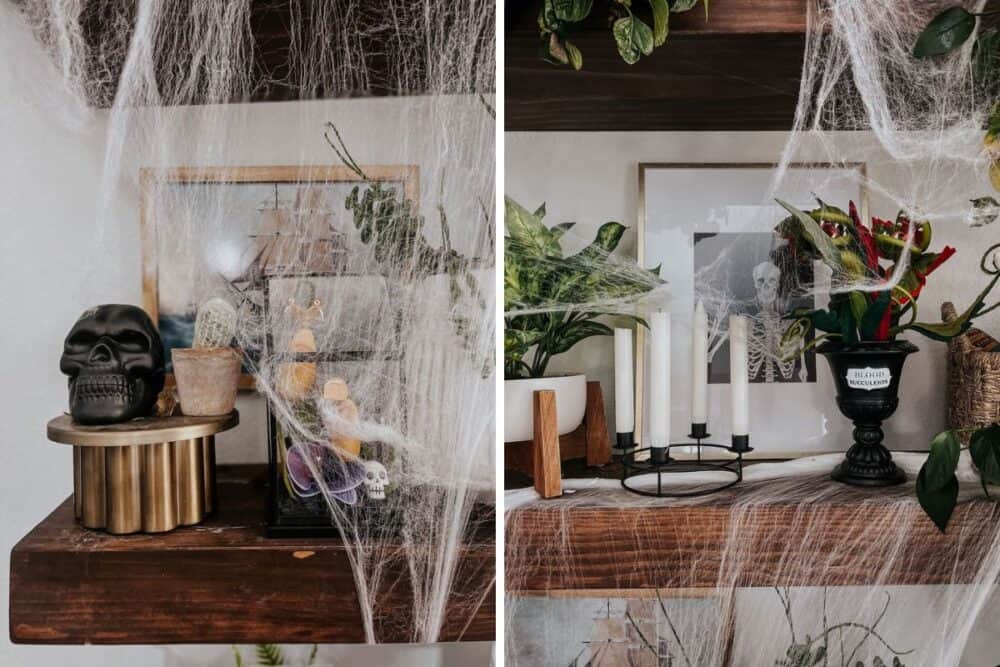
The spider webbing does a really great job of creating a spooky vibe, and it only costs a few dollars. I’m sure you could save it to use year after year, but I just buy fresh! I find it to be kind of a pain to work with, and I imagine it would only be worse if you’re using some that’s been stretched out already.
For the shelves, I kept most of my plants in place (a few got moved to the window shelf) and just tucked in some Halloween-y decor. I love that the faux plants fit right in with my plants but add a creepy touch. I also love that most of it is playful and not actually scary.
To round it out, I also added a few candles, stuck a few bats on the wall, and swapped out a couple of the art pieces for some Halloween prints.
Halloween shelves sources
Here’s the tutorial on how I built and installed these shelves!
- Spider webbing
- Faux spiders
- Haunted house print
- Skull with flowers
- Wooden pumpkin
- Black skull
- Faux carnivorous plants
- Candle holder (similar)
- Tombstones
- Skeleton print
- Bats
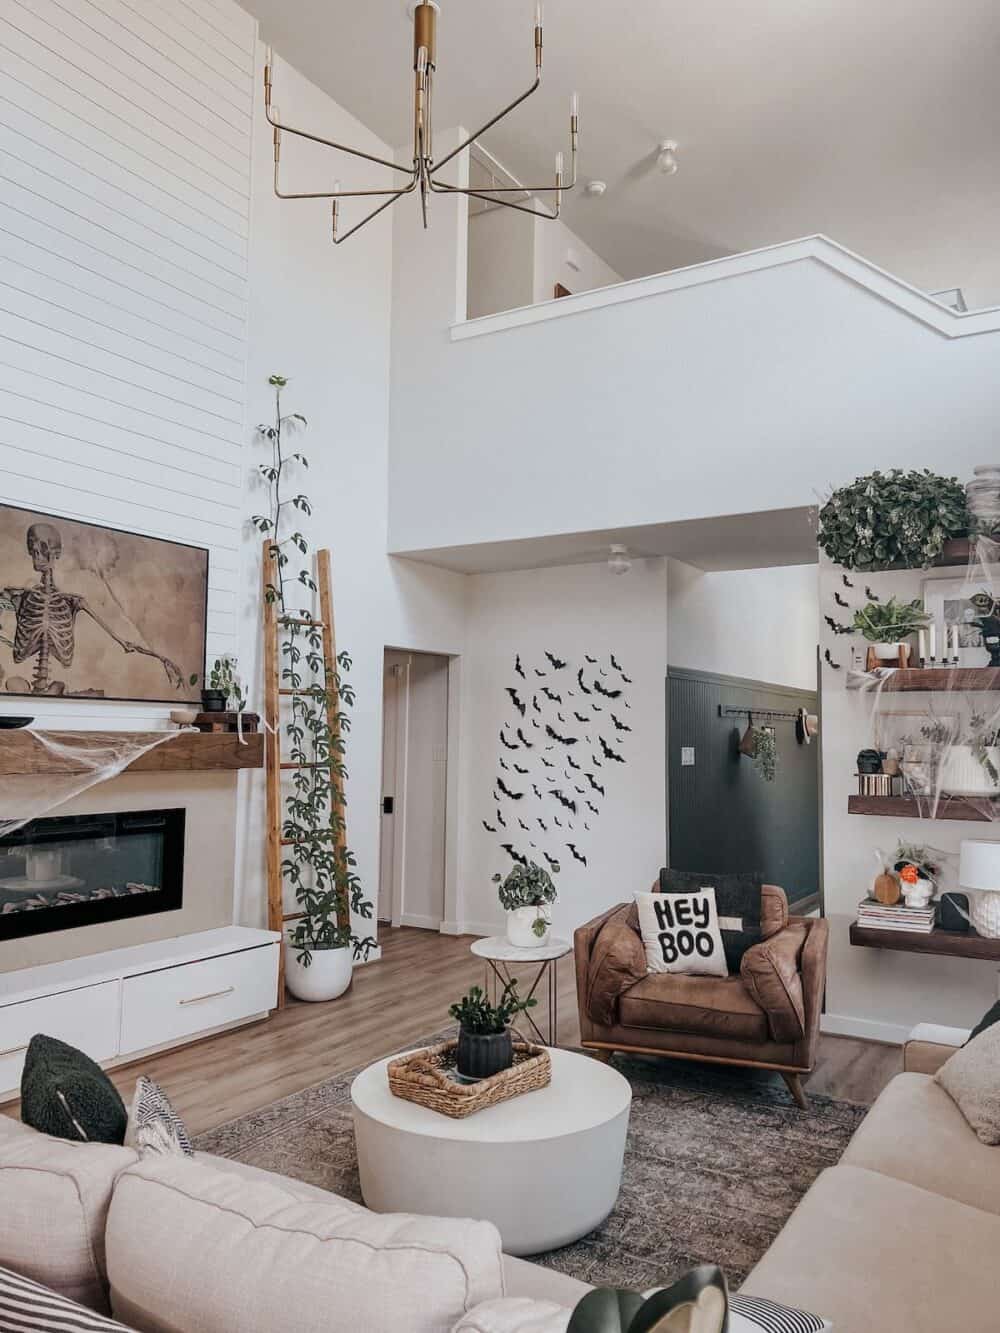
Halloween mantel
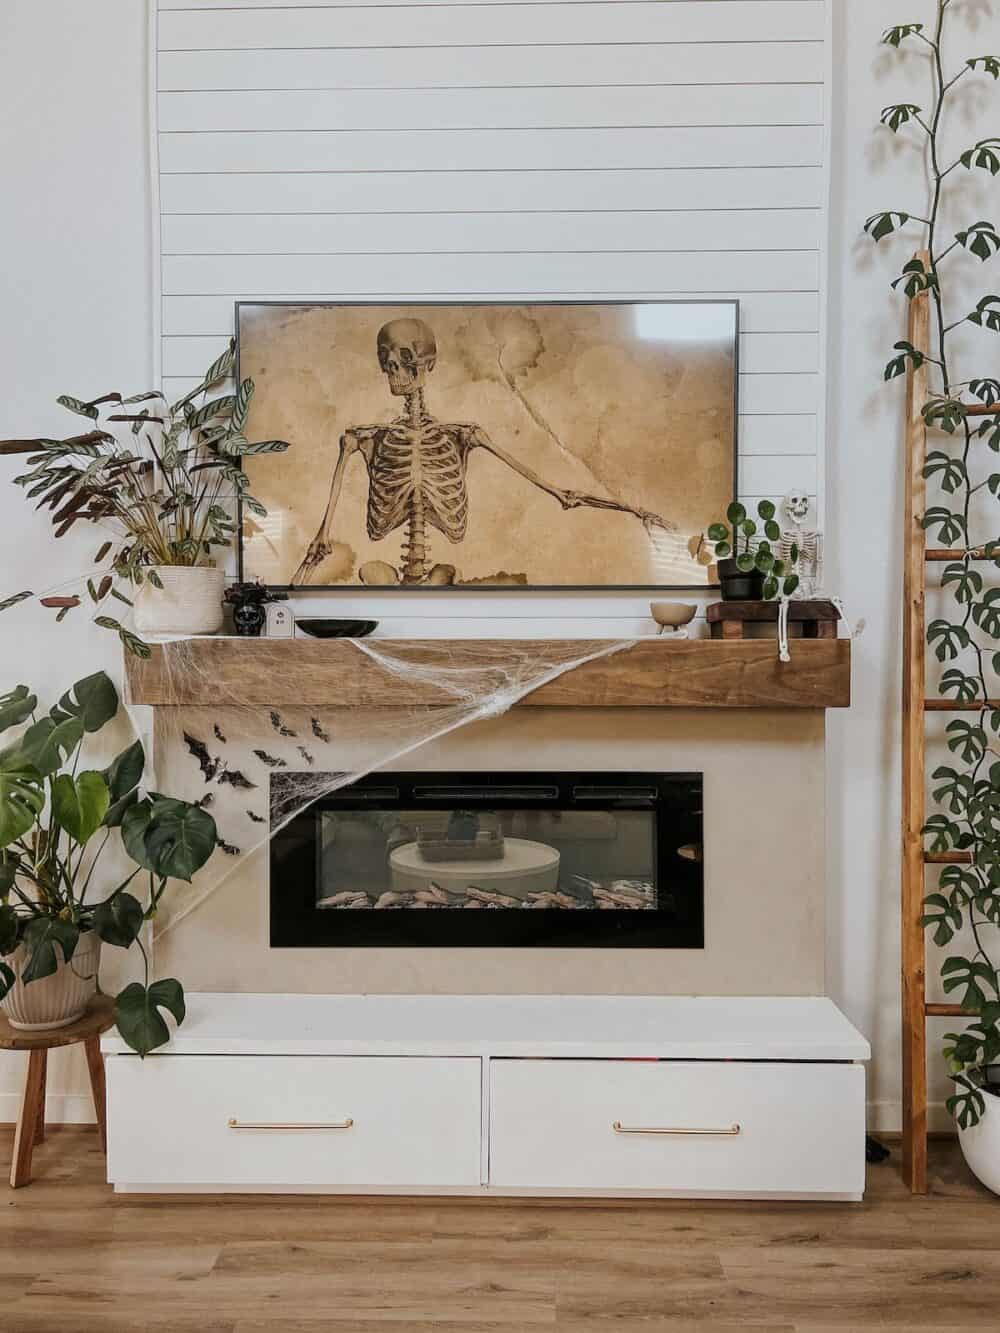

If you ask me, one of the great joys of having a fireplace is getting to decorate it for the seasons. I loooooove swapping things up and adding some festive touches here and there, and this little Halloween setup makes me really happy!
For the mantel, I used some more spider webbing and bats because they make a big impact without a lot of effort. I brought over a skull and a skeleton and kept the rest of the decorations in the “dark and moody” family.
And, of course, I had to swap out the Frame TV art for a skeleton print! I was also eyeing this one, so don’t be surprised if halfway through October I switch it up. Because you can’t have too many options when it comes to Halloween art for your TV.
Halloween Mantel Sources
- Spider webbing
- Bats
- Skull vase (similar)
- Tombstone
- Small footed bowl
- Skeleton
- Frame TV art
- Details on our DIY fireplace
The bat wall
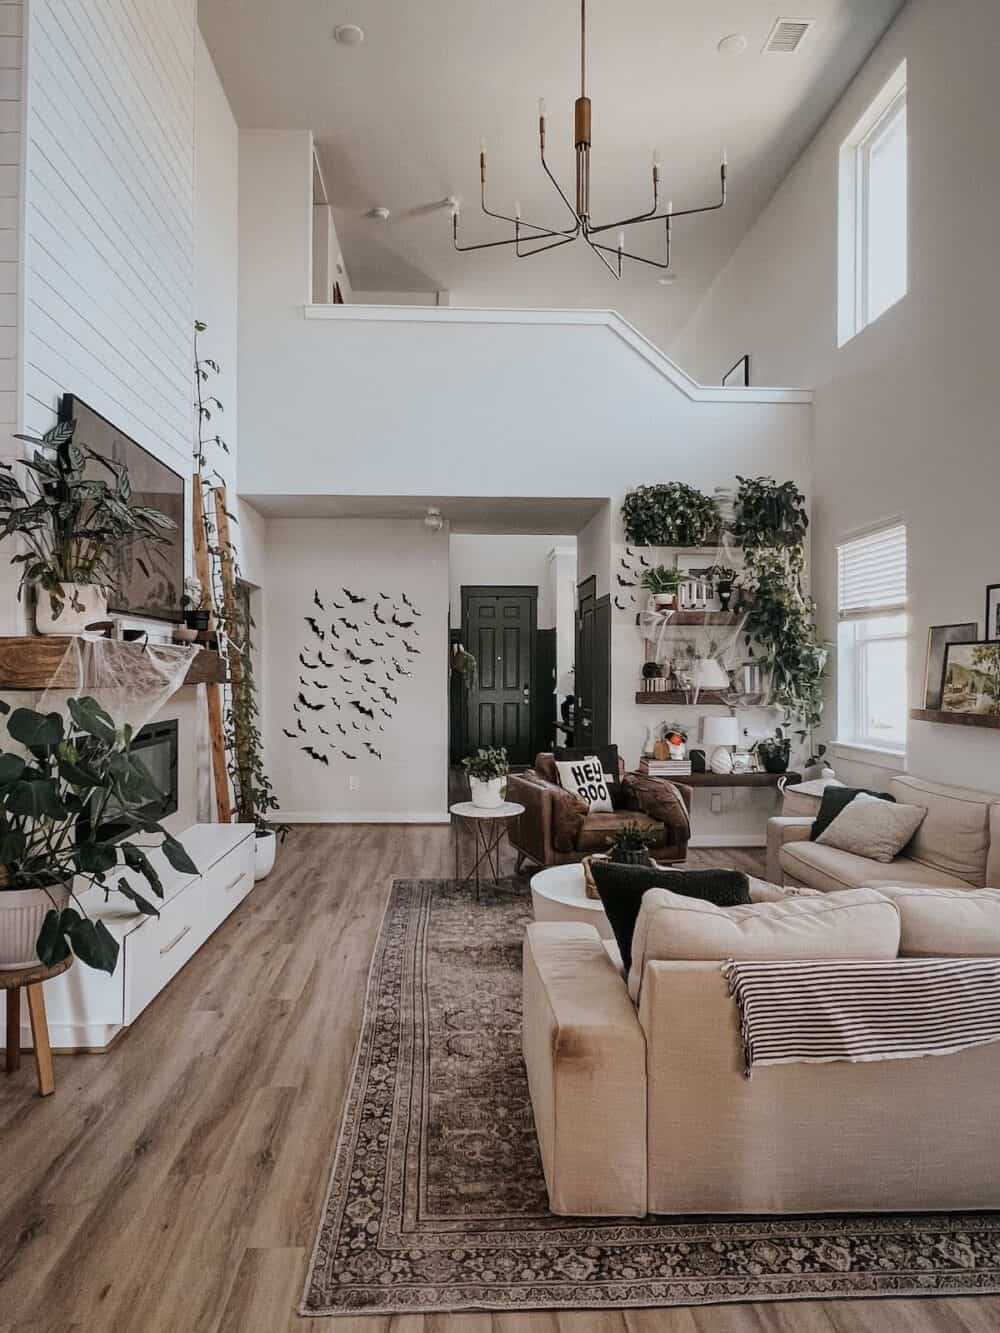
And, of course, the bat wall!
We started decorating this wall a couple of years ago for Valentine’s Day. I got the itch to do something fun with it, and we created a big heart display. The kids absolutely loved it and it added such a fun little touch for the season. So, it sort of stuck! We did bats here last year too, and I’m thinking it’s kind of going to be our thing. We also love to use this wall as a photo backdrop for birthday parties!
Last year, I cut out bats for this wall using my Cricut, but it was a ton of work. So this year, I decided to skip all that effort and just buy some pre-made bats. It was so much easier, and I love that they come in a ton of different sizes. At first I was worried that they were going to be too small to really make an impact, but there are enough large bats that it works great. The wings can be folded to make them feel like they’re really flying, and it’s really the perfect little setup!
And that’s how we decorated for Halloween this year! I have lots of other ideas for decorations, so I may add in another thing or two before the month is up. But, I really do love the slow and steady approach of adding a little bit every year. It feels so exciting to go out and pick out some new Halloween decor with the kids, and it’s fun to change things up a little!