Tape Measure Markings: A Deep Dive
Time for another beginner DIY tutorial. It’s everything you need to know about how to read a tape measure! Learn what all those tape measure markings are here!
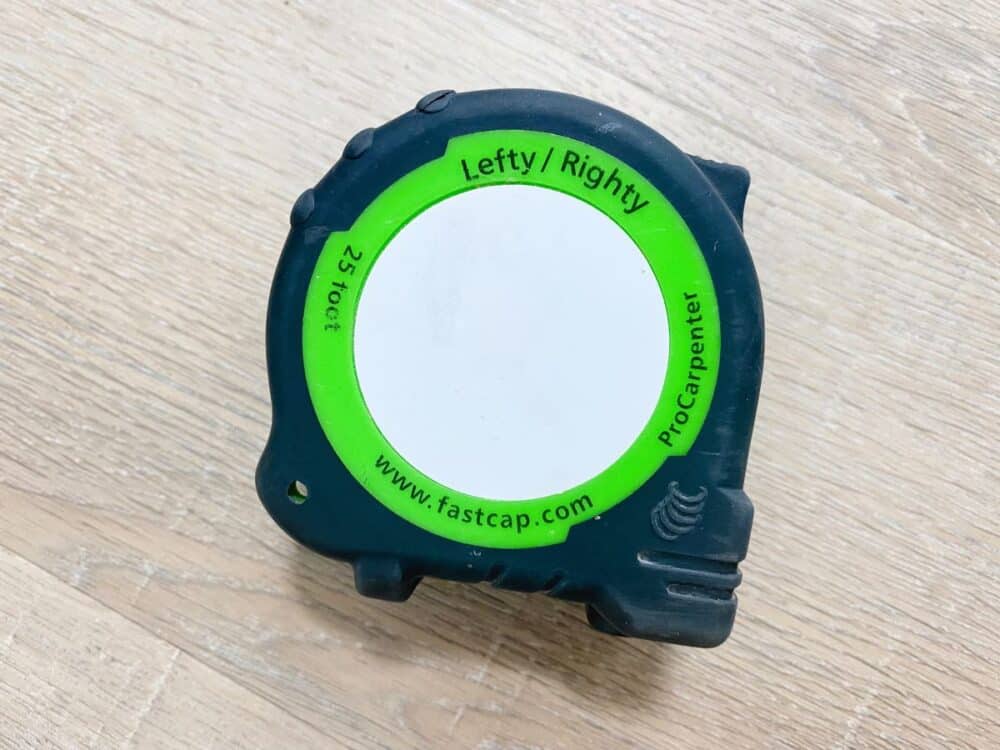
There’s almost nothing I love more than taking really basic beginner-level DIY concepts and doing a deep dive with you to help you gain some more confidence in your DIY projects. Today’s topic? How to read a tape measure! It might sound overly simplistic, but if you’ve ever measured something and found yourself referring to the tape measure markings as “six-and-one-line-past-a-half inches,” you might find this post helpful!
tape measure deep dive {video}
Let’s kick things off with a detailed video showing how to use and read a tape measure. This video gives a really close look at my favorite tape measure. I’ll cover how to use it, and all of my best tape measure tips and tricks. Of. course, if you aren’t a video person you can keep reading for all the details too!
Ok, now for all of you readers. Let’s dive into the details, friends.
how to read a tape measure
The best tape measure
I’m very particular about my tape measures, and that’s because I’ve discovered the very best tape measure out there. Seriously. It’s the perfect tape measure (especially for beginners) and you’ll very quickly fall in love with using it.
I love that the tape measure markings on this particular brand are very detailed and easy to read. Keep reading and I’ll show you what I mean!
I’ll also note that it’s really helpful to choose one type of tape measure and stick with it. You’ll get the highest level of accuracy when measuring if you’re always working with the same brand of tape measure!
Lefty-Righty Measuring Tape
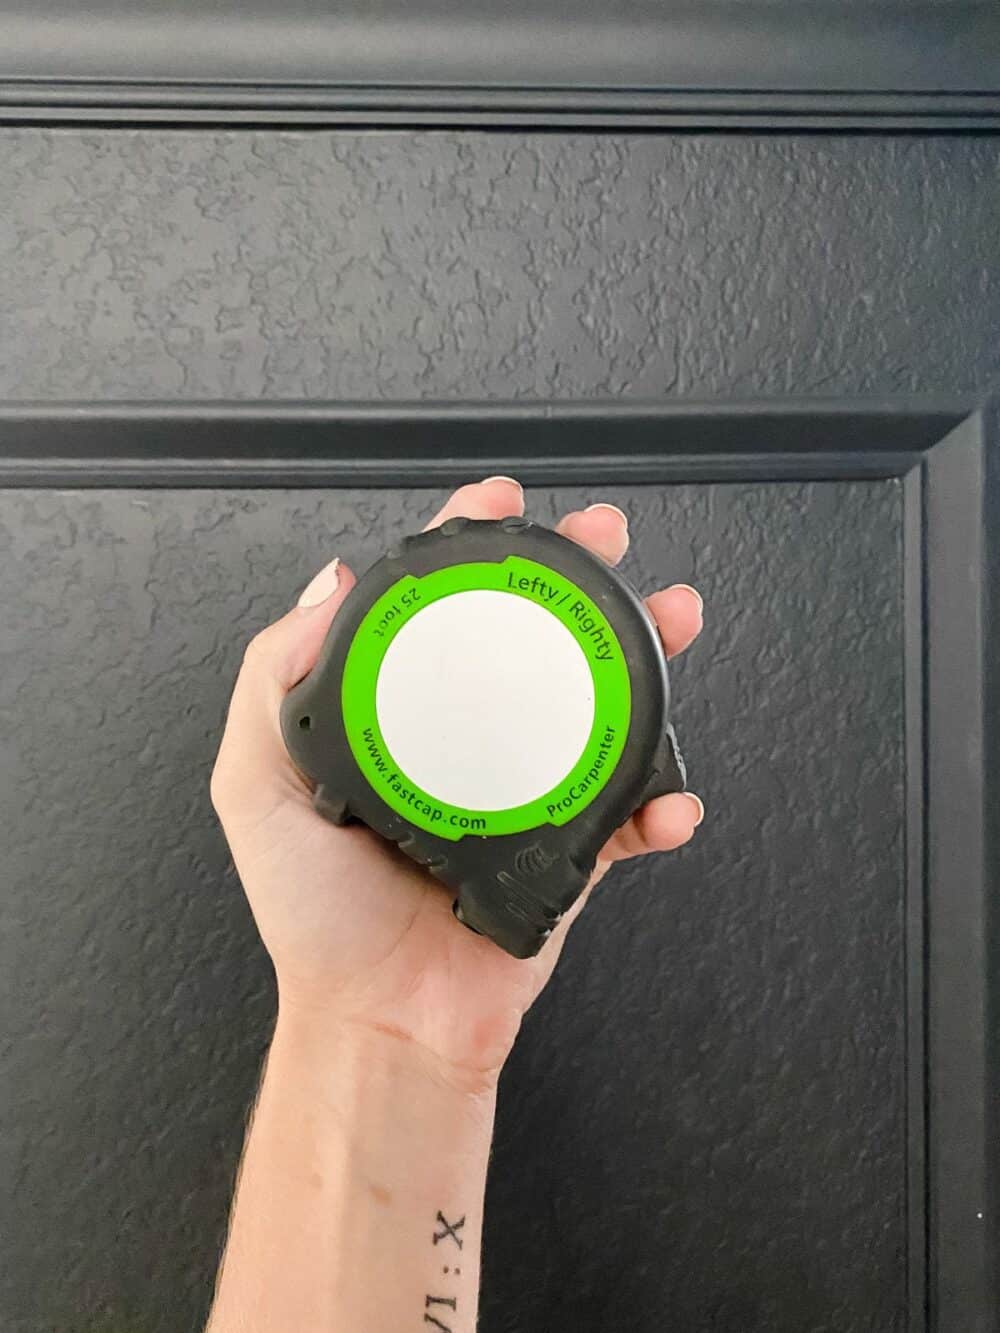
Meet the FastCap Lefty/Righty Measuring Tape. What’s so awesome about it? So many things. Let me break it down for you:
- The tape measure markings are facing in two directions. So, no matter which direction you’re measuring from, you’re looking at the numbers right-side-up (hence the “Lefty/Righty” name – you can measure with either hand and it’ll still be easy to read). This is especially great for me as a lefty!
- Every single tic mark on the tape measure is labeled. No more “two lines past a half” – you’ll immediately know that it’s 5/8 because it will be labeled for you. It goes all the way to sixteenth inches, so you won’t have any confusion! It’s so much easier to get an accurate reading with this than with any other tape measure I’ve tried!
- It has a built-in pencil sharpener in the base.
- It has an erasable spot on the front for notes. You can use a pencil to quickly jot down the measurements on the tape measure itself, then erase when you’re done!
- It locks into place better than any other tape measure I’ve ever tried!
We have two of these tape measures and I will literally spend five minutes searching for them before I’ll use any other tape measure in the house. I think we just need to buy 20 and tuck them into every corner of the house, because they’re that good.
So, if you want to learn how to read a tape measure and use it like a pro, my first tip is to get yourself one of these tape measures and you’ll already be halfway there. Promise.
Anatomy of a Tape Measure
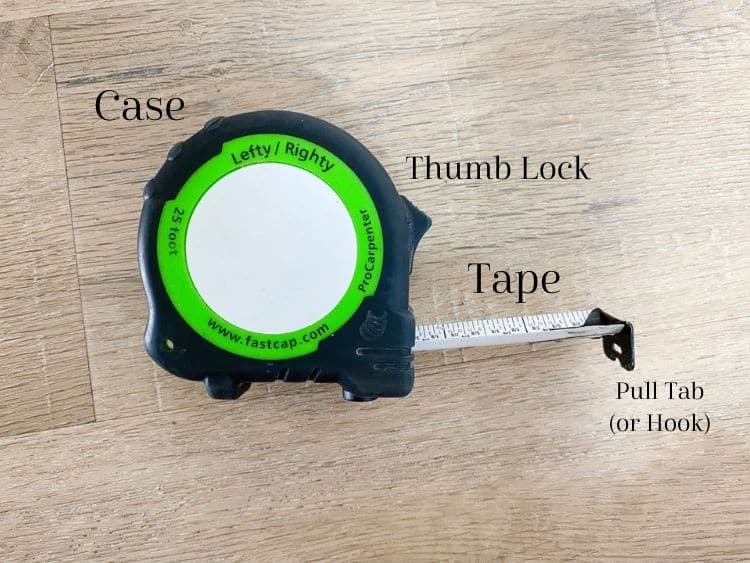
Let’s talk about all of the language and mechanics of a tape measure that you may not know!
The case
The outer case of the tape measure is sometimes referred to as the body. It can be made of a bunch of different materials. Some are plastic, some are metal, and some have special features like rubber on the bottom corners to protect it if it drops and help it grip surfaces better.
The thumb lock
This is the button that you press to help hold the tape measure at a certain point. It’s typically kind of like a switch that you push with your thumb. It will prevent the tape from retracting back into the case while you measure. When released, the tape will (typically) coil back into the tape measure…sometimes at a very rapid pace, so watch your fingers!
The Tape
This is the part that actually shows you the measurements! Essentially, it’s kind of like a flexible ruler. Not all tape is created equal. So, when you’re shopping for tape measures, pay attention to what this part looks like. I love that my favorite tape measure has the tic marks labeled all the way down to 1/16 of an inch. It makes my life so much easier. Generally, most tape measures at least have different sized tic marks for the different measurements. We’ll get into that in a minute! You also want to take note of how stiff the tape feels. Stiffer tape can handle longer distances before it starts to buckle. That means it’s really helpful if you’re often working alone and don’t have a second person to help hold the tape straight!
The Pull Tab or hook
The metal part on the end of the tape that you can hook onto various surfaces you’re measuring to help hold the tape in place. This tab will typically be left a little loose so that it can move back and forth – this is intentional! It will help make sure you have an accurate measurement whether you’re measuring from the inside corner of something (and you’re pushing the tab into the corner) or the outside corner (and you’re hooking the tab and pulling). It’s based on the thickness of the metal piece itself, so that having it there doesn’t affect the final measurement. It’s very precise, and a thoughtful design feature that most people don’t realize is even there!
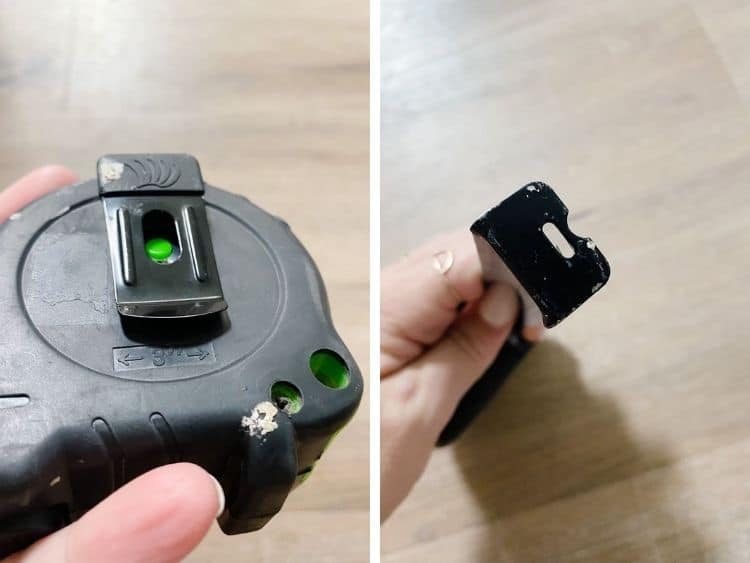
Most pull tabs also have a little hole or slot in the middle of them. This is to allow you to hook it onto a nail or screw to help hold it into place while you measure!
The pull tab often also has a small serrated blade-like edge so that you can easily mark your wall when measuring.
Other Features
Depending on the tape measure you purchase, you may have other features on it. There’s often a belt clip on the case of the tape measure so you can attach it to your pants while you work. And some tape measures come with other fun things like pencil sharpener attachments, places for notes, and more!
How to read a tape measure
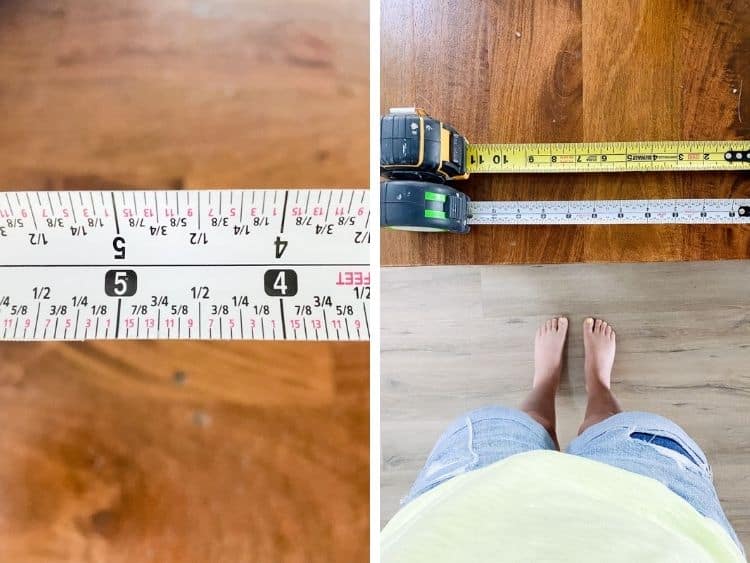
Now that we’ve got all the tape measure vocab down, let’s talk about how to actually read the tape measure markings. Every brand of tape measure will have a slightly different look. But, for the most part, they have some pretty standard features when it comes to reading it.
Of course, I’ll note that I live in the United States, so our tape measures are all based on feet and inches (though some do have metric units on one side of the tape). This will be different if you’re working with a metric tape measure.
Generally speaking, the longer the line on the tape measure, the larger the measurement. For example, on my favorite tape measure the shortest lines represent sixteenths. And, the one-inch marks cross the entire tape.
Most of the time, inch lines will go all the way across the tape, half-inch lines will the about halfway across the tape, quarter inch lines will be slightly shorter than that, etc.
Tape Measure Markings
The hash marks on most standard tape measures are as follows:
Standard markings
- 1/16″ lines: These are the smallest lines. You’ll usually see 8 of them in an inch, since the remaining 8 represent larger measurements (for example, 2/16″ is also 1/8″).
- 1/8″ lines: The eighth inch markings are usually just a little bit larger than the 1/16″ lines. There will be 4 of them for each inch – again, because 2/8″ is also 1/4″ and so on.
- 1/4″ lines: The quarter inch markings go about a quarter of the way across the tape measure. There will only be two of these lines in each inch.
- 1/2″ lines: I’m sure you can guess by now that the half-inch marks go halfway across the tape measure, and there is only one of them.
- 1″ lines: And, of course, your standard 1″ line that will cross the entire way across the tape measure and will be clearly labeled.
- 1 foot: Each foot on a tape measure will also be labeled clearly. The foot marking style will vary depending on the brand of tape measure, but there will always be some sort of special marking at each foot.
specialty markings
- 16-inch increments: Many tape measures will have red numbers or a red arrow every 16 inches. This is to indicate where studs should go on a wall, as they’re typically placed 16″ apart. This is helpful when you’re looking for studs in your walls. It’s not foolproof, but if you start at a corner and look for the red numbers it can help give you an idea about where they may be (you’ll still want to use a stud finder, though!)
- Black Diamonds: Some tape measures will have black diamonds on them that appear every 19 3/16”. They represent where the middle of your studs should be. Studs have 16″ spacing between them, this is for center-to-center measuring.
- Imperial Units & Metric Units: Many tape measures show inches/feet on one side and centimeters/meters on the other.
If you’re newer to woodworking and can’t confidently tell at a glance what each tic mark on the tape measure represents, I highly suggest you get yourself a tape measure with more labels! It makes things so, so much easier and will give you a lot more confidence in all of your projects.
How to Use a Tape Measure (Accurately!)
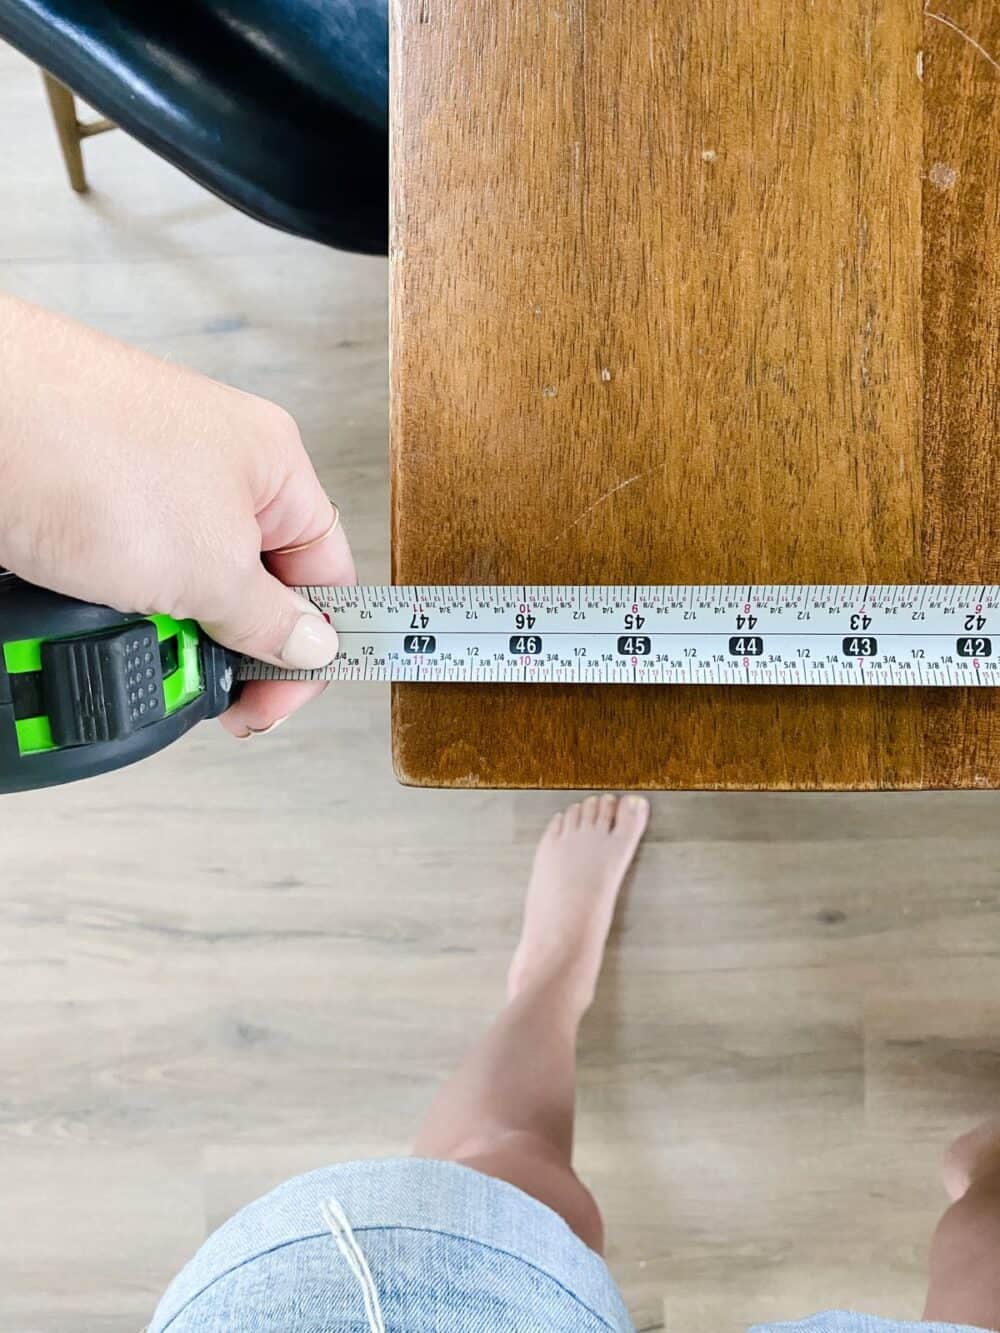
Now let’s talk about a few tips for how to actually use a tape measure so you can be sure you’re getting the most accurate measurement possible. It might seem intuitive (and to some extent, it is!). But, there are a few mistakes you could be making that interfere with a totally accurate measurement, so we’re going to break it all down here and make sure you know exactly what you’re doing.
A few tips…
- It’s very important that the tape measure be flat against whatever surface you’re measuring. Even letting it slightly sag can affect your measurements by a few sixteenths of an inch, and that can mess everything up! Try to either hook the pull tab on something or grab a friend when you’re measuring longer distances and can’t keep the tape measure fully flat.
- Find the closest inch mark to whatever you’re measuring. Then, use the tic marks to find out what fraction of an inch is included. For example, in the image above, the most accurate measurement would be 47 1/4″.
- If it’s very important that you get a super precise measurement, try lining up the 1″ mark with the end of your piece, rather than using the pull tab. This is called “burning an inch”. Sometimes you can get ever so slightly off if the pull tab isn’t engaged in exactly the right way, so you can get a more precise measurement if you start at the 1″ mark. Don’t forget to subtract 1″ from your final measurement! This is really only for more detailed finishing work where being extremely precise will really make a difference, but it can help!
- When marking on your surface, always create a V where you want your measurement to be, rather than a straight line. If you just draw a line, it might not be straight, or it might be slightly off where you intended. Instead, start at the exact measurement and draw one small line going out from the measurement diagonally. Repeat on the other side, and the point of your V is the exact measurement you need!
you may not know…
And finally, just for fun, a few tape measure secret features, tips, and tricks that you may not know!
- The case on your tape measure will have a number on it. This is the exact measurement of the case itself. You should use this number when you’re measuring the inside corner of something. Simply fit the case into the available space, check the visible measurement, and then add the number on the case to that number to get the exact measurement for the space!
- Is the end of your pull tab serrated? That’s a feature that allows you to mark your wall or wood without a pencil! Simply press it into the wall or wood that you’re measuring and it will create an indent at your exact measurement without you ever needing to grab a pen.
- You can draw a perfect circle with a tape measure by anchoring the pull tab on a screw or nail in the center of your desired circle. Pull the tape measure to the radius you desire for your circle and engage the thumb lock. Hold a pencil flush with the tape measure and pull it in a circle around the anchor point to draw a circle!
And that, my friends, is everything you’ve ever needed to know about how to read a tape measure!
Need some more beginner DIY tips and tricks? Click here for all of my beginner guides!

