
How to Patch Nail Holes In Your Drywall
Last updated on April 1st, 2026 at 12:11 pm
The ultimate guide to how to patch nail holes in your drywall, along with screw holes and anchor holes. Have a drywall patch that you’ve been ignoring? It’s time to tackle it!
Patching nail holes can be one of those projects that people put off for forever and ever because they’re intimidated or it just seems like too much work. Well, I’m here today to show you that it’s not too much work and it’s not that difficult. Patching nail holes in your drywall is affordable, easy, and will be so worth the effort – promise!
How to Patch a Hole in the Wall
You’ll Need…
There are two method here. You can either use:
- Joint Compound
- Putty knife
- Sanding Block
- Touch Up Paint
OR, you can grab this all-in-one kit that I love using. You’ll just need some touch up paint (and I love using this touch up paint pen for that!).
Patching Small Drywall Holes
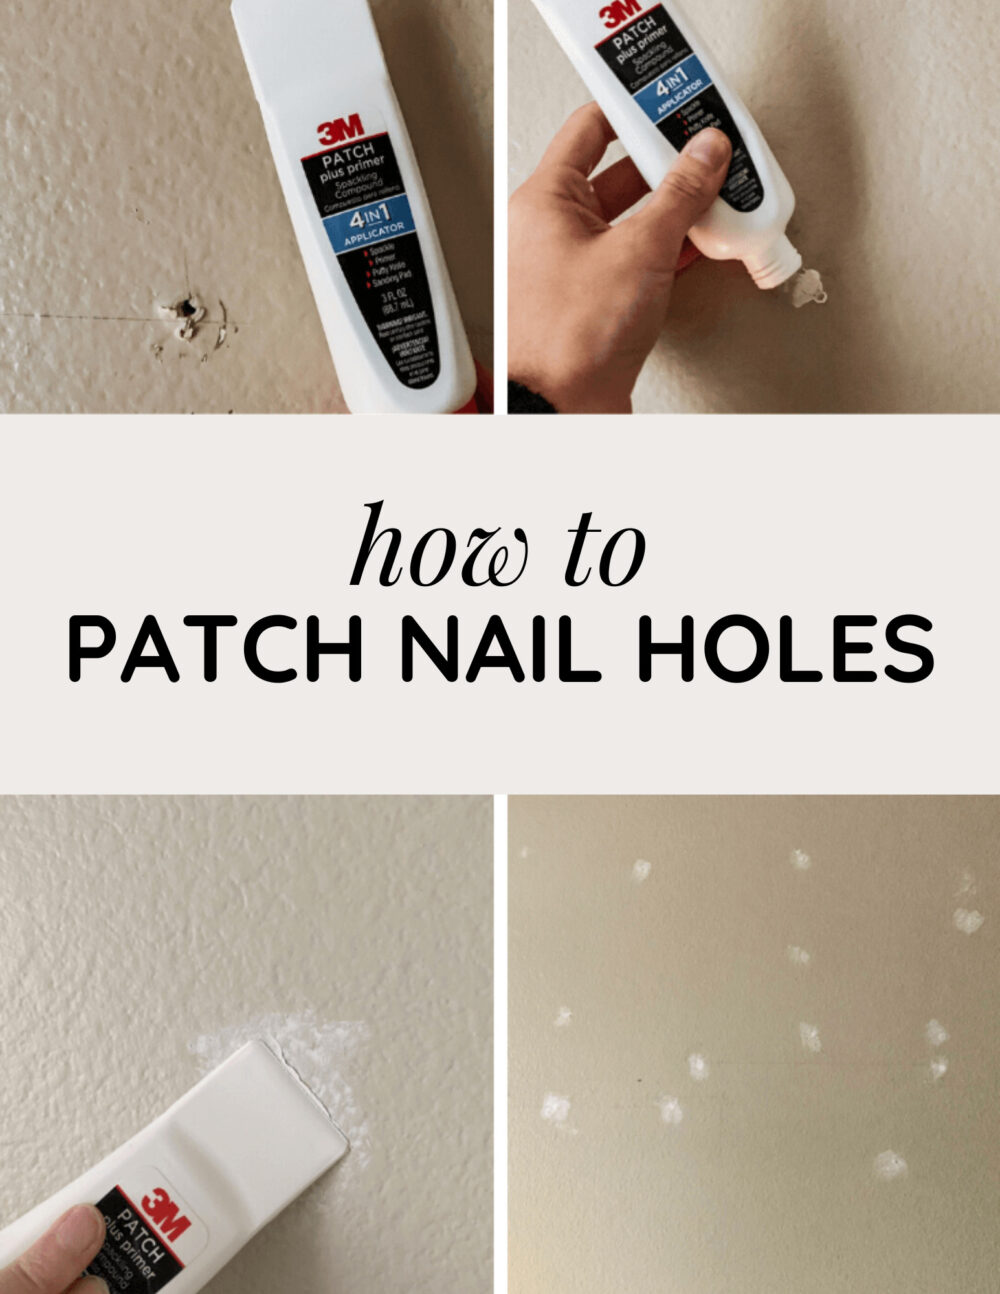
Here’s the basic process if you’re using the all-in-one kit that I love so much:
- Start by removing the nail or screw from the wall.
- Use the cap to lightly sand down the wall to remove any paint or drywall flakes.
- Squeeze the patch compound into the hole. You want it to completely fill the hole and overflow just a little.
- Use the back end of the tube to press the spackle into the hole and scrape off all of the excess.
- Allow it to dry for about 30 minutes.
- Come back with the lid of the spackle tube and lightly sand so that the patch is smooth with the rest of the wall.
- Paint over the patch with the wall color!
That’s it!
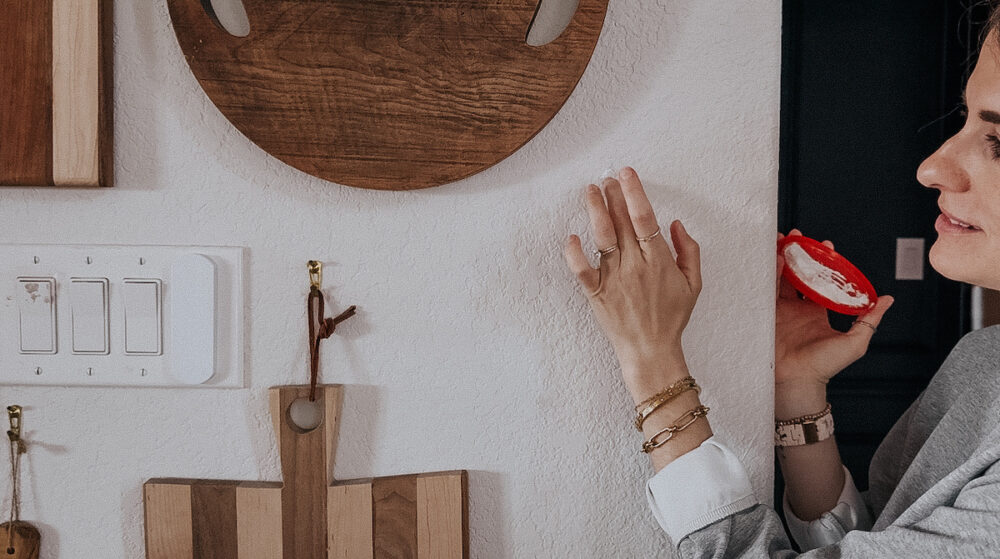
Patching Nail Holes With Joint Compound
Using joint compound to patch your nail holes is basically the same process! Here’s how it works:
- Use the sanding block to lightly sand the wall.
- Get some joint compound on your finger (or on a putty knife) and press into the hole, making sure to overflow a tad.
- Scrape off any excess with a putty knife.
- Allow to dry.
- Lightly sand, then paint!
Same process, just a little faster + easier if you buy the all-in-one kit!
Frequently-Asked Questions
Is it hard to make sure the paint matches?
My number one tip for touch-up paint after filling a nail hole is to use a paper towel! It sounds weird, but it works. Get a small amount of paint on the paper towel, then lightly dab over the touched-up area and all around it.
This will help the paint blend right in!
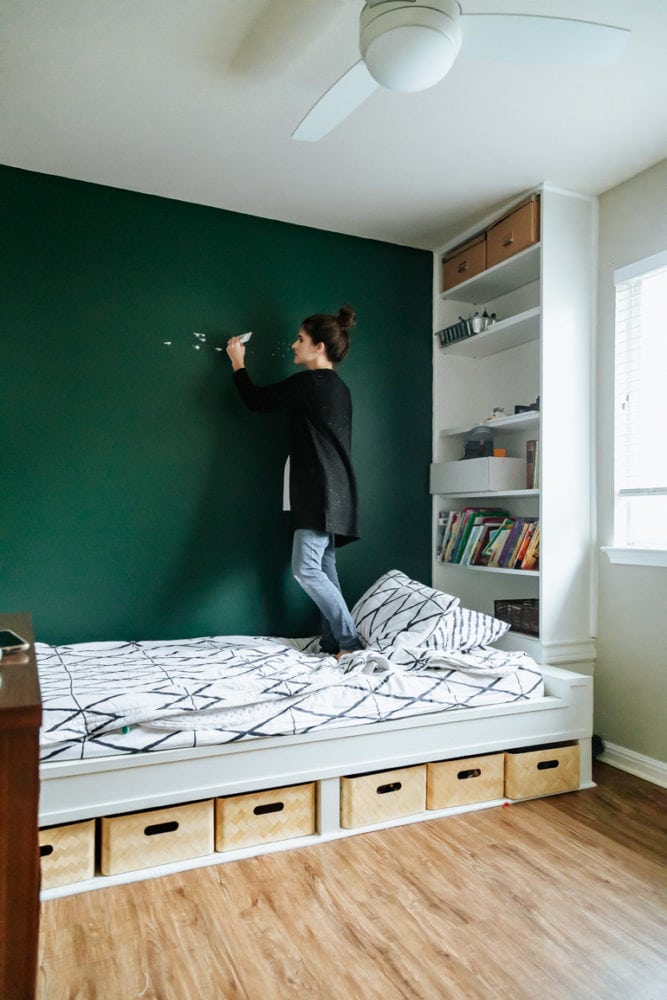
How does this work on textured walls? Is it visible?
If you have textured walls (like we do) it’s always harder to patch holes and make them invisible. I find that as long as you get the paint matching correct, the nail holes generally disappear for the most part, even with texture on the walls.
If you need to repair the texture after applying the patch, you can just grab one of these cans of spray texture and (lightly!) apply it to match the existing texture.
Can’t I just use toothpaste to patch the walls?
Nooooo! This is a suggestion you’ll see often as a simple “life hack” but this is not a good long-term solution. Toothpaste isn’t meant for this kind of application (obviously), so even once it dries, it can shrink and crack, leaving you with an unsightly wall.
Can you just paint over nail holes?
Sure! If it’s a small nail hole, you don’t have to fill it. Chances are, you’ll never really notice it. But, if you’re prepping to move or if you rent, it’s a good idea to take the time to actually knock it out.
Patching Nail Holes in Non-Drywall Walls
What if you don’t have drywall? Here’s a quick rundown of a few of the more common wall types I often get questions about.
Patching Nail Holes in Plaster Walls
Plaster walls should be no different than drywall when patching small nail holes. Simply sand the area to remove any loose bits, then fill with the spackle just as you would with drywall!
Patching Nail Holes in Brick Walls
When patching holes in brick walls, the best method is to mix up some mortar and patch the hole with that. If you want to be sure that the spot blends in well, you can get an extra brick that matches the color of your existing brick, then crush it up and blend with the mortar to dye it to match. Just use a putty knife to spread the mortar into the hole and allow it to dry.
For a simpler method, silicone caulk should also work well to patch nail and screw holes in brick walls, though it might not blend as well if your walls are unpainted.
Paneled Walls
If you’ve got paneling on your walls (shiplap, bead board paneling, or anything else along those lines), patching nail and screw holes is still really simple.
Grab a wood filler that fits the finish on your wall. This wood filler is a great option that can be stained or painted.
Lightly sand the area, then use a putty knife to spread the wood filler into the hole (the best method is to swipe it in one direction over the hole to apply it, then swipe in the opposite direction to remove the excess). Allow it to dry, lightly sand, and apply a second coat before finishing.
Patching nail holes is one of those projects that you might put off for a long time, but I promise that once you get around to doing it, you’ll be shocked at how quick and easy it is to make the walls feel like new!
Other Basic DIY Tutorials:
- How to Use Caulk
- How to Use Wood Filler
- How to Hang a Picture
- How to Patch Larger Drywall Holes
Where do I order a glass insert to modify my front door like you did? 🙂
You can read more about it right here!