
How to Make the Perfect Staircase Gallery Wall
Last updated on March 4th, 2023 at 11:13 am
Gallery walls have always been one of my absolute favorite ways to decorate an empty space in a room. Even when I was a teenager living at home, I remember trying to fill up my wall space with the best arrangement of my favorite posters, prints, and photographs – I would spend hours arranging and re-arranging everything so it looked perfect.
Yes, I’ve always been this big of a nerd.
When we bought and moved into our first home, I knew I wanted to have a gallery wall somewhere in the house. The only problem was that the house is filled with very large windows, and there really isn’t much wall space within the main living areas. There was one large wall, however, that was practically begging for something amazing to fill it up…

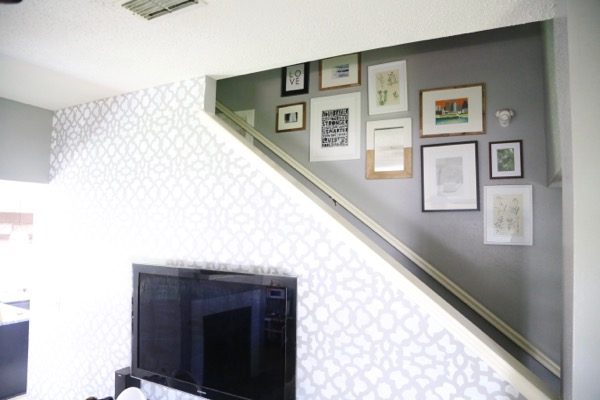
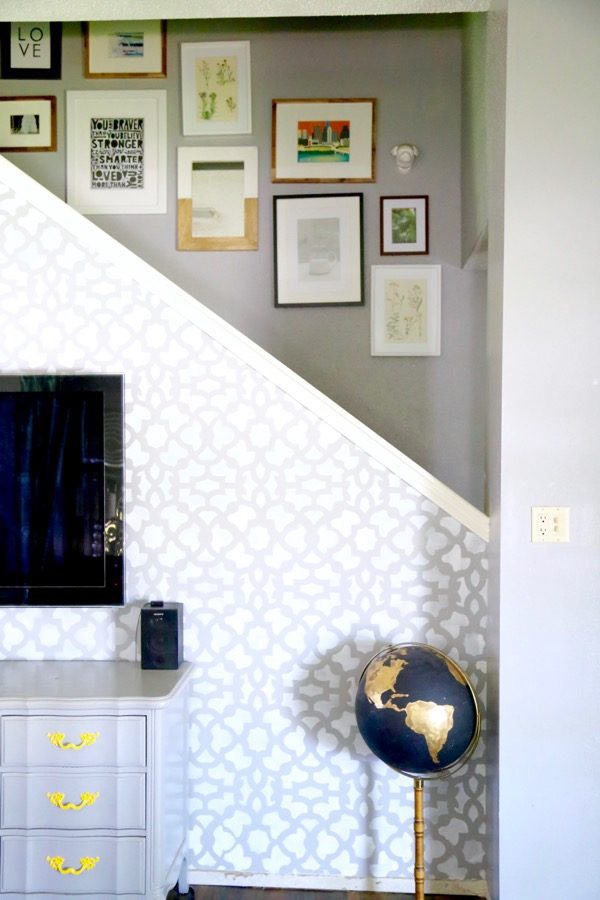
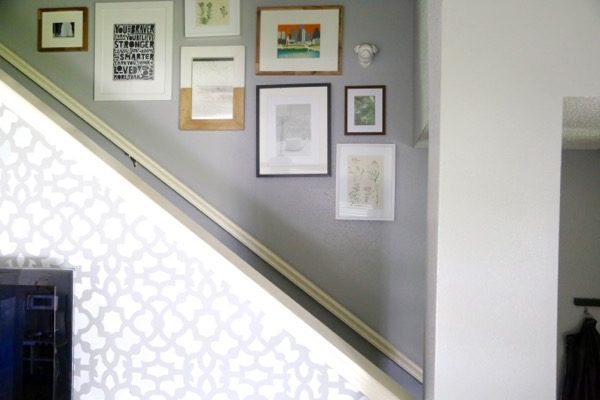
No, not the wall with the television – the one behind it! Our staircase wall is incredibly large – it goes all the way up to the second story ceiling – and it was a big stretch of gray wall without much else going on (and don’t worry we fixed up that wall with the television as well!). I knew it would be a perfect wall for a gallery of photos, I just had to get a little creative in order to tackle building the perfect diagonal arrangement for the photos.
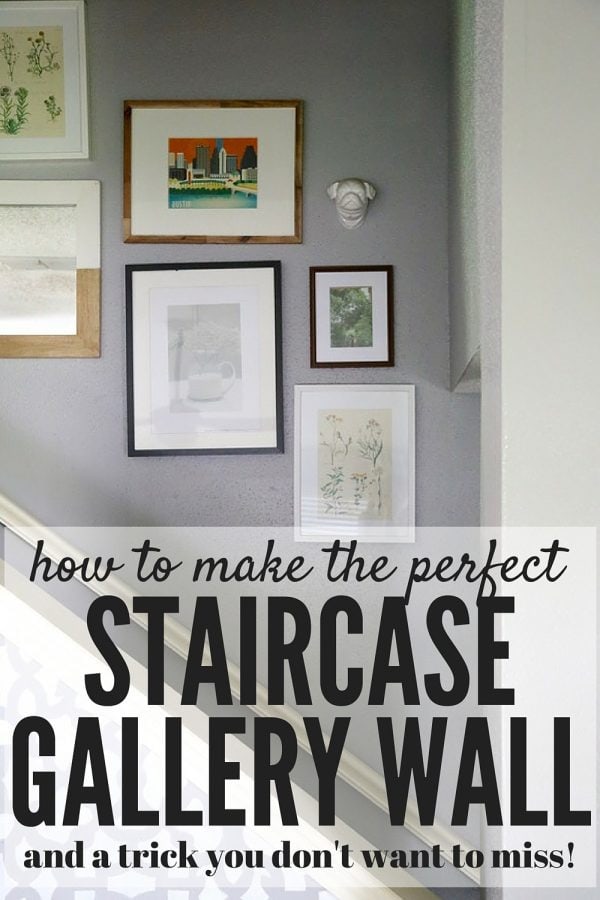
I started by laying out all of the photos on the floor and played around with them until I found something I liked. There isn’t much technique to this part – I just swapped things around until I was happy with the way it looked. The best way to do it is to start with the largest photos as anchors and work your way to the smaller ones.

Then, once I was satisfied with the arrangement I cut out some newspaper in the size and shape of all of the frames , and we taped them up on the wall to match how they were laid out on the floor.


The trickiest part of this gallery wall is that the photos had to be angled up the stairs rather than in the basic rectangular set-up that we’ve done in past gallery walls. To make sure our angles looked good and our lines were straight, we used a laser level nailed to the wall at an angle parallel to the handrail (you can see the red line from it in the photo above).
Once we got all of the mock frames taped to the wall, we started rearranging things that didn’t look right to us. Corey stood back on the other side of the room and told me what looked funny and what needed to be fixed, and we worked together to come up with an arrangement that we liked on the wall. It didn’t end up being too different from what we had set up on the floor, but we definitely moved a few things before we were satisfied.
Then, all that was left was to measure where the nail needed to go for the frames, get the nails in the walls, and hang the photos! What you see below is different from the photos above because it’s been a while since we originally set this up – over time it has slowly evolved a bit, but the initial setup process is the only way we were able to get to where we are now!
This strategy has served us so well in so many different situations – we’ve used it for multiple gallery walls throughout the years, and anytime we’re unsure about the scale of something that we want to hang it’s a quick process to check how it will look with some newspaper!
One of my favorite things about gallery walls is that over time they seem to grow and change and take on a life of their own – what we have on our wall now is completely different than where we started, but the changes have been slow and steady, and it’s been so easy to make little swaps here and there with our base arrangement.
What are your favorite tricks for hanging things on the wall?
Thanks for the share. With Spiral Staircase Prices being so affordable these days my wife and I have decided to put one in. With that being said do you have any tips on how to hang our pictures so you can still see them while going up the steps?
I love gallery walls…you guys did an awesome job! Where do you get your frames from? Just random places and then spray paint them all white?
They’re all from various places – I just spray painted them all white!
Looks great! If you got the frames from Ikea, did you have any issues spray painting them? I have some of the Ribba frames that are black (and I have progressed to white frames!), so they’re in need of some paint. Just wondering how that worked for you, and if you had any suggestions on spray paint. Thank you!
They weren’t Ikea frames, but they were pretty easy to spray paint! You just have to be careful to do thin, even coats because the paint can bubble and look funny if you don’t sand them (and I didn’t sand mine, since half of them weren’t even real wood frames!). As long as you take your time, you should be fine! 🙂
Oh wow – I love it! What a cool project!
Aw, I love how it turned out – you guys did a fabulous job!
I absolutely love this. LOVE THIS. Although we are enjoying our first house, we already know that we will soon outgrow it and definitely want a 2-story house for our next home. I’m going to have to save this post so that we can attempt to do a similar stair ‘gallery’ when we have the space to do it!! Good job!
Love, love, love.
wow, you two did a great job on this!
Your vision and outcome is freaking awesome. I especially love the letters you included. What a great interest to your staircase.
This came out wonderfully! I love the uniform white frames and the balance is just perfect!
It looks awesome! I love how you can see it from the living room. I liek how you added your initials to the photos, it makes it mroe interesting.
We’re planning on doing a gallery wall, we just aren’t sure where yet. I think it would look great over our fireplace, becuase it’s off centered, so it’s hard to put just a normal large photo over it, but Jim wants to do one in the dining room. I think it would be overkill to do both (since out living room opens into our dining room). We’re on hold for now figuring out if there is another option for the living room because our idea really would look better in the dining room.