Art Closet Organization
Friends, you are never going to believe the before and after I have for you today. Yesterday, I did a giant art closet organization project and….I honestly don’t even have any words for how excited I am about this change.
We should just kick things off with a before and after so you can see what I mean.
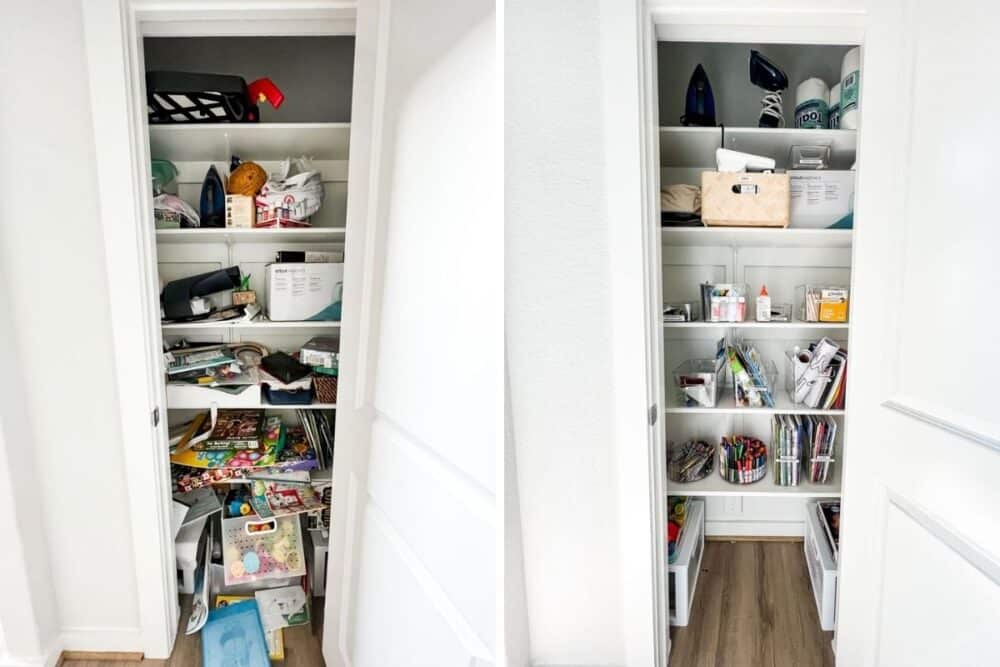
Ohhhhh myyyyy gooooodness.
I can’t even handle this.
but first, Some Notes
Now, before I dive into the “how” and “why” of everything, let me give you a couple of notes and disclaimers about my art closet organization:
- I didn’t paint the walls, add wallpaper, or do anything to make it much cuter. It’s a closet. And that’s okay – it can just be a closet. I reserve the right to change my mind in a few weeks or months, but for now…the priority is just on getting it freaking organized.
- I barely threw anything away. It’s easy to look at a big organization project like this and think, “well, they threw half of the stuff away so that’s why it looks so much better” – nope! I only threw away a few coloring books, and some packaging and actual trash. Everything else stayed!
- I have no idea how long this will last. My (lofty) goal was to get this closet so organized that it was impossible for it to get messy again. But, when it comes to kids and messes we all know nothing is impossible. You know I’ll keep you updated on how it goes!
So, let’s talk details, shall we?
When it comes to organization, I’ve always been really big on using what I have. I don’t love going out and buying baskets and bins for a space when I already have perfectly good baskets and bins at home. Even if they’re not fully suited for the space, decades old, and falling apart.
They still work, right?!
Well, I’m learning that that is not the right approach for me. All of the spaces in our home that I’ve organized with a “use what you’ve got” mentality have fallen back into disarray in a matter of weeks. It never lasts.
And, honestly, it makes sense.
If a system isn’t perfectly designed and planned for a specific space, why would it work?!
So from now on, I officially give up on “making it work” and will be focusing my efforts on intentionally choosing and purchasing products that are a good fit for the space I’m organizing. Because I’d rather drop a bit of money and organize once than not spend anything and have to organize it three or four times a year.
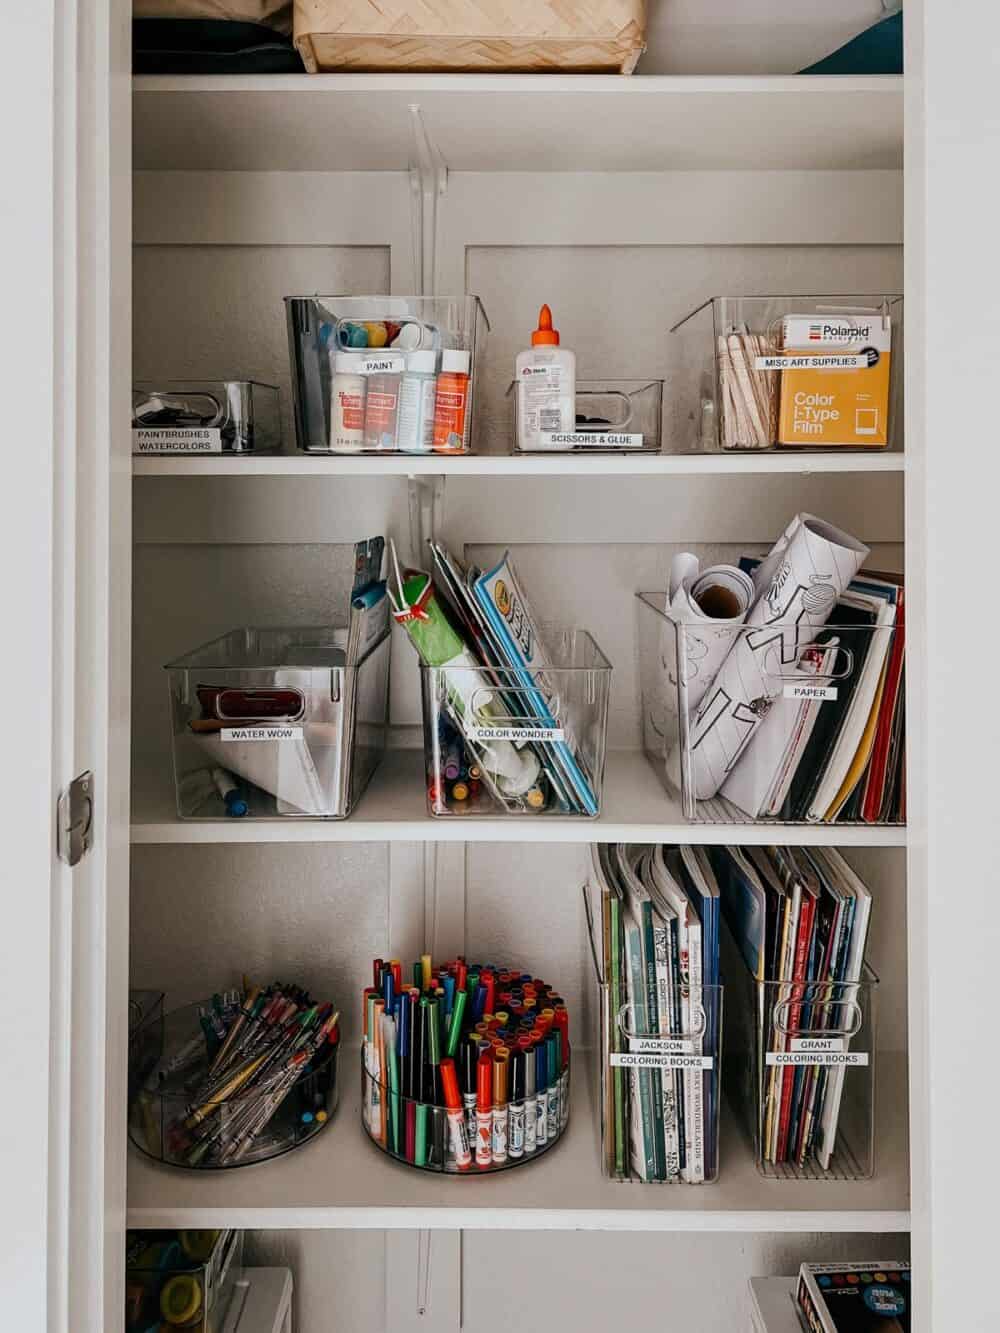
Art Closet organization tips
Let’s chat about how we got here. When I decided to organize this closet (hopefully) once and for all, I spent a lot of time making a plan. I wrote out all the things that are in this closet by category so I had a general idea of what kind of bins I would need, and I stuck to ordering bins that look similar so that it feels uniform.
The biggest categories I had in mind when I was ordering were:
- Crayons, markers, and pencils
- Coloring books and paper
- Paint
- Play-doh
Everything else is kind of peripheral and can be organized in just about anything.
I decided I wanted to do some lazy Susans with dividers for the crayons and markers – it makes it really easy for the kids to just grab the whole thing when they want to color! Also, doing this got rid of aaaaaall the art kit boxes, the crayon boxes, and the various sized containers we were storing all of this in. It was a little shocking how much I cleared out just by putting all of these into one container!
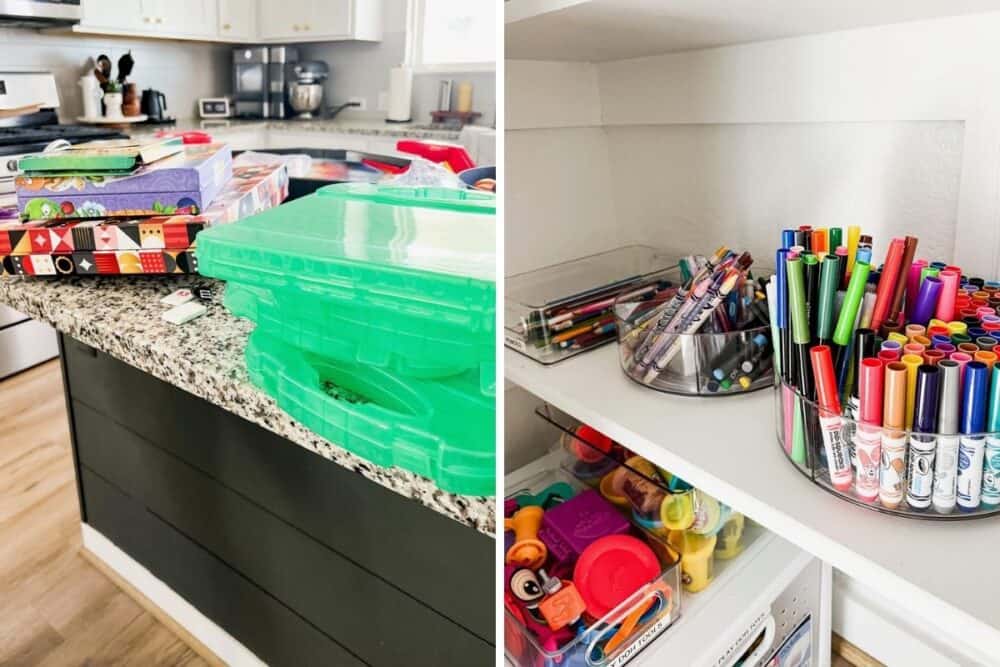
I decided on some magazine holders for the boys’ coloring books – I wanted them to be able to stand up and I wanted it to be really easy for them to put away. With this system, each boy has their own little bin and they can grab it out whenever they want to color. I also love that it’s a contained space – when that bin is full, you need to get rid of one before we can get any more!
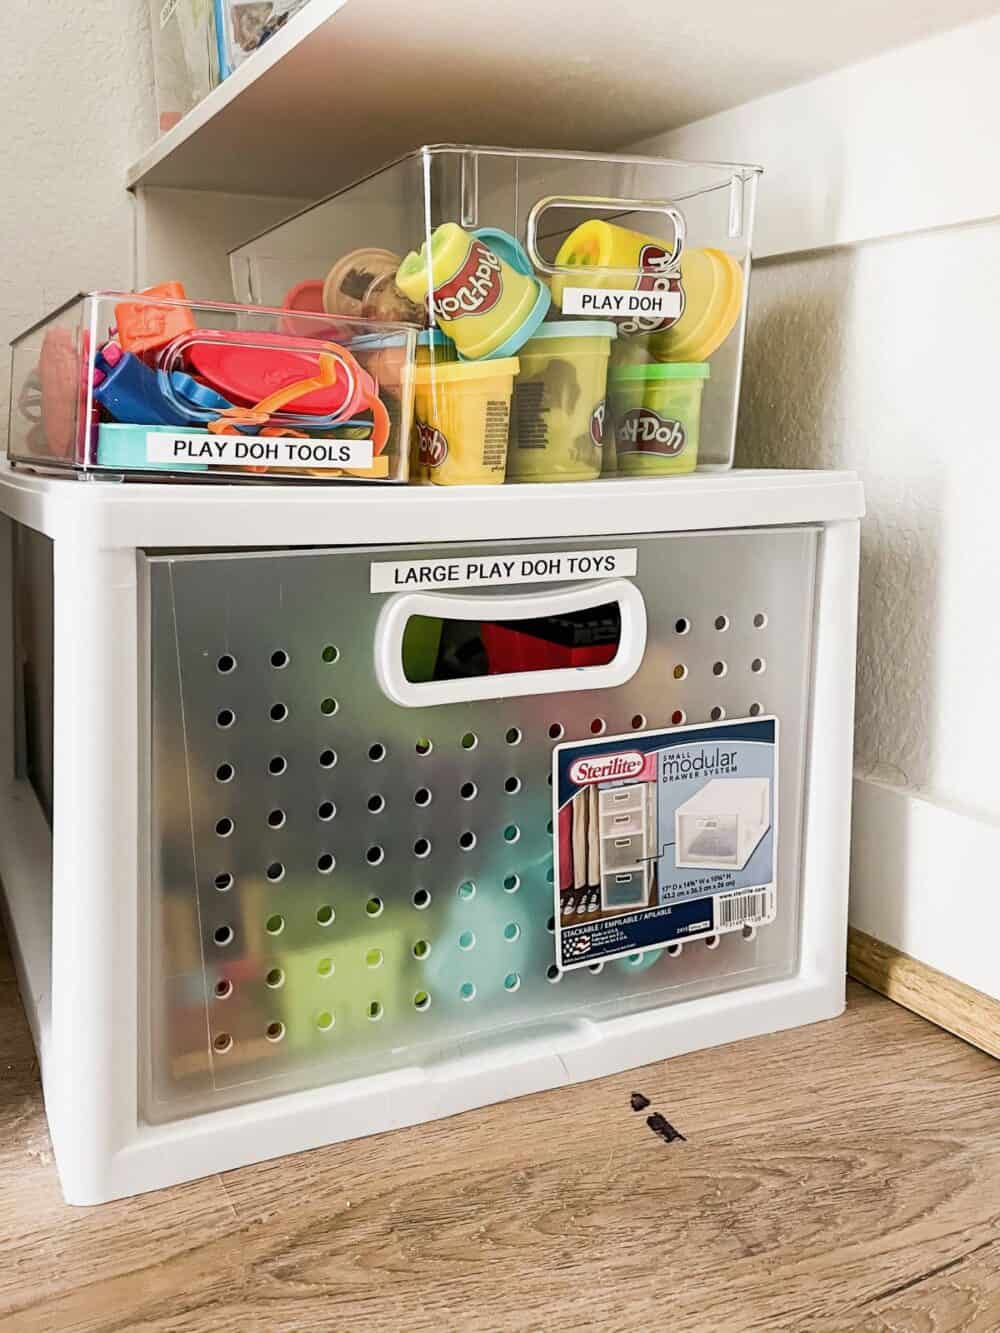
We have a couple of small plastic drawers that we’ve had for years that fit perfectly in the bottom of this closet. One of them holds some specialty art kits that the boys don’t use as often (or that they need help with), and the other holds larger Play-doh toys. We used to have all of the Play-doh in the drawer, but it was a complete disaster and impossible for the kids to sort through. I think separating things out a bit will make a big difference, and help the boys find what they need. Now, there’s a small bin that holds the Play-doh itself, another small one for tools and cookie cutters, and then the big drawer has the larger, specialty toys.
art closet sources
I’ll be honest – when I was ordering, I told myself I was ordering way more than I needed to and that I’d be able to return a whole bunch of it once I got the closet organized.
In reality? I used every bin I ordered except for one.
But, that’s okay because hopefully this means we’ll have a system that sticks! And in total, I spent about $150 on all of the bins, which feels totally reasonable for a super organized closet!
Here’s a rundown of everything I used (a couple of the bins I purchased are no longer available, so I’m linking similar ones).
What I used
- 12″ Lazy Susan. I bought two, wouldn’t have been mad at having three, though. I would have liked a third for scissors, glue, etc.
- Tall plastic storage bins. I used these for the coloring books. I wouldn’t have minded another set to keep notebooks and paper in.
- 11″ x 7.5″ x 6″ storage bins. These are probably the most versatile size! I used them for Play-Doh, paint, Water Wow supplies, and a bunch of other stuff.
- 10″ x 6″ x 3″ storage bins. These are perfect for smaller things. I used them for my Cricut tools, the Play-Doh tools, paintbrushes, scissors, and glue!
- 12″ x 10″ x 8″ storage bins. These are the biggest ones I got, and also the most expensive. I only used one of these, and I put paper and notebooks in it. I could have easily gotten away with just doing a second of the tall storage bins instead. But, I do think this is a good size worth having around. I’m sure I won’t have an issue finding a spot for the second one!
And that’s what I used for our art closet organization! There were a couple of things I thought I might have liked to have while I was working. I may add them later (or I may not). Here’s a few more specialty things I would have liked:
What I May Still Get
- Storage bins with dividers. As I was working, there were definitely a few things I would have liked to have dividers for! These would be handy for the miscellaneous supply bins, or for sorting crayons or other small supplies.
- Drawer organizers. This is another option I thought of as I was working – I love that these take advantage of the vertical space a bit more, and it’s still easy for the kids to pull out a drawer and get what they need. Would be great for painting supplies, Play-Doh tools, or any number of other often-used crafting supplies.
- Small bins with lids. This is the one thing I definitely am considering grabbing to add into the closet – some smaller bins with lids! They’re stackable and would be so nice to have for things like pom-poms, googly eyes, popsicle sticks, etc. Right now, I have all of that in one “miscellaneous” bin, but I definitely am thinking about swapping it out for these stackable guys instead. We’ll see!
- Cork boards. After I shared on Instagram, I had someone suggest some cork board tiles for the back of the door, and I immediately ordered a set. I think this will be the perfect way for the kids to display some work and (hopefully) keep the paper clutter contained!
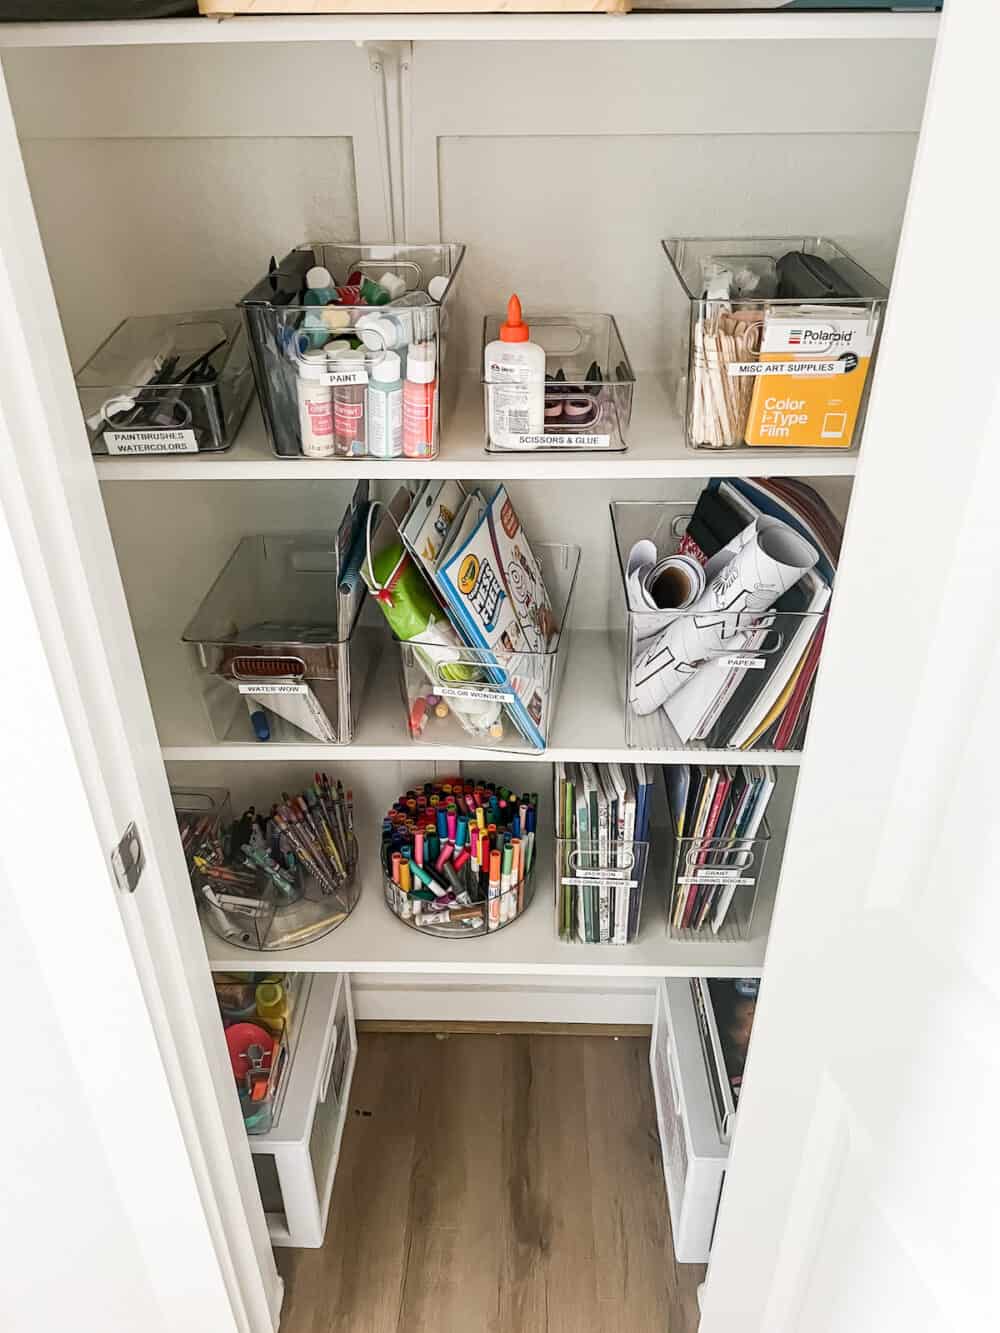
Overall, I’m so thrilled with how this art closet organization project turned out and I can’t wait to see how it holds up over time. It’s exactly what I had in mind when I set out to organize this closet. And, honestly, I feel really good about my chances of keeping up with it!
But, you know, if it falls back into disarray in a few weeks you’ll be the first to know.

Thanks for this! As someone who made drawing and painting a hobby especially the last pandemic, I didn’t realize the haul I’ve made. Didn’t know where to put things and it was all a mess. Glad that I came across these tips. I now have an art section in my bedroom.