
Moody, Traditional Budget-Friendly Dining Room Makeover Reveal
I just finished a moody, traditional dining room makeover that was budget-friendly but so impactful! Here’s the big reveal, along with a recap of all the projects we did to make it happen.
Friends, it’s been a while since I had a full-blown room reveal post here on the blog. But, the day has come. The dining room is more or less complete, and I am so excited to share how it turned out with you! Way back when I first shared the mood board for this space, I wasn’t sure if it would turn out as good as the vision I had in my head. In the end, I think it turned out even better.
In this post, I’m walking you through everything we did, including how we made our decisions and what we still may do down the road. We’ll talk dining room sources, see the before and afters, and dig deep on choices like lighting, art, and more.
Dining Room Before & After Video
Want a virtual tour of the space? Just hit play on the video below to see the full reveal video!
Budget-Friendly Dining Room Before & After
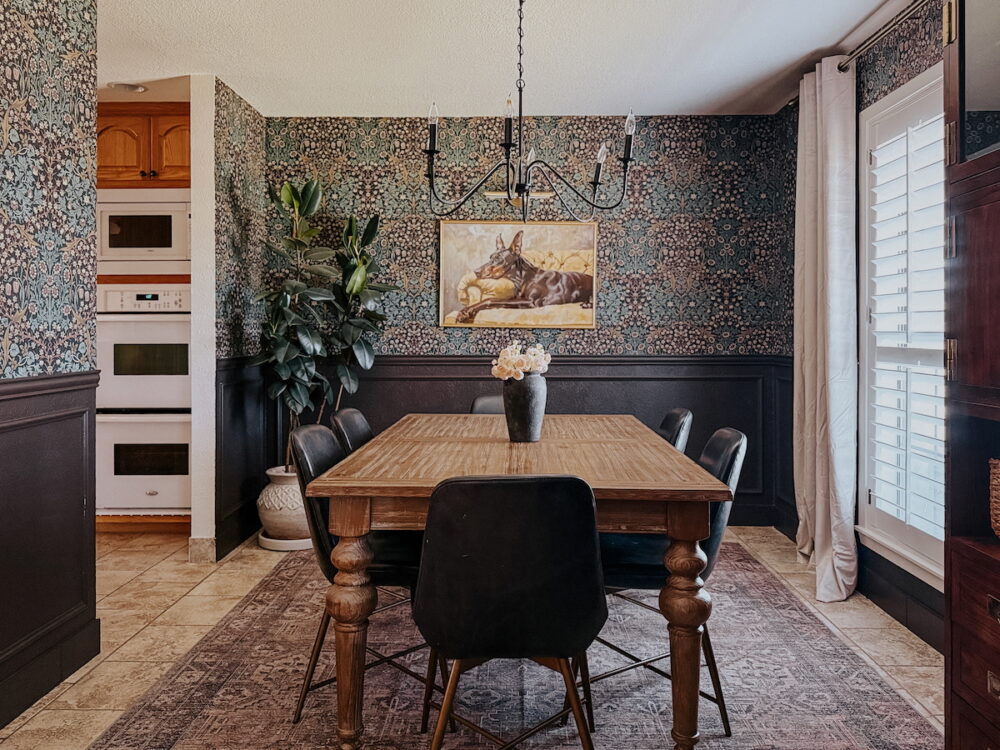
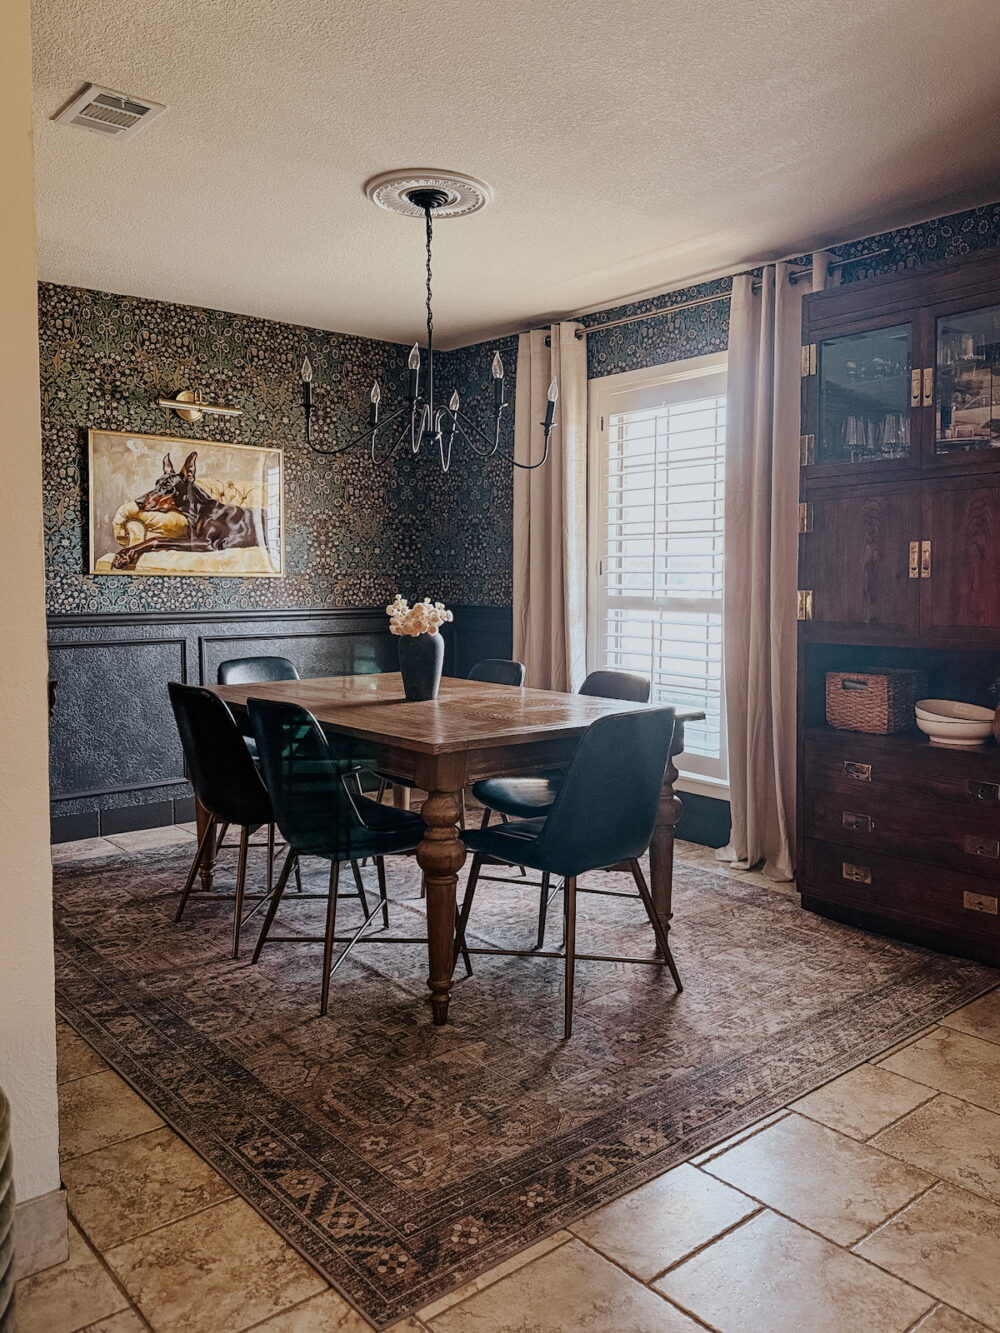
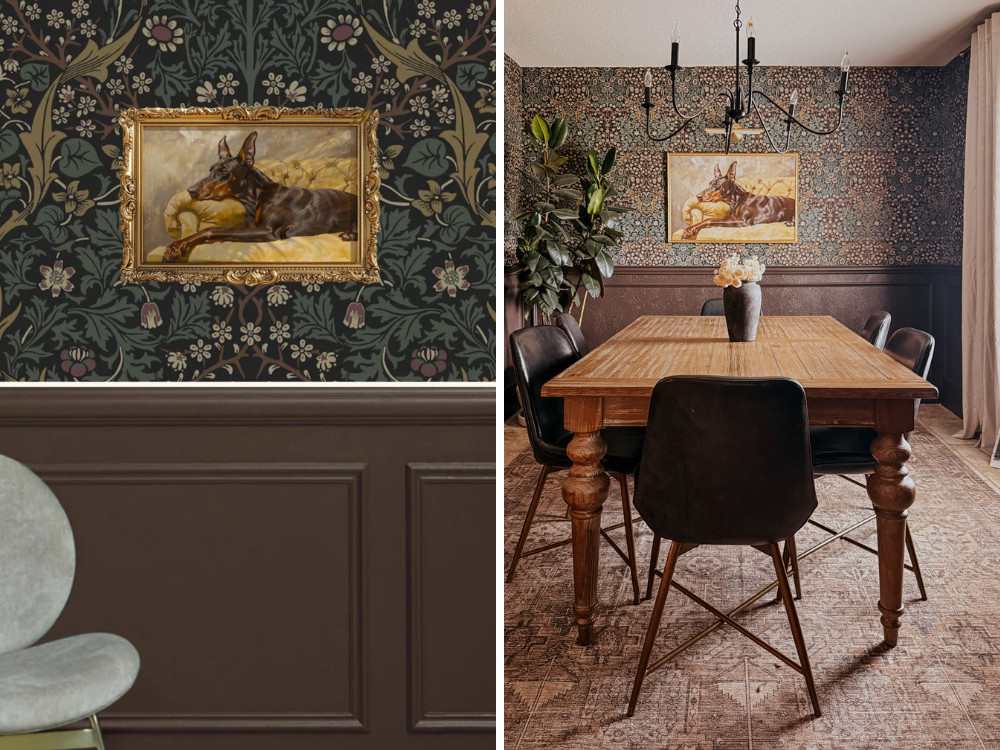
Our dining room is a small, mostly open space right off of our entry. When we were house shopping I knew I wanted a formal dining room, and this one checks the box – even if it’s smaller than I would have liked! It was a blank slate when we moved in. It had a dated chandelier, heavily textured walls, and a tile detail on the floors that made things feel very 90’s.
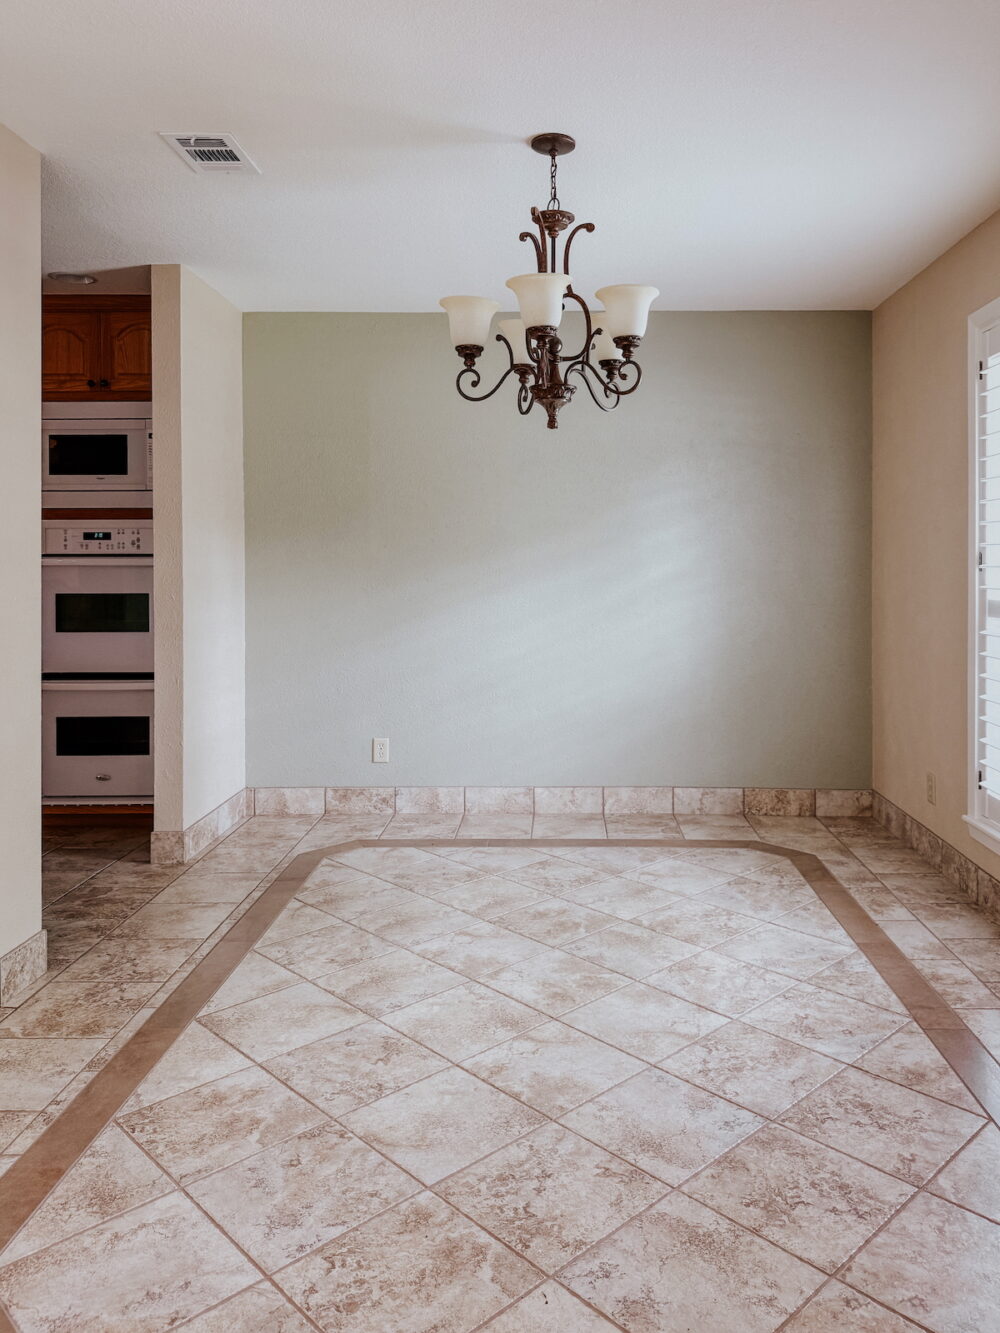
I knew from the beginning I wanted wallpaper in here, so the first step was smoothing out the top part of the walls. Then, I added trim and wallpaper, painted the entire thing a dark and moody color, and layered in some details. It’s kind of hard to believe that the “after” is the same space!
Dining Room Design Details + Sources
Looking for details on any of the pieces in this room? Before we dig into the design process and my thoughts and tips, here’s a rundown of everything I used in here:
- Wall Color: Coffee Date by Clare Paint
- Wallpaper
- Dining Room Table
- Dining Room Chairs
- Rug
- Chandelier
- Ceiling Medallion
- Curtains
- Curtain Rod
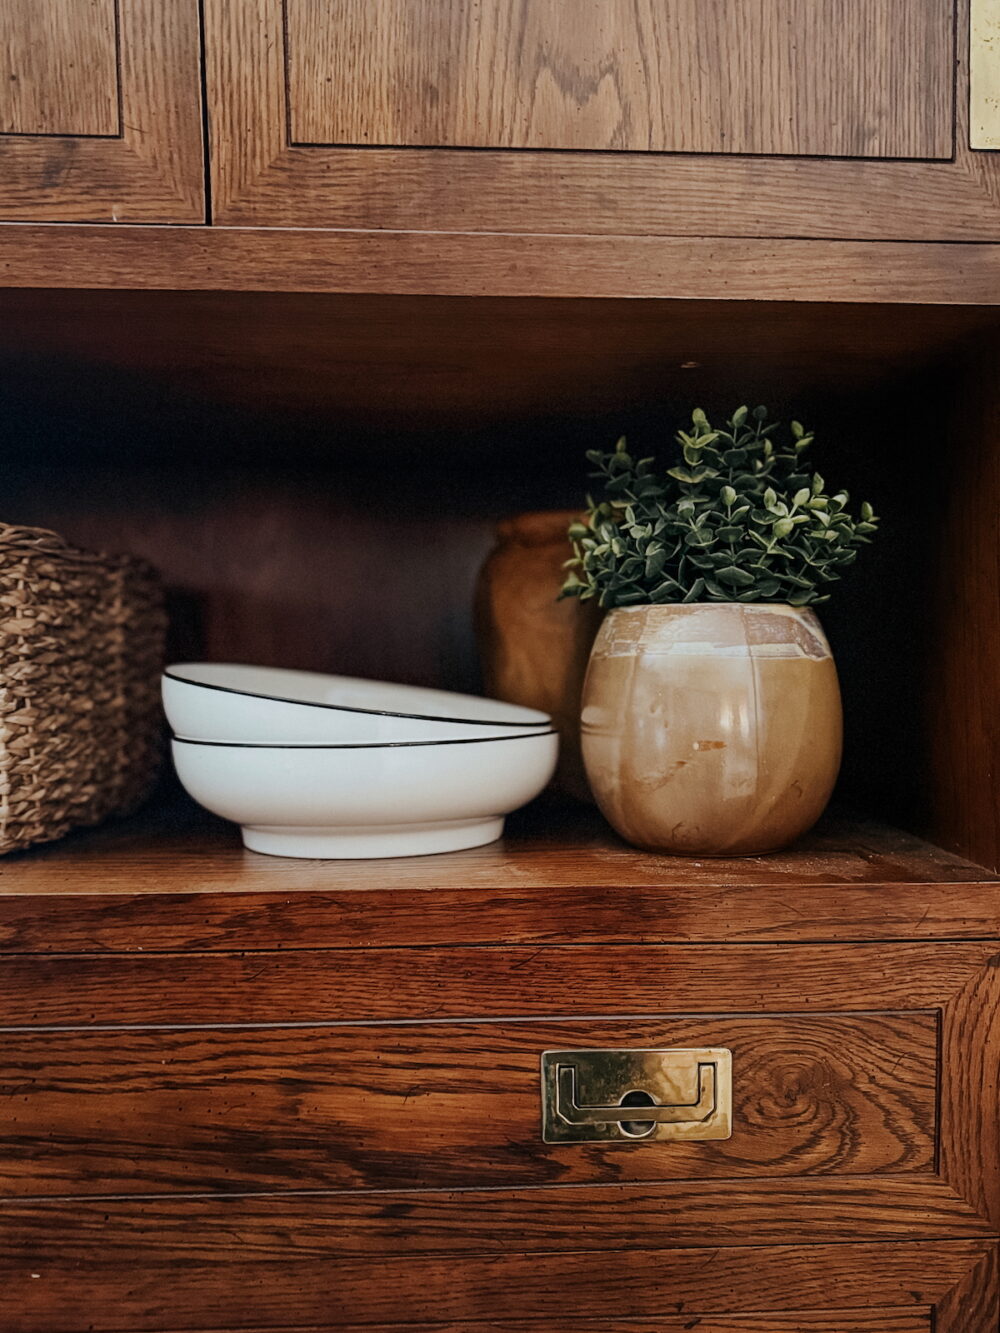
- Bar Cabinet (Vintage)
- Brown vase
- White bowls
- Centerpiece vase
- Centerpiece flowers
- Doberman Art
- Frame
- Picture Light
The 3 Changes That Made the Biggest Impact
The Traditional Wallpaper
Obviously, the walls are what really steal the show here. This is the one room in the main part of our house that gets the most natural light, so I knew I could go bold here without it feeling cave-like. I’ve never painted a room brown, and this felt like a good time to start.
The trim and the wallpaper make the space feel really traditional and a bit formal, but the pattern still feels playful and fresh, and the brown paint is something you don’t see all that often.
The Lighting
We’ll talk in more detail about lighting in a moment, but I think people often underestimate how big of a difference it can make to swap out a dated chandelier! This $50 chandelier does a ton of heavy lifting when it comes to making the room feel updated, and it’s such an easy change to make. Adding in a ceiling medallion was a really easy touch that elevated the entire thing!
The Art
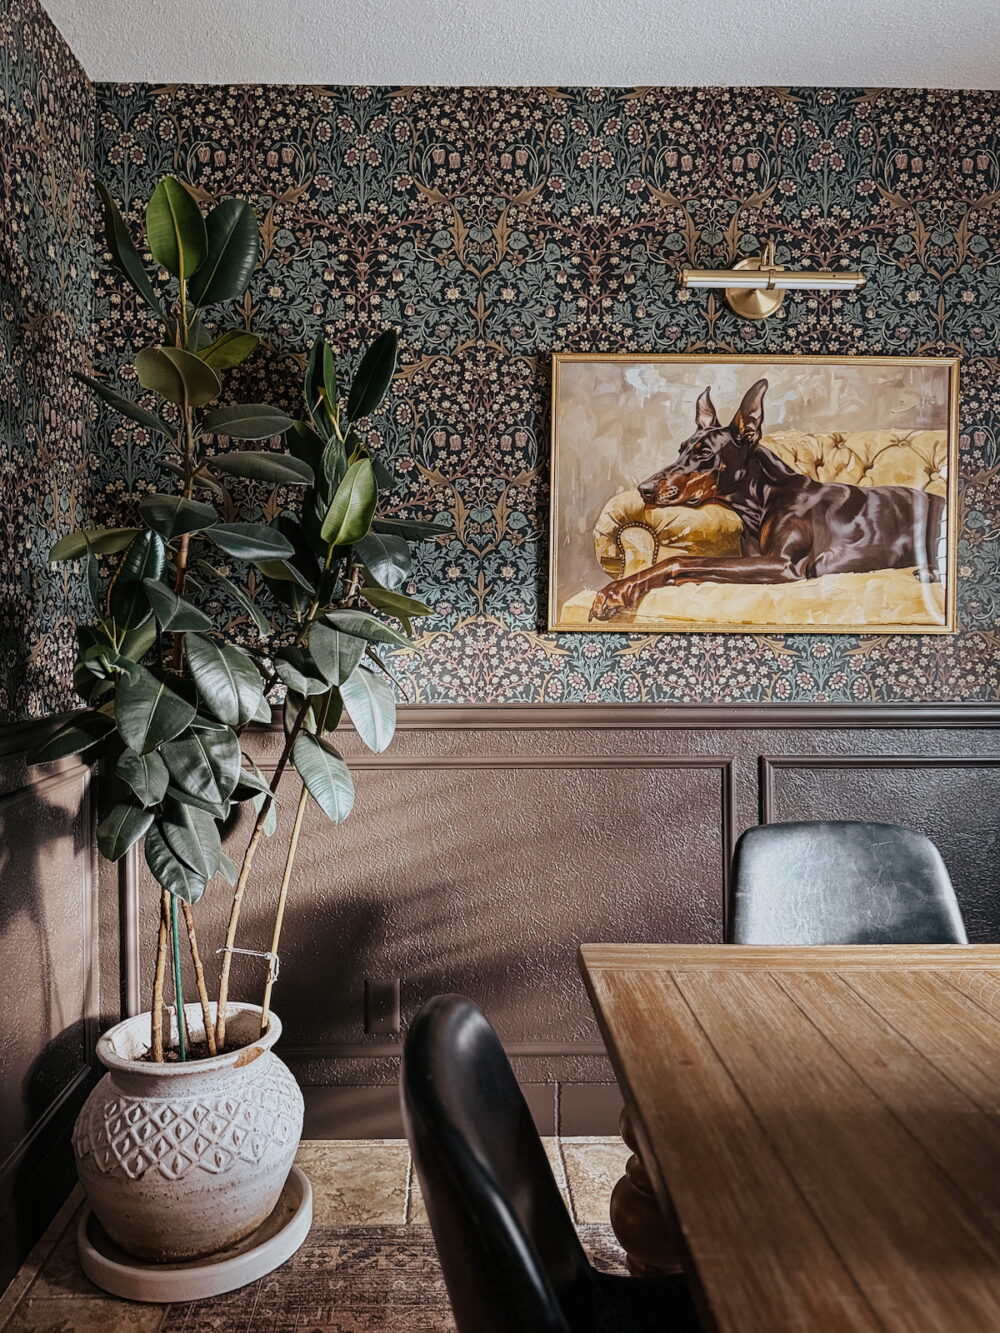
If you would have told me a month ago that the art for this space would make my top three list, I wouldn’t have believed you. The art was originally a bit of an afterthought, just something I needed to fill the walls. But, as I was searching (and struggling) to find something that worked against the wallpaper, I wondered what would happen if I leaned into some whimsy.
Enter this Doberman artwork that makes me smile so much. It’s a unique and unexpected choice for a more formal space like this, and it helps keep the room from feeling too stuffy. Plus, it’s the perfect way to pay homage to our beloved Hadley!
Design Tips for Dining Rooms
Designing a dining room is really fun, and it’s a room I always like to play with a bit. Here are a few of my top tips for making it the best space it can be:
- Have fun! It’s easy for formal dining rooms to lean into stuffy or overly elegant. Balance that with an unexpected color choice, some playful art, or some live plants. Anything to help the room feel a bit more organic and unbuttoned can help!
- Do what works, not what’s expected. Think about how you actually use your dining room. Do you eat in there as a family, or only when you’re hosting? Do you use it for crafts and game nights, or is it more often a dumping ground for chaos? Making the room pretty will only do so much to change how you actually use it. You need to lean into what naturally happens already! We eat dinner here most nights, and it’s also a space where we play games, work on puzzles, and assemble LEGO. So, it was important to make sure all of those needs could still be met after the makeover!
- Make it comfortable. If you plan to host long dinners around a table with lots of laughter, you’re going to want it to be a comfortable place to hang out! Giant, elaborate centerpieces are fun, but what’s the point if you have to move them every time you eat so you can see the person across from you? Make sure to choose chairs for comfort, a table that fits your family, and finishing touches that make sense for you.
- Remember that the best spaces are built over time. I am calling this dining room makeover done, but really I should add a for now after that. I firmly believe all the best spaces need time and can’t be done on the first pass. After we’ve lived with this for a while, we’ll tweak and add and update. That’s part of the process!
Dining Room Color Palette
When you’re designing any room, a great place to start can be by planning out what colors you want to use in the space. For me, I knew brown was going to be the main character here. After that, I found wallpaper that made me happy, and everything fell into place from there.
As we make future changes and tweaks, I can pull from the wallpaper to determine what fits into the room. I highly recommend using a design software like Canva to help you make these decisions – in fact, I used it to help me pick out my art (pictured above, with both the rendering and the real life version!).
Dining Room Lighting

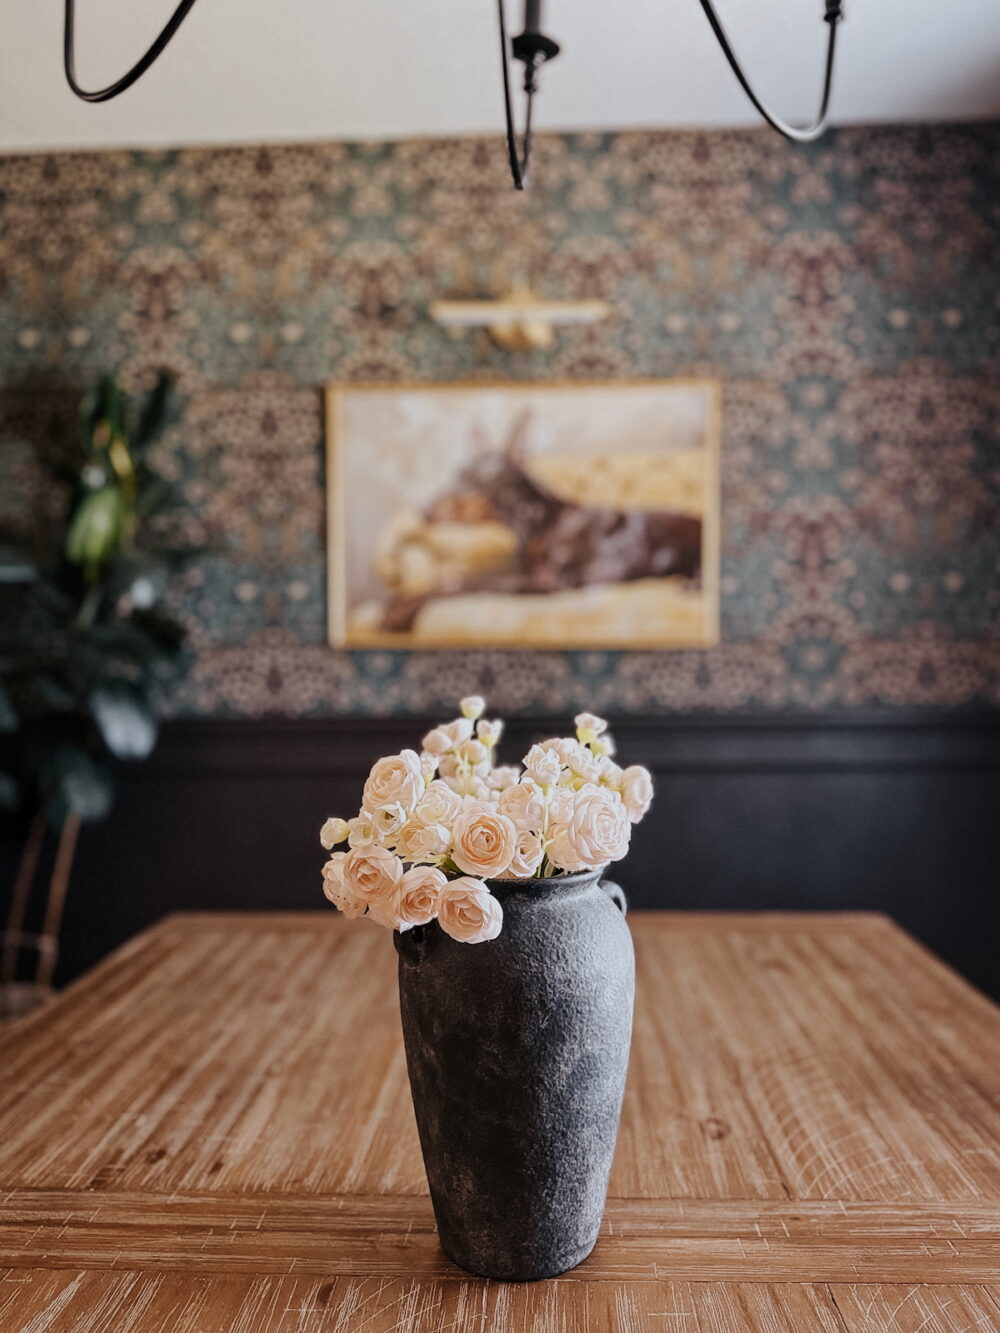
In any room, lighting is key. To create a cozy and layered space, you never want just one light source. In this little dining room, we’ve got the chandelier (on a dimmer switch), a light in our bar cabinet, and the art light. If I thought I had a spot for it, I’d probably have a lamp in here, too! (But, don’t worry, there’s one right on the wall across from it in the entry).
Having multiple light sources can take a room from feeling flat and single-dimensional to layered and complex. Don’t overlook it!
Dining Room Wall Decor Ideas
I took a long time deciding on the perfect art for this space. I wanted something quirky and playful that wouldn’t compete with the wallpaper. Here are a few of the options that I loved but didn’t end up using:

- Lounging Tiger
- Cheers
- Kitchen Disco
- Geese + Sunglasses
- High Class Place
- Pizza and Wine
- Go Get ‘Em Tiger
- Pet Leopard
- Tigers in Bed
- Tiger + Lion Eating
- Tablescape
FAQs
What Paint Color Did You Use in the Dining Room?
Coffee Date by Clare Paint
Where is the Wallpaper From?
I got it from Home Depot, but the name is Blacksmith and Cliffside Victorian Garden and you can find it multiple places!
Did You Paint the Tile Baseboards?
I did! And, I love the result so much that I’ll probably be painting the “baseboards” throughout the rest of the house too. Stay tuned!
What’s the Plan for the Floors?
Right now, the plan is to live with them! We do eventually place to replace the tile floors, but there’s in great condition so we aren’t in a rush. There is a long list of things that are far more pressing in this house (like the patio roof that’s way too short, the electrical that needs updating, the lack of closets, the lack of natural light, the failing windows, etc. etc. etc.) so the floors are definitely on the back burner.
How Did You Prep the Walls for Wallpaper?
If you want the full details on how to prepare textured walls for wallpaper, this post will help you out!
And more questions? Leave ’em in the comments!