
Our DIY Rust-Oleum RockSolid Garage Floor
Last updated on March 15th, 2024 at 10:08 am
Long before we closed on this house (and, if I’m being honest, before we even chose this house), we knew that the very first project we tackled in our new home would be doing a DIY epoxy garage floor coating.
It was such a priority to us that we requested a leaseback on our old house so we’d have time to do it before we moved a single thing into the garage. I started working on it before we even moved in! Our entire first weekend in this house was full of work on the garage floor and, while it was busy, I don’t regret it for a second. Using an epoxy floor kit to coat the garage floor was worth every second, and it’ll be so great to have in the long run.
This post was written in partnership with Rust-Oleum and contains affiliate links.
We used a similar epoxy garage floor coating in our first house, and it was so nice to have. There was no question we wanted to do it again (and honestly, in every home we move into going forward). So today, I’m going to give you a little deep dive into the Rust-Oleum epoxy floor kit we used, and answer some of your most frequently-asked questions.
Why Do You Need to Coat Your Garage Floor?
First up, let’s answer the question I got the most when I was sharing the process of doing this floor over on Instagram – why?
Our garage gets used a lot. We’re always working on some sort of project out there, and there are regular drops, spills, and other messes. With a regular concrete garage floor, you end up with stains, cracks, and a ton of dust on the floor that gets tracked inside.
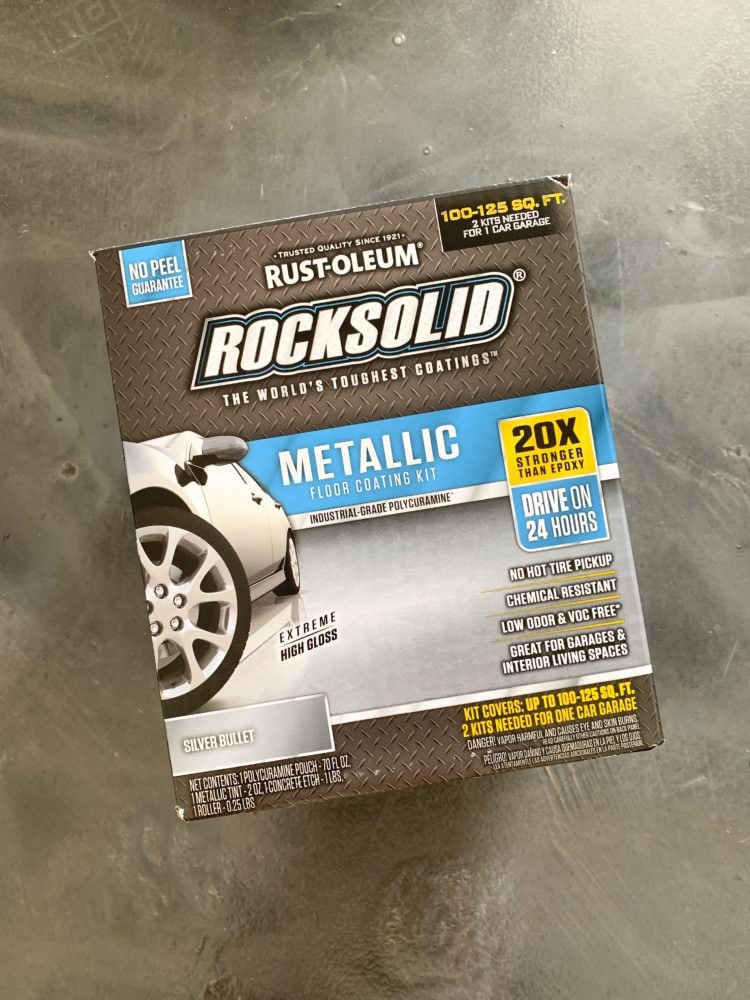
RockSolid is made with a unique Polycuramine formula that is 20X stronger than epoxy. It’s extremely chemicals-resistant, low-odor, and VOC free.
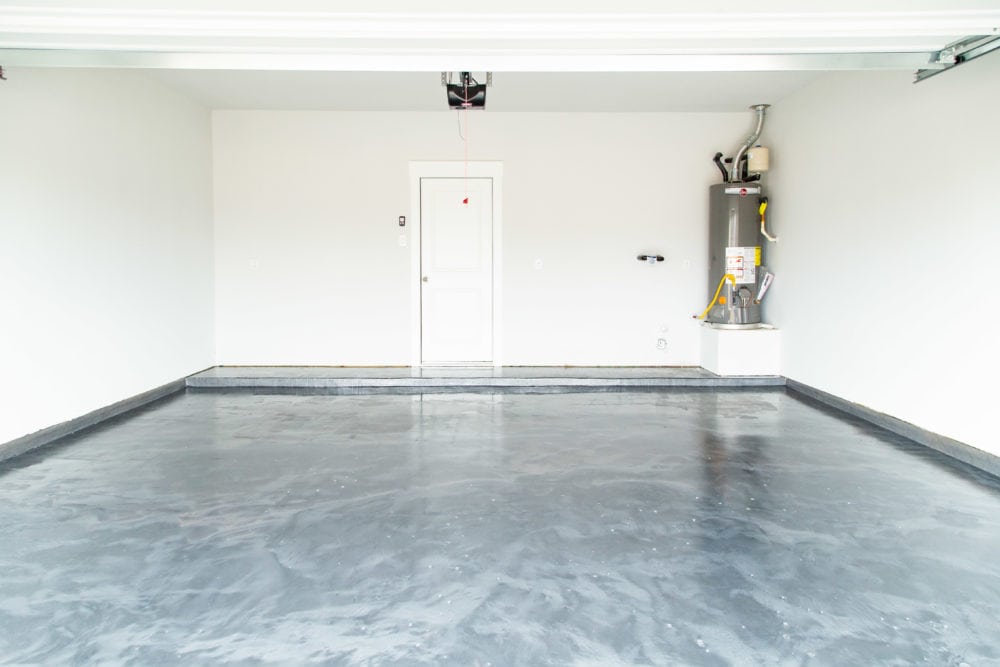
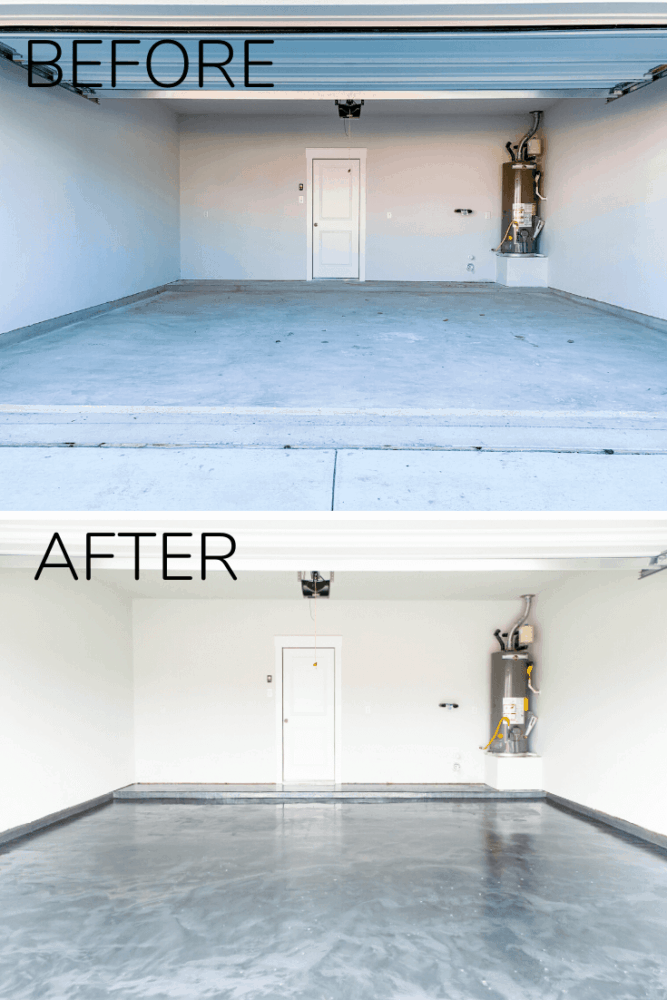
The beautiful thing about a RockSolid garage floor is that it resists stains and cracks, and it’s so much easier to clean! Un-sealed concrete puts of a regular layer of dust, so no matter how much you sweep it kind of always feels a bit dusty and dirty. And every time you go out into your garage, some of that dust gets tracked back in with you.
We found that when we had a RockSolid garage floor, it was so much easier to see the dust and keep it swept up, and it didn’t product extra dust at all! So, we tracked notably less junk into our house on a day-to-day basis, and the garage just looked so much better.
So, bottom line? A garage floor coating like RockSolid keeps your garage (and therefore your entire house) cleaner. Plus, it looks about a zillion times better than plain ol’ concrete.
How Do You Install a DIY Epoxy Garage Floor?

This project is deceptively simple. It seems like such a difficult job, but it’s really not! Here’s a breakdown of how to do it:
Materials Needed:
- Rust-Oleum Clean & Etch (I used this product because my concrete is new and clean. Otherwise, I’d recommend Rust-Oleum Cleaner & Degreaser)
- Concrete Etch (included in kit)
- Scrub brush for floor (with extension pole)
- Hose
- Rust-Oleum Rock Solid Metallic Garage Floor Kit (We used Silver Bullet)
- Microfiber roller cover (included in kit)
- High-quality paint brush
- Paint Roller (use the extension pole here as well!)
- Rust-Oleum Rock Solid Clear Coat (optional, but I highly recommend it)
- 3/8” nap roller cover (for clear top coat)
- Nitrite gloves
Step One: Clean + Etch Your Garage Floor
The first (and arguably most important) step is to prep your garage floor. If your concrete isn’t properly prepped, the product won’t adhere. Then, you’ll spend a ton of time (and money) on this project for nothing. Don’t make that mistake!
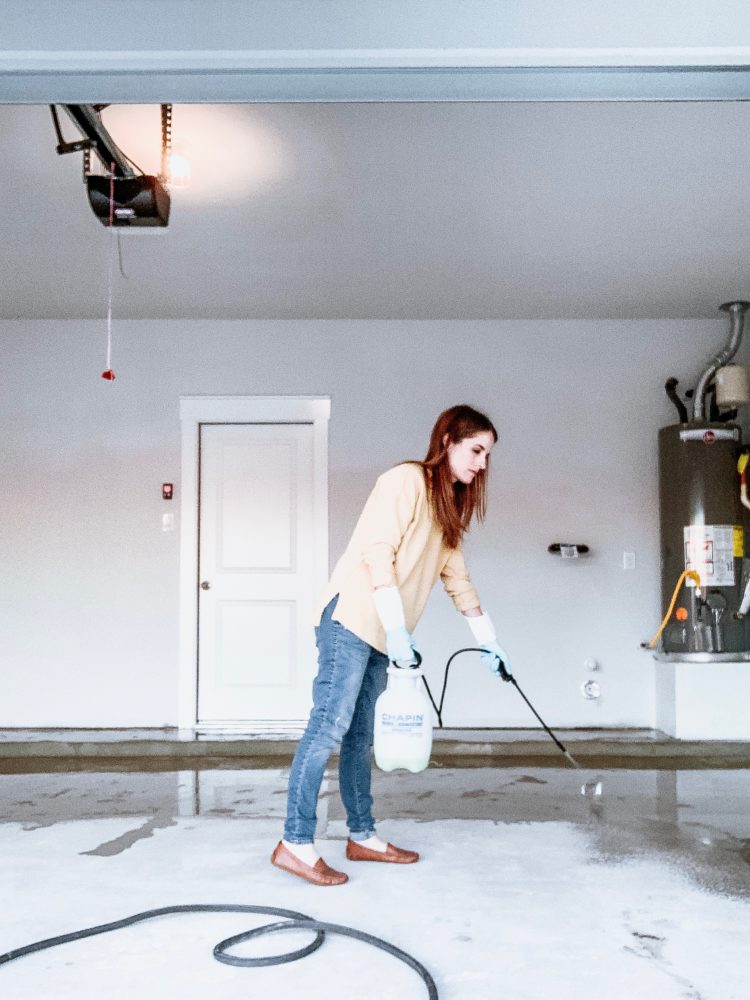
If you’re working with a clean, un-sealed concrete floor like we were in our new house, it’s a pretty straightforward process, If not, read on and I’ll cover that too! First, you’ll sweep the floor to remove any debris or dust. Then, mix 1 part Rust-Oleum Clean & Etch solution with 1 part water. I used a sprayer like this, but you could also just use a big watering can or bucket. Working in 10×10 sections, apply an even amount of the cleaning solution to the concrete, then scrub it with your scrub brush. It should fizz up a bit as you scrub – that’s how you know it’s working! Once it’s done fizzing, rinse it with some water and move to the next section.
Note: If you’re working with a dirty concrete floor, you’ll want to clean first and remove oil spots with a scrub brush and Rust-Oleum Cleaner & Degreaser. Then, you’ll mix the concrete etch (included in the kit) with two gallons of water until it’s fully dissolved. From there, you’ll pre-wet the entire floor using a hose, remove pooled water and follow the steps above working in 10 square foot sections.
Continue until you’ve cleaned the entire floor, and then thoroughly rinse it to make sure you remove all of the etching solution. They recommend rinsing three times! Use your scrub brush (or a squeegee) to get as much of the water pushed out of the garage as you can. Then allow it to dry fully.
Concrete looks dry far before it actually is, so I recommend a very minimum of 24 hours before you apply the garage floor coating. If you can wait longer, that’s even better! You don’t want any moisture remaining on the floors.
Step Two: Apply RockSolid Garage Floor Epoxy
Once your concrete is all the way dry, you’re ready to paint the floor!
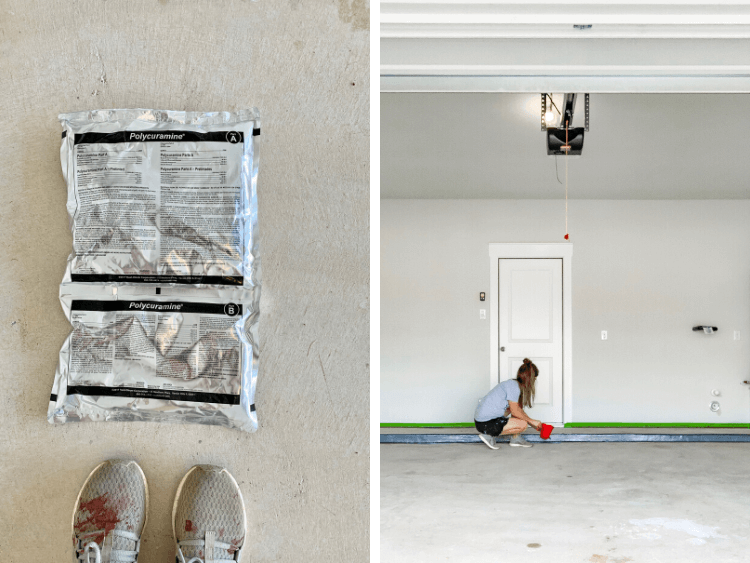
RockSolid is a two-part Polycuramine coating. What that means is you’ll need to mix it a bit before it’s ready to be used. The pouch has an “A” side and a “B” side. After massaging each individual side to mix them a bit, roll the “A” side until it pops and you can freely mix the two. Shake the packet for at least a minute or so until you’re confident it’s fully mixed up.
Once your coating is mixed, cut off a corner of the pouch and pour some into a plastic cup or paint pail. Grab your brush and cut in all of the edges and corners around the room.
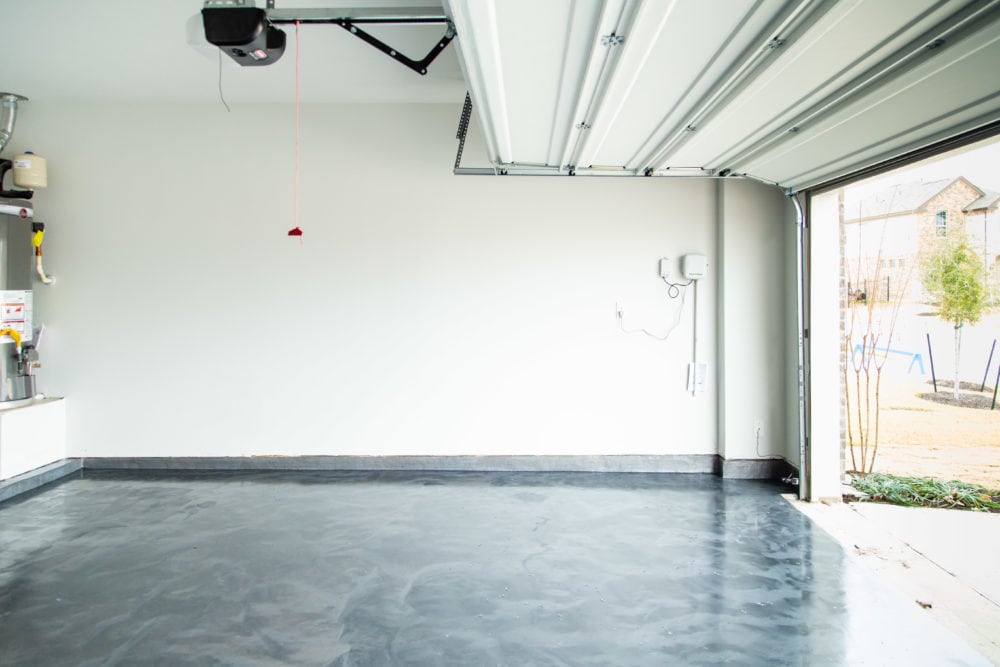
After you’ve cut in, you can pour the floor coating directly on the floor and use your paint roller to spread it around. You want it to go on pretty thick – it looks better if it’s a thicker coat! I work in small sections at a time. Cover the floor, then go back with the roller and swirl it around a bit to create movement in the paint. There’s no official way to do it, just roll around and up and down until the paint has some good swirls in it. This creates a really cool metallic-y look when it’s done. Plus, it’s self-leveling and buildable, so you basically can’t mess it up!
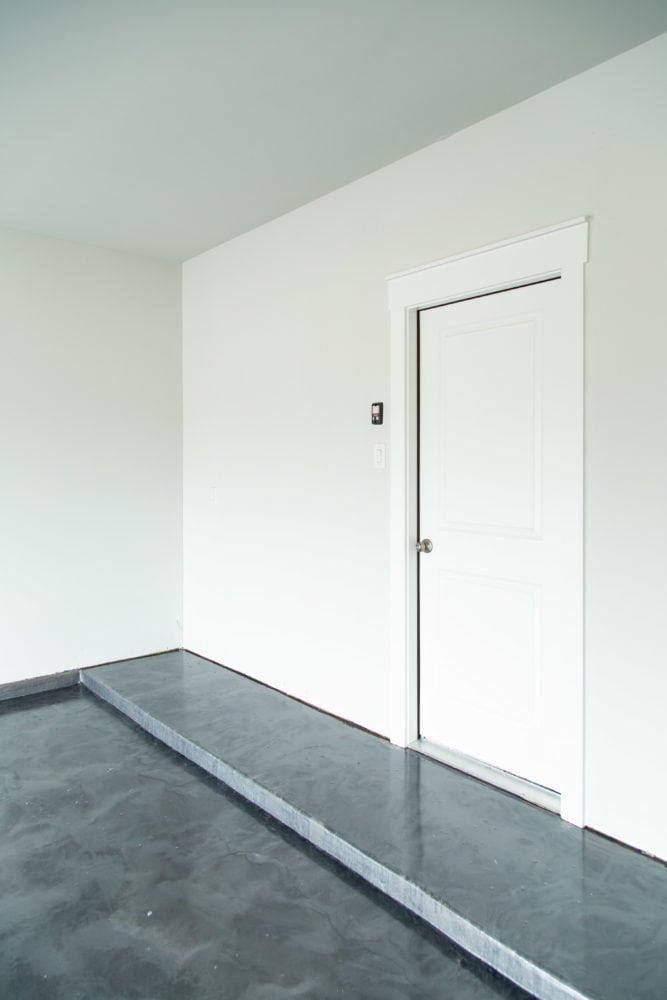
Be sure to map out your painting path ahead of time so you don’t work yourself into a corner! I started working at the door to the house, then painted my way to the garage door so that by the time I was finishing, I was standing outside of the garage.
You only need one coat. Once it’s dry, you need to allow it to dry for 24 hours before moving on to the next step!
Step Three: Apply Your Top Coat
Technically, you can stop at just the base coat if you want! But, the top coat provides an additional layer of durability. Plus, if you mix in the anti-skid powder that comes with it, it’ll make your floor a lot less slippery! This has a high gloss finish that is very smooth. It can be a bit dangerous if the floor gets wet at all. We work in our garage all the time, and power tools and slipping don’t mix well!
The top coat works very similarly to the base coating step. Just burst the pouch and mix it thoroughly before opening it. If you’re adding the anti-skid additive, you’ll need to pour it all into a separate bucket and mix before you begin painting (and I highly recommend using the additive!).
You’ll follow the same process to apply it as before – cut in, then pour it on the floor and use your roller to spread it. You don’t need to do the swirls for the top coat, though!
This layer doesn’t need to go on as thick as the base coat layer, either. As long as you’ve got the floor covered, you’re good!
Allow it to dry for 12 hours before walking on it, and for 24 hours before putting anything heavy (like your car!) on it.
Epoxy Garage Floor FAQs
How Much Does It Cost?
Here’s the budget breakdown for a standard 2-car garage:
- Clean + Etch (3 gallons): $65
- Rock Solid Metallic Garage Floor Kit (this will cover a two-car garage): $329
- Rock Solid Clear Top Coat (1 kit): $259
- Other necessary tools: $60
APPROXIMATE TOTAL COST: $713
Does My Garage Floor Have to be New?
No! Epoxy floor kits work great on any garage floor as long as it’s in sound condition and is properly prepped.
You can read the full application instructions right here for full details on how to prep various concrete surfaces before coating.
What If My Garage Floor Has Small Cracks?
Minor cosmetic cracks and imperfections in your garage floor are no big deal. They’re really easy to repair before applying any finish! If the crack is large enough that the flooring is uneven or the crack is wider than 1/8″, you’ll need to call a professional. But anything smaller than that is simple to fix on your own.
Simply clean out the crack and use this Concrete Patch & Repair Kit to patch any cracks. Once it dries, you can apply the base coat as normal!
What If My Garage Floor is Already Painted?
If you’ve already used garage floor paint in your garage, you’ll need to take an extra step prior to adding an epoxy floor coating. Rust-Oleum has a Garage & Interior Floor Primer specifically meant to prep previously-painted surfaces before adding any coating.
When we did this in our old house, we had to scrape off all of the paint prior to applying RockSolid, so this is much easier! You just clean, prime, and coat!
Is There an Ideal Temperature to Apply This?
Yes! Optimal temperatures to apply in are between 55-90 degrees Fahrenheit. You should never apply when temperatures are below 40 degrees or above 90 degrees.
We also learned while applying that it’s not ideal to have the coating drying when you have big temperature swings happening. We had a few bubbles pop up in our coating during dry time. After some research, I learned it was probably due to the 40-50 degree temperature swings we were having while I applied. So, just check the weather for the few days you plan to work on it to ensure it’ll be relatively steady!
What About the Epoxy Floors With Decorative Flakes?
Rust-Oleum includes decorative color chips in its EpoxyShield Garage Floor Kit and RockSolid (solid color) Garage Floor Kits. The decorative chips are also sold separately if you’d like to choose a different color.
Are There Other Color Options?
Yes! RockSolid Garage Floor Coating comes in multiple colors and finishes. Click here to see the full range of options!
I hope this was helpful if you’re considering applying a garage floor coating to your garage! I highly recommend it as a really fantastic DIY project, and it was worth every chaotic minute of installation while moving in to our new house.
Considering doing this and saw some reviews that said it didn’t hold up well. If you could do it all over again, would you? Thanks!
Yes, absolutely! It has held up beautifully for us.
Why did you need 4 Rocksolid kits? We have a 2 car garage so we bought the 2 1/2 car garage kit. Will that not be enough? I just want to make sure we do it right the first time so all of this information you’ve provided is so helpful 🙂
The kits we were using were smaller, and each only covered a 1/2 car garage! You’ll notice on the top of the box in the photo it says “2 kits needed for 1 car garage”
How thin does the top coat need to be put on? I keep seeing reviewers saying that you need to buy double what the box says even over previously coated floors. We are looking at doing a 380-390 sqft garage if that is of any value.
The top coat can be very thin! I found that the recommended amount worked fine for me.
Can somebody please call me about this product and servicing?
This looks fantastic. We want this look in my hubby’s game room in our basement. Our home was built a year and a half ago. What prep would need to be done? We can’t rinse floor like in a garage. What would we need to do? thanks
I’d just do a really thorough cleaning before you start!