
DIY Wood Lanterns
One of my very favorite things about learning how to use power tools has been the ability to take things that I see for $$$ in stores and making it on my own. Take, for example, the trend of beautiful wood lanterns I’ve been seeing for years. They’re so cute but they can get really pricey, especially for the bigger ones. But, I knew I could make some DIY wood lanterns for a fraction of the price!
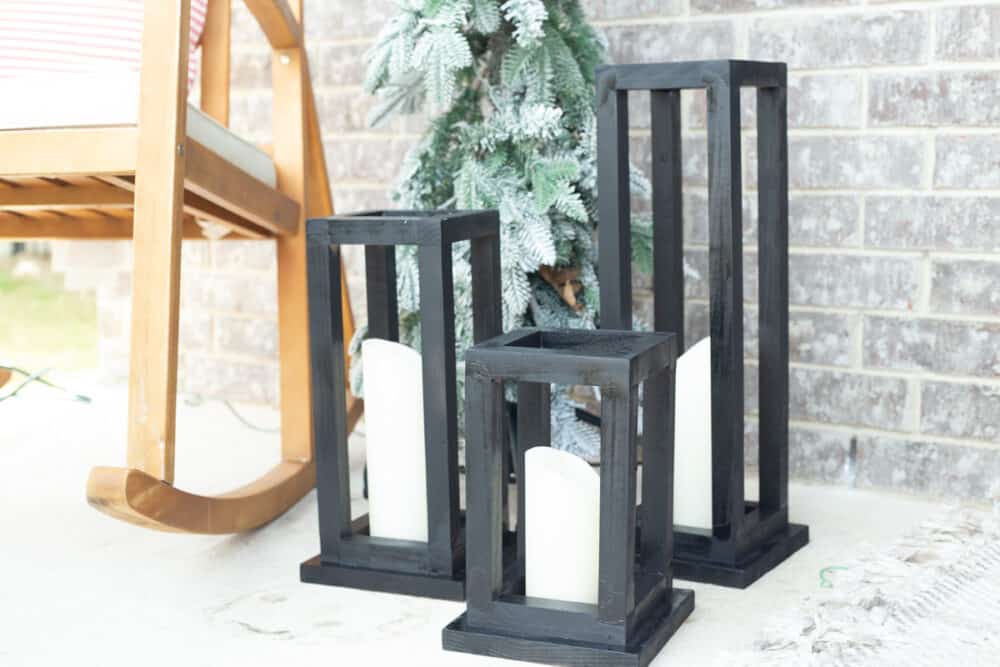
These easy DIY wood lanterns would make a really perfect Christmas gift for anyone in your life, and they work as seasonal decor or regular decor for everyday. They’re so versatile and SO SO easy to put together. I promise – anyone can make this quick little craft.
I worked with my friends at DAP to make these wood lanterns – they have been my top choice for wood glue, wood filler, caulk, and more for years and I love working with them! So, here’s a quick little tutorial for how you can make some DIY wooden lanterns of your own!
How to Make DIY Wood Lanterns
Materials Needed
*Note – these materials will make 3 lanterns at varying heights (18″, 12″ and 8″). If you’d like to make more or different sizes, just adjust the materials accordingly!
- (1) 1×8 pine board (I purchased a 6′ board, but you only need about 8″ per lantern you’re making, so you may be able to use some scrap wood!)
- (8) 36″x1″ square dowels
- Weldwood wood glue
- Pin nailer
- DAP Premium Wood Filler
- Orbital sander (you can also sand by hand if you don’t have one!)
- Black spray paint
- 3″ flameless candles
Step one: Cut (and sand) wood

For each lantern, you’ll need one square of the 1×8, and four long pieces of square dowel and eight shorter pieces. Here’s the breakdown of the cuts for each of the lanterns I made:
Large lantern (18″)
- (1) 7 1/4″ piece of 1×8 (This is the actual width of the wood, so it should be square)
- (4) 18″ pieces of square dowel
- (4) 6″ pieces of square dowel
- (4) 4″ pieces of square dowel
Medium lantern (12″)
- (1) 7 1/4″ piece of 1×8
- (4) 12″ pieces of square dowel
- (4) 6″ pieces of square dowel
- (4) 4″ pieces of square dowel
Small lantern (8″)
- (1) 7 1/4″ piece of 1×8
- (4) 8″ pieces of square dowel
- (4) 6″ pieces of square dowel
- (4) 4″ pieces of square dowel
You’ll notice that the only thing that changes is the long pieces that determine the height of the lantern – everything else is exactly the same!
Once you’ve cut them. I recommend you go ahead and take a minute to sand the wood pieces down. I waited to sand until after everything was assembled, and it wasn’t ideal!
Step Two: Assemble top & bottom
Start assembly by putting together two squares per lantern. You’ll use your wood glue and nail gun to make a square with the two 6″ pieces and the two 4″ pieces. It should look something like this:
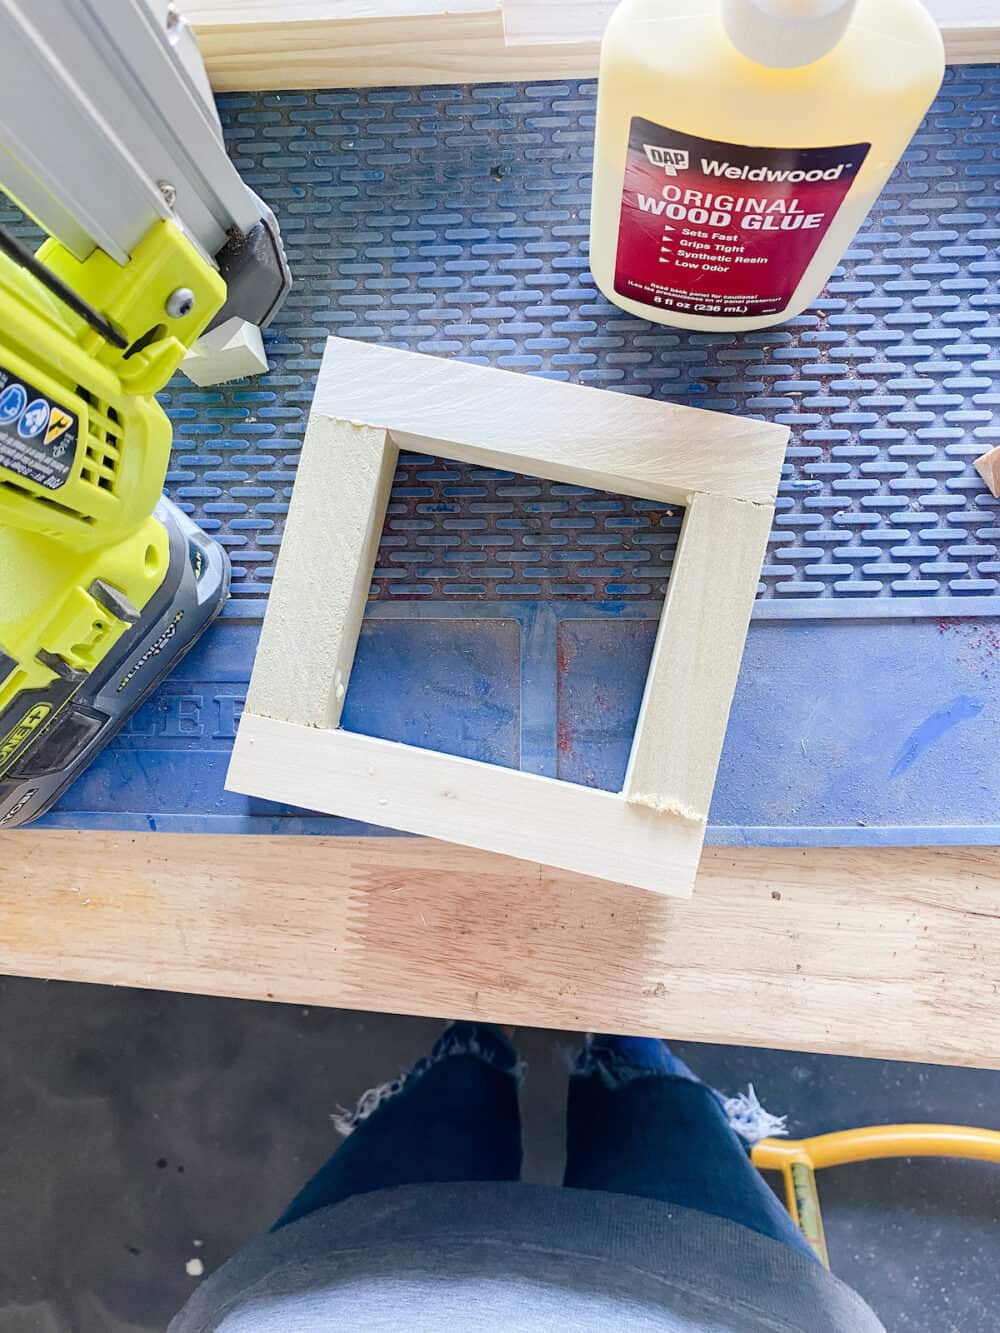
I highly recommend DAP’s Weldwood glue – it’s trustworthy, works great, and is my go-to for any project. An important thing to note is that the glue is what actually really holds things in place for the long haul. The pin nails are only there to essentially act as little clamps to hold things together while the glue dries. Wood glue is extremely strong, and it’s not ever a step to skip if you want your projects to really stay together!
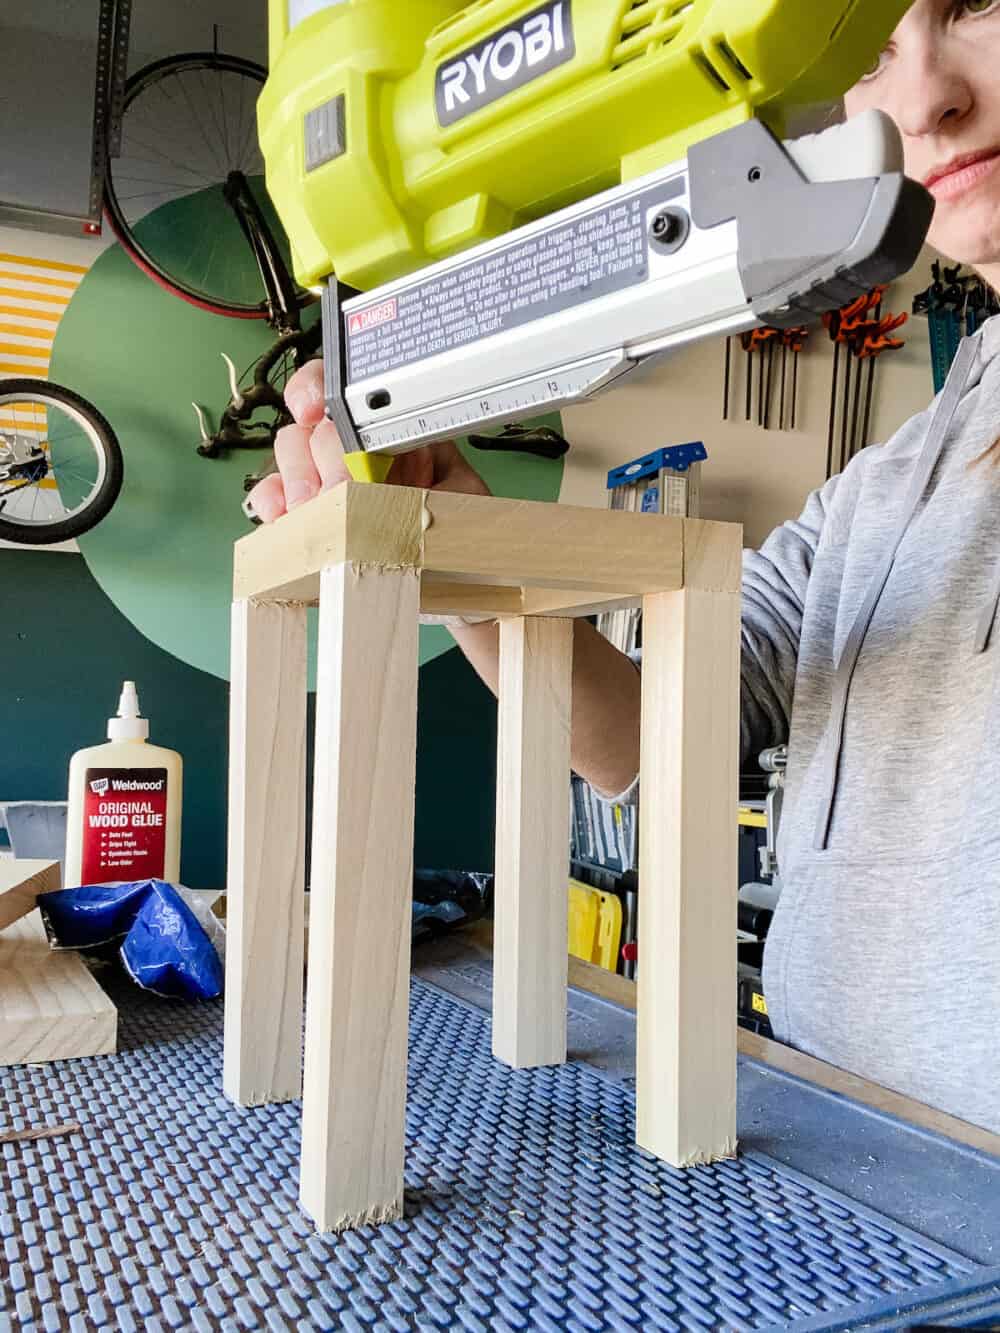
Step Three: Finish assembling lantern frame
Once you’ve got the top and bottom squares of each lantern put together, you’re ready to add the longer side pieces to finish out the frame.
I used my wood glue and pin nails again here – simply attach the four longer pieces to each corner of one of the squares, then add the second square on top!
Step Four: Add base of lantern
Now, grab your square 1×8 bottom piece and center it on one side of the lantern frame. Use wood glue and pin nails to attach it, and you’re done!
Here’s a look at what the finished lanterns look like before being patched and painted:

Step five: finish + paint
From here, you can finish them however you want. You can stain or paint them, but I really wanted to paint mine black. I love the look of a classic black lantern, and using spray paint felt a lot easier than trying to stain all of those nooks and crannies!
I started off by patching all of the seams with DAP Premium Wood Filler – this is my absolute favorite wood filler for any project. It’s really easy to use and you can even mix in your paint or stain while it’s still wet to get an exact match to your finish. It’ll accept paint or stain really well once it’s dry, too, so it’s always my top choice for any project.
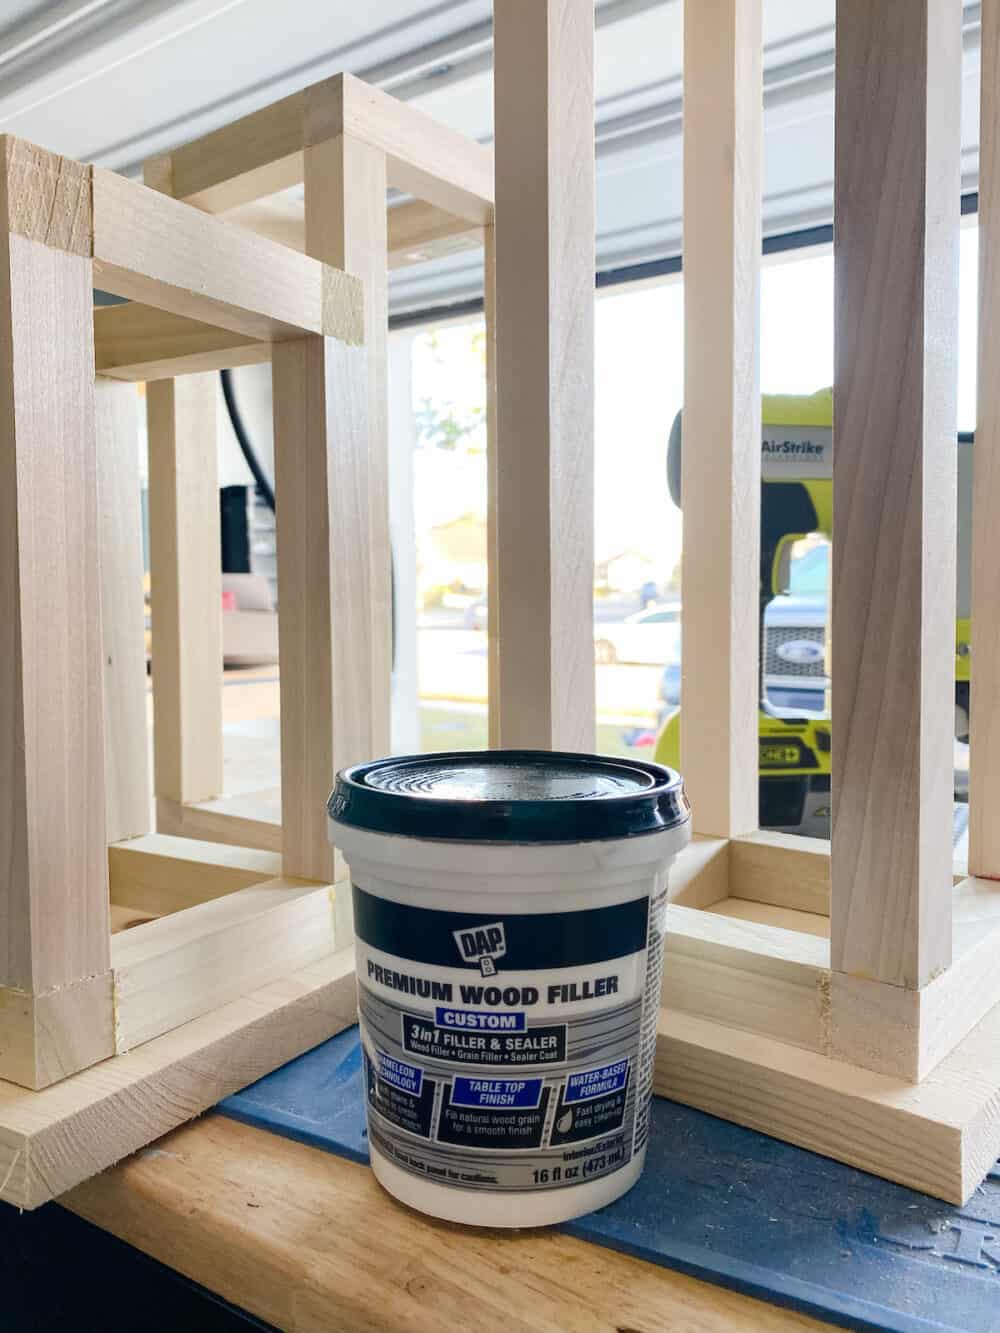
I patched all of the seams where the pieces of wood meet each other, then once it dried I sanded it down so it was perfectly smooth.
Then, I painted the lanterns with some black spray paint, added some candles and….
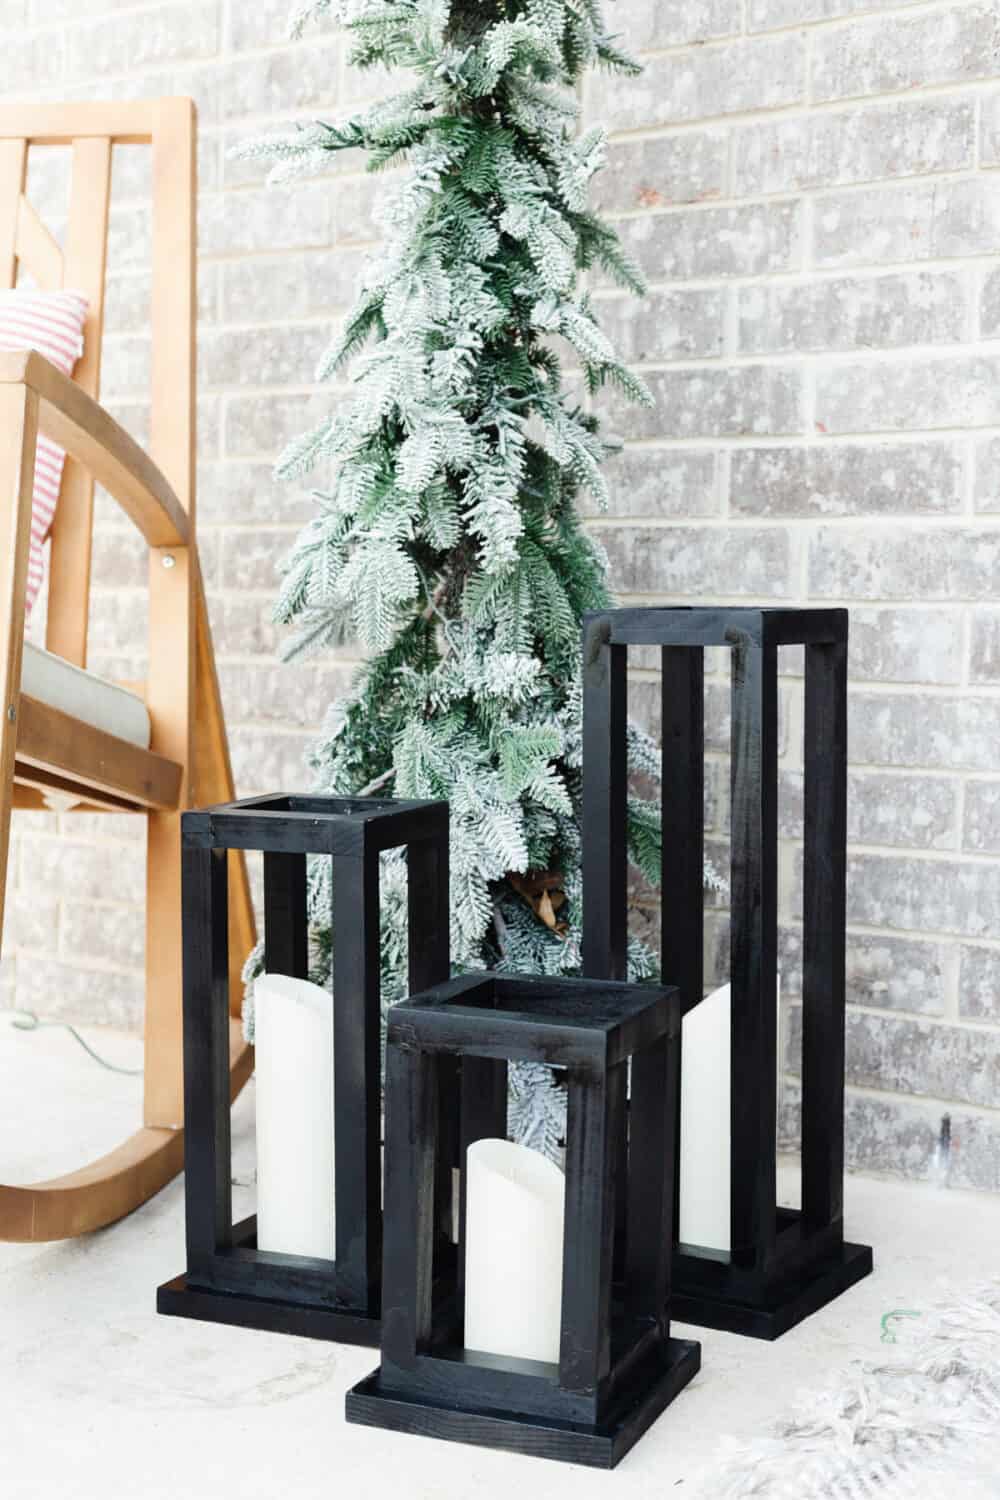
Boom! Done!
I added some flameless candles to my lanterns, but you could also just tuck some string lights in there, or use glass jars to hold real candles. They’d even look great with a mason jar filled with seasonal items like leaves, greenery, or berries! You can mix them in with the pumpkins on your porch at fall or wrap some greenery around them at Christmastime.
If you’d like to add a little rope at the top for an extra detail, use a drill to add small hooks to either side to tie the rope to, or just drill a hole large enough to thread some rope through. This could be a fun way to create more rustic wooden lanterns if that fits with your decor a little better.
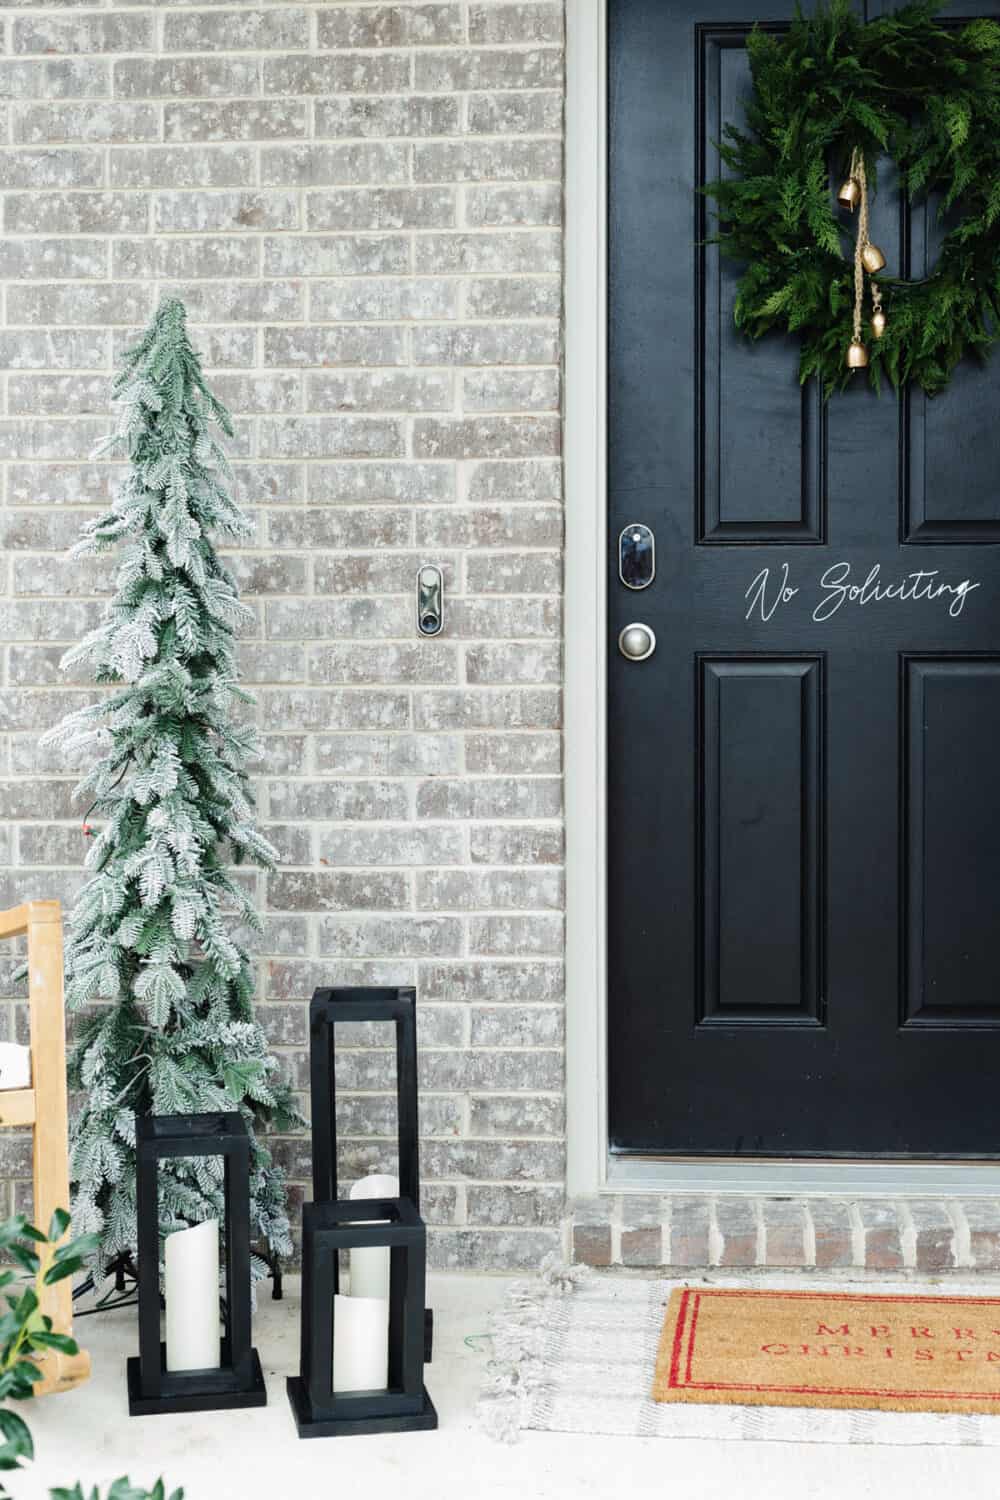
These cute little lanterns would be great for a table centerpiece (especially for a party or a wedding!) or set up in a little vignette anywhere in your house at Christmas. I wanted to use them out on our front porch, so I have them set up next to our little porch Christmas tree and it makes me smile every time I walk past.
These were so easy to make and it was a really fun and simple DIY project. It only took a few minutes to put together each of the lanterns, and most of the time was spent on sanding and waiting for paint to dry.
Happy building! Be sure to let me know if you try this project out – I’d love to see. And, be sure to check out DAP’s wood glue and wood filler next time you’ve got a project that needs it – I promise, they’re the best!