DIY Camper Playhouse {Part 2}
When we last left off with our DIY camper playhouse build, it kind of looked like we were getting ready to host a backyard concert or two. We had built the base of our playhouse, painted the flooring, and that was it – you can see that post here if you want to catch up!
Since then, things have come a looooong way!
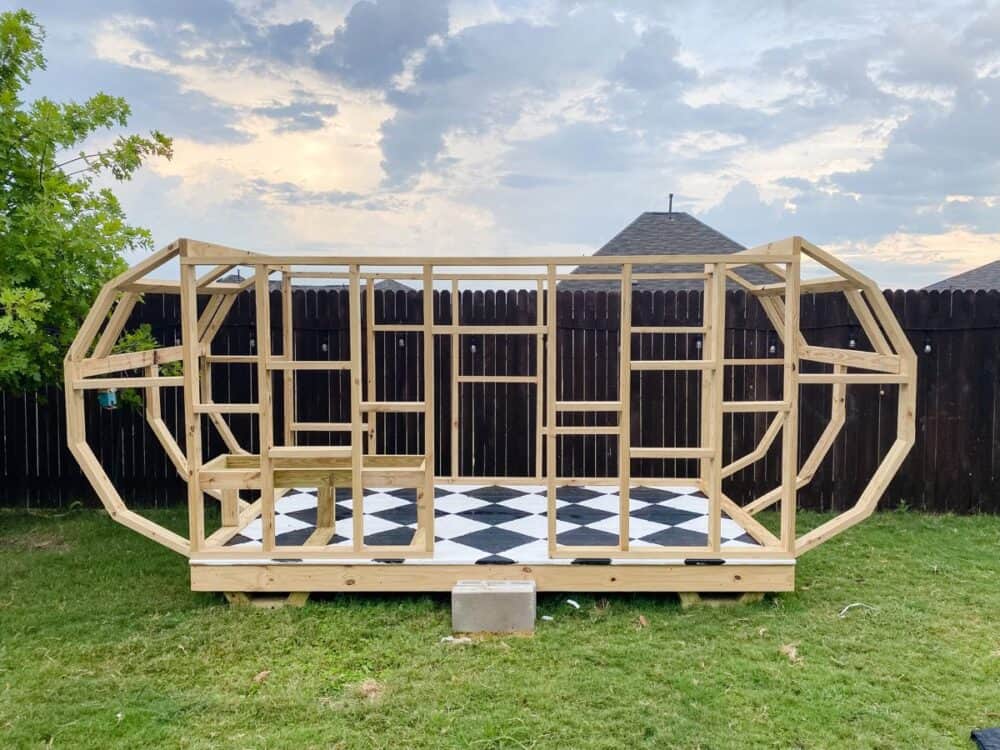
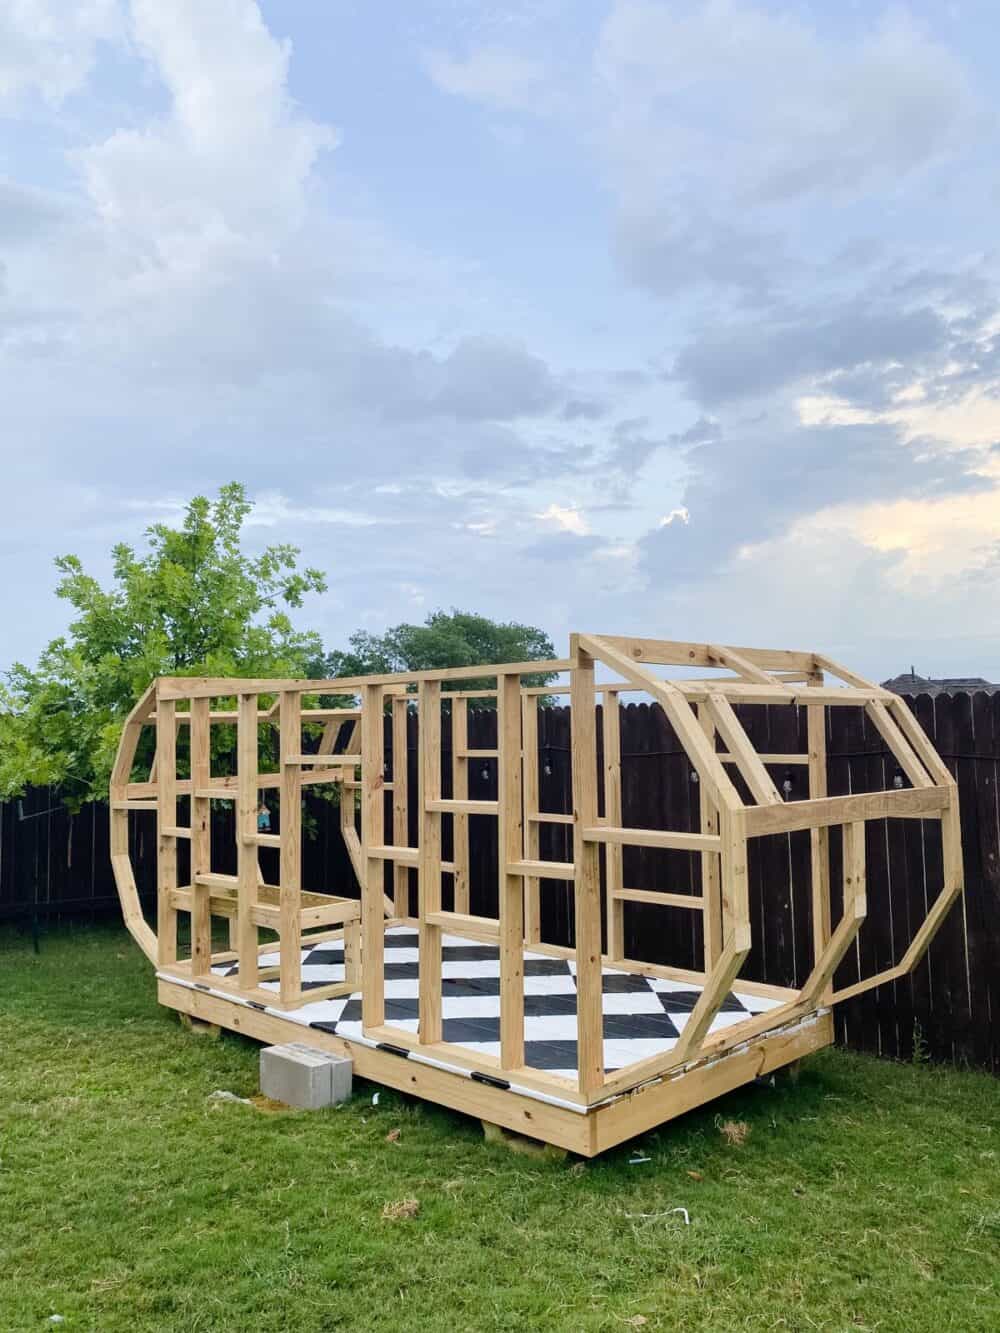
It actually looks like, well, a camper!
I spent all week working on framing everything out, so this week’s update is all about how to build walls, prep the framing, and get the shell of your camper playhouse ready to go.
If you want to watch the video update, just click play below. You’ll get a great visual of how things came together this week, in a little more detail than I’m going to give you here.
Also, just a reminder – when all is said and done, I fully intend to have some downloadable plans for you for this entire build. So, consider these posts more a behind-the-scenes update on how things are going rather than a full tutorial.
Got it? Let’s do it!
camper playhouse vLOG
Framing the camper playhouse
With the base of the playhouse fully built and painted, the next step was to built out the walls and the frame of the playhouse.
I started by building the two straight walls – this was the easiest part and took a lot less time than creating the curved walls did!
Framing out a wall is actually incredibly simple. You start by just building a rectangle in the size you want the wall to be, then you add studs (aka: extra supports) every 16-24″ (16″ is for things like housing, 24″ is great for exterior sheds and playhouses like this).
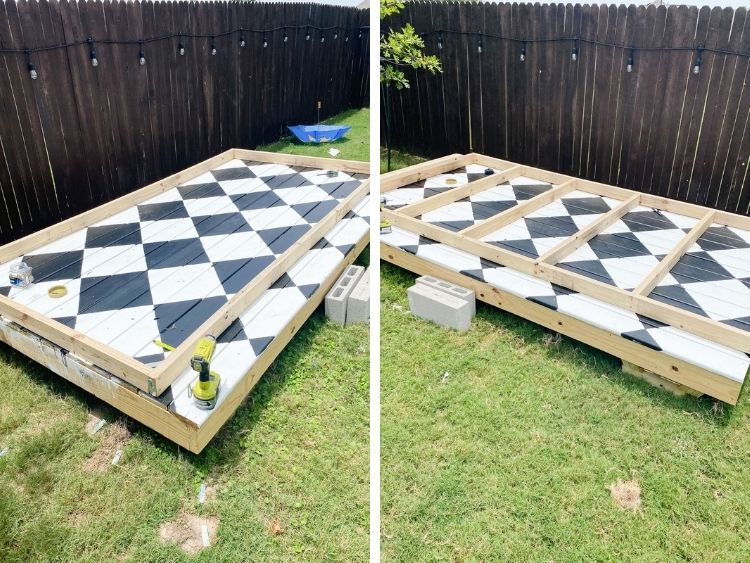
Once that’s done, you’ll add in some smaller support pieces (also called blocking) between the studs. This helps prevent the studs from bowing or warping over time, and generally strengthens the wall.
There isn’t a specific place the blocking needs to be installed – I tried to stagger mine a bit along the wall so that they weren’t all in one line.
The back wall was very simple – it’s just a basic wall with some blocking.
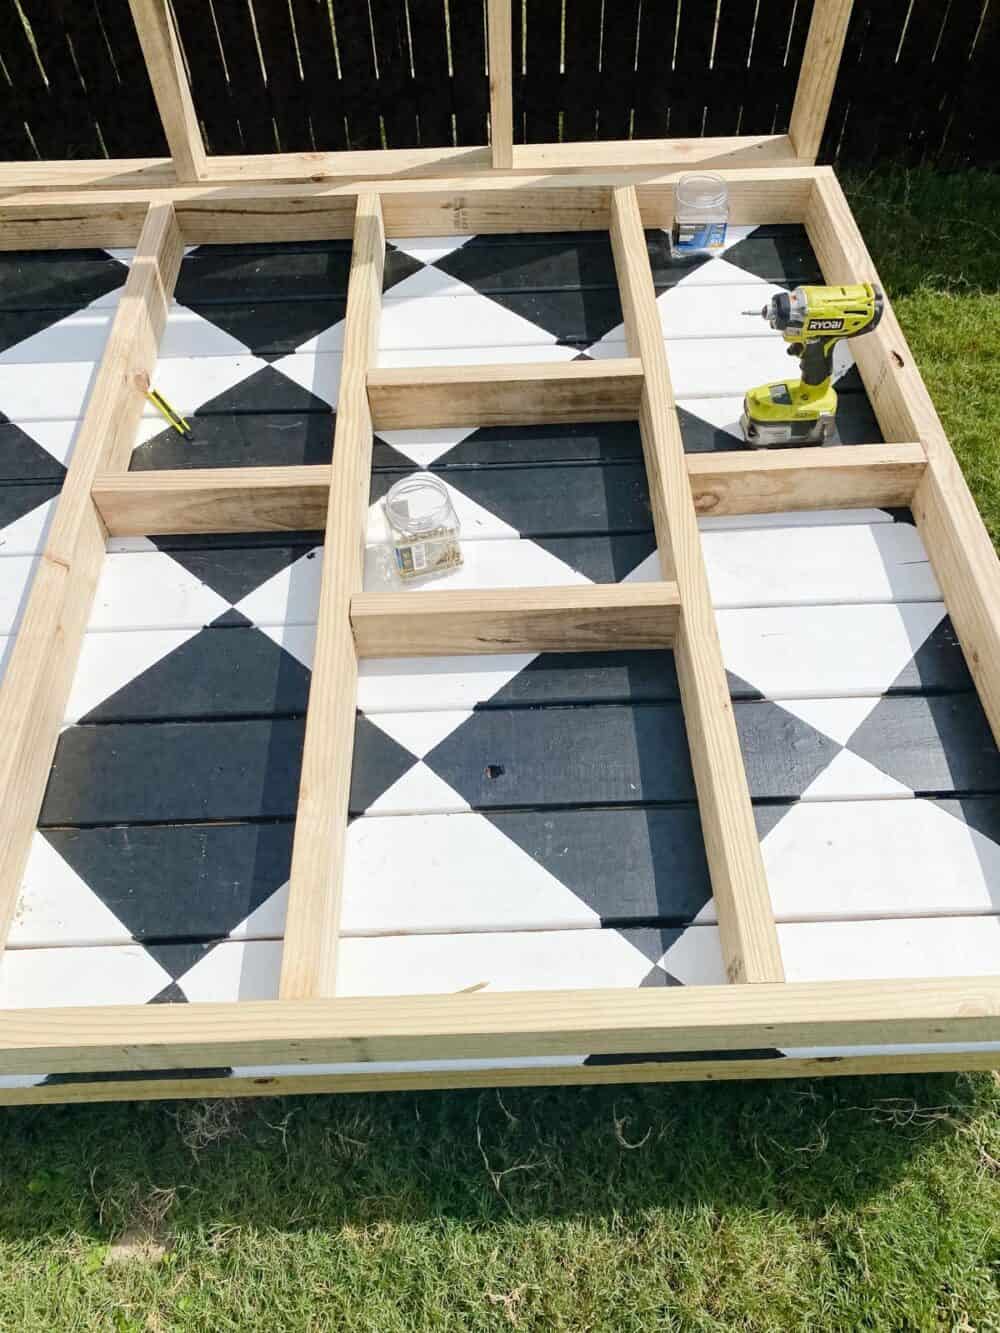
For the front wall (where the door is), you’ll also need to frame out a door, and windows if desired. You just need to plan out the size and placement of anything special you want in your wall (I did one door and two windows), then add studs around those features to create them. I recommend drawing out what you want and writing down all of the measurements before you start so you have a bit of a map to go off of as you work.
Here’s an example of what a framed out window for the front wall looks like:
With the two long walls complete, we were ready to move onto the part of this build that made me the most nervous.
I wanted the general feel of this camper to be like a vintage camper, so that meant I was aiming for some rounded walls on either side. Corey and I debated about a million different ways that we could do this, but in the end we decided to create the curves with shorter, angled pieces all attached to one another to make a C-shape.
We built two of these shapes for each side, then added supports across them, plus one more C-shape in the middle.
We also framed out a large window on each of the curved sides – we’re not installing actual windows, so I wanted to be sure to have multiple windows to create some airflow when the boys are playing out here.
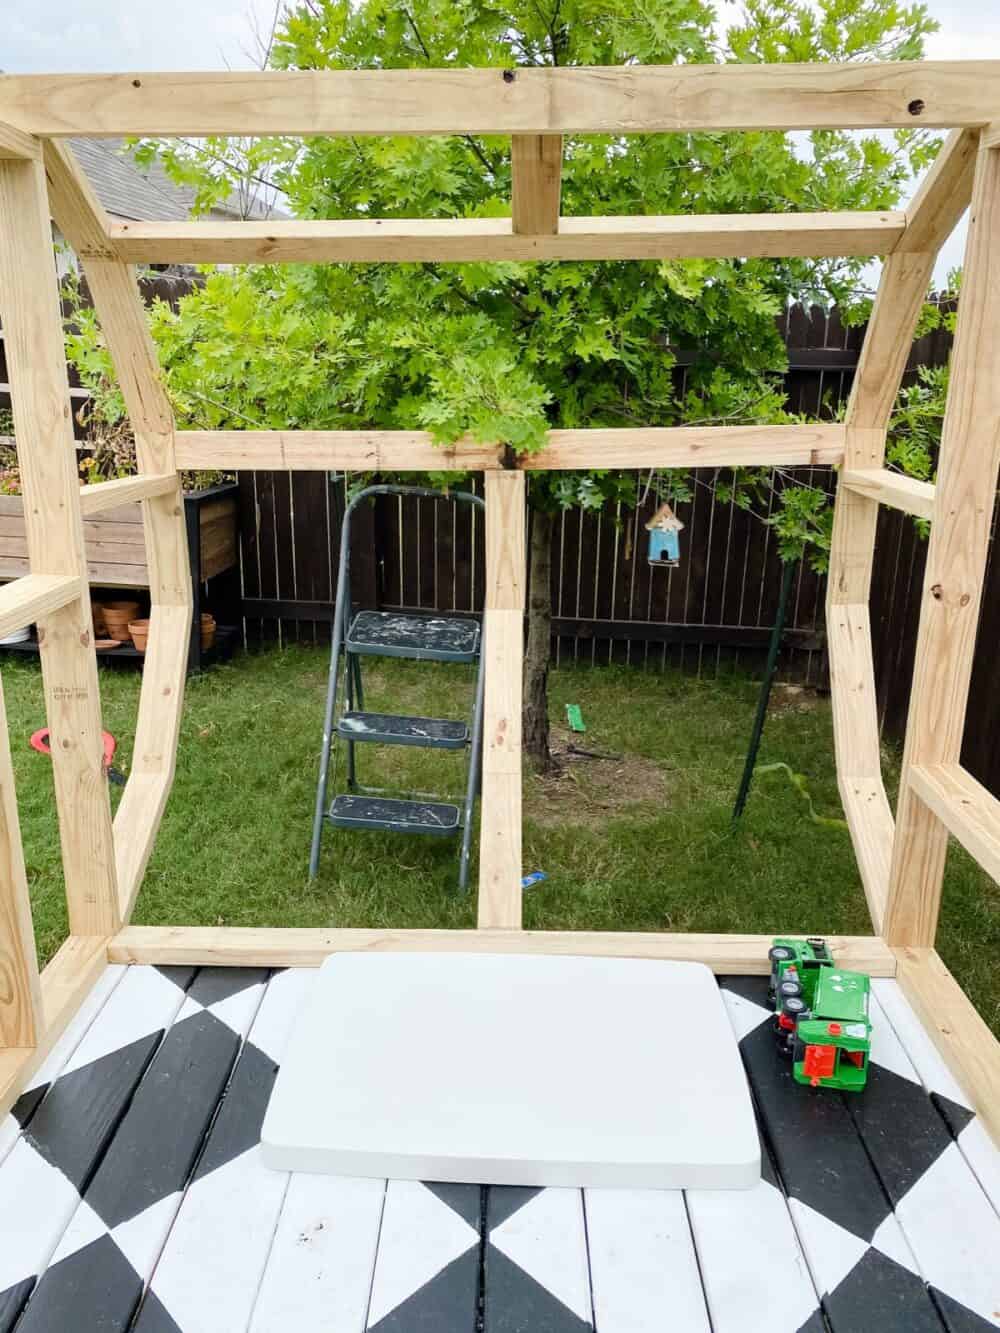
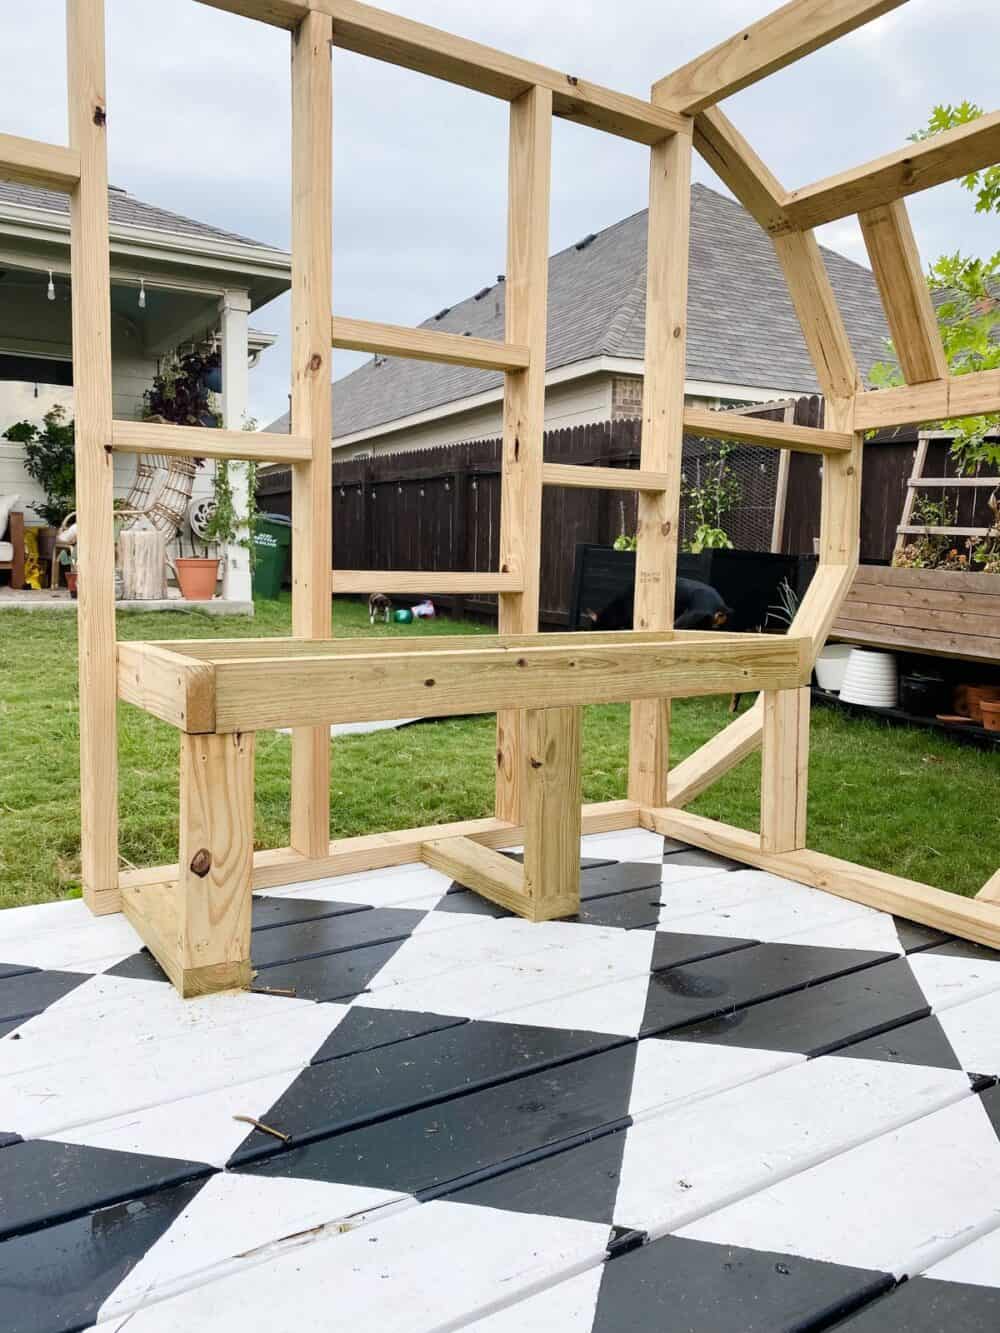
With all of this done, the final step to framing things out was to build a little bench inside the camper! I don’t want to do too much in terms of permanent structures on the inside because I’d like this to be able to evolve over time as the boys’ needs change. But, a bench is always going to be useful!
As you can see in the picture below, I kept things really simple with the bench. Under the bench there will be two openings for us to stash baskets with outdoor toys, and it will have a wood top that we’ll add a few exterior throw pillows to.
So, what’s next?
This week, my plan is to:
- Frame out the ceiling and install a plywood roof
- Add the walls!
- Finish building out the bench
- Paint the interior of the camper
If I can manage to get all of that done this week, all that’s left will be painting the exterior and finishing things off. I feel like I can see the light at the end of the tunnel!
As always, if you want to stay up-to-date with what’s happening in the camper on a day to day basis, just click here to follow along on Instagram.
