DIY Camper Playhouse {Part 1}
Alright friends, the time is here! I told you last week that Corey and I are planning on building a DIY camper playhouse for our kids in the backyard, and the build has officially begun!
You can catch up on the details of this build and some of our plans right here.
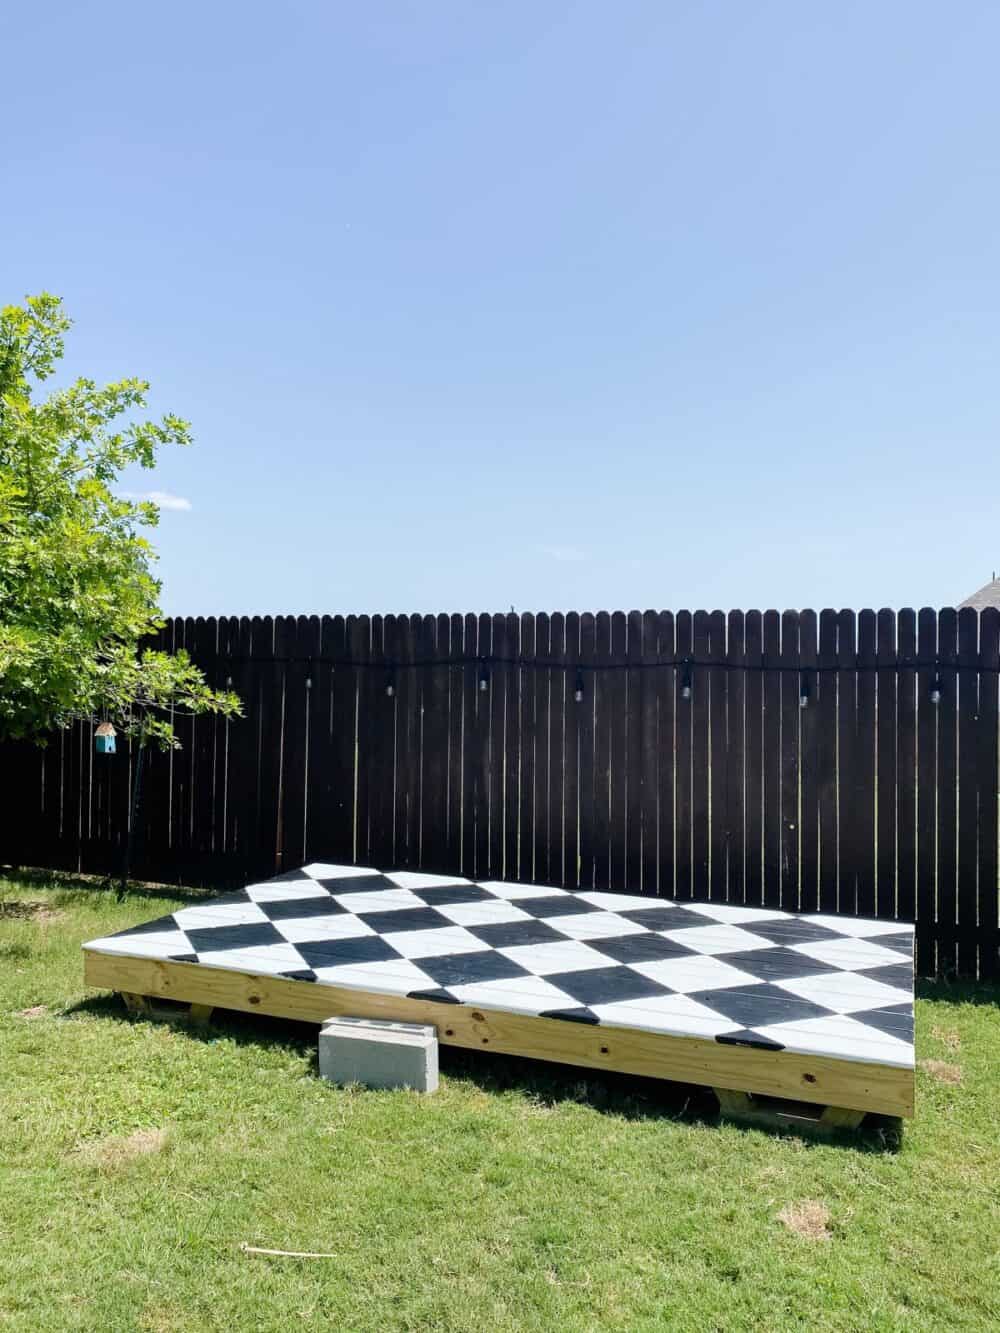
We started work on the playhouse last week, and we’ve officially finished the base of the camper, along with painting the flooring.
I’m going to be sharing an overview of the entire process of this build here on the blog in parts – because it’s going to take us a couple of weeks to put it all together, and I figure it’s more fun to have a peek at the progress than to have nothing!
But, when all is said and done my intention is to have full and details build plans available for you to purchase and use. This is the biggest building project Corey and I have ever done, so I think having some detailed plans for this one are definitely in order. Stay tuned for more on that as we get closer, but until then…look what we’ve done so far!
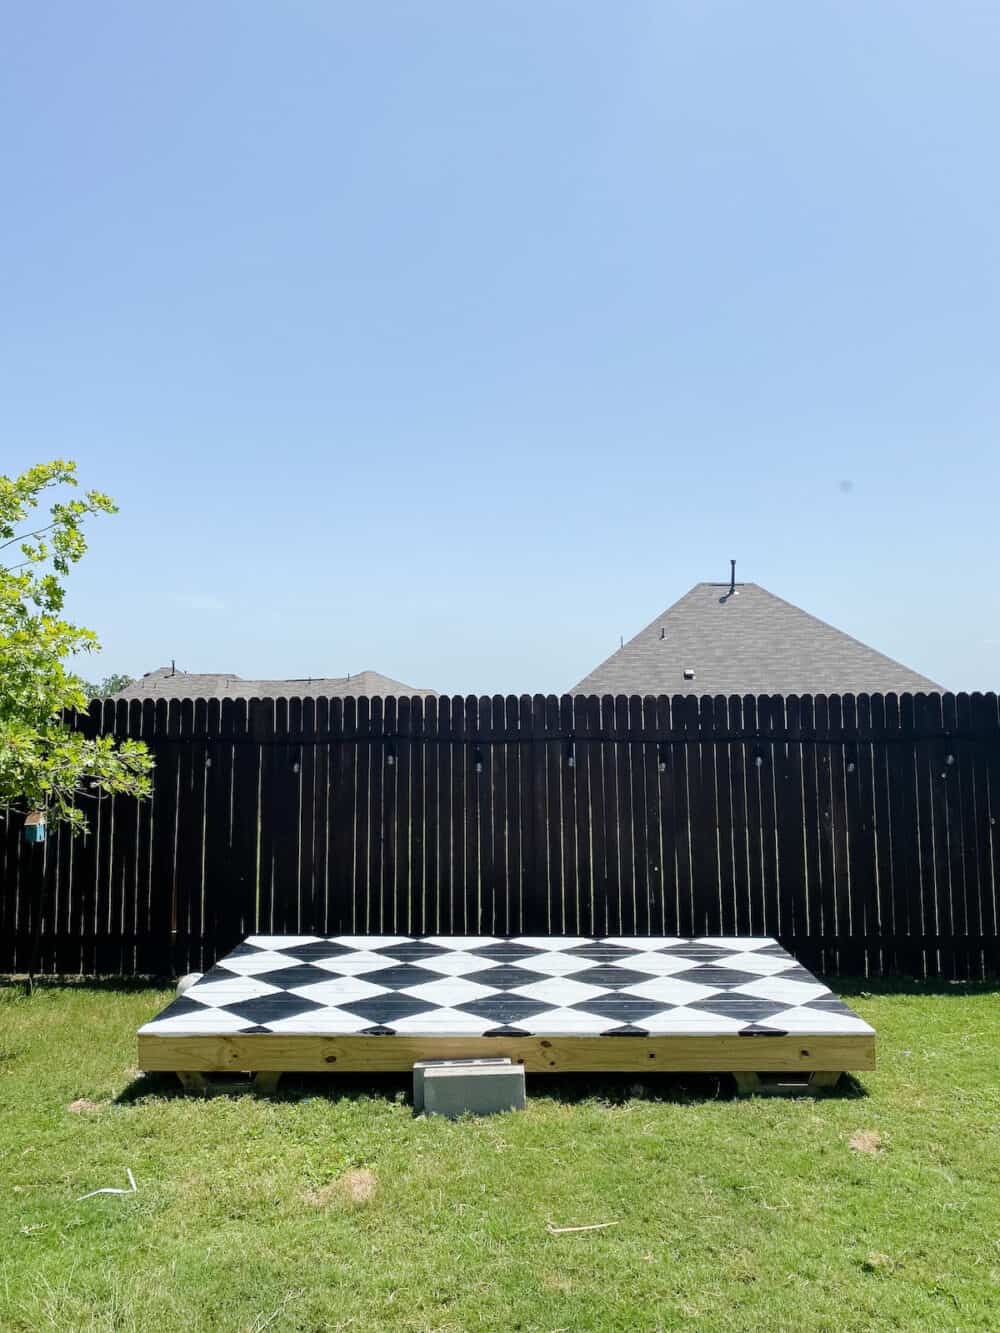
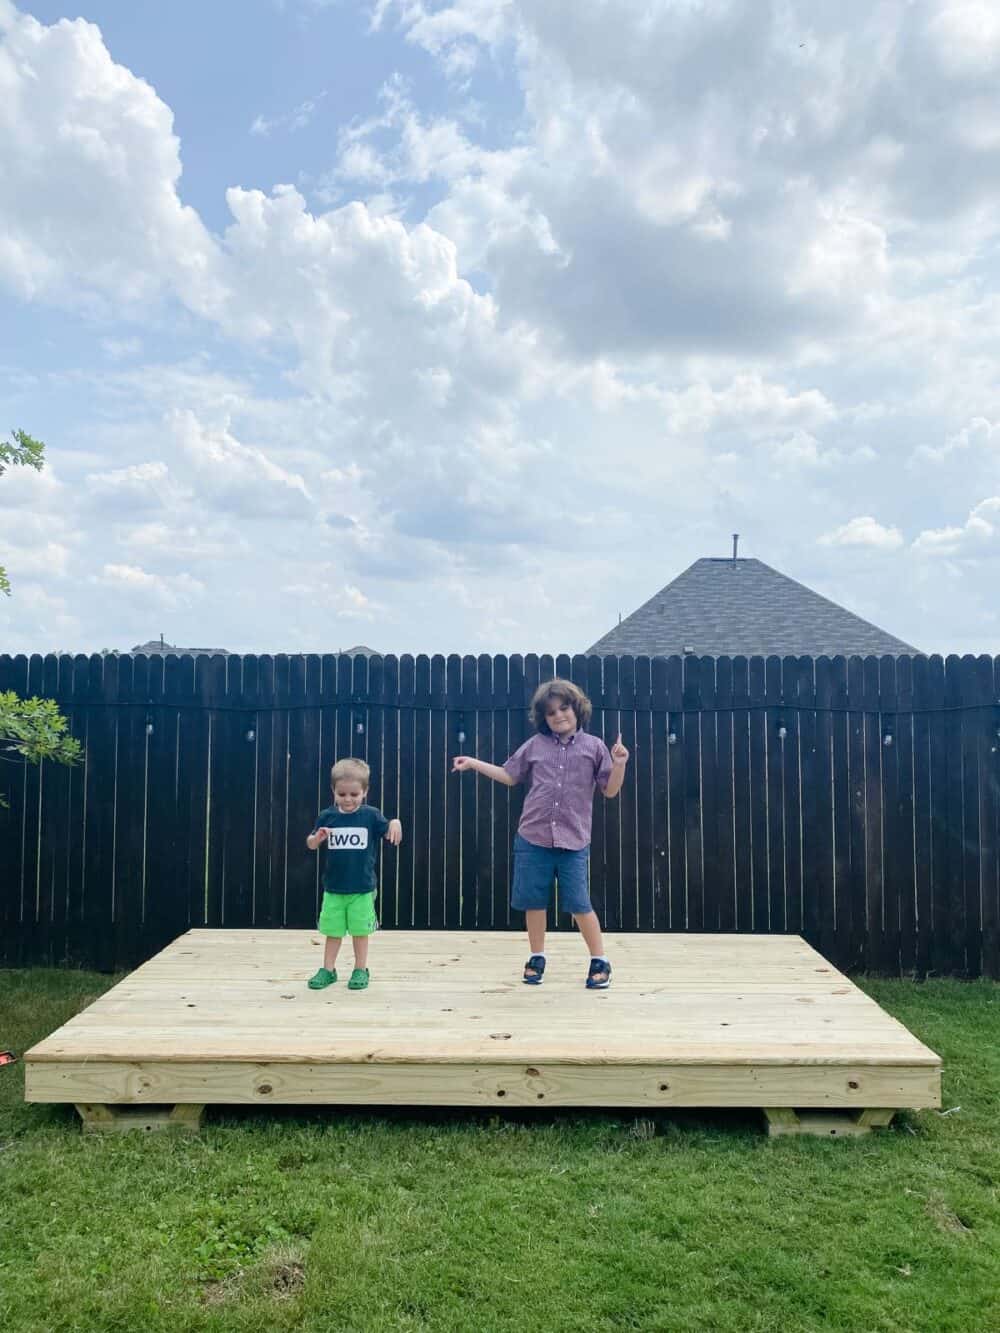
It looks nothing like a playhouse yet – in fact, it kind of just looks like a random stage in the back of our yard.
But, I promise, we’ll get there. As I type this blog post, Corey is on his way to the hardware store to pick up lumber so we can start framing out the walls tomorrow. And, I couldn’t possibly be more excited!
I made a quick video that shows how the process came together visually – so be sure to watch that if you want a closer look at how it all went down!
DIY Camper playhouse {Part one: The base}
The first step to building this playhouse was to figure out what the supports will look like and how we could make sure it’s all sturdy and supported.
We decided to start things off with two long supports that run underneath the camper and will hold everything up off the ground and keep it all level.
Here’s a look at what the front and back of those supports look like. Each one of the supports has two of these U-shaped pieces, with a long 4×4 that connects them and lays across the ground.
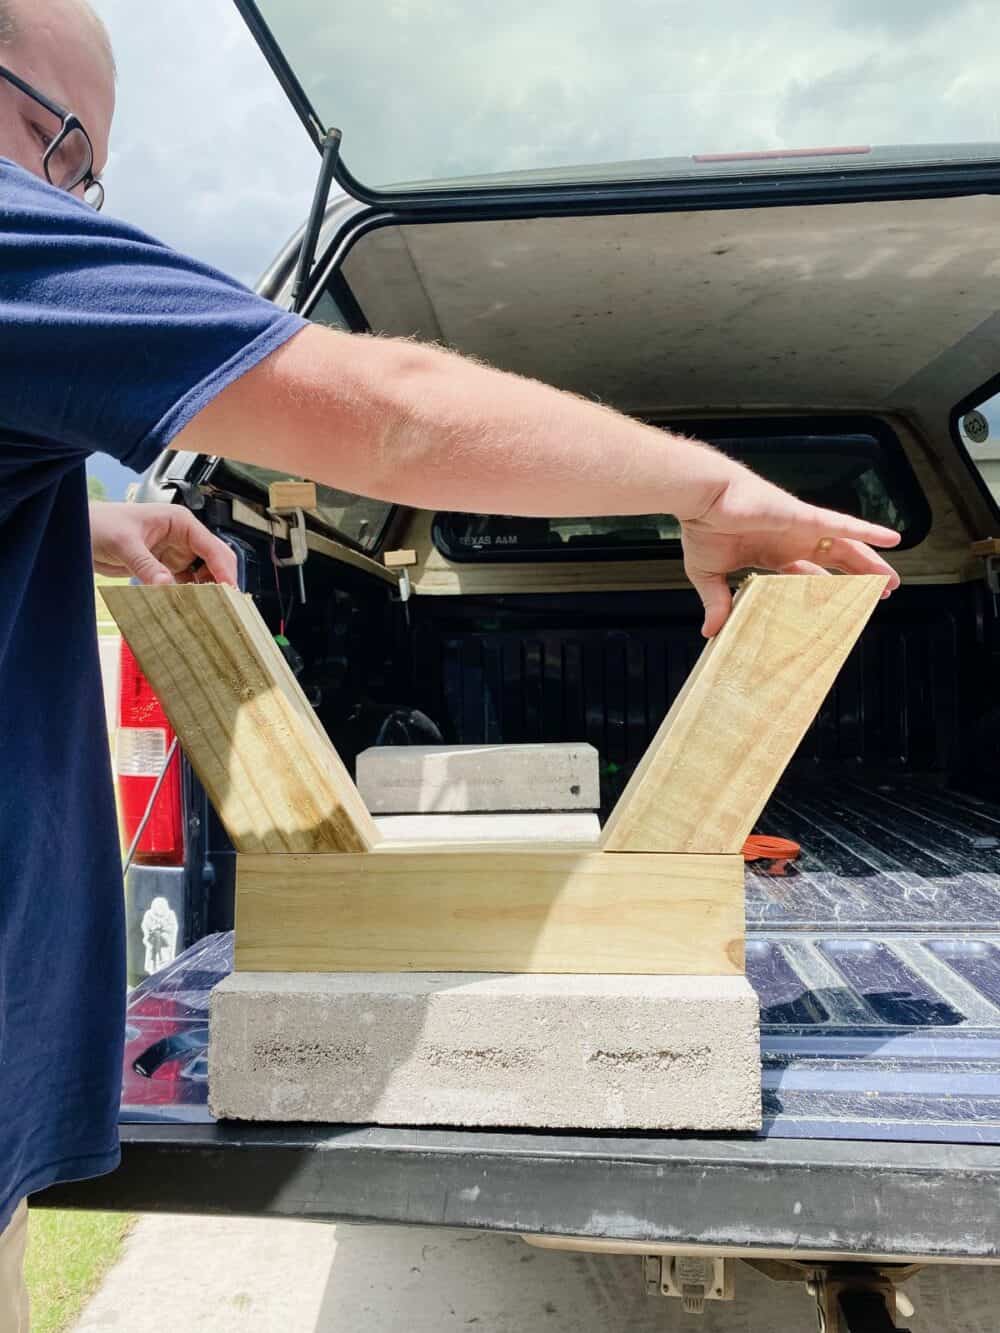
Once we built the two supports, laid them out on the ground and used some concrete pavers to help get them perfectly level.
This is honestly, for me, the most frustrating and challenging part of the whole thing. I can build and sand and paint all day long, but working on leveling some wood in every direction on a totally unlevel ground is so frustrating.
Thankfully, it didn’t take more than about an hour to get them fully level and stable in the ground. Our yard slopes downward, so I placed a concrete block at the back of the support and dug down on the front as needed to get the supports level in the ground.
Once each support was roughly level, we laid a long board across the two to make sure they were level with each other. There was more adjusting, and then a final check of everything to make sure that everything is perfect.
This is the most important part of the process when it comes to everything being level and stable in the ground. That being said, it is just a playhouse for kids. So if things are every so slightly off, it’s not the end of the world.
But, they’re not. This thing is probably more level than my house is. Because I’m anal.
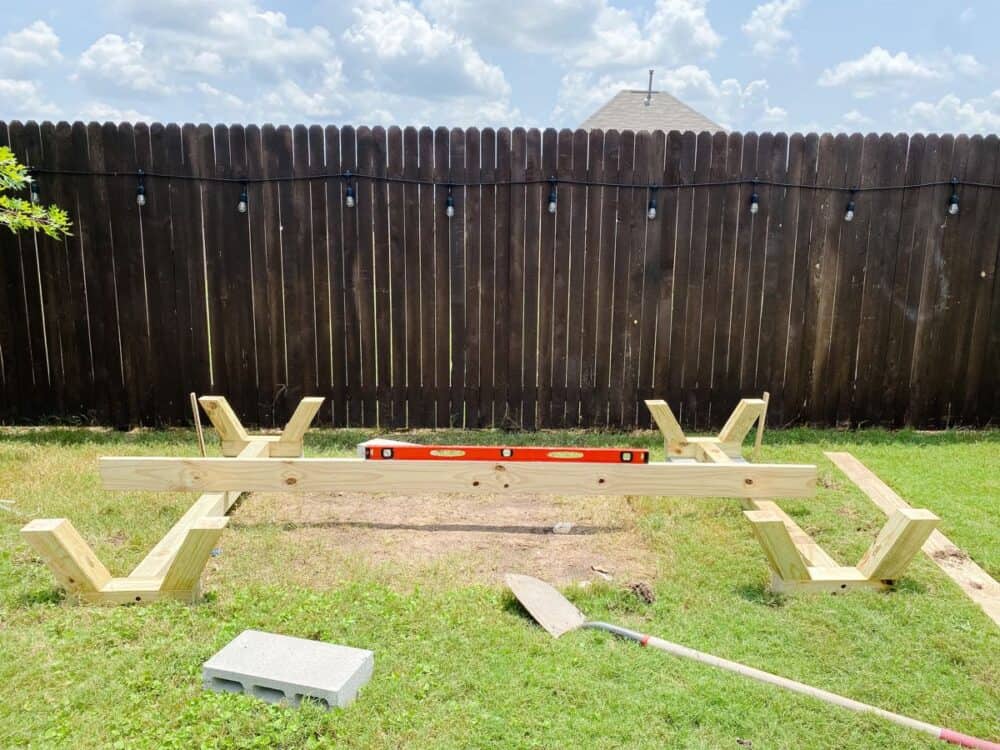
With those pieces in place, it felt like a huge piece of the puzzle had been solved. From here on out, everything felt a little easier (well, until we get to creating the curved walls we’ll have to build this week, I’m sure you’ll be hearing me complain about that one at this time next week!).
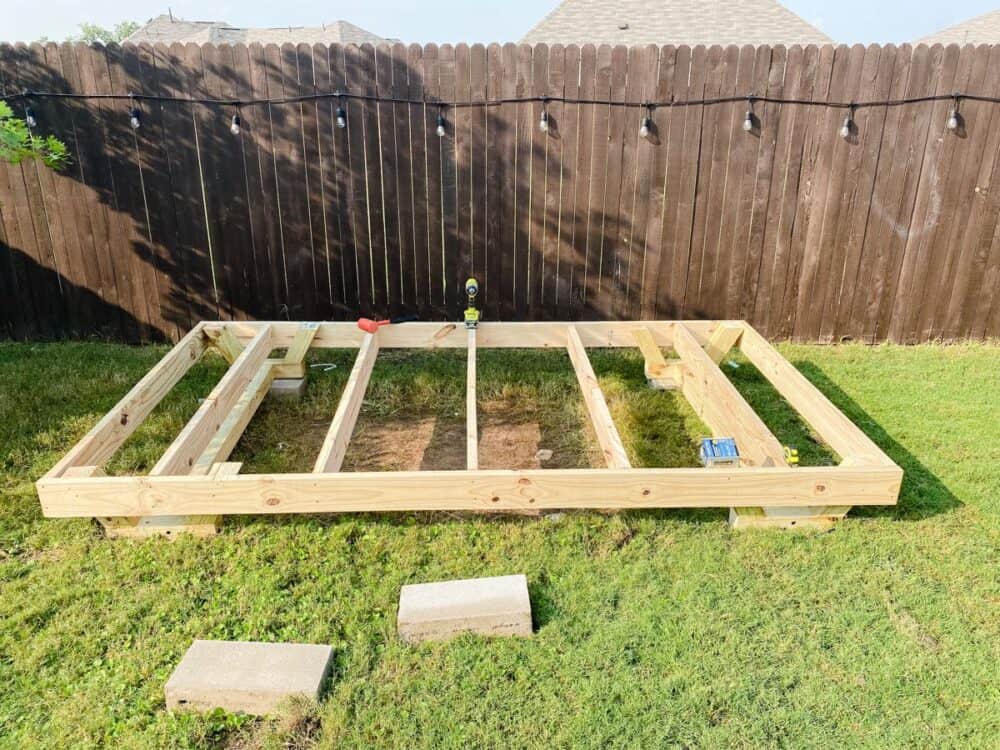
Next up, we took some 1×6 pressure-treated boards and created a frame around the supports that would be the base of our flooring. These also need to be level, and this is a good opportunity to correct any mistakes you made when laying the main supports – if they aren’t perfectly level, you have some wiggle room when installing these to make it better!
After doing a frame all around the supports, we added the joists in the middle with more 1×6 boards, along with some support pieces between each of the long joists (the smaller supports haven’t been installed yet in the picture below).
What’s the purpose of all these supports? These are the boards that help make sure your flooring doesn’t sag! They give you a place to attach the floor boards, make sure there’s enough support that they don’t dip down over time, and create a base for your playhouse that will ensure it lasts for years and years to come.
After the joists have all been screwed in, you’re ready for flooring! We used 1×6 decking for these, and each board is 10′ long, which is the same length as the playhouse, so there was no cutting down needed! We also intentionally planned the spacing so that we wouldn’t need to rip down boards on either of the long ends – the playhouse is 6′ deep, and so we needed exactly 12 boards to fill it!
Here’s where things start to get decidedly stage-like. The boys even decided to put on a show for us the morning after we finished this, because how can you not dance to Hamilton when you’ve got a stage and a captivated audience waiting for you?!
The last big step we took this week was going ahead and painting the camper floor. Jackson requested a black and white diamond pattern, and I knew it was going to be a major pain to do that when the walls had been installed. So, I decided to go ahead and tackle it now!
Painting a diamond pattern on a wood floor
I started by quickly sanding the flooring (to prevent splinters, since my kids seem to be allergic to shoes most of the time), then I painted the entire thing with Porch & Floor Paint in the plain, base white color.
From there, I cut a piece of plywood to be about 16″ square. I used this as a template to create my diamonds. It’s a tedious process, but I found it to be the quickest and most effective way to get the look I wanted.
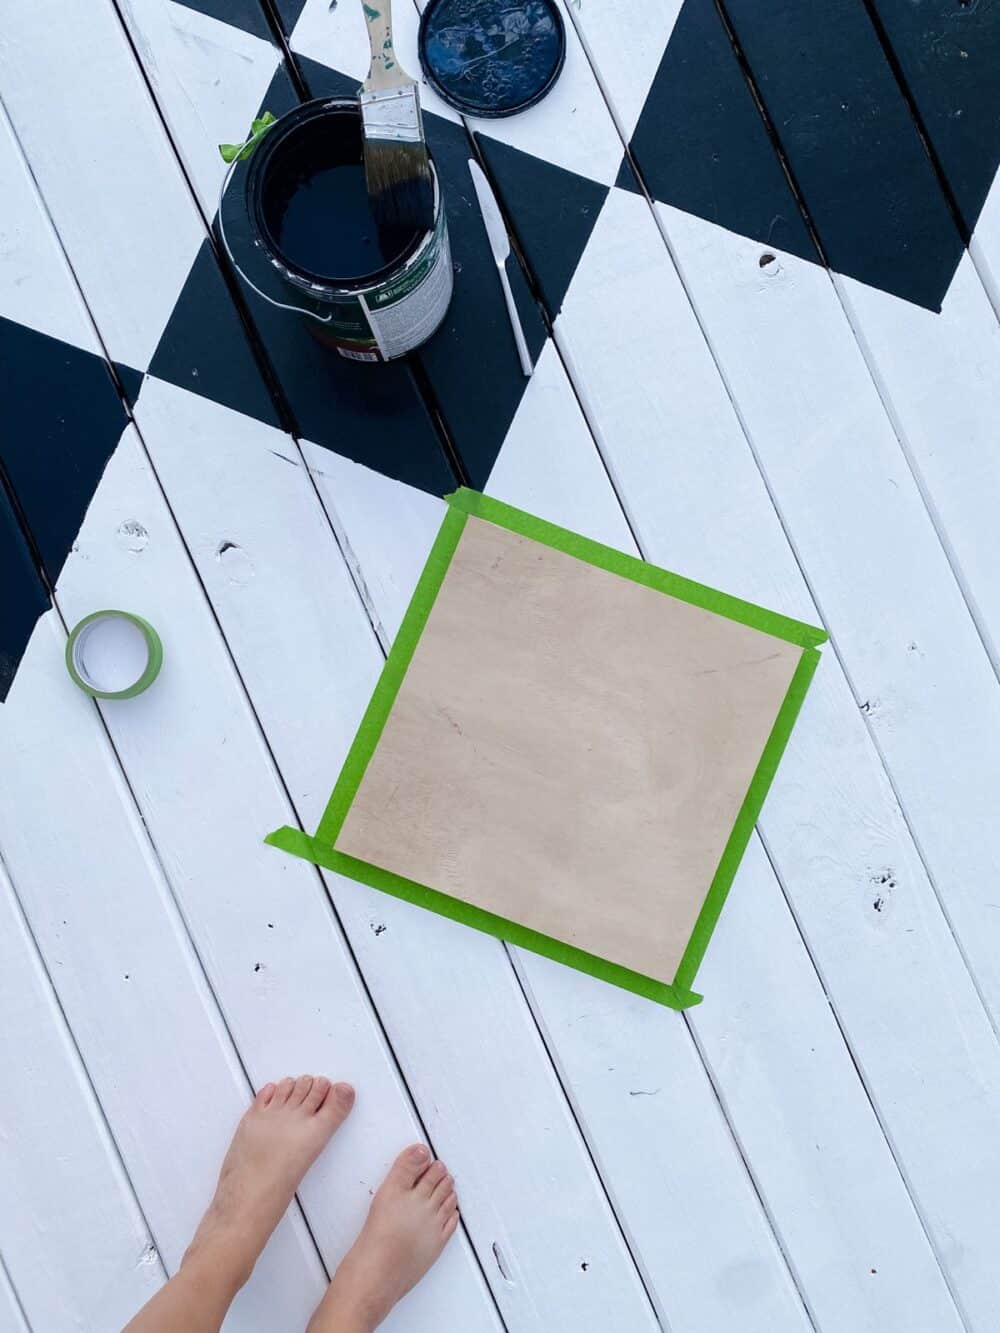
Here’s how I did it:
- I started by laying my diamond template in the center of my floor. I used the space between the middle two boards as a guide to place it straight – I made sure the top and bottom corners of the diamonds aligned with the space between the boards.
- Then, I added painter’s tape all around the edge of the template.
- I pulled the template up, and aligned it so that the corner of the template just barely touched the corner of the last diamond. Important note: You want the template to touch the corner of the diamond itself (as in, where you’ll be painting), NOT the tape you put down. You’ll have excess tape to remove, that’s okay!
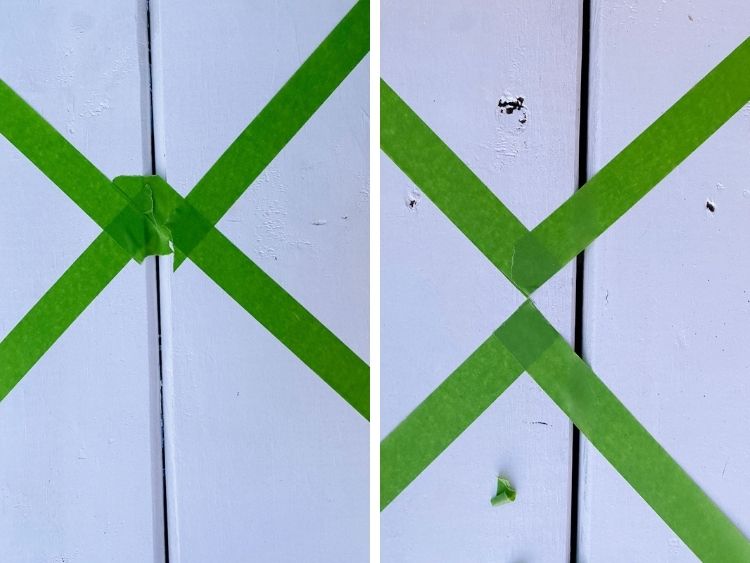
- After taping off all of the diamond patterns, I went in with a razor blade and cut off the extra tape so that the diamond corners would all touch. You can see a before and after of this below.
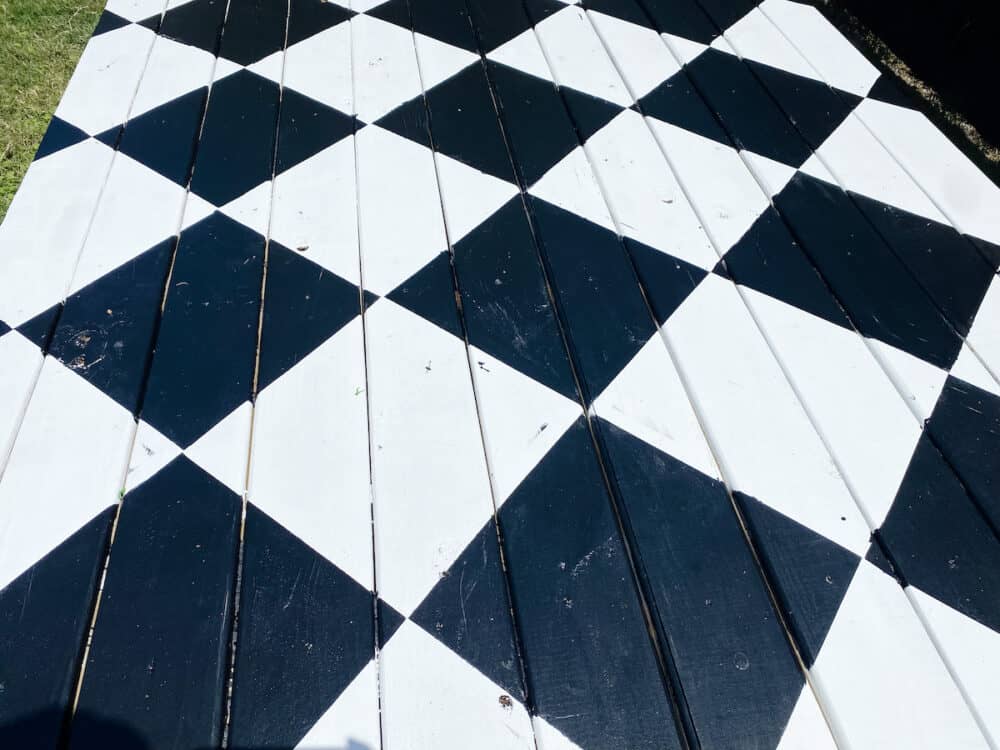
Once all the taping was done, I just grabbed a paintbrush and went to town! I had a gallon of porch & floor paint mixed to Behr’s Limousine Leather (my favorite black!), and I did two coats before pulling up the painter’s tape.
There are definitely some imperfections and spots that need to be touched up (especially in the cracks between the boards), but overall this was a perfect technique and I love how it turned out!
I’ll touch up the major issues over the next week or so as we continue to work on the camper, but I fully intend to leave most of the smaller imperfections. I want this floor to look hand-painted and casual, because it’s a playhouse! If I get too fussy with it, it stops being fun. So, don’t be afraid to paint outside the lines a little here. Remember: it’s just a playhouse!
With the base of the camper playhouse complete, it feels like the fun part can begin! We’re going to start framing out walls and constructing the skeleton of the playhouse this week, so be sure to follow along on Instagram stories if you don’t already. I’ll share all of the behind-the-scenes details as we go there, and I’ll be back next week with an update for you.
Wish us luck!
