
Installing Garage Cabinet {Ideas for Tool Storage}
Last updated on October 8th, 2021 at 03:45 pm
Let me confess something to you: my garage has been a hot mess for a long time. We’ve lived in this house for almost two years now and, despite our best efforts at getting it organized and cleaned up, we’ve never really fully finished the job and things have slowly gotten worse and worse with each project we’ve tackled.
I’m finally frustrated enough with the whole thing that I’m officially – once and for all – tackling tool storage and organization and getting my garage clutter under control. I started with installing some garage cabinets – and, oh my goodness, it added so much storage space.
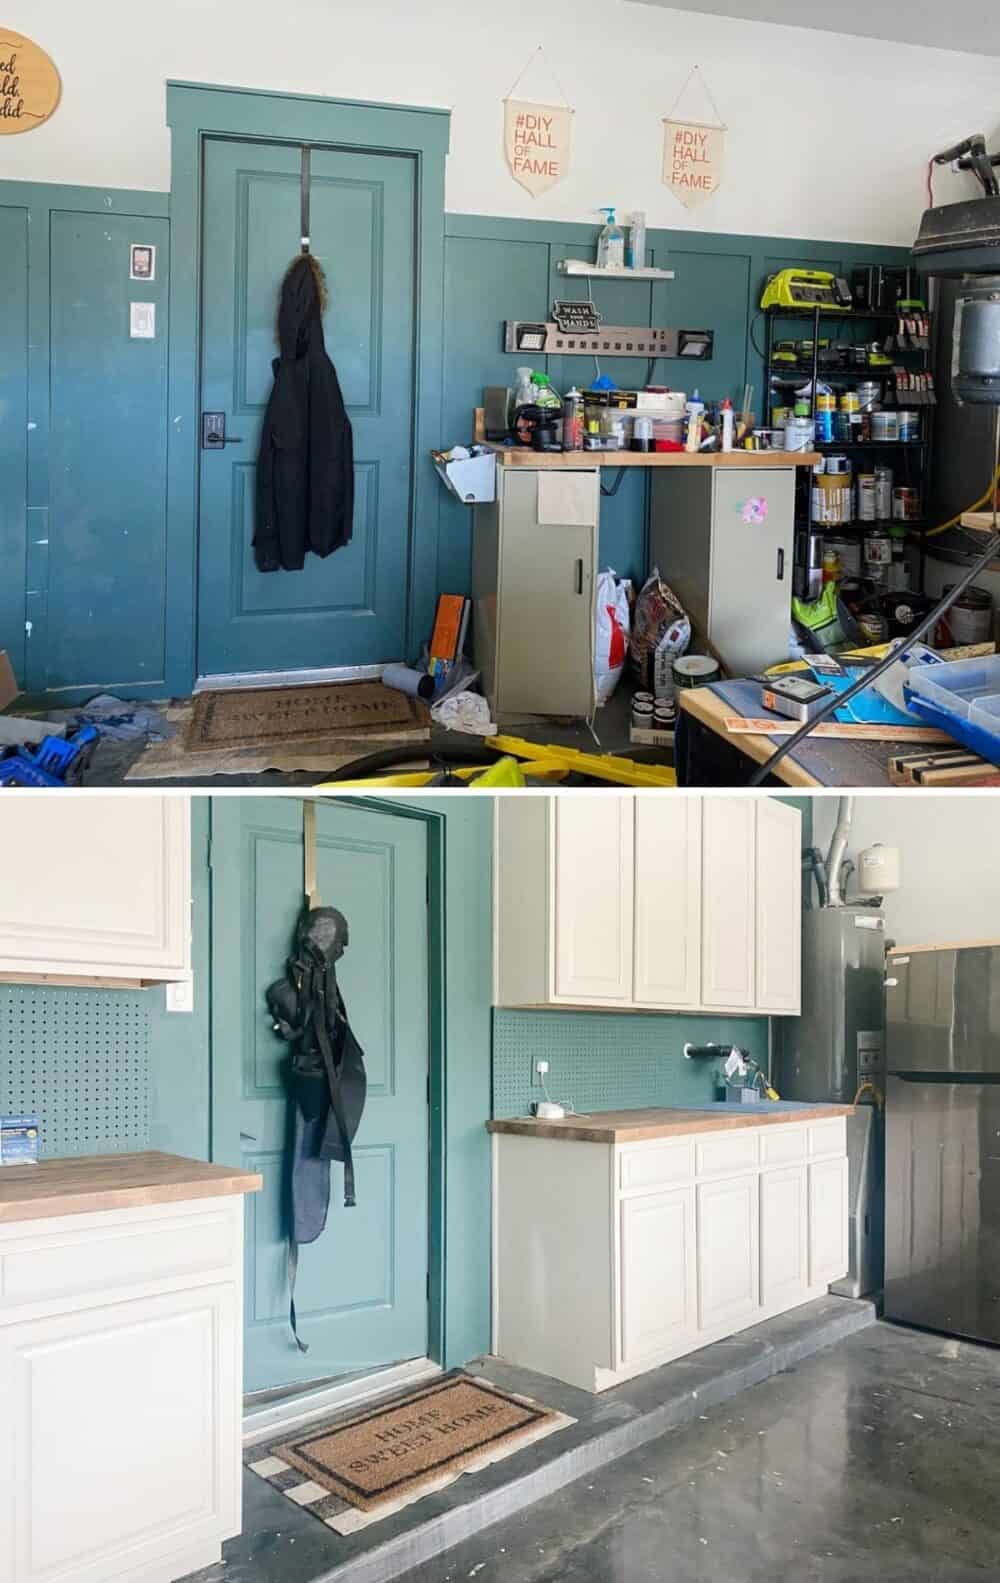
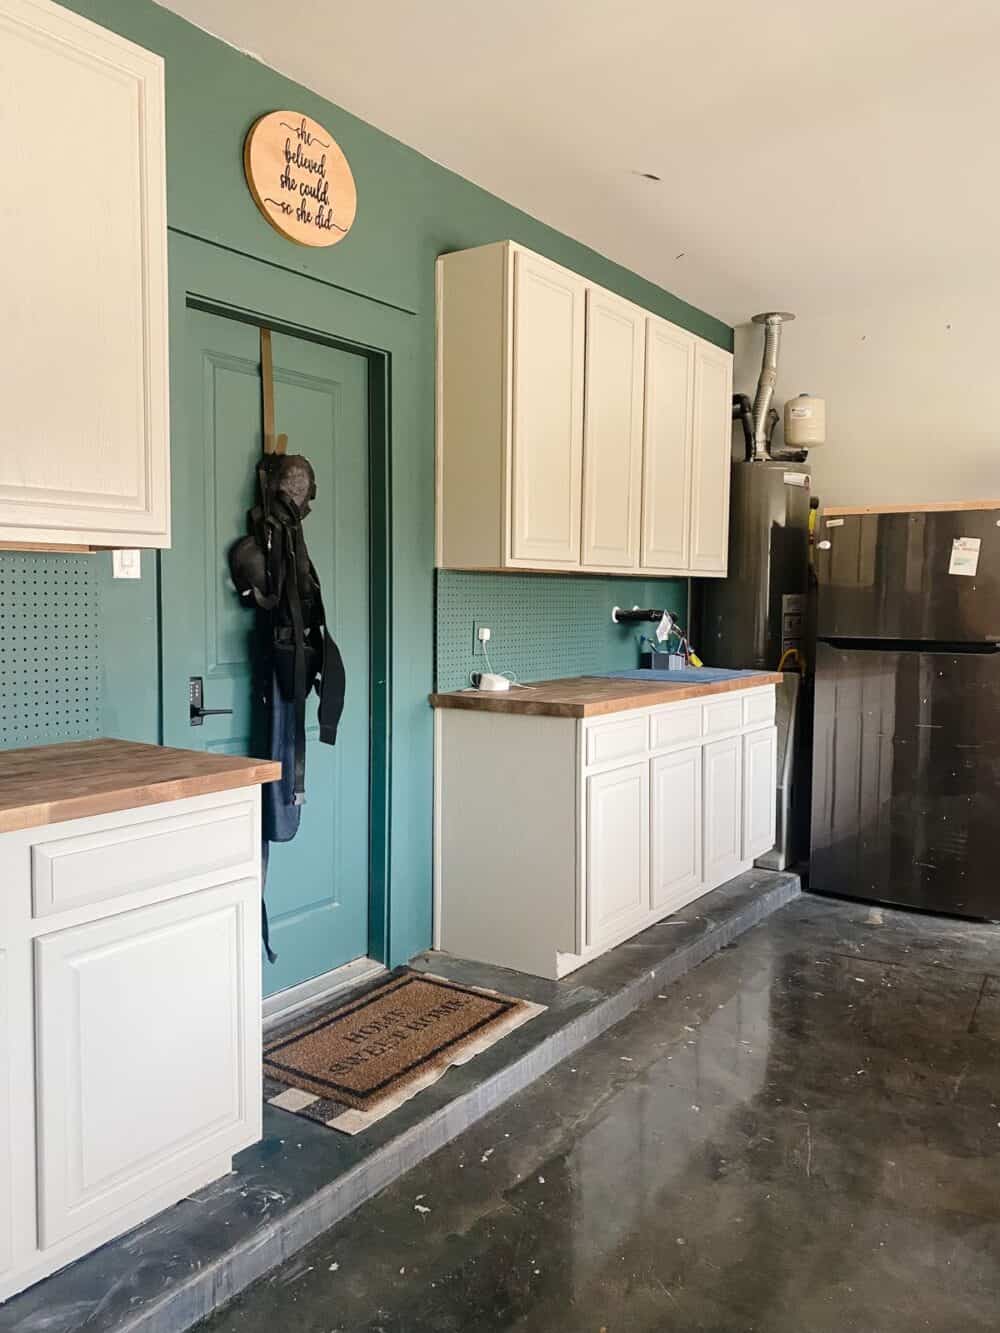
You wanna see a before and after?!
This post is sponsored by Wagner.
I’m so excited about how this turned out, and today I’m going to share some garage cabinet ideas to get your brain flowing with ways you could implement something similar in your garage. Because now, I’m convinced everyone needs some garage cabinets!
Garage Cabinet Ideas
First of all, let’s talk about how we got here, and a few ideas for how this could be useful for your space. Our original plan was to use this cabinetry as storage for our board games – we used to keep them in the garage in our first house, and it worked really well for us. But, once we got them in place Corey wasn’t thrilled with how the storage would be set up, so we pivoted and decided to use these for storing tools, paint, and other garage essentials. There’s some shelving on the other side of the garage that we’re using for games – more on that later.
I found these cabinets on Facebook marketplace – someone had renovated their kitchen and was selling all of their old kitchen cabinets. I was able to get all of the cabinets shown here (plus a few more) for $600. We sold the extra for $60, so this entire project cost us $540 – definitely more than buying some cheap wire shelves would have been, but I think it’s worth it for the amount of storage it adds to the garage!
So, how could these storage cabinets be used in your garage? Here are just a few ideas of what you could keep in them:
- Power tools or hand tools
- Paint, stain, or painting supplies
- Hardware (like screws, nails, and hooks)
- Seasonal items
- Holiday decorations
- Kid gear (like sport equipment, etc.)
- Supplies for DIY projects
- Garden tools
- Cleaning chemicals and supplies
You can use baskets or plastic storage bins to help keep things a little more contained within the cabinets, and the drawers are also a really great way to keep smaller things organized!
Are you convinced yet? Let’s chat about how we got them set up and installed.
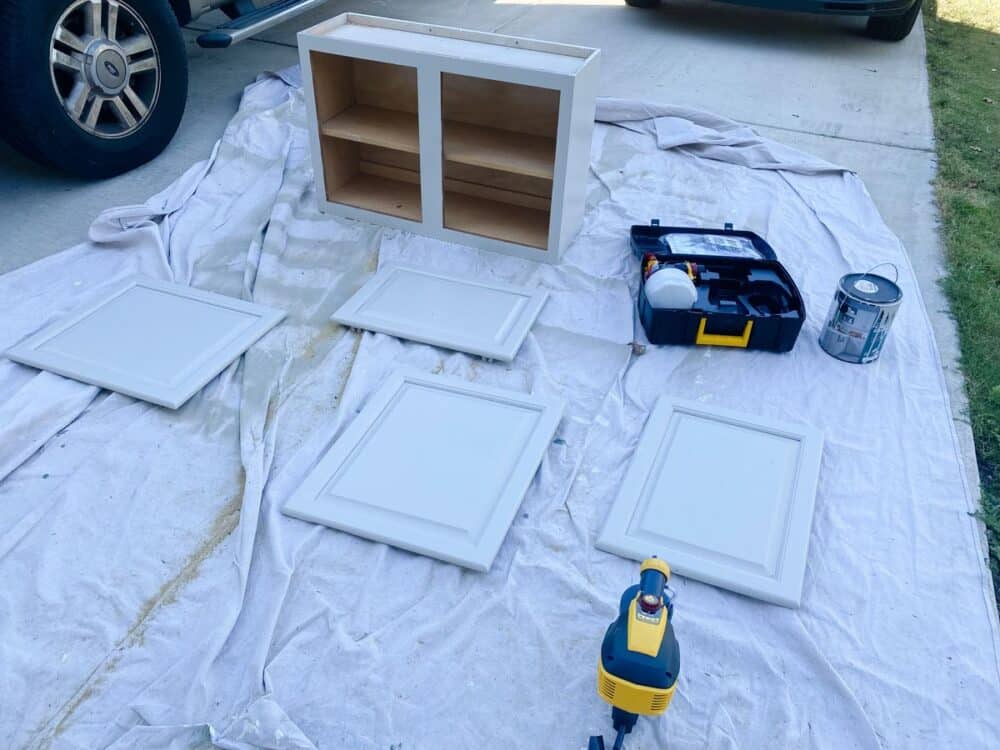
painting the garage cabinets
Before installing the cabinets, I decided to paint them – because if I’m spending all this time getting my garage organized, I might as well also make sure it’s cute!
I’ve painted a lot of cabinets in my day – it’s always an annoying job, but it’s not difficult. If you’re working with unpainted cabinets like these, you can paint them without sanding if you use the right primer (linked below). If they’re painted or have any sort of chipped finish, you’ll want to thoroughly sand them before you get started.
Here’s a rundown of the process:
- Remove the cabinet doors. To take these off, just remove the screws from the hinges that hold the door in place, then fully remove the hinges before painting. I toss all of the hinges and screws in a bowl for safekeeping until I’m ready to put them back on.
- Clean the cabinets. I use Krud Kutter, and allow it to fully dry before painting.
- Prime cabinets. I highly recommend this exact primer for the best results – no sanding needed.
- Paint cabinet frames. I generally paint the cabinet frames by hand, because it’s faster than taping everything off to spray. But, if you’re working with a lot of cabinetry, it might be worth it to take the time to cover everything up and spray them!
- Spray cabinet doors. Your last step is to spray the cabinet doors using a paint sprayer. I highly recommend this over painting by hand. It’s faster and you’ll get much more even and professional-looking results.
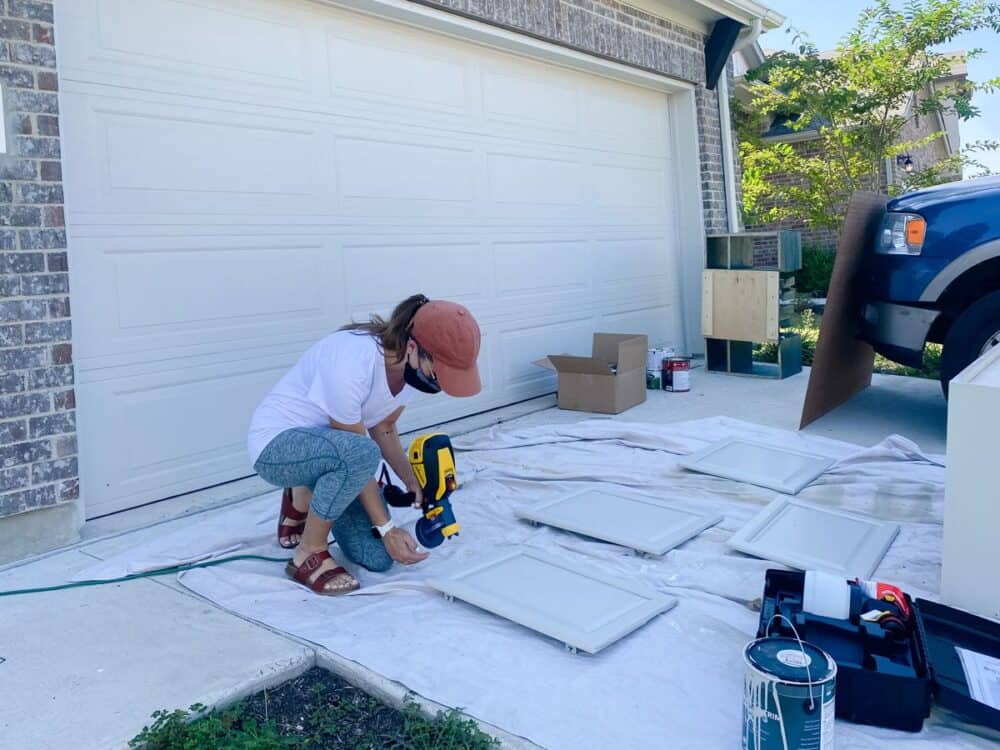
I used my Wagner FLEXiO 3500 for this project. I’ve been using Wagner’s FLEXiO line of paint sprayers for years now, and they always deliver awesome results. If you’ve never used a paint sprayer before, click here for my full tutorial on how to use a paint sprayer. It’s quick and easy to learn, the clean-up definitely isn’t as bad as you probably think it is, and it makes every paint job so so much easier!
The FLEXiO 3500 is one of Wagner’s new sprayers – it’s 10% lighter than previous FLEXiO models (which makes a huge difference if you’re doing a lot of painting) and it comes with a detail finish nozzle for smaller jobs like this one!
I painted the cabinets using Behr’s Cabinet & Trim Enamel, and the color is Sculptor’s Clay (the same color I used on my bathroom vanity).
You can paint the cabinets before or after installation – I painted mine after, but it doesn’t make a huge difference either way. The only thing to keep in mind is if you’re going to paint them prior to installation, you’ll want to take extra care when installing them to not chip the paint!
Installing garage cabinets
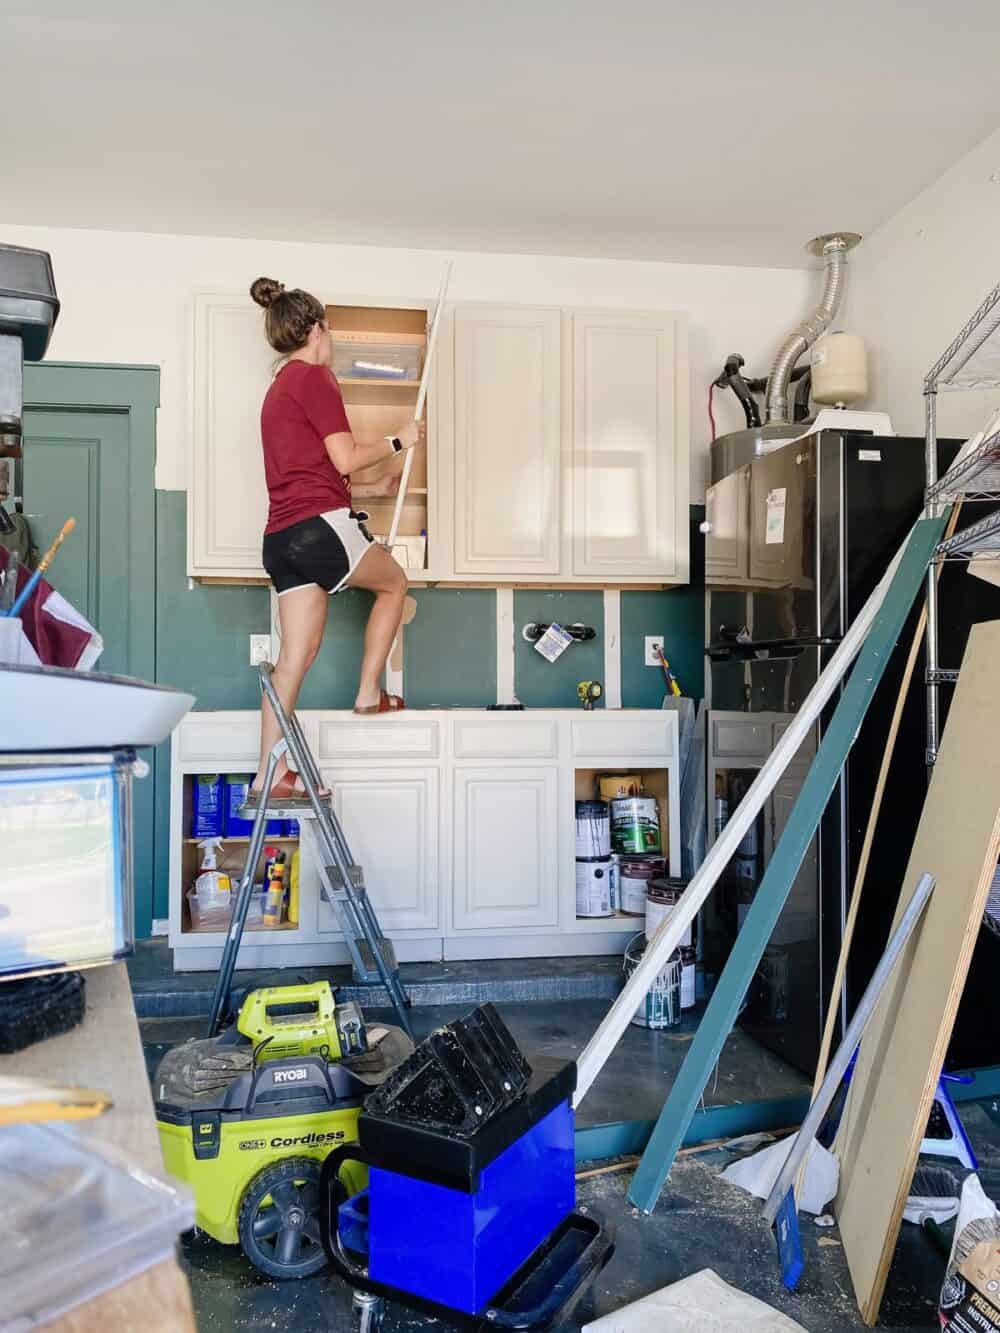
The idea of installing cabinets can feel intimidating if you haven’t done it before, but it’s super easy.
To install the base cabinets, you simply set them in place directly on the garage floor, make sure they’re level (use shims to help level them if they aren’t), and drill holes directly through the back of the cabinets and into studs in your wall.
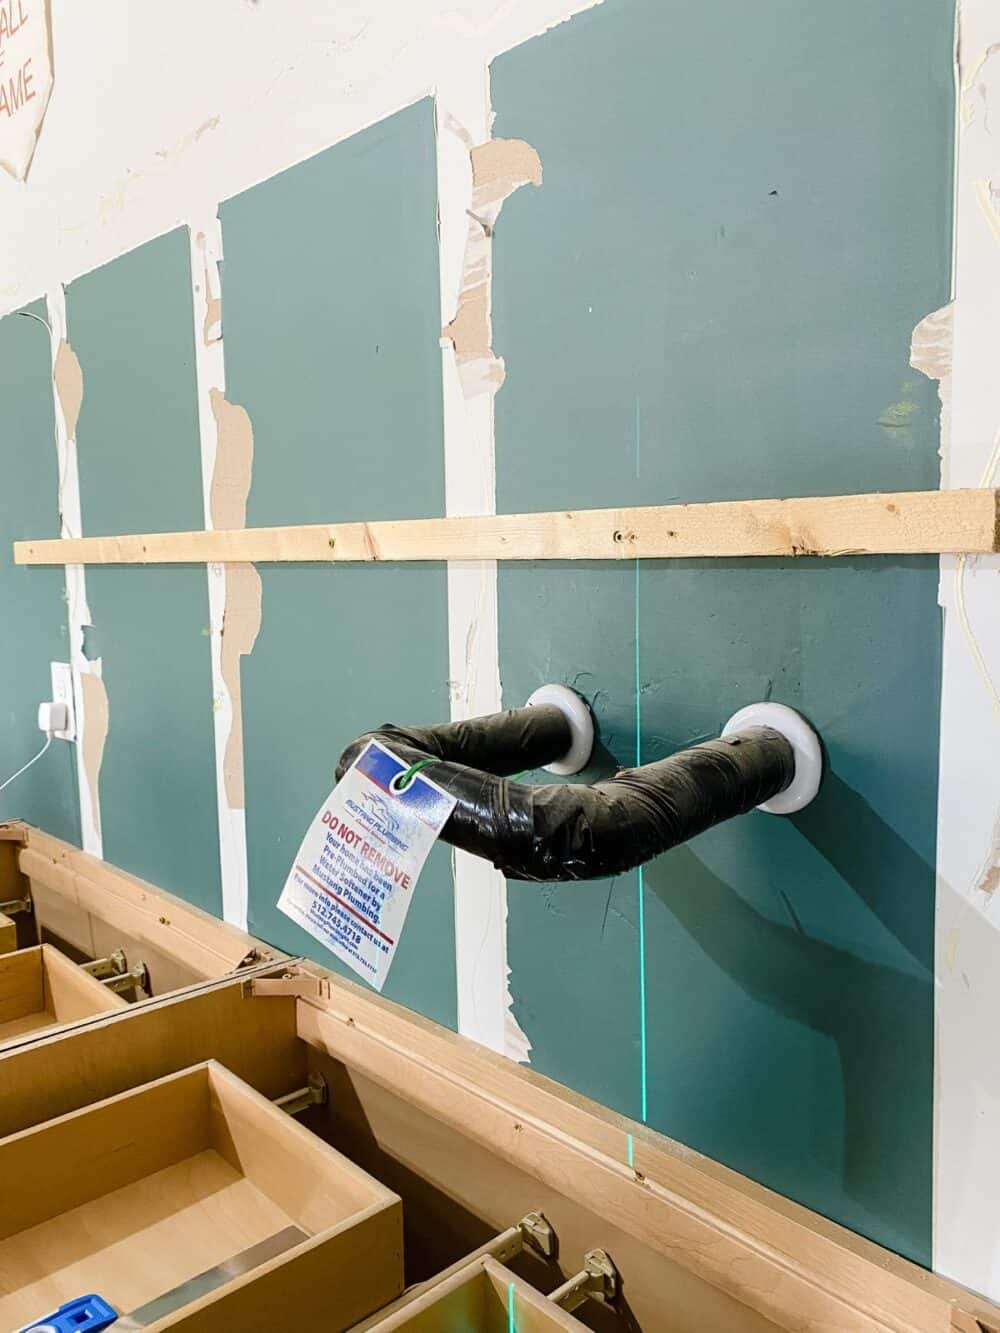
For the upper cabinets, you’ll need a second set of hands. We installed a ledger board 18″ above where the countertop would be to help rest the upper cabinet on, and that made the process way easier.
What is a ledger board?
It’s simply a board you can use to help hold your cabinet in place while you drill it into the wall. It takes most of the weight of the cabinet so you don’t have to, and helps hold it perfectly level. To install it, just mark a level line on the wall and drill a scrap board into the studs along the line. Then, rest your cabinet on top of it and install!
The upper cabinets also just need to be drilled into the wall directly through the back of the cabinet. Make sure you’re drilling into studs!
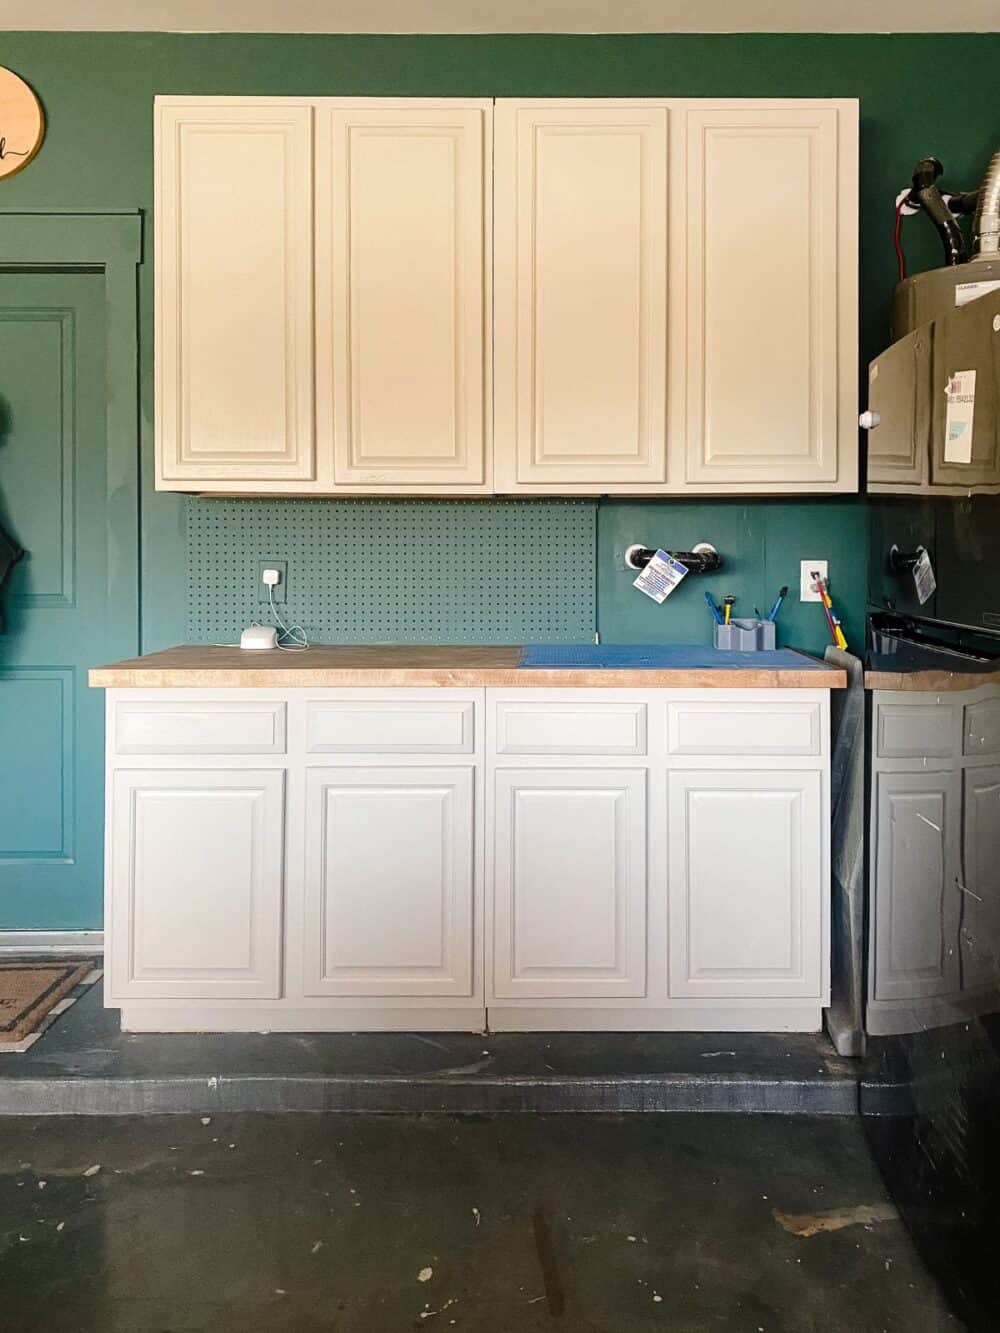
Adding a butcher block counter
After installing and painting the cabinets, we added a simple pre-made butcher block countertop to both sides. We got ours from Home Depot, and they usually have them in-stock and ready to bring home. It’s a little more expensive than taking the time to make your own butcher block counters, but it’s so simple and saves a ton of time.
Installing the counters was really easy. We used a circular saw to cut the counter down to the correct length (we allowed a 1.25″ overhang on each side), and then used the plastic brackets in the corner of the base cabinets to drill it into place from underneath.
I stained the countertops Dark Walnut by Varathane, and it reeeeeally brought everything together so nicely!
Other Garage Storage Systems
With the cabinets installed, I wanted to take some time to think about other ways I could add some simple storage to this area to really maximize the storage solutions in here.
I decided to add some small pegboards to the wall between the upper and lower cabinets – kind of like a little backsplash! I still need to fill it out with organization and figure out exactly what I want to store on the pegboards, but I can already tell it’s going to add so much functional storage to this area.
Here are a few other ways we’re maximizing storage in the garage:
- We have overhead storage racks that sit above the door and are attached to the garage ceiling. These hold things we don’t access all that often but still need to be able to reach in a hurry. They’re mostly filled with large plastic totes that contain less-often-used tools and supplies.
- I added bike hooks to the wall to store all three of our bicycles – it frees up a bit of floor space and keeps them out of the way, but they’re still so easy to pull down when we need them.
- We have a large mobile workbench that has drawers for storage. It’s such a workhorse and adds so much function to the garage.
- We keep our miter saw on a folding rack that can easily be stored fully out of the way when it’s not in use. This has saved an incredible amount of space in the garage, and is really easy to pull out and put away as needed.
We still have quite a bit of organizing to do in here, but we’ve come a looooong way, and these new garage storage cabinets have made the biggest difference in helping us get here.
If you have a big painting job like this, I highly recommend you check out Wagner’s FLEXiO line of sprayers! The Wagner FLEXiO 3500 is a great fit for both large and small projects since it has a detail finish nozzle, and would be the perfect starter sprayer for someone who hasn’t tried one before!