
How to Use a Paint Sprayer
If you’re considering trying out a paint sprayer for your interior and exterior projects but feel overwhelmed at learning how to use one, this is the post for you! I’m going to show you step-by-step how to use a paint sprayer. We’ll also walk through how to clean a paint sprayer! By the end of this post, you’ll be a paint sprayer pro, promise!
It’s no secret that I’m a huge fan of my paint sprayer. I’ve been chatting about it for years. I love how it makes painting projects so much easier and faster than using a brush or roller!
One thing I get asked about often, though, is how hard it is to use. I love sharing simple tutorials for tools to help you learn how to use them, so I’m excited to share this detailed guide to how to use a spray painter today.
Let’s do this!
How to Use a Paint Sprayer
The first thing I want to tell you is that using a paint sprayer should not feel intimidating or scary. I promise! Many people have the misconception that they’re too messy, too difficult, or only for advanced painters. None of this is true. Paint sprayers are simple and effective. And, with proper technique, they really aren’t any messier than regular old painting. Read on for my step-by-step instructions. I’ll also answer a few frequently asked questions at the end of the post!
First, Choose the Right Sprayer
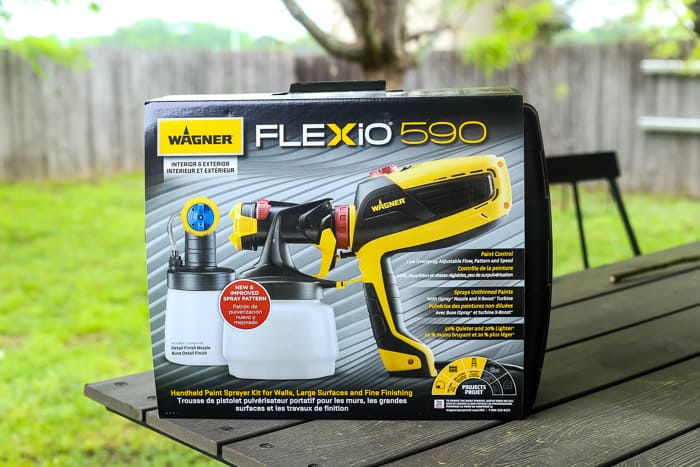
Of course, before you can use a sprayer, you’ve gotta choose one, right?! There are lots of different types of paint sprayers out there. My personal go-to paint sprayer for most jobs is the Wagner FLEXiO line. It’s an HVLP sprayer (which stands for high volume low pressure), which basically just means it uses large volumes of air to push the paint out at a low volume. It allows for lots of control over the paint, and is perfect for smaller-scale projects.
For large scale projects, I’d recommend sticking with airless sprayers. Airless paint sprayers are a little more heavy-duty so I won’t cover that here. But, you can see me use one to paint the exterior of our house in this post!
But, back to HVLP paint sprayers! The Wagner one that I like to use comes with two nozzles. There’s one for larger painting projects, like walls and fences, and one for smaller projects like furniture or trim. It also has two differently-sized containers to hold paint. It’s lightweight, super versatile, and great for both beginners and more experienced painters.
If you’re looking for just one sprayer that can spray paint and stain and can tackle a variety of projects, this is definitely the one I’d recommend!
Parts of a Paint Sprayer
Once you’ve chosen your sprayer and are getting ready for your first project, it’s time to get it all set up. Of course, I always recommend starting off with the instruction book that comes with your sprayer. But, I’ll give a quick rundown of what it looks like with my Wagner paint sprayer. Then, you’ll have an idea of what to expect!
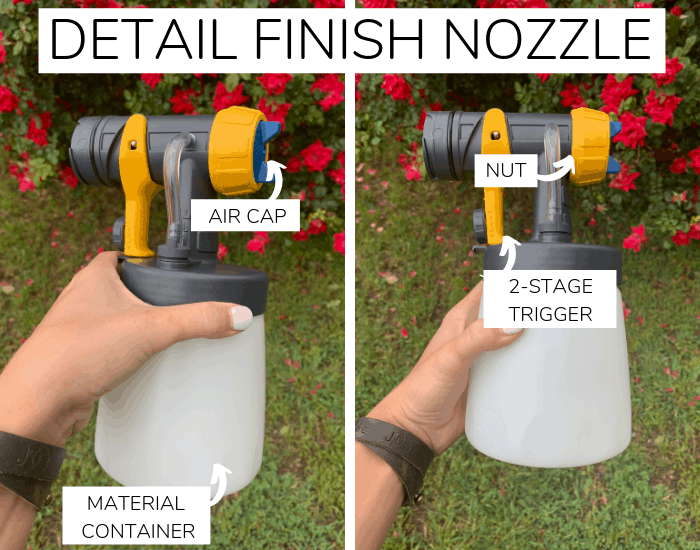
First things first, let’s chat about the parts of a paint sprayer so that you know what I’m referring to when I name certain pieces. Here’s a handy graphic to help you out:
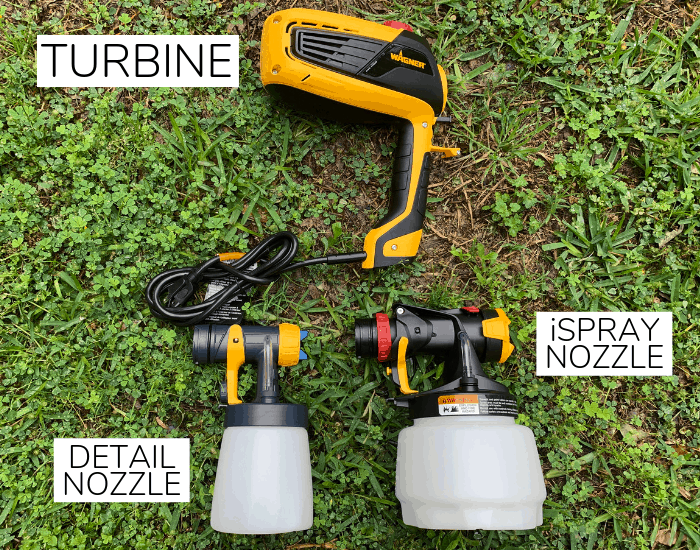
Here’s some detail on the two different nozzle options with the FLEXiO. Remember that the Detail Finish nozzle is the one you’ll reach for if you’re doing a smaller project. The iSpray Nozzle is the one that you’ll use if you’re working with a larger space, like walls, ceilings, or fences.
How to Set Up a Paint Sprayer
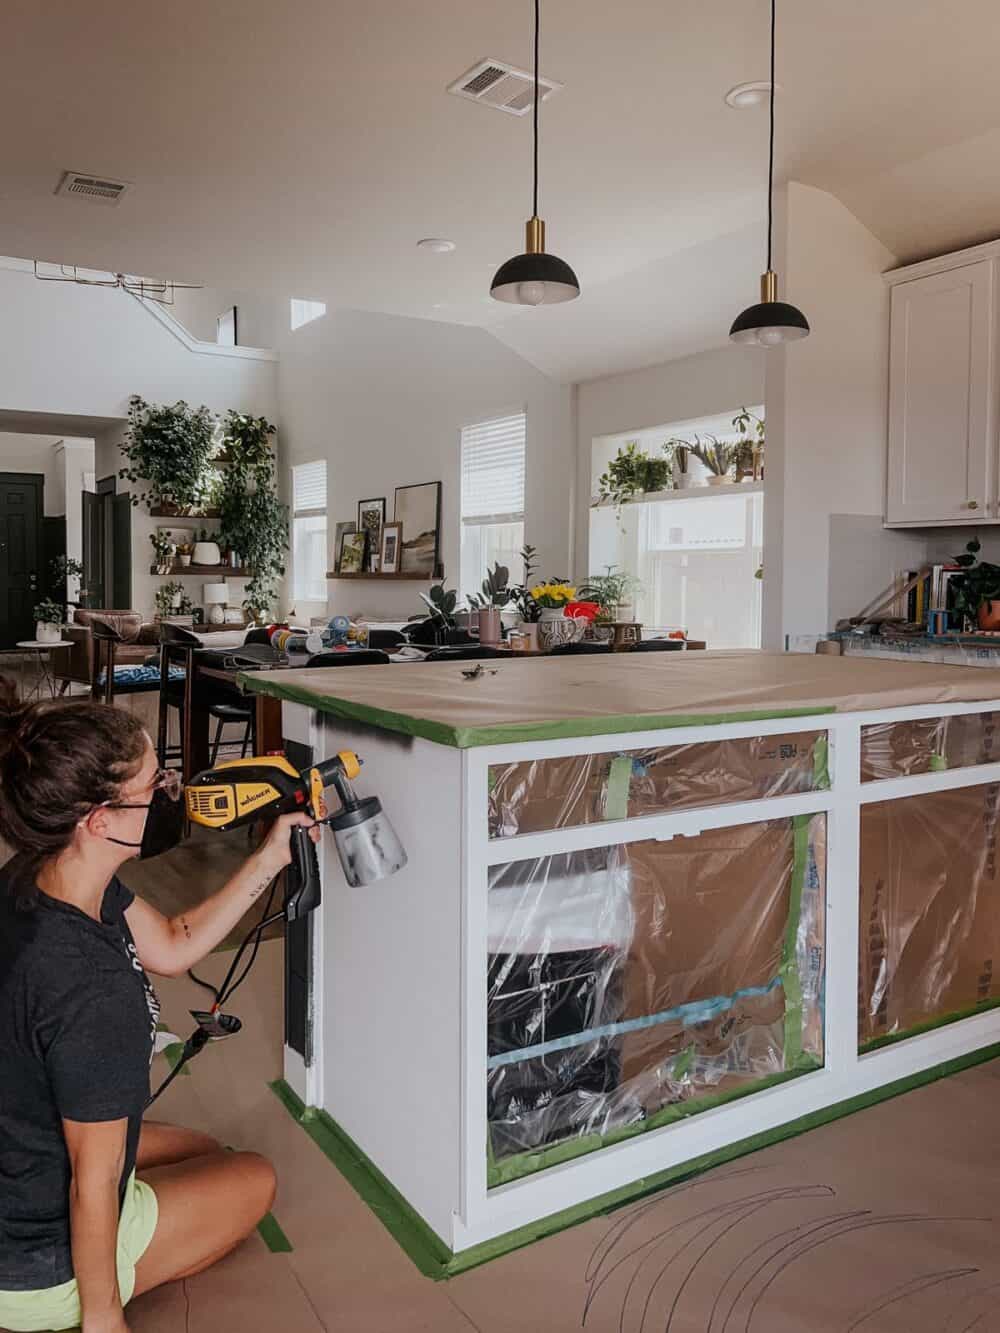
1. Insert the suction tube into the intake opening of your nozzle assembly. It should slide right into place. Be sure to align it to the appropriate direction for how you’ll be spraying. If you’re spraying in a downward motion you’ll angle it towards the front of the gun. This applies to most projects like furniture, lower cabinetry, or trim. If you’re spraying upwards, you’ll point it to the back of the gun. This applies to things like for ceilings, walls, or upper cabinets. Basically, you want the opening of the suction tube to be pointed towards where the paint will be pooling when you tilt the gun!

2. Thoroughly mix your material (paint, stain, or poly). Then, fill the paint reservoir to the desired level. I’ve never thinned my paint when working with either nozzle. You should only need to worry about thinning paint if you’re working with a really thick paint or finish. If you do need to thin the material, be sure to follow the recommendations on the specific material you’re using. Most will have directions for how to thin listed right on the container!
3. Carefully screw the cup back onto the nozzle assembly, making sure to tighten it all the way.
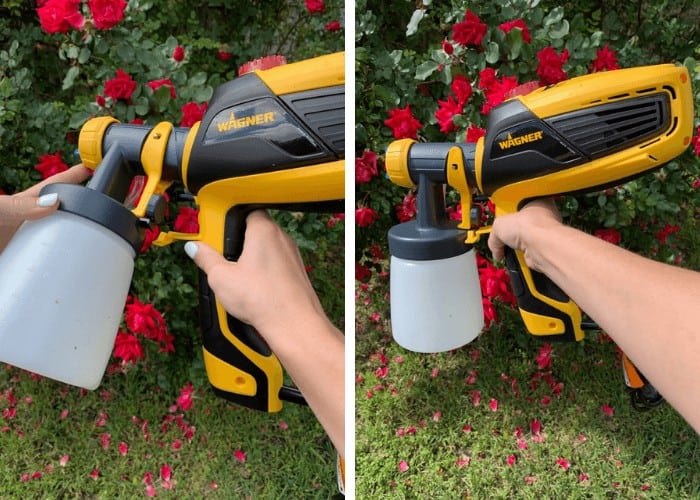
4. Now you’re ready to attach the nozzle assembly to the turbine. Align the arrow with the “unlock” symbol on the turbine, then push it into place and twist towards the “lock” symbol. You should feel a click as the tab below the trigger locks the two pieces together. Now, you’re ready to go!
Adjust Your Settings
Before you get started spraying, you’ll want to check the settings on your sprayer to be sure you are set up for optimal performance. Again, I’ll remind you that if you’re struggling with this, the instruction manual will be your best friend. No matter how long I’ve been using a sprayer, I still find myself pulling it out on occasion to remind myself what settings I should be using! To some extent, there is a bit of trial and error when it comes to the settings. You’ll learn what materials do best with what settings over time! You’ll also learn how to fine-tune things as you work. But, to get you started, here are some general guidelines.
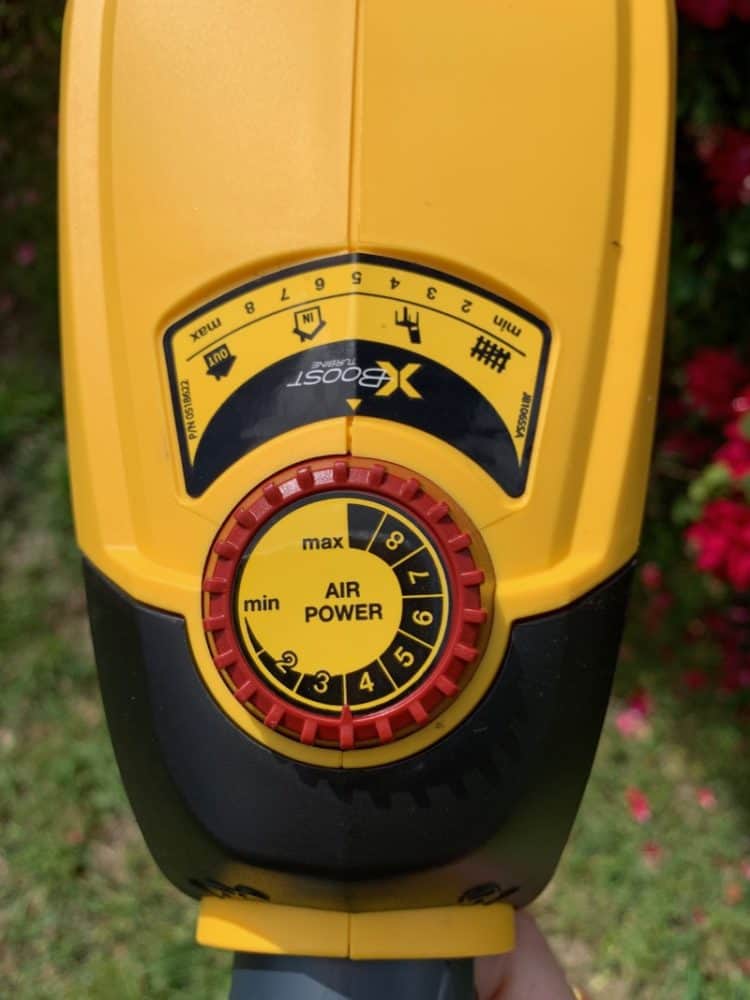
air power Dial
This dial adjusts the level of pressure produced by the spray gun. A high air power level will give you faster coverage and a smoother finish with thick materials. A lower air power will give you larger drops of material coming out of the gun. This will give a slightly rougher finish. The thicker your material, the higher you’ll want the turbine power to be!
If you’re working with a thin material (like stain), you’ll want a lower air power. When you have the air power too high with a thin material, you get more overspray. If you need a reference, there’s a handy chart in the instruction manual that shows you exactly what air power level you should use for different types of materials. For most projects, I keep my air power around a 7 or 8 (out of a possible 9).
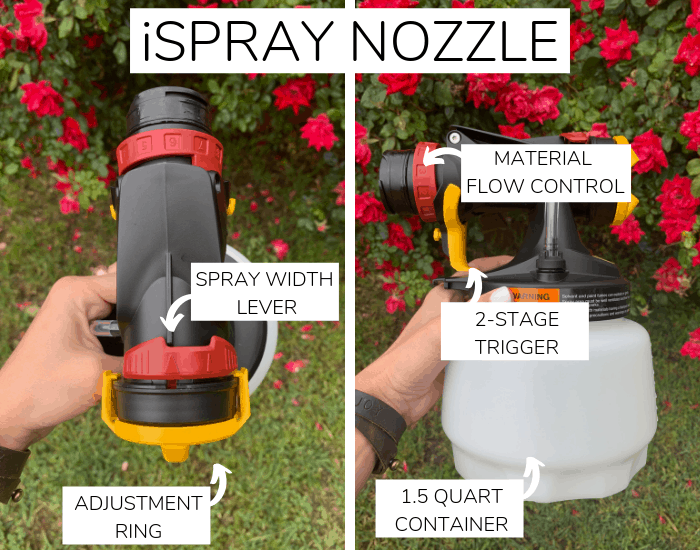
Material Flow Control
Next, you’ll want to adjust the material flow. This is the amount of material that actually comes out of the gun. If you’re working with a thicker material (like paint), you should start with the highest setting and gradually decrease it until you find the sweet spot. With thin materials, like stain, you should do the opposite – start at the lowest setting and increase it until you get to the right level.
With higher material flow settings, you’ll need to move faster to avoid drips in your spray pattern. When you’ve got the maximum amount of material coming out, you’ll quickly start to get drips if you aren’t moving your arm fast enough.
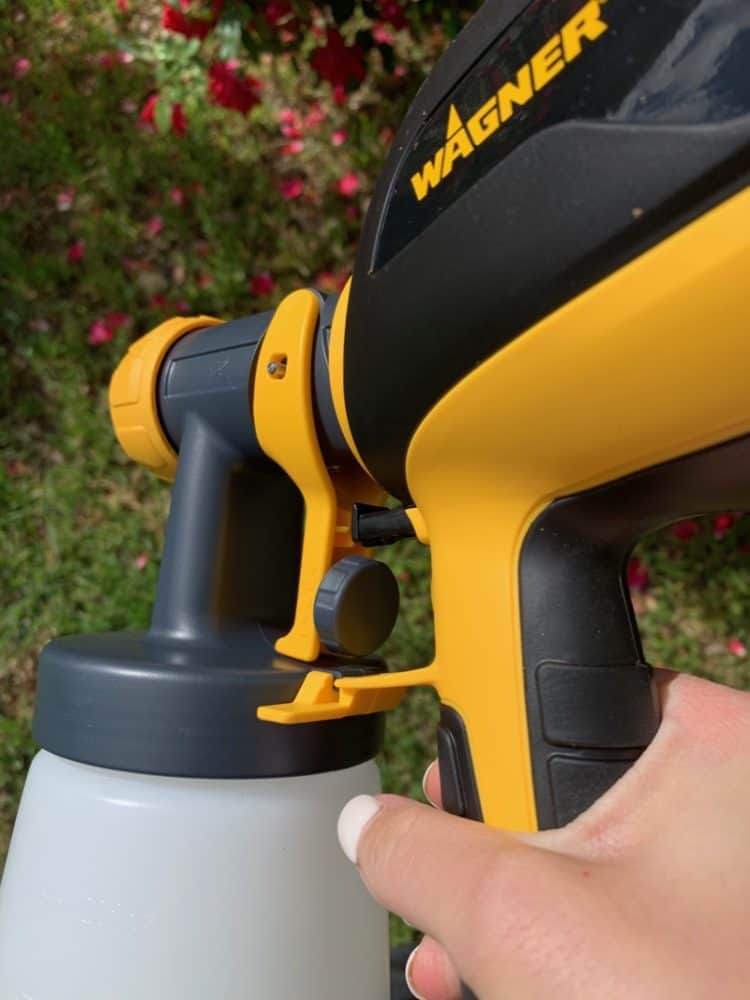
This setting is adjusted with the red knob on the trigger of the spray gun, and it basically just adjusts how far back you can pull the trigger. As you’re working, if you notice your paint is running and tripping, you should reduce the material flow. If you notice that you aren’t getting enough coverage, you should increase it.
Spray Pattern Adjustment
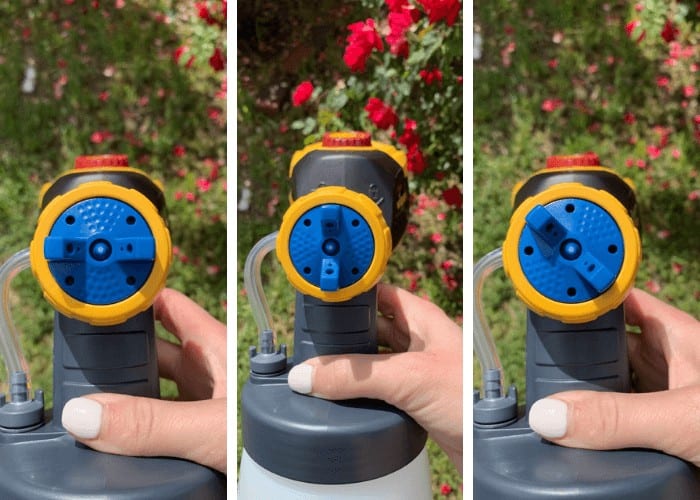
Finally, you need to adjust to your desired spray pattern. For the Detail Finish Nozzle, you adjust the spray pattern by twisting the air cap ears, and on the iSpray Nozzle you adjust it with the adjustment ring.
You have three options: a horizontal pattern, a vertical pattern, or a diagonal pattern. This is mostly a personal preference thing. You can play around with what works best for each specific project. Sometimes you’ll need to adjust the pattern as you work if you’re moving around a lot and needing to get to the project from different angles. Generally speaking, if you’re using an up and down spraying motion you’ll use the horizontal pattern and if you’re spraying side to side you’ll use the vertical one. The diagonal pattern is typically just used for really small areas, or for corners and edges.
If you’re doing a larger project with the iSpray Nozzle, you can also adjust the spray width, which is just how wide the spray pattern is. It’s pretty intuitive – you want a wider pattern for large surfaces, and a narrow pattern when you’re working in a smaller space.
Clean and Prep Your Space
Okay! You know your paint sprayer inside and out. You’ve got it all set up. Now, it’s time to get ready to paint! When you’re working with a paint sprayer, a little more prep work is required than with regular old painting. It’s annoying, but totally worth it in the end!
With a proper technique and settings you will have minimal overspray, but some is unavoidable. If you’re working inside, be sure to cover up furniture, floors, and other things. If you’re working outside be sure to work in an area that can get a little messy. I always like to lay down a scrap piece of plywood or some cardboard to protect the ground. You’ll also want to set up so that no debris gets on your project as you work.
You’ll also want to thoroughly clean your surface before you get started. If you’re painting walls, give them a quick wipe down to make sure there isn’t any dust or gunk on them.
Start Spraying!
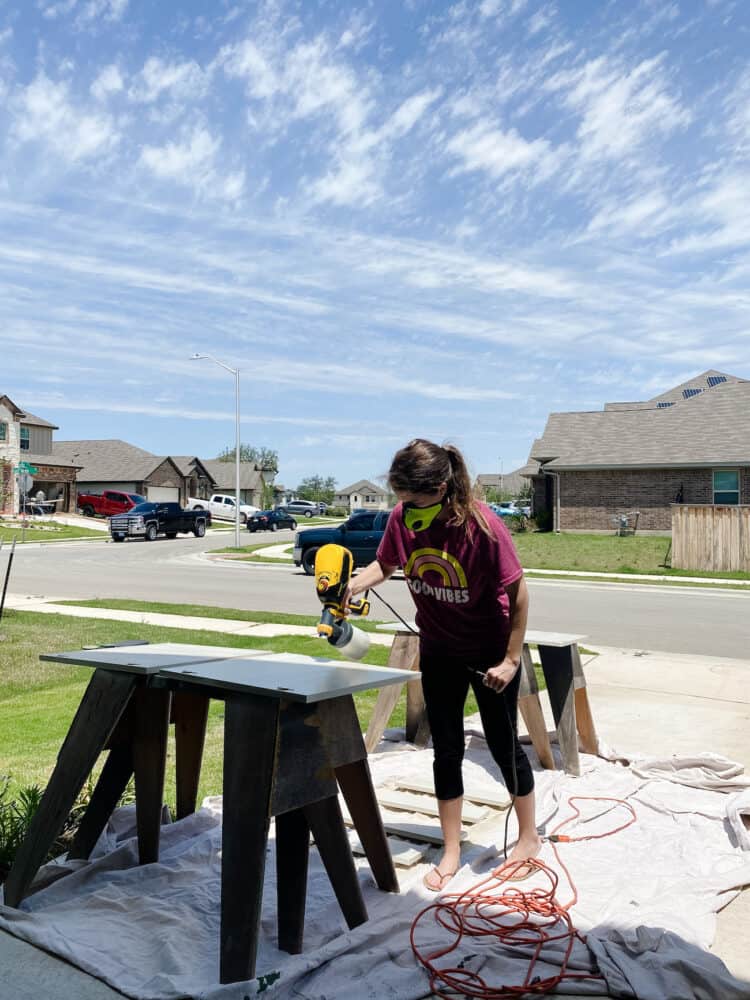
Alright, now that we’ve got everything all set up and adjusted and our surfaces are clean and dry, we’re ready to get to spraying. It’s always recommended that you test your settings and spray pattern before you start working on the actual project. You can just use some scrap material for this little test spray!
Here are a few basic tips on paint sprayer techniques:
- Keep your arm moving. If you aren’t constantly moving the gun as you spray, you’ll get drips and runny paint. Remember that as long as the trigger is pulled, paint is coming out of the gun! It’s similar to using a can of spray paint – you shouldn’t pause or linger in one spot, and you should always have your arm moving as you work.
- Activate the turbine before you start spraying. If you just partially pull on the trigger, the turbine will be activated but no spray will come out. You should generally do this to start the turbine before you actually start spraying. It’s a small detail, but it helps you have a smoother finish in the end!
- Get closer than you’d think! The biggest tip I have is to get much closer to your project than you’d think you should. Your spray gun should never be more than 6-8 inches away from the project. This drastically reduces the overspray and gives a better finish overall.
- Spray parallel to the project and keep your strokes smooth and even. Try to move at a relatively consistent pace, and don’t flex your wrist while you’re spraying – you should move your entire arm across the project as you work!
- Always start with a thin coat! You aren’t looking for perfect coverage the first time. Most painting projects require two coats anyways, so you should stick to a nice thin coat the first time around, and once that dries your second coat can be (slightly) heavier.
- Overlap your spray passes. Again, just like with using a spray can, you should overlap each pass by about 50% or so. This gives you better coverage and reduces your work on the second coat.
- Periodically clean off the nozzle tip. Finally, as you’re working it’s a good idea to clean off the nozzle tip every once in a while. Since the paint is so fine coming out of the gun, it can dry really quickly on the nozzle tip and cause issues with your spray pattern. Don’t get too caught up in this, but do wipe it off with a cloth every now and then to remove any dried paint. You should especially do this if you step away from the project for any length of time!
How to Clean a Paint Sprayer
Now for the part that I think is the most intimidating for most people. I can’t tell you how many people have told me that they would love to use a paint sprayer but the cleanup just seems too overwhelming. I promise you that it’s really not that big of a deal, and the slight additional work during cleanup is so worth the time you’ll save while painting!
Before we dive in, a quick note: you should always use the appropriate cleaning material for whatever you were spraying. If you were using latex paint (which is the vast majority of what I work with) you just need warm, soapy water, and if you’re using oil-based paint or stain, you’ll need to clean with mineral spirits.
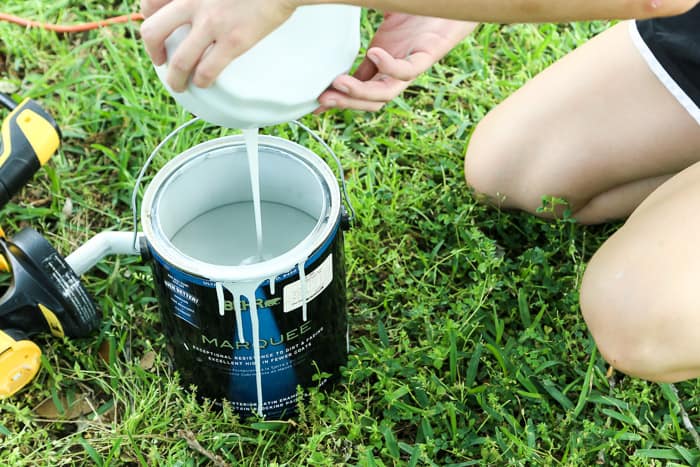
Start by pouring any unused paint in the paint cup back into the original container.
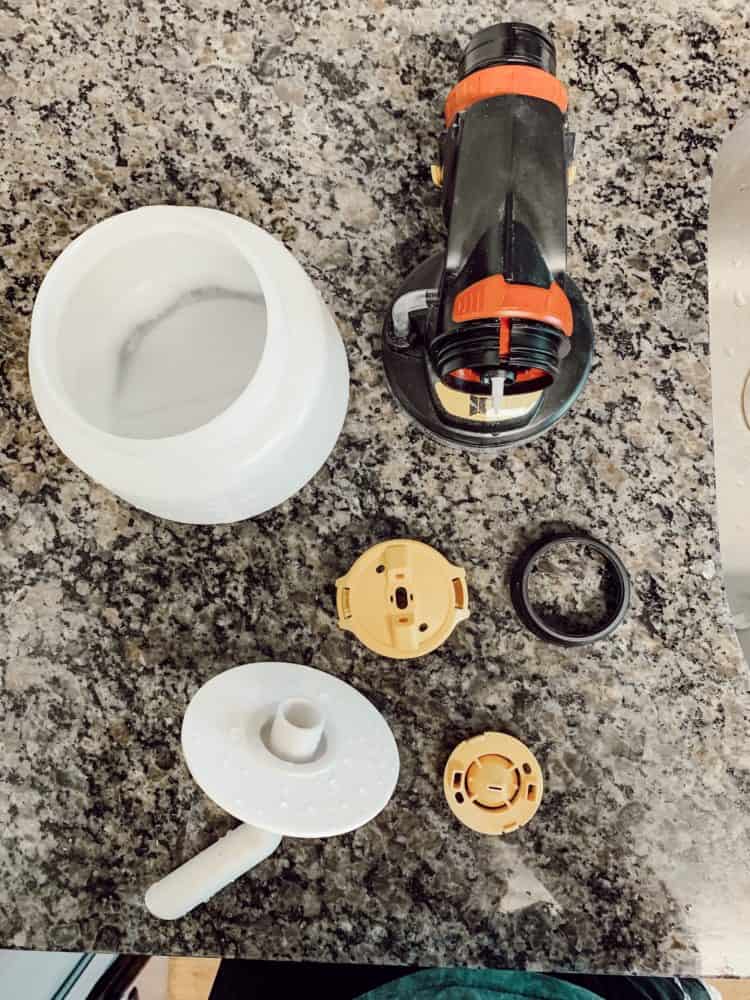
Next, disassemble the entire paint sprayer to clean each piece. I always do this in my kitchen sink, but if that makes you nervous you can work with the hose outside. You can just grab some big 5-gallon buckets and clean it in there!
Once you’ve disassembled everything, use warm, soapy water to fully clean it. It’s pretty intuitive, and generally takes me less than 5 minutes from start to finish. Make sure to allow water to run through all of the channels in the paint sprayer until the water runs clear.
Leave everything out for a while to fully dry. Then, you can re-assemble it and put it back into the storage box until you need it again!
I’ll also mention one more time that you should always bust out the manufacturer’s instructions when you’re cleaning! The directions are so incredibly thorough, and they have great graphics to help you stay on track. It’s really helpful and will ensure you are always properly cleaning your spray gun.
Okay, now that we’ve walked through the basics of how to use a paint sprayer, let’s answer a few common questions.
I hope this guide has been helpful to you and that it gives you the confidence to try using a paint sprayer on your projects around the house!

Thanks for giving the step by step! I am considering getting a sprayer for some projects I have coming up, but I am still concerned about the process between coats. Most of what I will be doing requires 2 coats of primer, and 2-3 coats of enamel with a 16 hour recoat time. My plan is to do a coat each night after putting the kids to bed. Typically I wrap my rollers & brushes and put them in the refrigerator over night. Would I need to fully clean the sprayer every night, or just the spray nozel between coats?
I put it in the fridge! You’ll just need to clean the nozzle off before painting again.
Hi,
My question is about the paint viscosity I have a Zahn now paint cup.
Could you please inform me to the exact viscosity which best to use in the wagna paint sprayer and to the exact timing of how long it takes for the paint to travel through.
Thanks for this article, we just got a Wagner 590 and we’re stuck on a few points but you cleared it up for us.
Do you find that when spaying something like a door that it’s better to spray it laying flat or standing up? Feels like flat would reduce drip/runs risk. But not sure if it negatively impacts finish.
I like to spray flat whenever possible! Just be sure to give it plenty of time to cure before flipping it