
How to Make a Mood Board
Need some help making plans for a space? Let me show you how to make an interior design mood board for your home! No fancy tools or software needed, I promise.
I’ve learned a lot of lessons about DIY over the years. Things like always test your paint color before buying a whole gallon. Never toss your stain rags into the trash can (they could catch on fire!). Every project will take twice as long as you think it will. You know, the important life lessons!
But something that took a little longer to clue in on is how helpful creating mood boards can be for a space! You see, despite what you might expect from my Enneagram 1 nature, I’m a bit of a “dive right in” kind of person when it comes to projects. If I overthink it too much, my perfectionist will come out and I’ll never accomplish anything! So, I like to jump in first and make the plan as I go.
But, when it comes to designing a room, that can lead to a pretty disjointed space. Over the years, I’ve learned that if I really want a space to feel cohesive and finished, I need to start with a mood board.
I know what you’re thinking – mood boards are just for the pros! But truly? They aren’t! They can be a tool that totally changes the game for you.
What Is a Mood Board?
Let’s start with the most basic thing – what even IS a mood board? A mood board is basically a blueprint for how you want a room to look. It gives you a guidepost for the direction to go with your style, finishes, and color scheme, and helps you stay on track if you tend to get distracted while designing.
A mood board generally has all of the major design elements in a room, and it isn’t meant to be followed exactly. It’s more a jumping off or inspiration point to help you stick to the general mood or vibe in a space.
A mood board can come in the form of collages of images, a Pinterest board, or even a bulletin board with different textures and magazine cut-outs. You can add description words for the emotions you want to feel in a space, specific fabrics you want to use, or even play with some different fonts to add famous quotes that capture the vibe of the space you want. Whatever your creative process is, the idea of an interior design mood board is to give you a guide when you’re designing a specific space.
Why Are Mood Boards Important?
First of all, some rooms are just hard to design. We have a few spaces in our home where we really just knew what we wanted from the very beginning. We’ve gone after that without pause and without really needing to put a lot of extra thought into it. But, honestly, those rooms are few and far between. Generally speaking, a room doesn’t come together quite so easily. We’ve learned that when we attempt to just let a room “come together” over time without a specific plan, we’re left with a space that doesn’t feel quite as finished and beautiful as we know it could.
Secondly, just because I’m good at visualizing things doesn’t mean everyone is. Corey and I go back and forth on design plans a lot. No matter how compelling and wonderful my verbal descriptions of my plans are (hah!), Corey just has a hard time picturing things without some sort of extra visual. I’ve noticed that since I started putting together mood boards and communicating my ideas with him that way, we get a lot further a lot faster. He can specifically tell me what he does and doesn’t like about a design. Then, I can adjust my plans accordingly, and we’re both happy.
Without mood boards and specific plans for rooms we often both feel frustrated. Neither one of us feels fully heard and understood. But, when we make a mood board we’re able to actually collaborate and come up with a plan we both love!
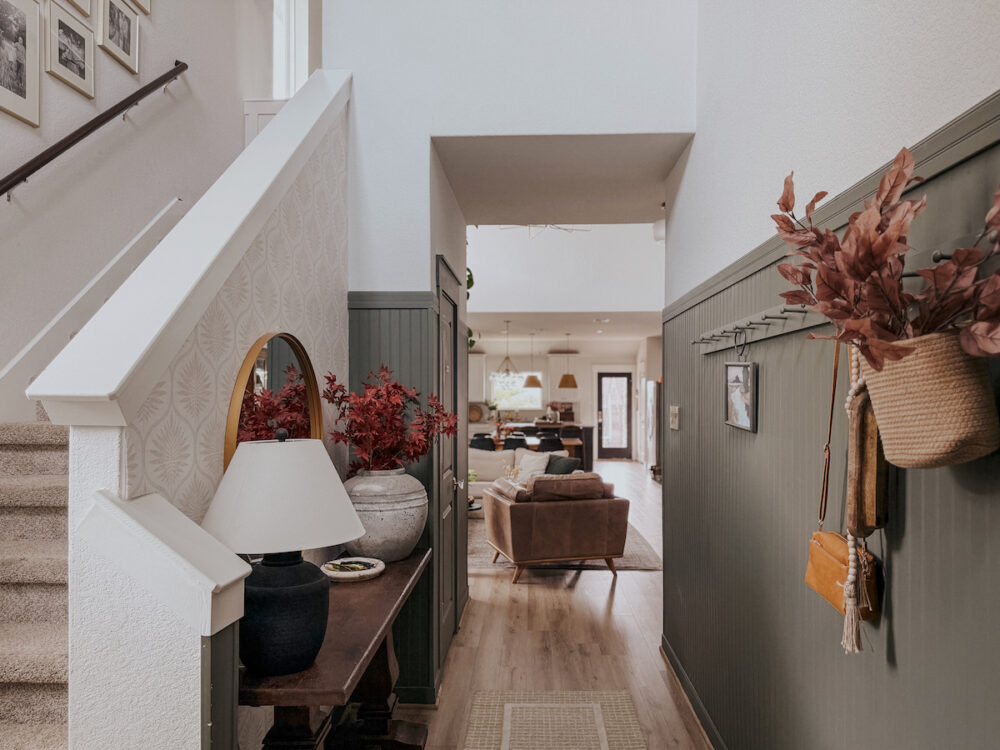
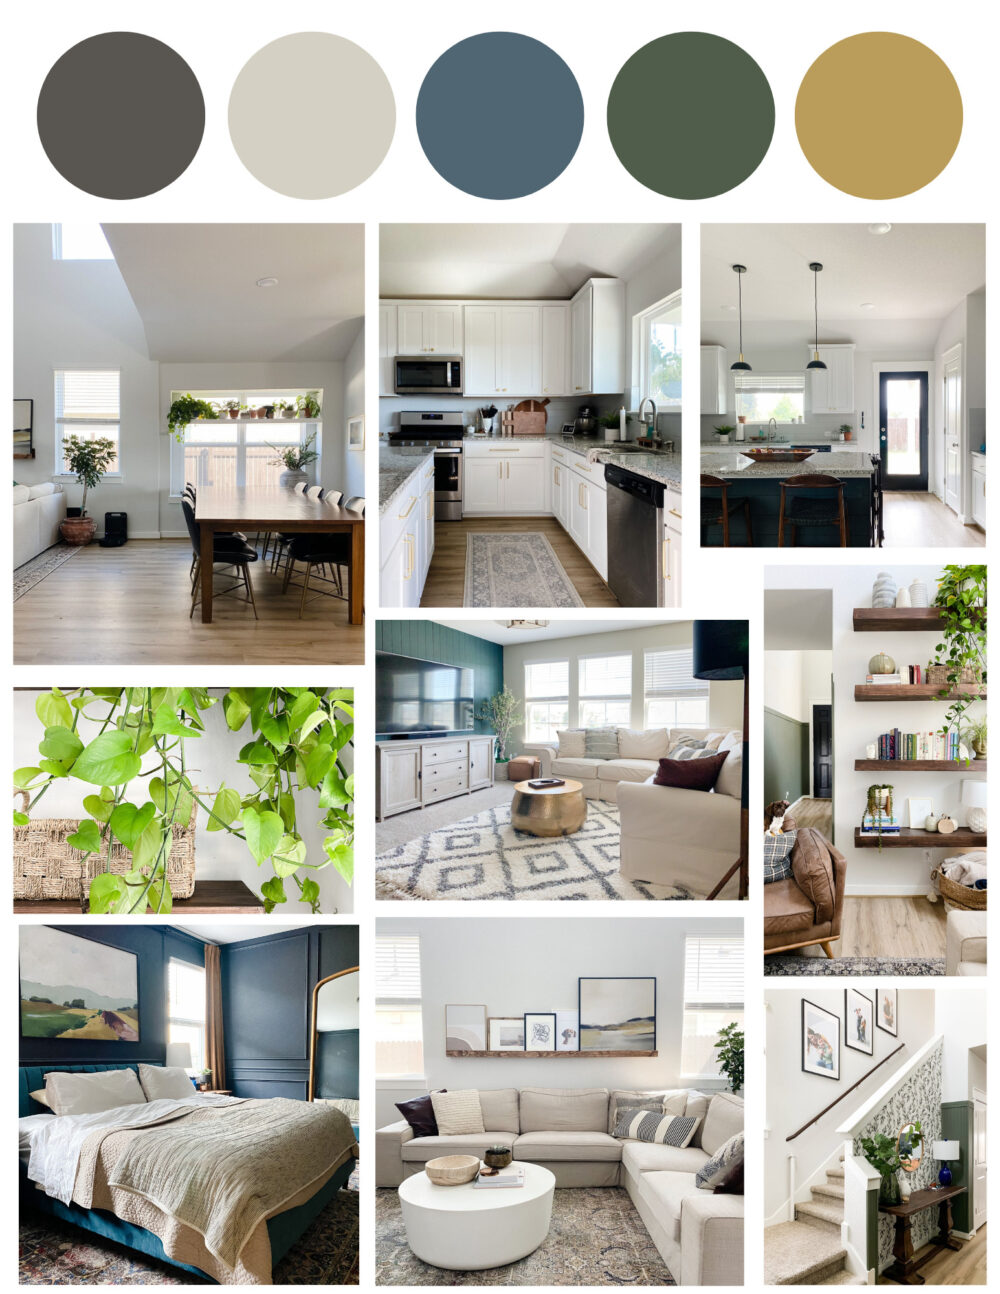
I even have a general “whole home” mood board that I put together with existing elements in our house, so I can compare new ideas against it to see if it fits (see that below – you may notice it’s a little dated, haha!).
Are you convinced yet? You should be.
How to Create a Mood Board (for FREE)
Now, I know what you’re thinking. Mood boards might be great and all but you’re no graphic designer, right? I get it. I thought the same thing at first too. But, y’all, it’s so simple to create them!
Here…I’ll show you.
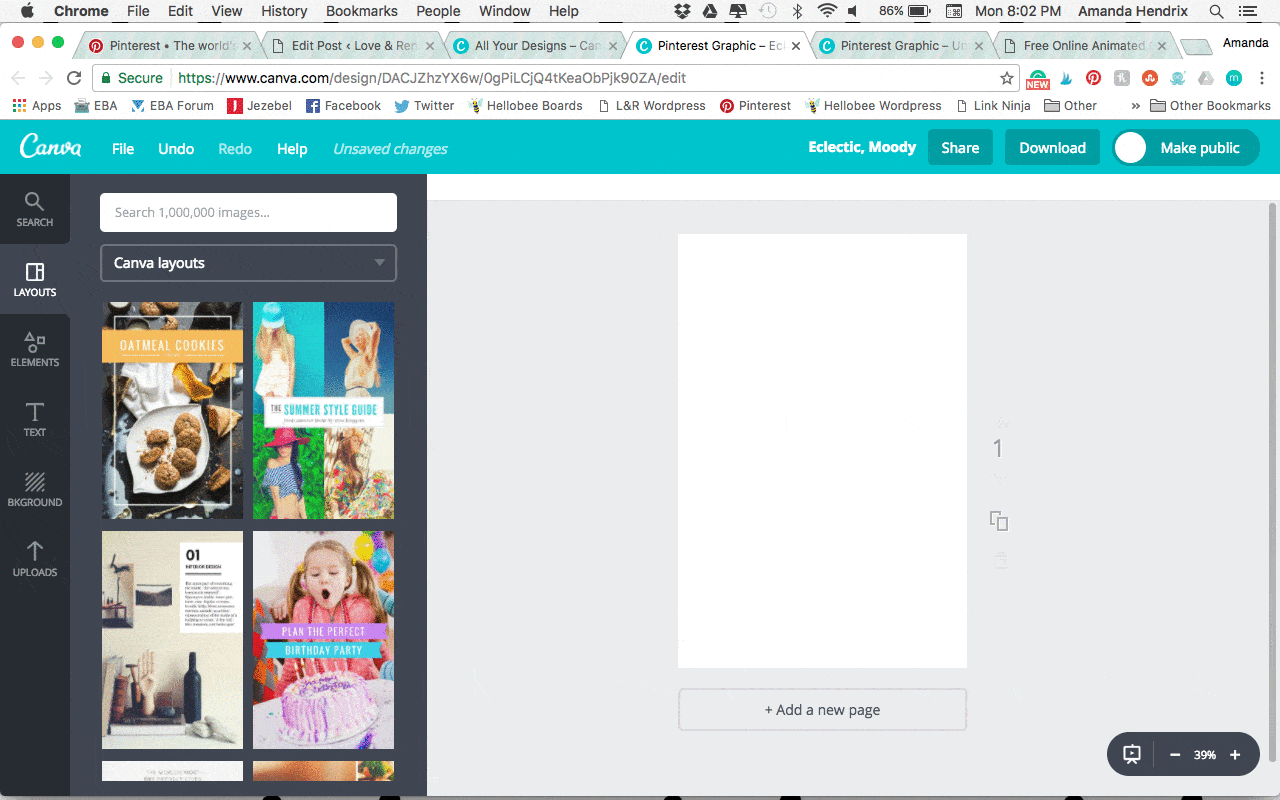
I like to use Canva to create most of my graphics and mood boards. I’ve been using it for years now and I think pretty much everyone has caught on at this point – it’s the best tool for this sort of thing!
Step One: Gather Images
First up, you’ll need to gather your images. There are lots of ways you can do this, but I love to start by browsing Pinterest! I create a board specifically for the room I’m designing and start pinning absolutely recklessly. Pin everything that inspires you or makes you smile. You can cull it down later!
In addition to using actual rooms you like, it can be really helpful to add some product images of things you have or know you want to use. I just save all of the images I want to use to a specific folder on my computer so they’re easy to find, then I drop them in Canva.
Note: You can easily do this on your phone as well, by saving images or just taking screenshots.
Step Two: Upload Images
Head to Canva and create a blank design (I usually use the “Pinterest Image” size). A new window will pop up with your design – click “uploads” on the left-hand sidebar, and upload your inspiration images. Once you’ve got them uploaded, you can simply drag and drop them onto the board, then resize and arrange them to fit.
As you work, be sure to pause and look at things periodically to make sure they are cohesive. A beautiful mood board will start to emerge as long as you’re thoughtful about what you add!
Step Two: Color Palette
Once I have all of my product images in I like to add a color palette for the room, especially if I don’t already have a super clear direction for it. This is really easy to do in Canva, and can be so helpful!
To add the colors, all I did was click “elements” on the sidebar, then chose a circle. I added four of them and then changed the colors to fit with the colors for our room. How do you choose the colors? It’s simple – when you click on the rainbow button to change the color of your circle, you’ll see a section that says “Photo Colors”. These are colors found specifically in the photos you’ve included in your mood board! Choose the ones that fit the vibe you want and you’re done!
If you have already chosen specific elements like a paint color, a rug, or curtains, I highly recommend including those specific colors as well. I always aim for no more than 4 colors for my general color scheme.
Mood Board Examples
Let’s go through a few examples of times that I’ve used mood boards in my designs. I haven’t saved all of them over the years, so I’m limited on what I can share, but I managed to dig up a few!
Our Powder Room
On the left, you’ll find the mood board I created for the space. On the right, is what the room looks like today.
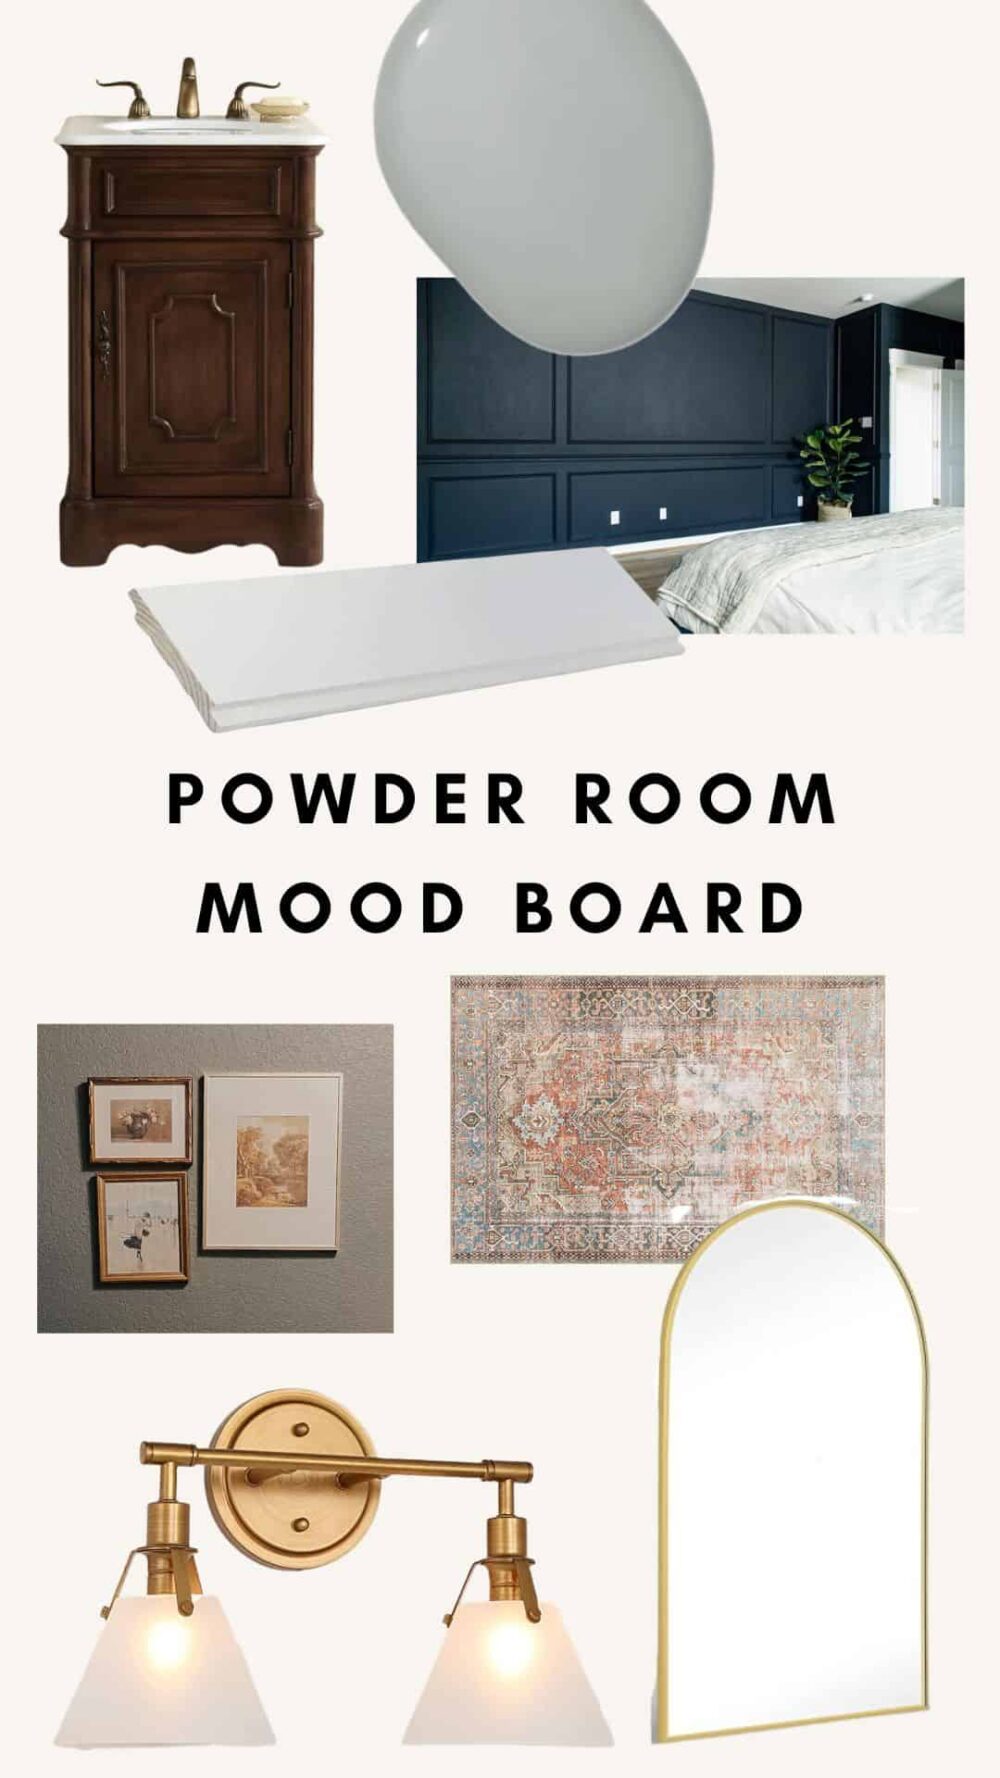
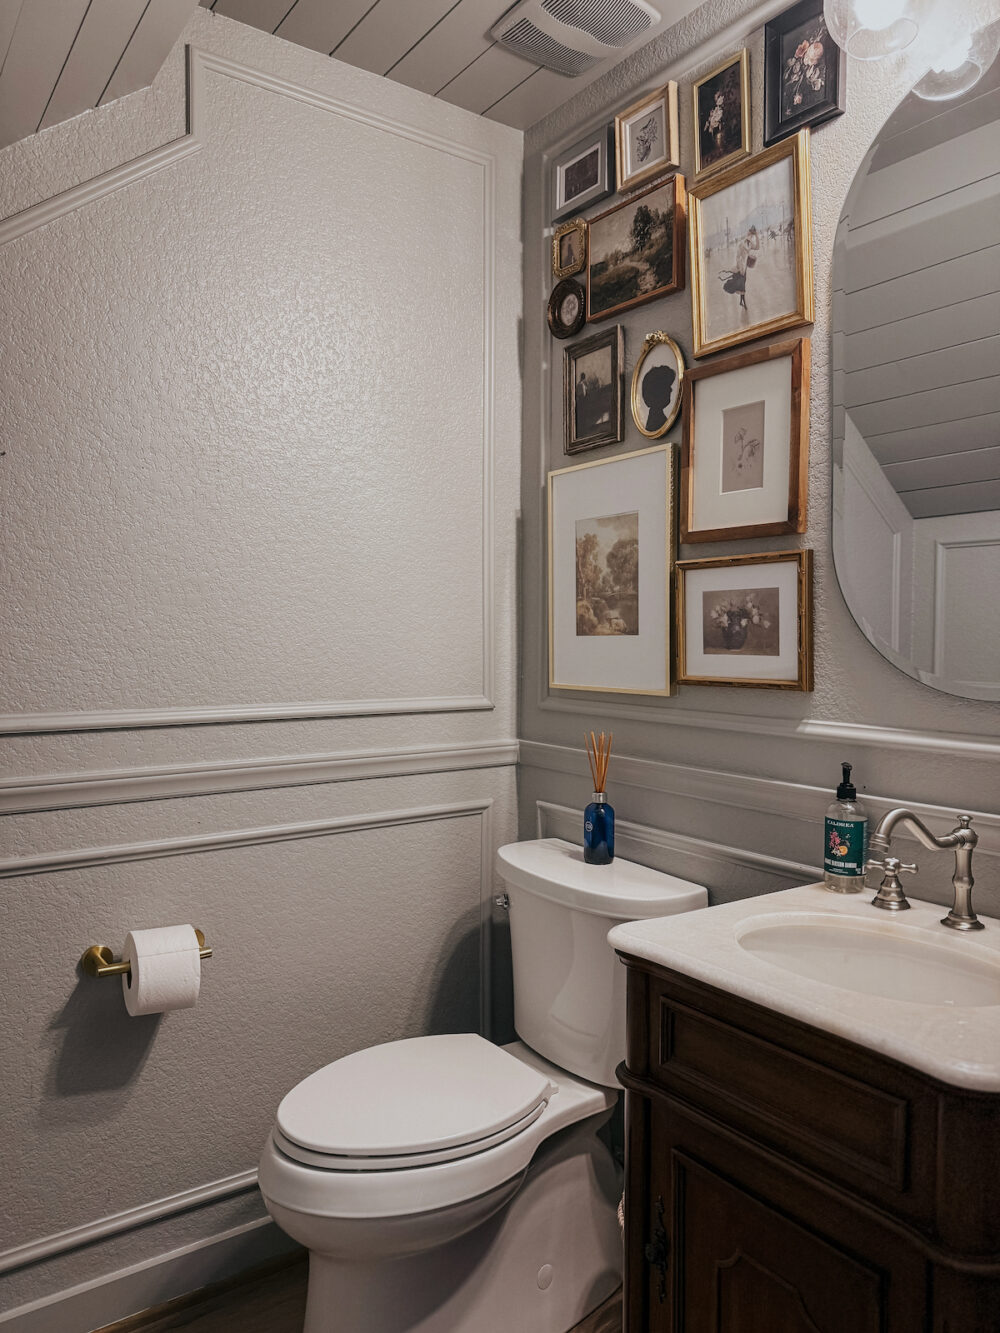
Is it an exact match? No! And that’s okay! Some of the elements changed as I was designing, but you’ll note that a lot stayed the same. I used gold finishes, I added box trim (in the paint color on the mood board), and I used the same vanity from the mood board.
Grant’s First Nursery
I created the below mood board for Grant’s nursery in our last home, before he was born.
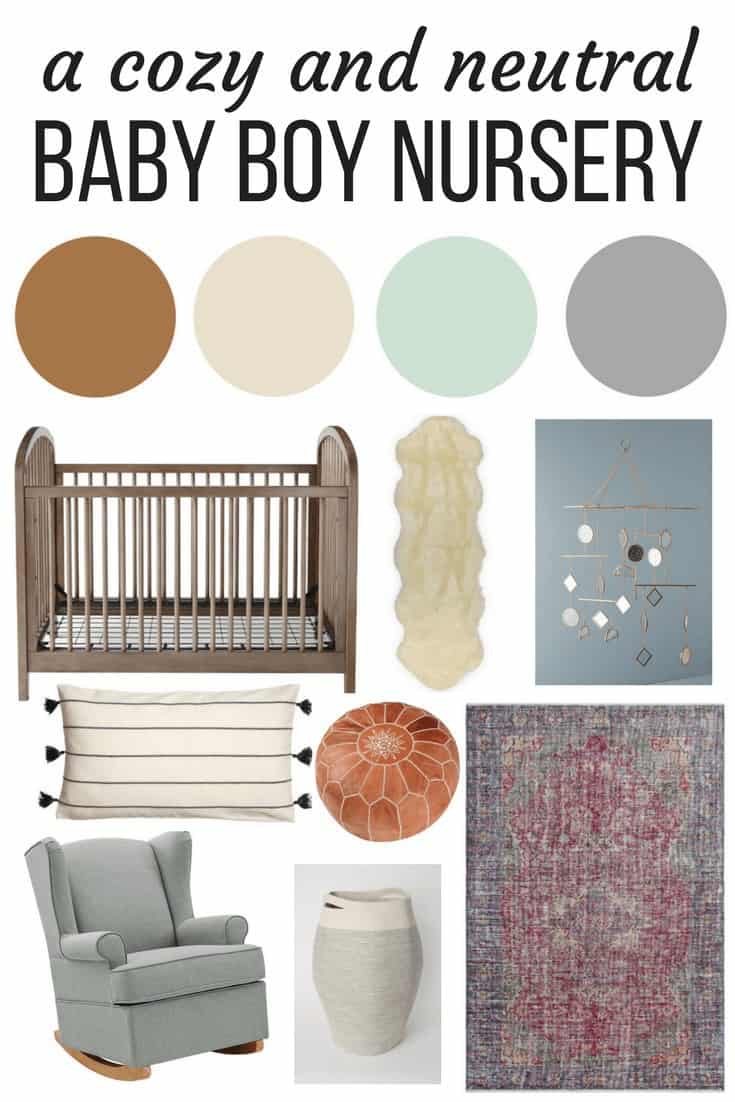
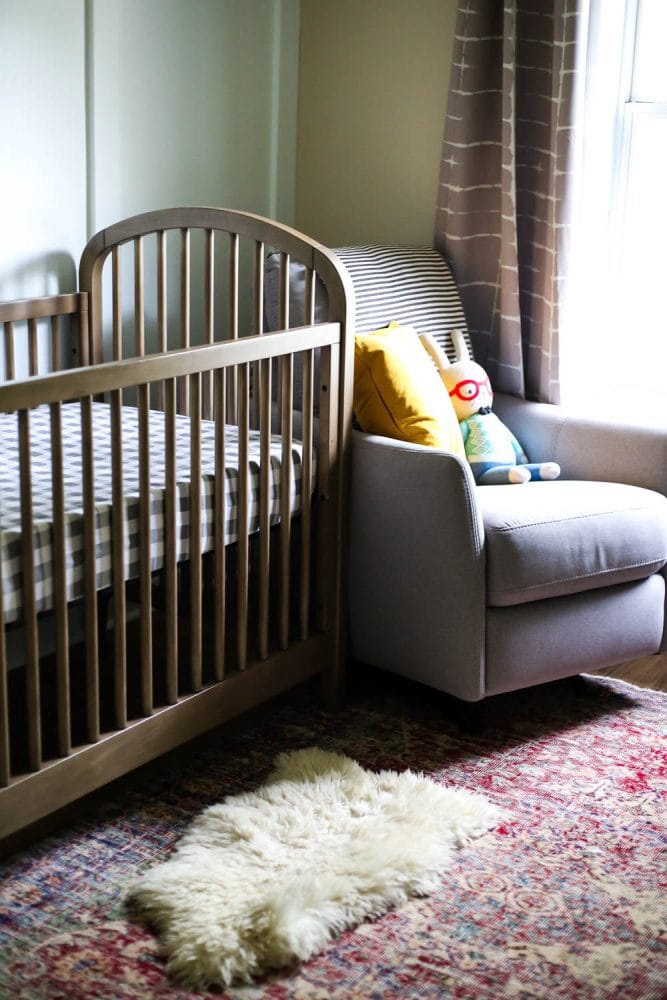
You can’t see the full room here, but you get the idea! On the other side, there was a dresser painted in that beautiful light green color on the mood board.
When I created these mood boards, I had a very general idea of what I wanted the space to look like, but I did NOT have a full plan. That came together afterwards…and that’s why an interior design mood board is so helpful!
Let’s do one more.
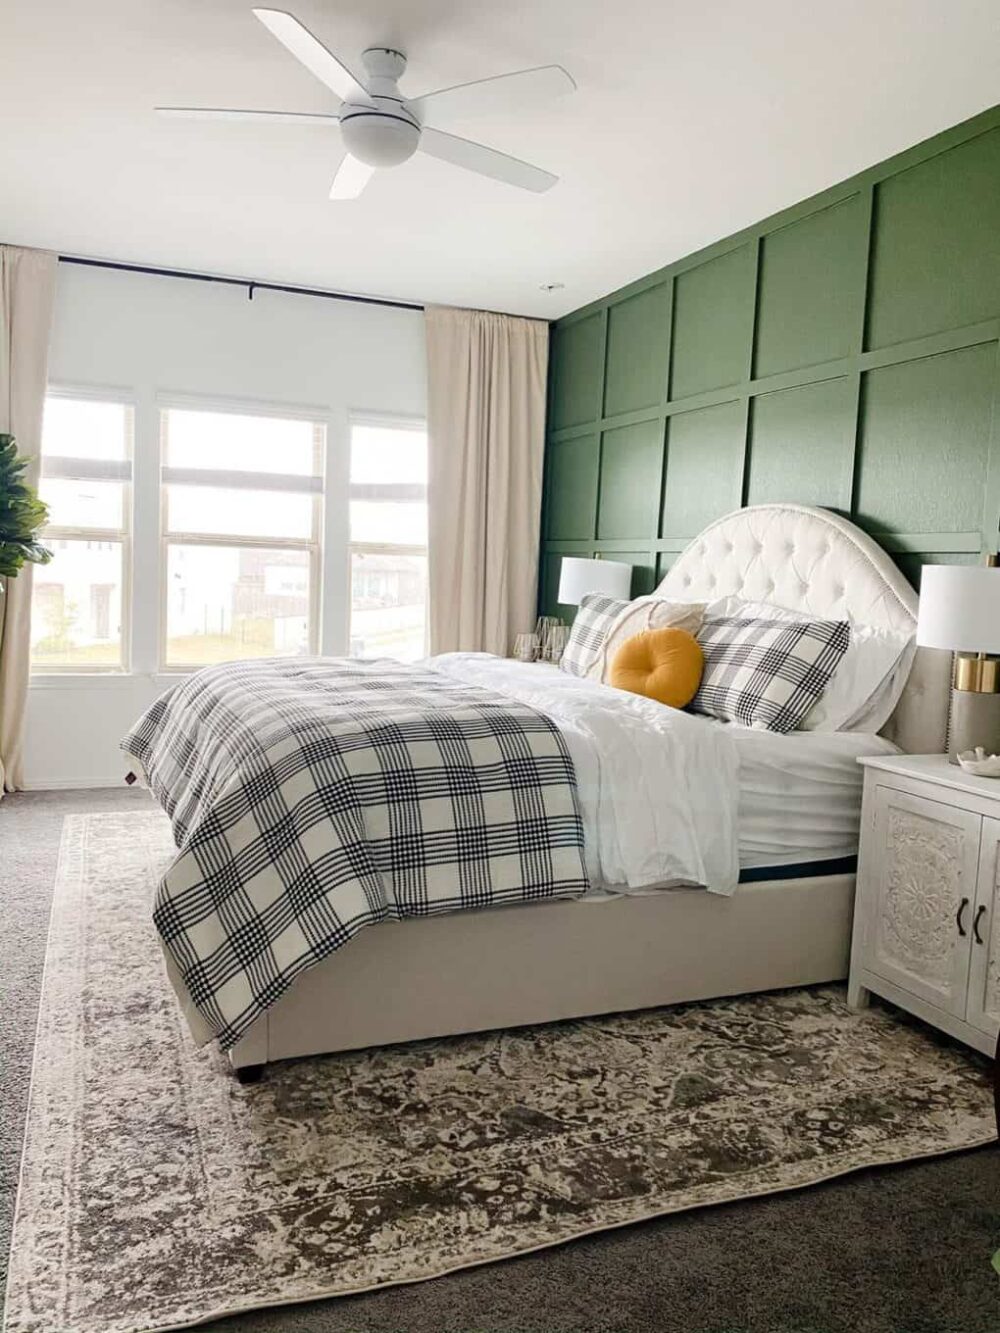
Parisa’s Room
And finally, let’s do something a little different.
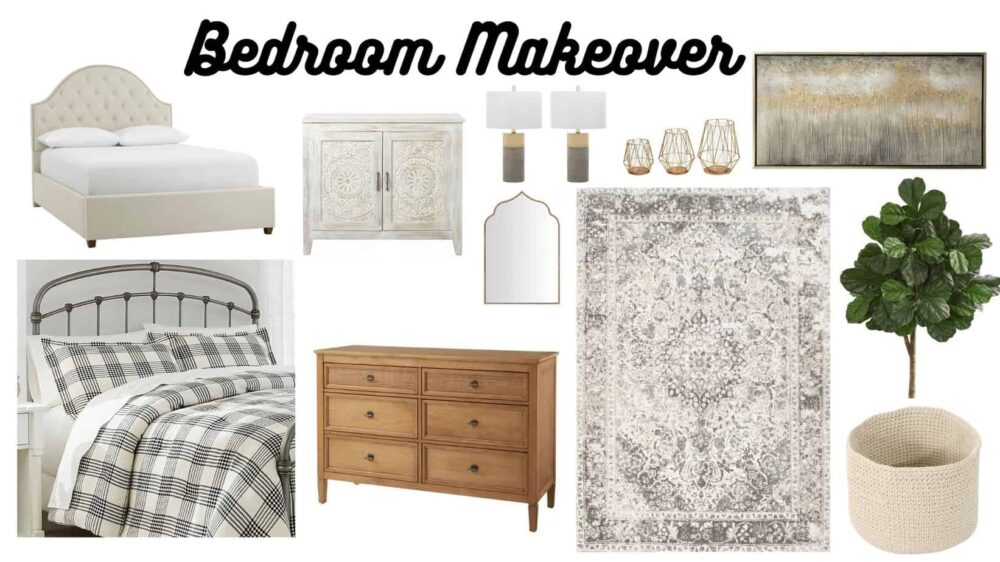
This is a great example of a product-heavy mood board. For this mood board, my best friend Parisa and I were doing some online shopping and wanted to make sure what we chose was cohesive. So, as we picked an element for the room, we’d just add it in and see how it looked! If it stood out like a sore thumb, we knew it didn’t belong.
This is a realllllyyyy great method if you struggle to pick things for your space. Create a mood board with some of the elements you already have or know you want to use. Then, when you’re shopping you can plug in something you’re considering to see if it fits. If not, you know you need to keep looking.
Oh, and as for the room above? It turned out pretty great.
Hopefully with these examples you can get some ideas for how to use mood boards in your design process! It doesn’t have to be fancy, overly complicated, or follow a certain formula. It’s just a really great inspiration board and guide to make your life a little easier.
Now, go forth and create a mood board! I’d love to see what you design if you decide to give it a shot – I promise, it’ll make a lot of your design dilemmas seem a lot less stressful when you just get all of the elements laid out together. You can easily see what works and what doesn’t, and adjust your plans accordingly. It’s a game changer, y’all!
What room in your house do you need to create a mood board for? Do you prefer digital mood boards or physical boards?
Thank you SO MUCH for this! I have always thought that your graphics pulled your articles together in such a gorgeous way. To have a step by step tutorial is a dream, especially for someone just getting into blogging and having very little knowledge about the background work!
I’m so glad to hear it, Stephanie! I love it when I can make something easier for someone!! 🙂
Thank you so much!!
Of course! Glad it’s helpful!
I was literally going to google how to do this today, but for other inspirations (Easter, birthday parties, showers). Thank you!
Glad it helped! It’s so, so easy!
Ahh, this is what I’ve been looking for! Thank you! Also, love the mood board, especially the sconce. Where is it from? Thanks!!
Yay! Glad it helped! And I meant to include the sources for that mood board – thanks for pointing that out! Here’s the link for the sconce!