DIY Standoff Mount for Art
Last updated on July 22nd, 2024 at 05:25 pm
Learn how to make a modern standoff mount to showcase your favorite art in your home. This DIY tutorial uses plywood and hardware easily found at your lumber store.
*****
Hey friends! Just a reminder – I’m away on maternity leave for the next few weeks and I’m having a few of my friends pop in for guest posts on the days I don’t have content scheduled. Today, I’m thrilled to introduce my friend Amanda from A Crafted Passion. She’s so talented and kind and you’re going to LOVE the project she’s sharing today! Enjoy!
Hi there! I’m so excited to be sharing on Love & Renovations today! Besides the fact she has pretty much the best name, Amanda is also one of the most genuinely caring people I know. I’m so happy she asked me to share a tutorial with you all and I hope you love it!
So, if you don’t know who I am, I’m the other Amanda and I share inspiration for busy moms to create, decorate, and celebrate over at my blog, A Crafted Passion. I’m on a mission to help moms make themselves a priority and find time to be creative.
Today, I’m excited to share with you how to make a simple standoff mount for art. This easy DIY project is perfect to whip up in an afternoon and can be personalized to fit so many different styles.
Let me show you how to make your own.
This post contains affiliate links. Click here to read my full disclosure policy.
What you need:
- 12”x14” 1/4″ birch plywood
- Paint to decorate your board (optional)
- Painter’s tape
- Measuring tape
- (4) 1/4” lock nuts
- (4) 1/4” x 20×1” hex bolts
- (4) 1/4” x 1/2” steel spacers
- Spray paint for the hardware (optional)
- 9” x 11” art
- Picture hanging wire
Instructions
1. Cut Board
First, you need to cut your board to size. My art was on a 9×11 inch thick watercolor paper, so, with a 1.5″ border around, that meant my board needed to be 12 x 14 inches.
Feel free to go with that measurement or whatever size fits the art you want to display.
This 1/4″ birch plywood was left over from a series I did called Naptime Craft Time where I shared a project a day for an entire month that could (ideally) be completed during naptime. I had so much fun putting together all the projects and I hope you love them too! You can check out all the simple, budget-friendly DIY projects here!
2. Sand Board
Be sure to sand down the edges of your board once it is cut. My favorite way to sand birch plywood is with a sanding sponge. Start with an 80 grit and then do 120 grit to get it all nice and smooth.
3. Paint
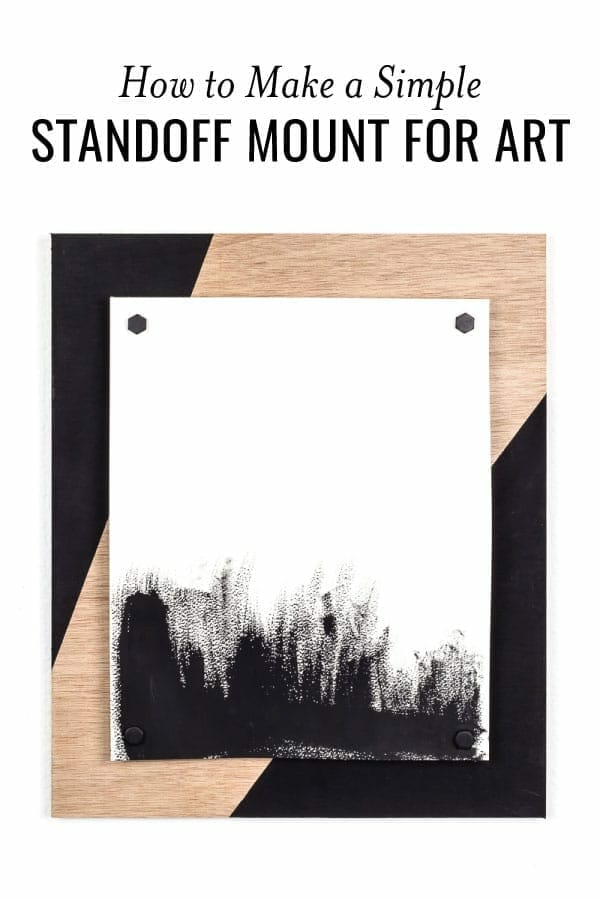
Once it’s sanded and cleaned, paint your board. Be sure it matches the look of your art that you will be displaying. I was sticking with a neutral theme for my office so opted for just two black corners to go with my abstract art.
Use painter’s tape to tape off and paint your board. You can either use spray paint (watch for overspray) or just a brush and craft paint.
I also chose to paint all the hardware with matte black spray paint to make it all cohesive.
4. Drill
Once your paint is dry, place your art in the center of your board (use a measuring tape to make sure it’s perfectly centered) and use painter’s tape to hold the art to the board.
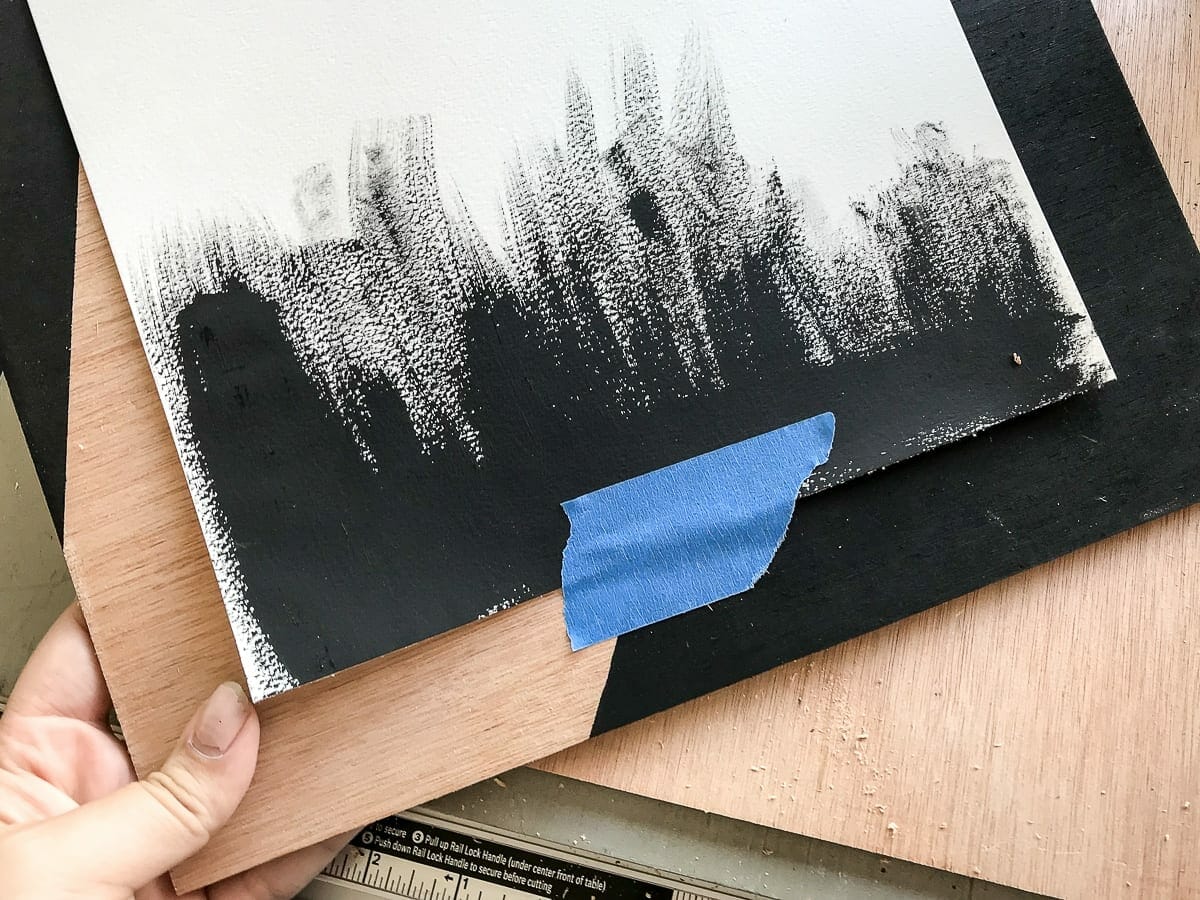
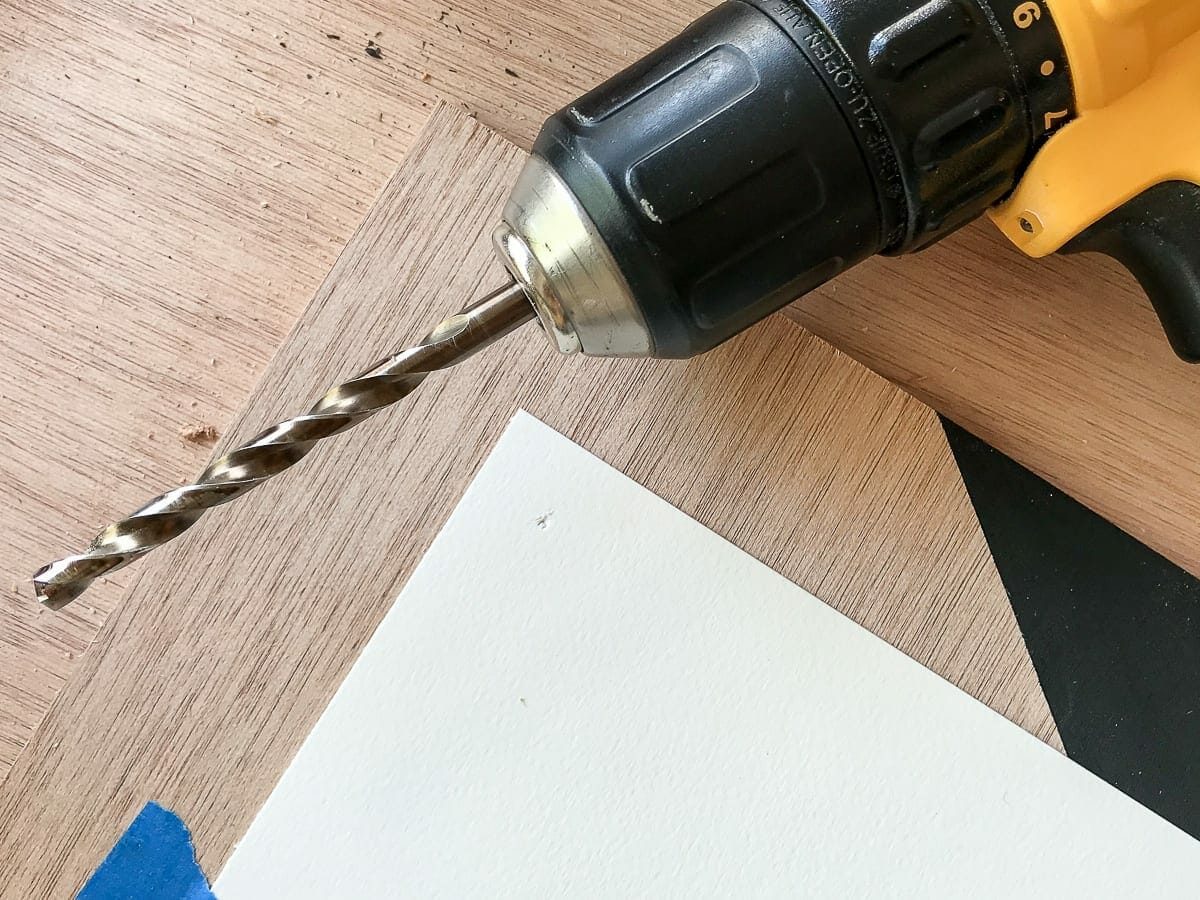
Measure 1/2 inch away from each edge in the corners of the art to mark where your holes will be.
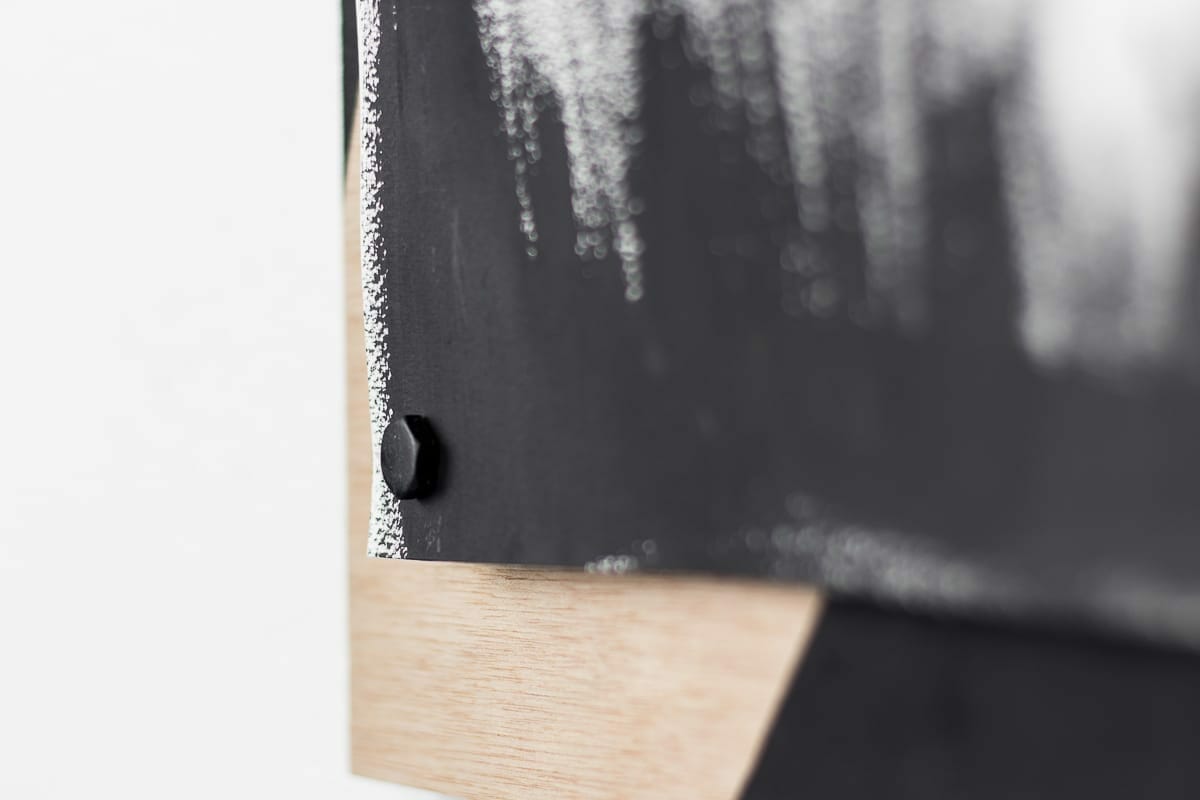
Once they are all marked, take your drill with a 1/4 inch bit and, making sure your art doesn’t move, drill a hole through your art and the plywood board. This distance will make sure the steel spacer is fully covered by the art once it’s all put together.
5. Mount
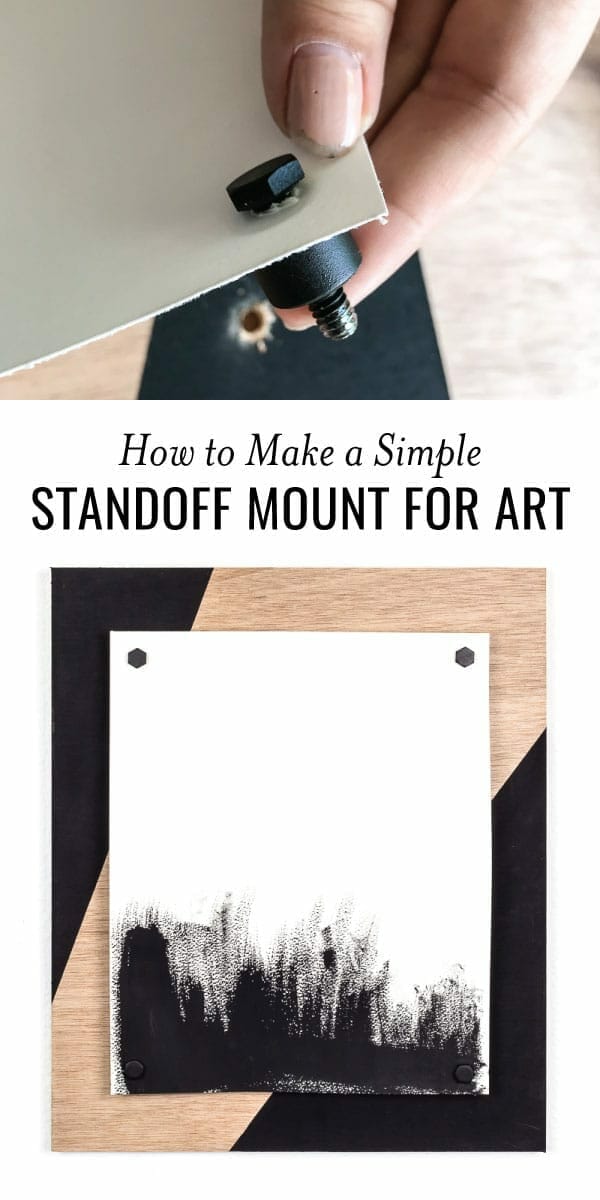
Once you’ve drilled a hole in each corner, time to put it together. First, place your hex bolt through the art, followed by the steel spacer, and then thread the bolt through the wood.
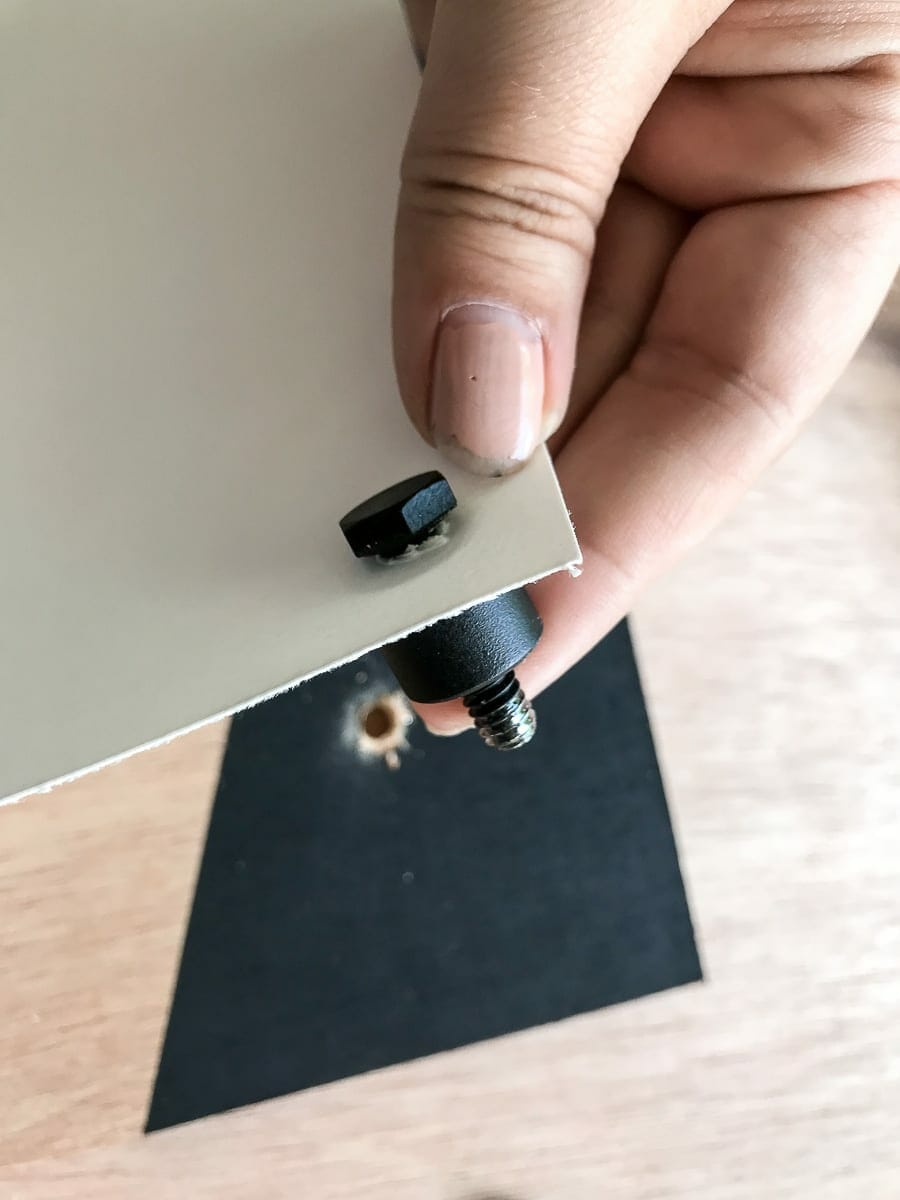
The bolt should slip nicely right into the wood without needing to thread it much, but if it’s not going through well, just give it a few turns to get it secured.
Add a lock nut on to the back side of the board to hold it all in place and you’re almost good to go!
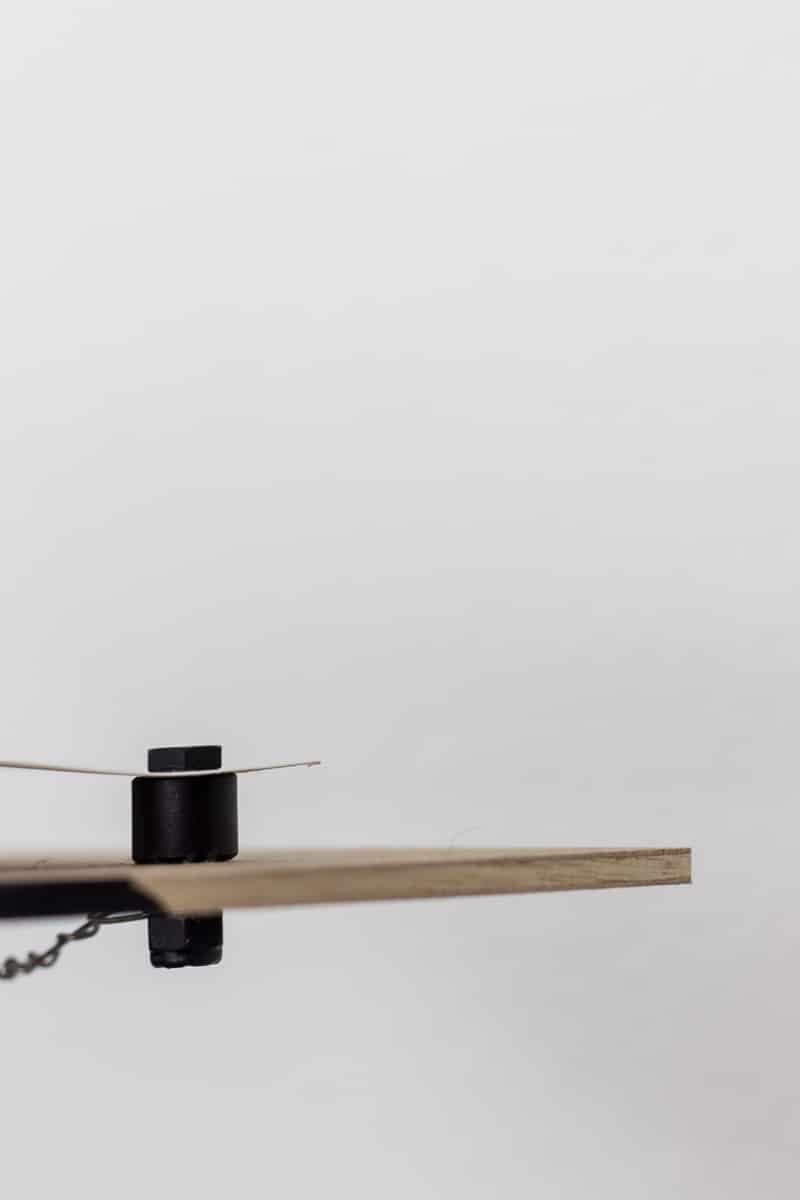
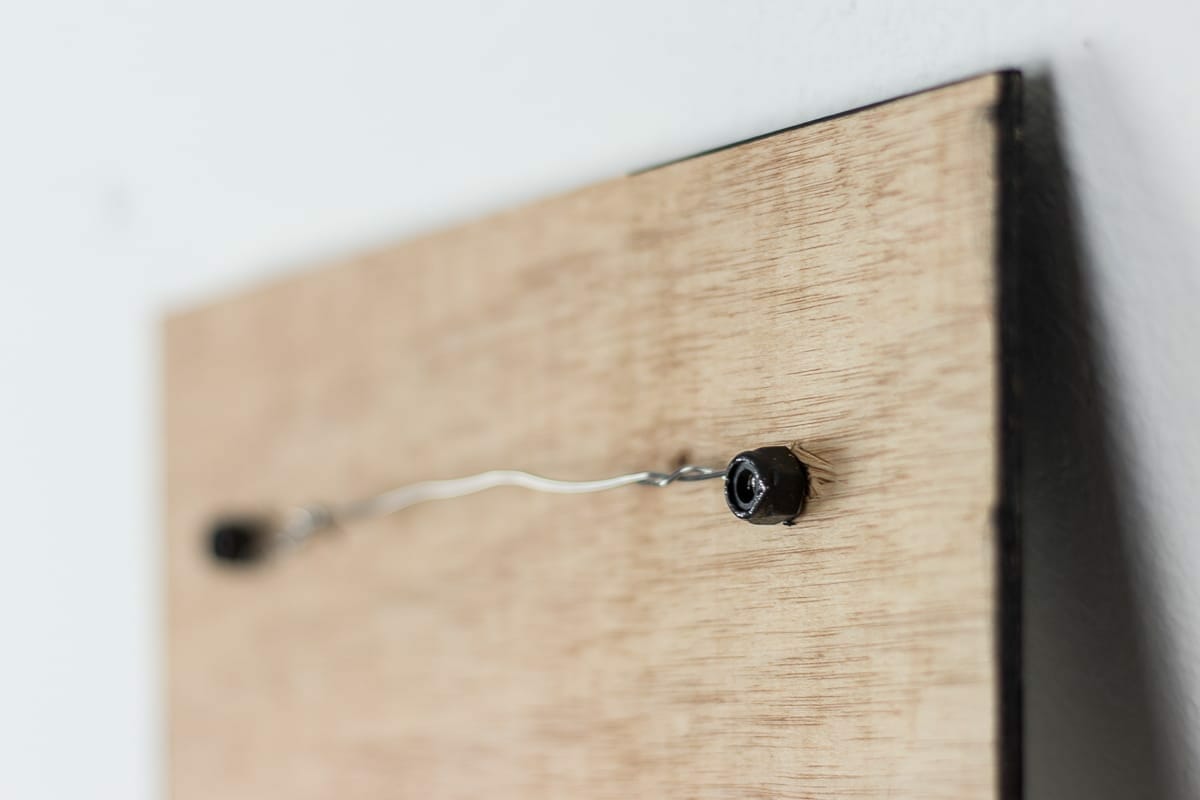
6. Hang
All you need to do now is wrap some picture hanging wire around the lock nuts on the back of the board, twist the excess wires together, and then hang it up.
I love how this art looks and makes more of a statement than your typical framed art.
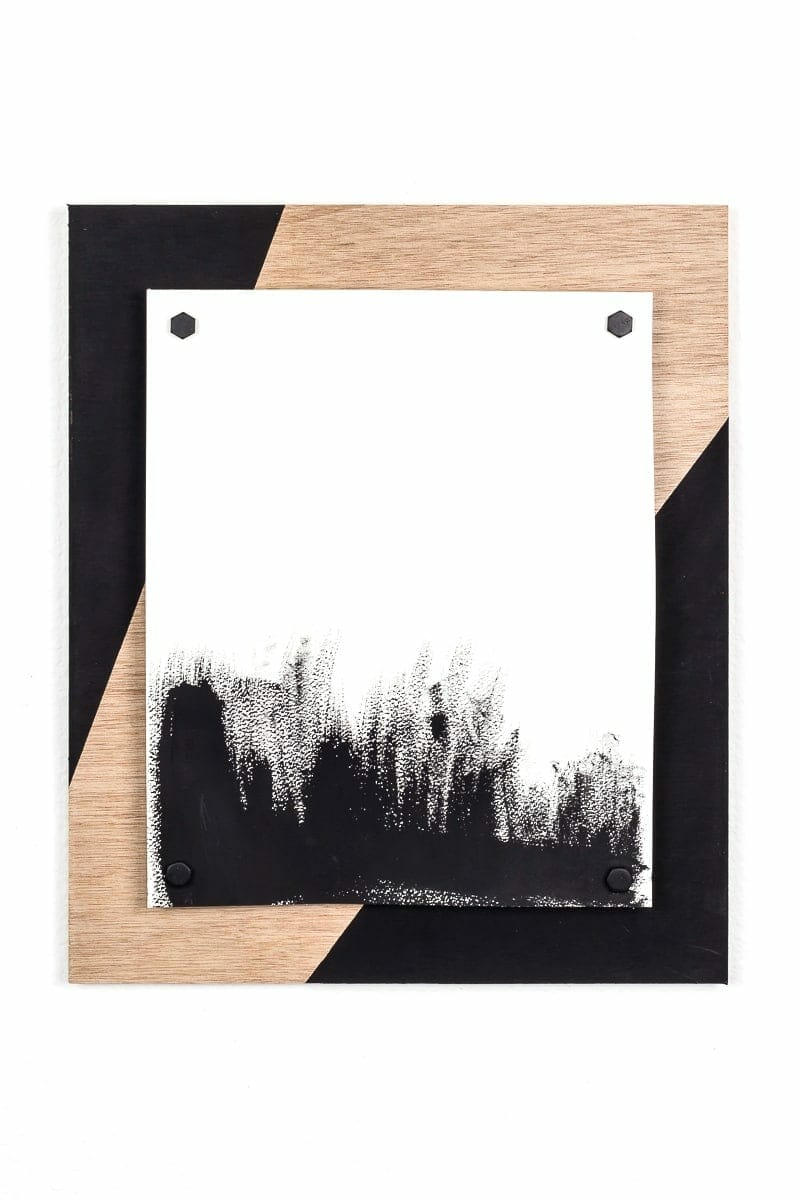
Plus, I’m OBSESSED with these hexagon bolts and I love that they are more modern than the typical round metal standoff mounts you can buy in the store.
So, what do you think of this standoff mount?
What art do you plan to display? I think this would also be really cute to display a wall of family photos.
Love this simple project using plywood?
You’ll love these other 8 budget-friendly projects you can create using only a half sheet of plywood! Get the free plans here.