
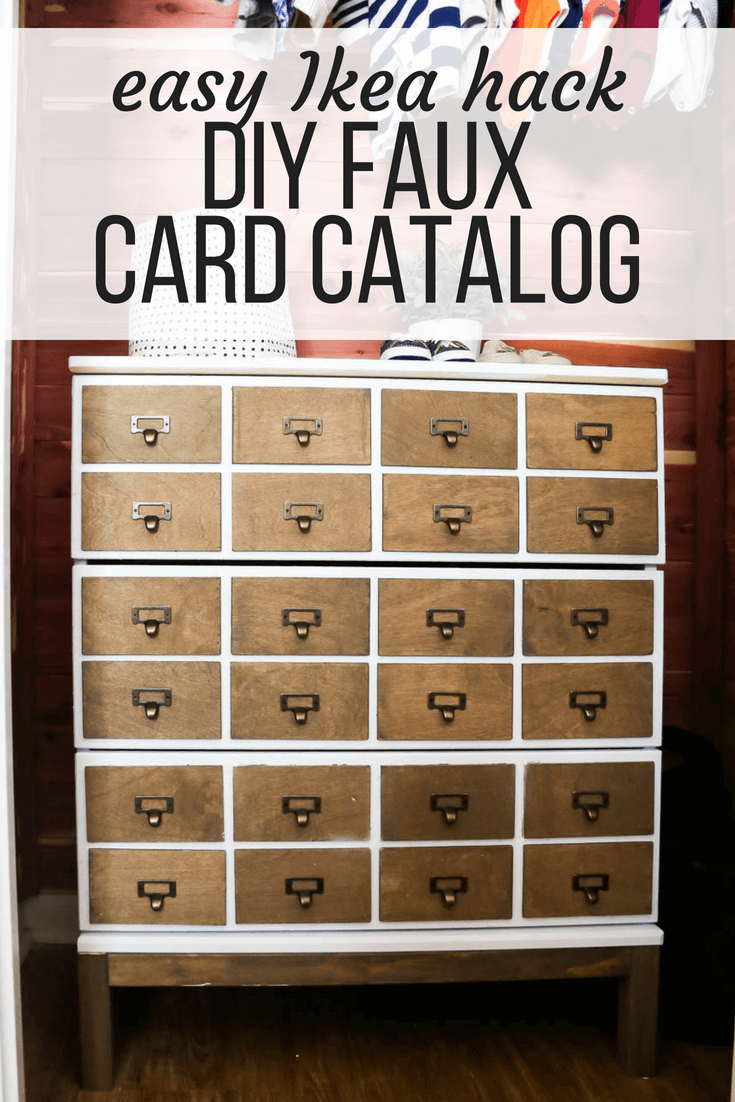
DIY Faux Card Catalog (AKA: Easy IKEA Dresser Hack!)
Last updated on July 23rd, 2024 at 11:06 am
We tackled yet another simple IKEA dresser hack! We created a faux card catalog dresser for our nursery closet. The end result is adorable and SO easy. I’m sharing all of the details on how to do it today!

I have been wanting to tackle a faux card catalog project for years now. Years! It’s been on my project-to-do-list for as long as I can remember. So, when Corey mentioned wanting to do a dresser in the closet for the nursery, I knew right away that we had to make it a faux card catalog.
related
Nursery Posts So Far…
This little dresser started off as a plain old IKEA Tarva dresser – yes, the same dresser we’ve already used once in this nursery! I love a good IKEA dresser hack, and this one is really the perfect size, perfect price point, and perfect style for the project – so why not?!
I won’t waste a ton of time chatting about the why behind this project – I think we should dive right into the “how” because we all know that’s the most important part, right?!
DIY IKEA Dresser Hack: How to Make a Faux Card Catalog
This post contains affiliate links. Click here to read my full disclosure policy.
Materials Needed:
- 3-Drawer IKEA TARVA Dresser
- Small sheet of 1/4″ plywood
- White paint
- Varathane Briarsmoke stain
- Gorilla Glue Clear Grip Contact Adhesive
- Hot glue gun
- Card catalog drawer pulls
Step 1: Paint IKEA Dresser Pieces
I started by prepping all of the pieces of my TARVA dresser. I painted everything white except for the base pieces (which would be stained the same color as the faux drawers). As you can see, on the drawer fronts I only painted the parts that would be visible after the faux drawers were added. We didn’t want to have to use any nails on the front of the piece, and glue doesn’t stick nearly as well to paint as it does to raw wood!
Also, a note: since I wasn’t planning on installing traditional drawer pulls, I used wood filler to fill in the pre-drilled holes for the drawer pulls as I was painting!
If you want a perfectly smooth finish, I highly recommend using a paint sprayer to paint the pieces of the dresser. Of course, here in Texas in the middle of August, it was much too hot to use a sprayer (I was worried the paint would dry as it was coming out of the sprayer) so I stuck to a plain old roller. Technically I think it was too hot to even be painting outside (generally speaking, it’s not a great idea to paint in super hot conditions), but what’s a girl gonna do?!
Step 2: Assemble the Dresser
Next up, you get to have the joy of assembling the IKEA dresser. Have wine on hand. Or chocolate if you’re pregnant and can’t drink wine. Pray for lots of patience and just remember that this too shall pass. You can do it!
Be sure not to assemble the drawers yet – you’re going to be altering the drawer fronts, so you’ll only want to assemble the base of the dresser at this point.
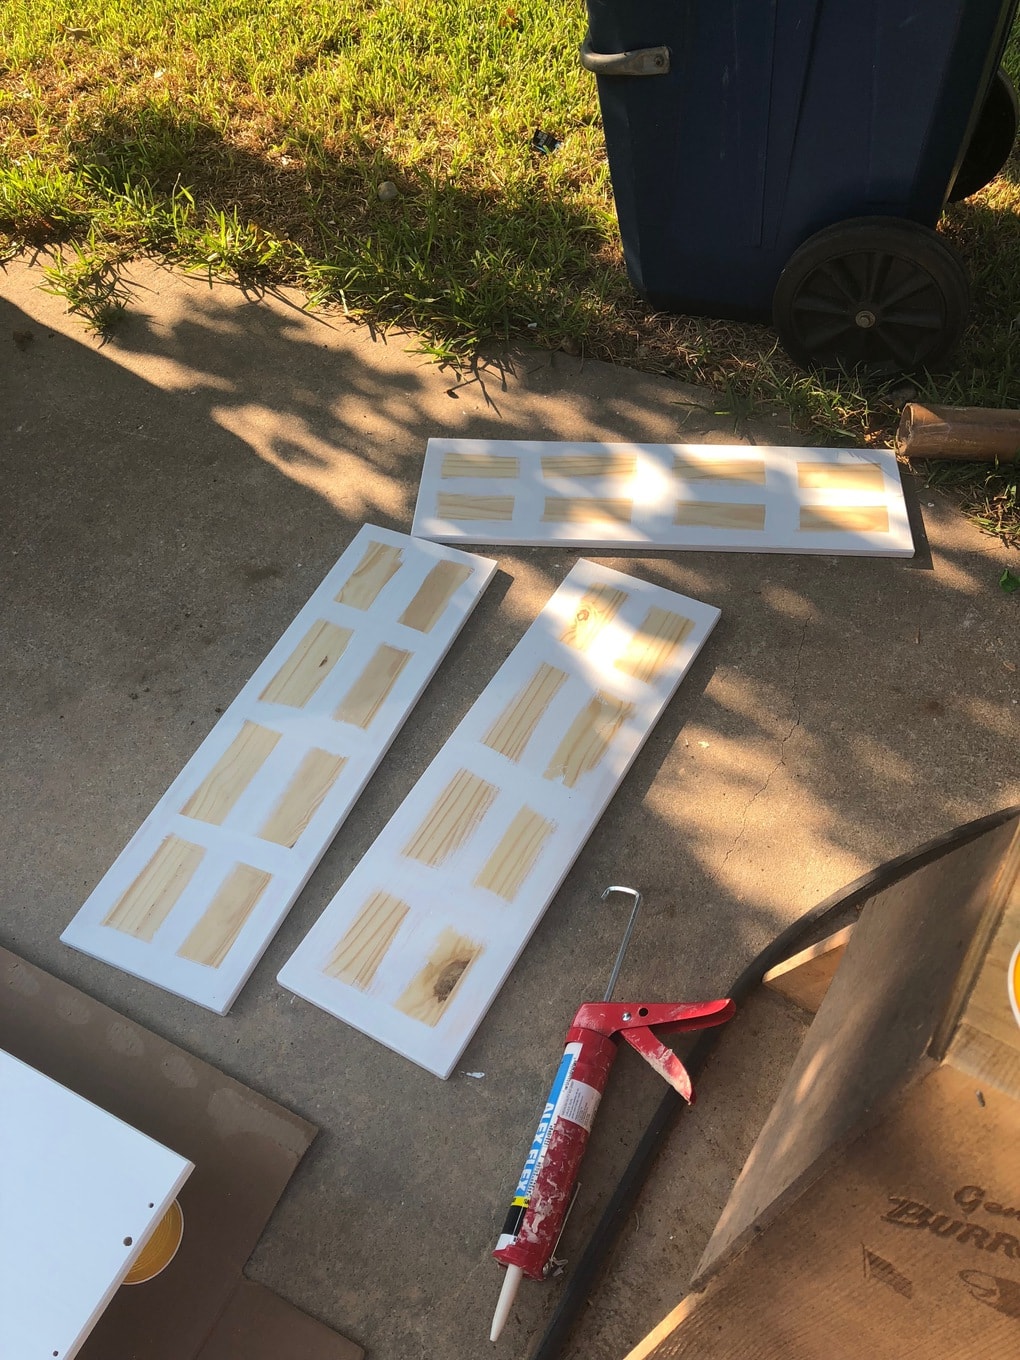
Step 3: Cut Down Plywood Pieces
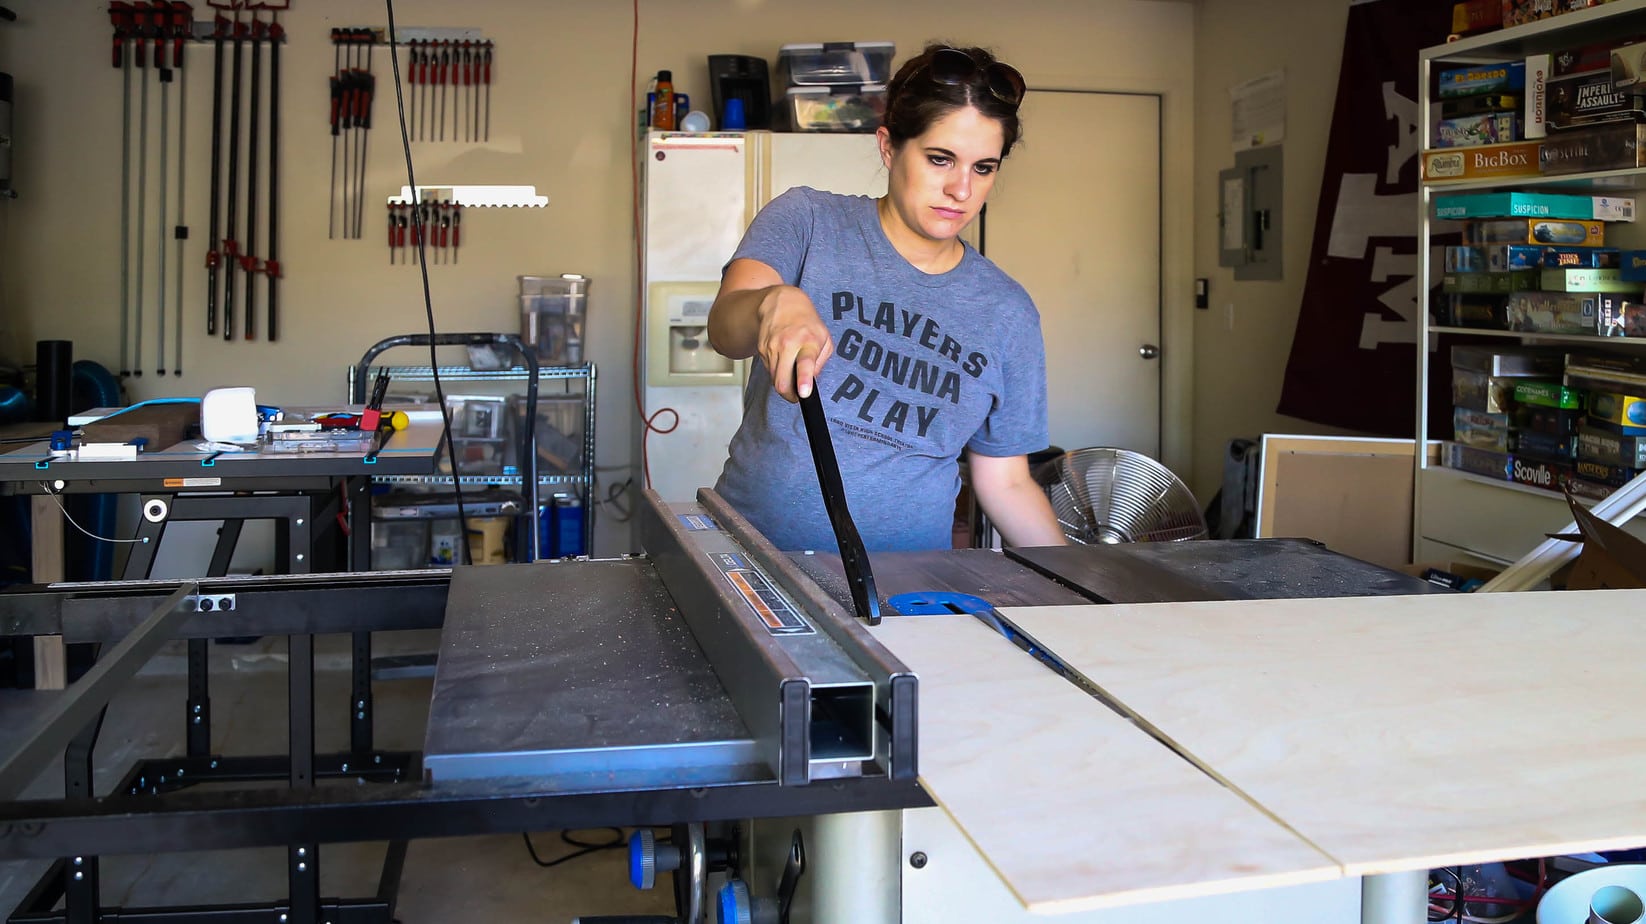
Now, you’re going to cut all of your faux drawer front pieces. A little math told me that in order to get 8 faux drawers for each regular drawer, my pieces needed to be 6.75″ wide by 3.75″ tall. So, I set up the table saw and got to cutting – 24 tiny little faux drawers, to be exact.
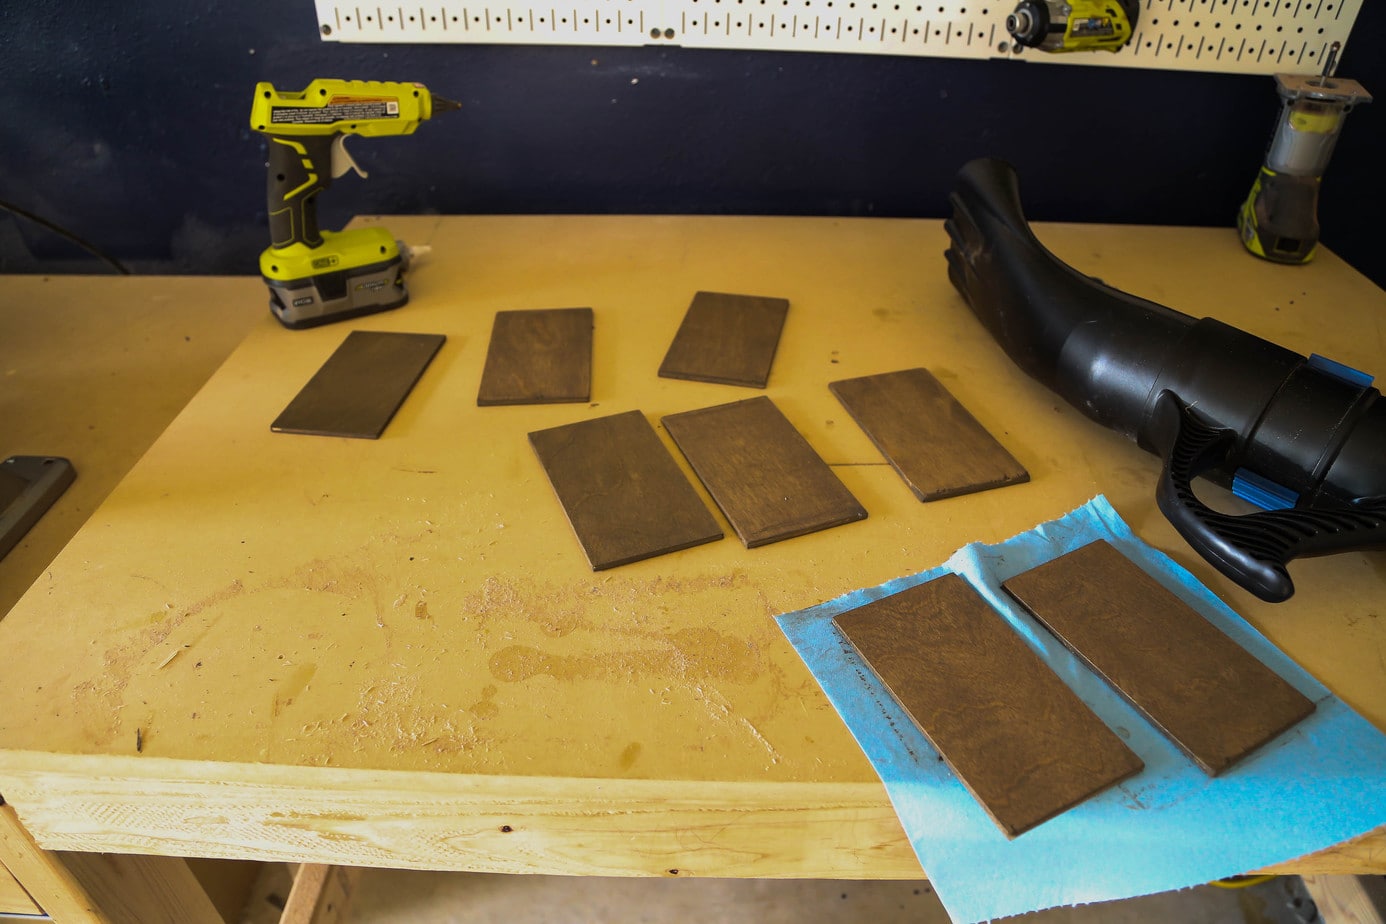
Once all of the drawer fronts were cut down, I sanded them thoroughly (focus on the edges and corners – you want it to look aged!) and then stained them using Varathane’s Briarsmoke stain.
Step 4: Attach Faux Drawer Fronts
Now, it’s time to attach the faux drawer fronts to your actual drawers. Like I said before, we didn’t want to use nails at all so we stuck to glue only. I started by applying a bit of hot glue to the real drawer front, then applied the contact adhesive to the back of the faux drawer – then, I gently pressed it into place.
The reason for using both hot glue and regular glue is that the hot glue dries extremely quickly and will help hold the drawer front in place while the regular glue dries – it basically functions as a clamp so you don’t have to worry about clamping each individual piece (which can make them shift slightly and mess with your alignment).

Step 5: Attach Hardware
Finally, you’ll add your hardware to each drawer front using the screws provided and a plain ol’ screwdriver. I shot for putting each drawer pull exactly in the middle of the drawer front – but a little variation is okay, since you want it to look vintage anyways!
Once your hardware is in place, you’re ready to assemble the drawers and put your new faux card catalog into place. Then, step back and marvel at the amazing DIY IKEA dresser hack you just pulled off!
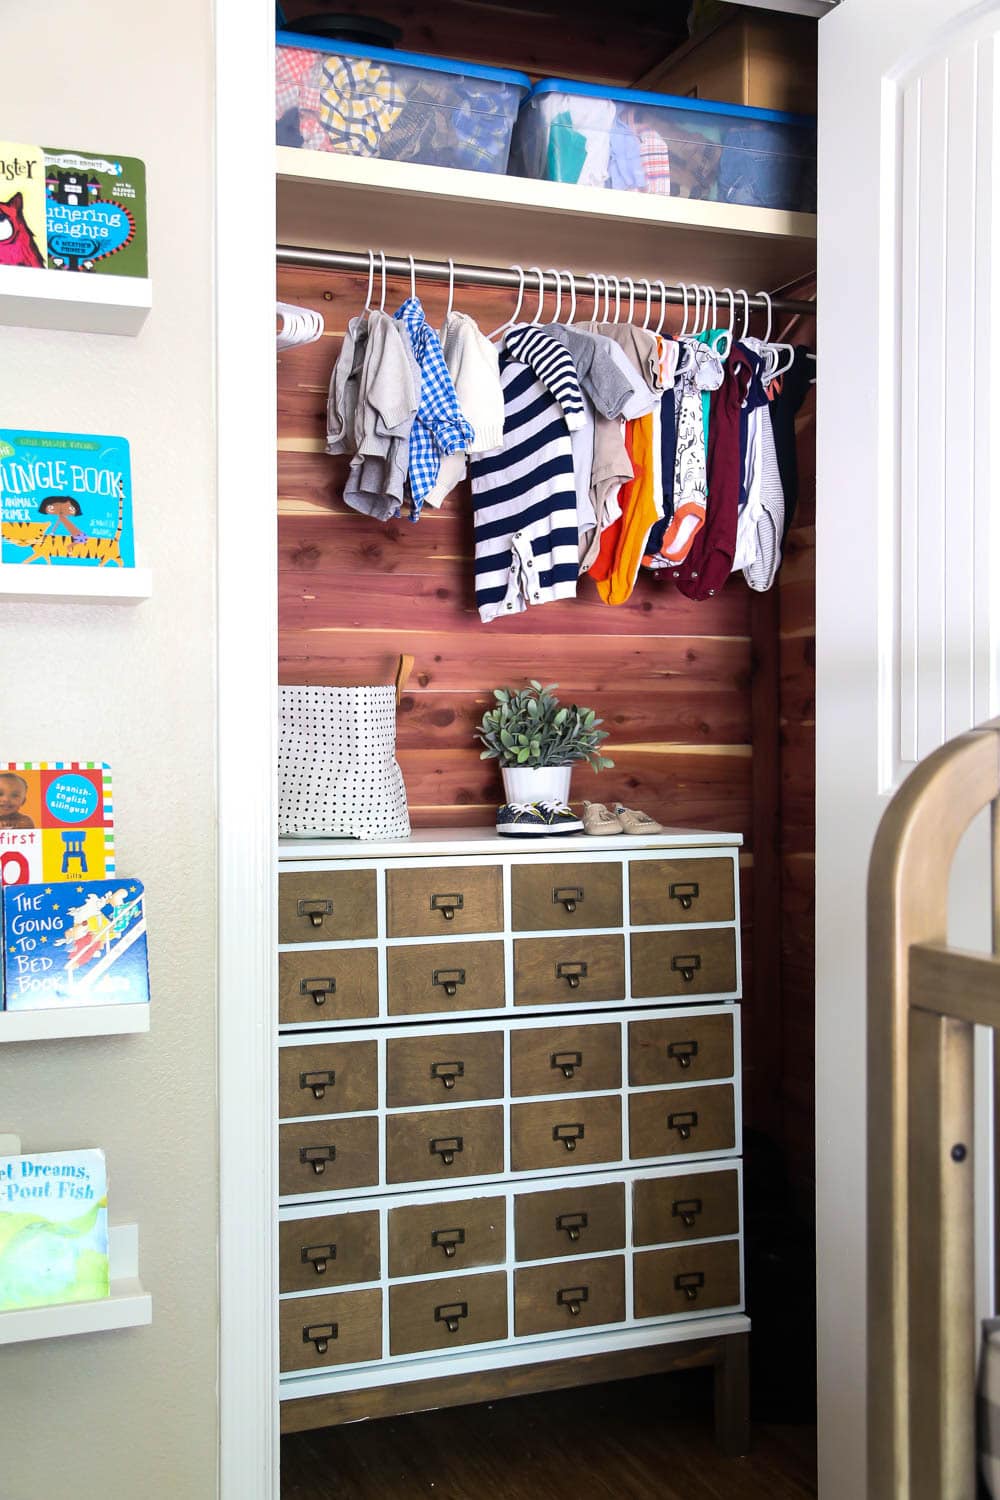
I’m pretty thrilled with how this little guy turned out – although, I have to say, it really just makes me want a real card catalog that much more!
But, until I track down that ever-elusive piece on Craigslist, at least I have something to tide me over, right?!
I think with this post I’ve officially shared all of the projects for the nursery, which feels a little bit crazy. We still have a couple of tiny things to do (we’ve got to switch out the light, install some blinds, and install pulls on the closet door), but as soon as those are crossed off the list I’ll be back to share the official room reveal! And, of course, I’ll also share all of the details on how we’re keeping the nursery organized. If you have any questions about anything specific, be sure to leave them in the comments so I can address them as I work on the posts!
This turned out really pretty!