
Our New Rose Bed
Last updated on March 3rd, 2023 at 05:16 pm
Also known as, “how we totally transformed one side of our yard”. Come see how I added a new bed along one fence to totally change up the look of our rose bushes!
I have always loved that we have five rose bushes lining one side of our yard – they’re really gorgeous when they’re blooming, and they’re easy to take care of so it makes me feel like a semi-competent gardener.
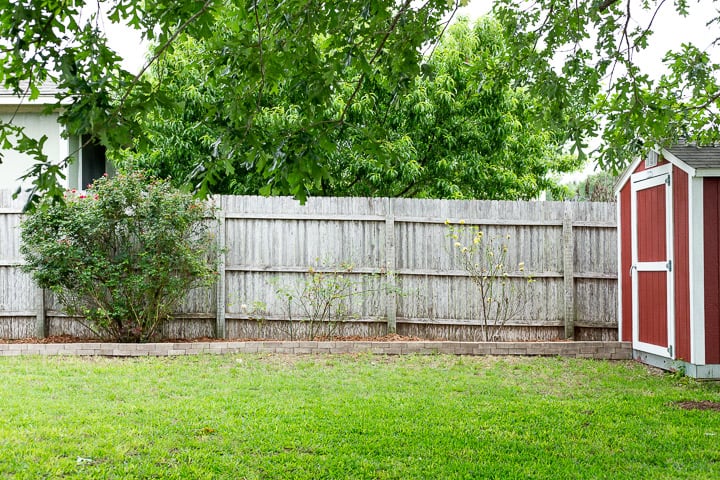
The only problem I’ve always had with the rose bushes is that they have always felt like a bit of an afterthought – there were little squares of pavers around each individual bush, but it made it almost impossible to mow around them and they tended to just look really, really messy.
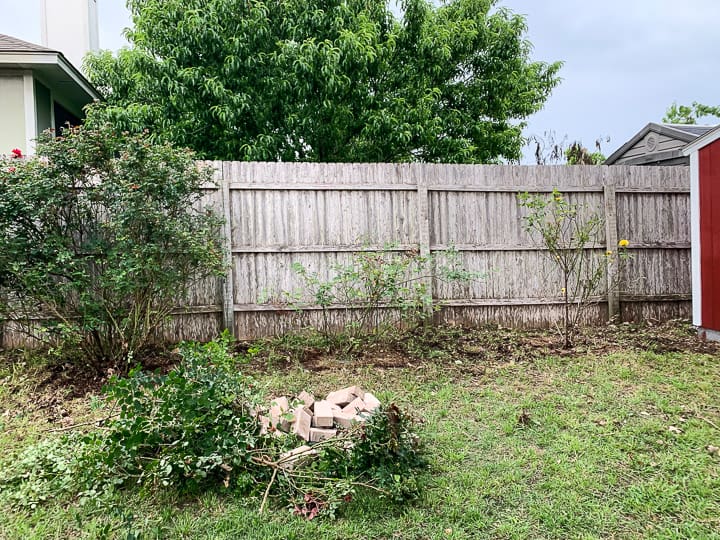
Here’s a peek at what they looked like when we moved in:
This post is sponsored by Greenworks , but all opinions are mine alone. Thanks for supporting the brands that support Love & Renovations!
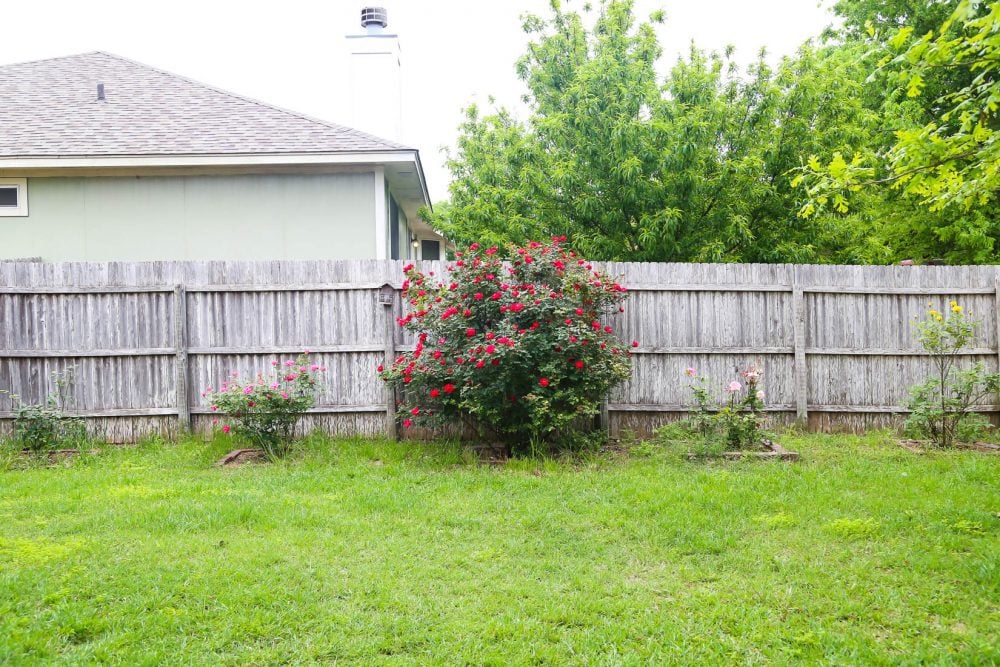
The flowers are gorgeous, but everything else? A bit of a hot mess.
I’ve always wanted to add a nice, long bed along this fence to make the rose bushes look a little more intentional, but it felt like too big of a project. Well, once I updated the flower bed in the front I realized it’s not nearly as intimidating or difficult as I anticipated. We’re currently doing a lot of work in the backyard to gear up for summer entertaining (our house is small, so the more comfortable it is to hang out in the backyard, the better!), so it was the perfect time to knock it out.
This is a really easy project, so the tutorial isn’t all that complex, but I’ll give you a rundown of what I did!
Oh, and you probably know that I’ve been working with my friends at Greenworks this spring to spruce up our yard, and if you’ve been following along you’ll know they love a good giveaway! They’re running one on their Instagram page right now, so be sure to read to the bottom of the post for all the details on how to enter, and then head to your local Lowe’s to check out Greenworks’ awesome line of gardening and outdoor tools.
tips for creating a long flower bed
Tools & Materials used:
- Greenworks Pro 60-V Cordless String Trimmer
- Greenworks Pro 60-V Leaf Blower
- Shovel
- Landscape fabric
- Landscape fabric staples
- Concrete Pavers
- Level
- Rubber mallet
- Outdoor construction adhesive
- Soil
- Mulch
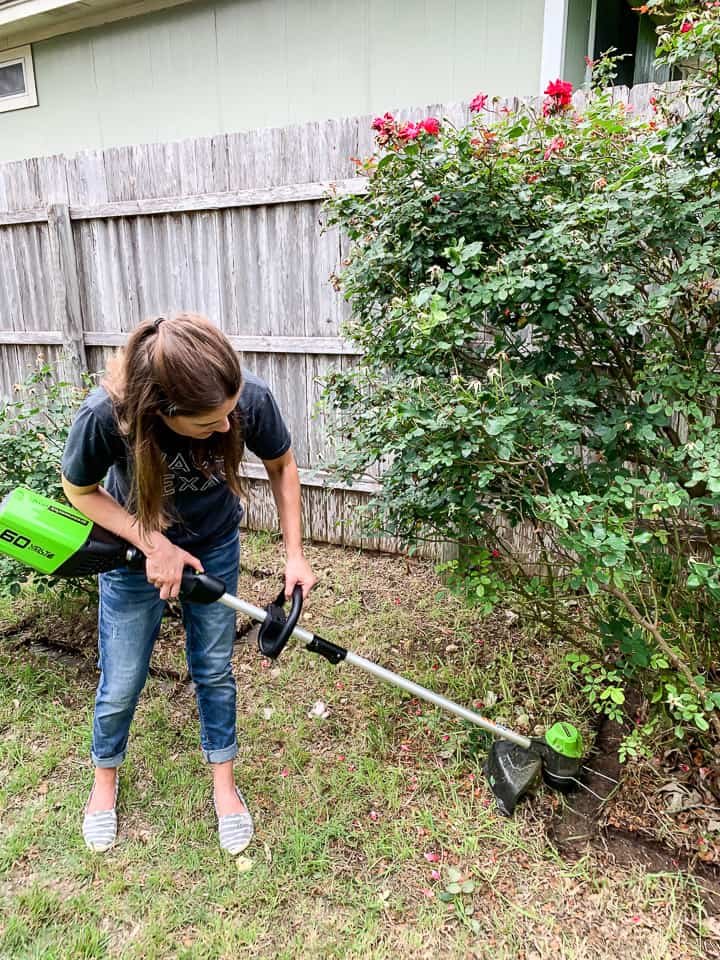
The first step of any landscaping project like this is to clean everything up. After mowing, I whipped out my Greenworks 60-V cordless string trimmer and trimmed up the entire area around all of the beds. Allow me to remind you one more time that just a couple of months ago I refused to touch the string trimmer because I was terrified of using it – there’s just something about it that was so intimidating. But, thanks to the lightweight feel of the Greenworks trimmer and how easy it is to use, I’m finally able to take care of this job on my own. It makes life a lot easier, since Corey doesn’t have a ton of spare time for lawn care.
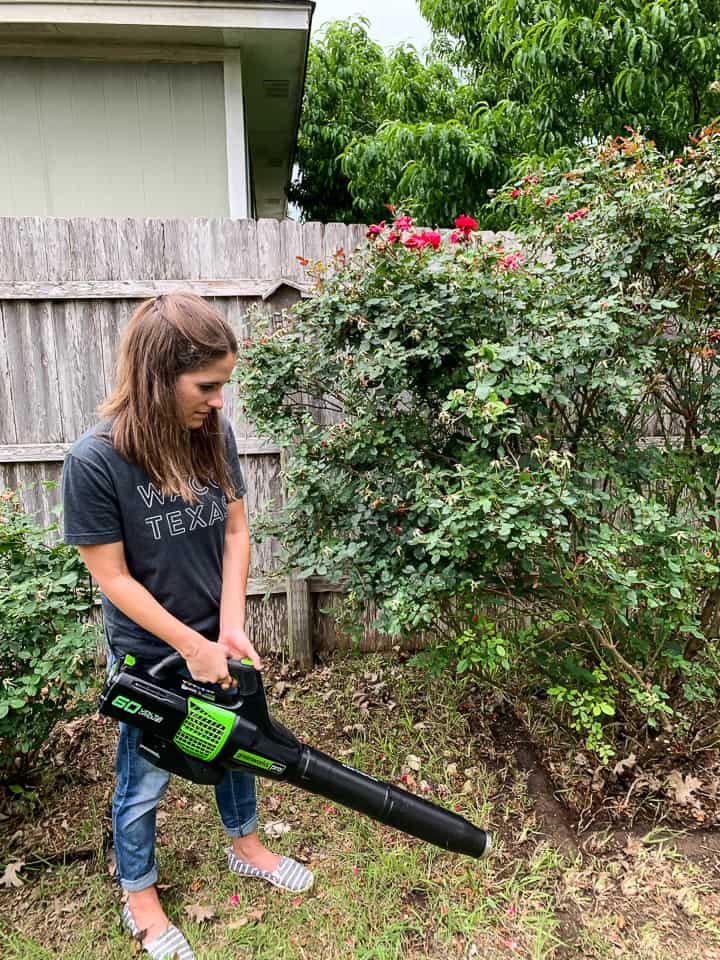
After cleaning up the grass a bit, I needed to get rid of the debris. There were lots of leaves that had gathered at the base of each bush, and there was a lot of grass clippings and other things that I wanted to clean up before I started installing the pavers.
I used our Greenworks leaf blower to blow away all of the leaves and debris – I love that it has a turbo button on it to get rid of anything stubborn. It made it a lot easier to blow away all of the leaves that had gathered underneath the bushes, and it only took me about five minutes to get the area for the bed totally cleared. The other beautiful part is that after using the leaf blower I realized I actually had very little grass left to dig up in order to prep the bed – I love a tool that saves me some manual labor!
Once the entire area was cleaned and prepped, I used a shovel to dig out all of the remaining grass. As you can see above, it was really patchy already so after using the string trimmer and the blower there really wasn’t that much left to do.
Here’s how it all looked when it was prepped and ready for the landscape fabric:
It has to get worse before it gets better, right?!
Next up, I installed landscape fabric all along the fence. All you have to do is lay the fabric down and use landscape staples to hold it in place. This will help kill any remaining grass or weeds and keep things looking nice and neat.
After the landscape fabric has been laid, it’s time to install pavers. I’ll give a disclaimer that I take a more casual approach to this than a more, um, professional landscaper might. The formal way to install landscape pavers would be to dig down a bit and lay down a couple of inches of sand to ensure a totally level and compact ground before putting the pavers into place. After talking with my dad about it (who has been taking on these sorts of projects for years), we decided that for something like this it’s fine to just level out the soil and lay the pavers down. It’s how they were installed on the existing border and those haven’t shifted at all, so I feel confident that it’ll last.
So, my process was as follows:
- Dig out the soil a bit to get it mostly level.
- Lay down a paver and use a small level to check if it’s level in every direction.
- Adjust as needed, then hit it several times with a rubber mallet to help compact the soil underneath and get the paver set in place.
- Check for level again, then adjust as needed.
- Repeat the process with remaining pavers, but also check that the pavers are level to one another!
There’s a lot of tweaking and adjusting and scooting the soil around, but it moves faster than you’d think!
I laid one row going from the fence all the way to the shed, then for the second row I staggered the pavers in a brick pattern. I had originally planned on just stacking them but Corey pointed out that it’s much less structurally sound that way. I don’t really need this little border to do any heavy lifting when it comes to being sturdy, but I would like it to last, so I decided to stagger them instead.


I’ll also note that there was one area where the ground began to slope, so I needed to add an additional row of pavers underneath. Once I got to a point where I was having to add in a bit of dirt to bring the soil up to level, I instead started digging down and adding in another row – if you just add dirt, it’s likely to get washed away the first time you get a heavy rain and then your whole wall crumbles. It’s a little extra work to add a row of pavers, but in the long run it’s definitely worth it!
I also used some construction adhesive to attach the top row of pavers to the bottom row. It’s not a completely necessary step, but since my kid likes to use these retaining walls as a balancing beam, I figured it was worth it.
Once your retaining wall is built, you can add in soil and mulch to make it look a little nicer and cleaner, and you’ve got a brand new flower bed!
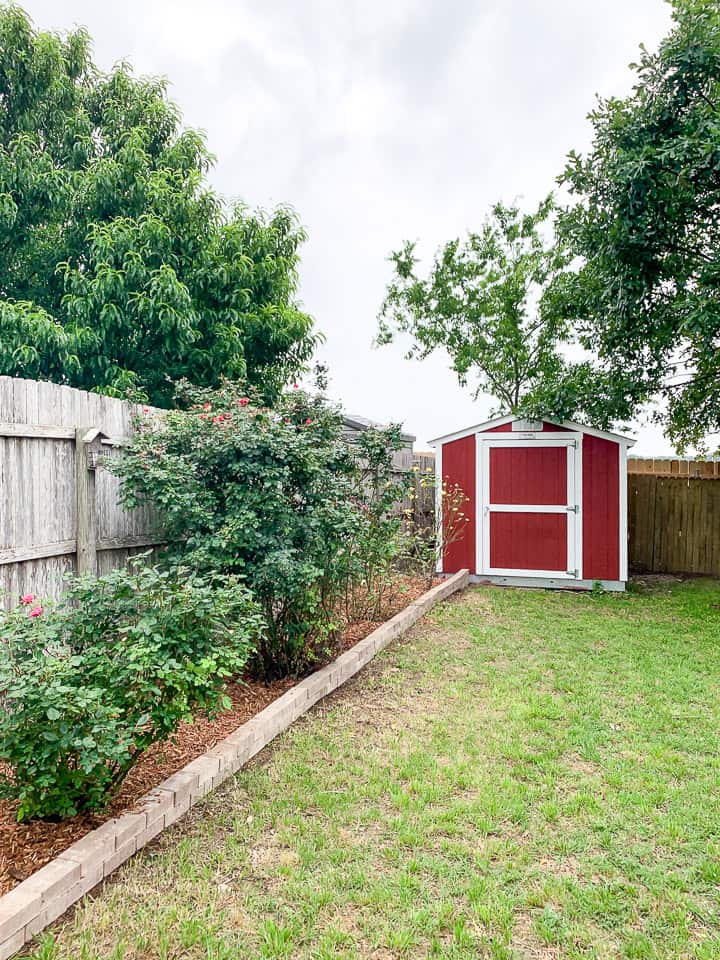

I’m so excited to have this space looking a little neater for the summer, and I think this is a much more functional option for us. We always have kids running around in the backyard when we entertain, and there’s something about a designated bed that tells kids to stay out versus just the wild jungle it was before (which looked oh-so inviting to those little eyes!).
And, of course, this will be much easier to maintain than the old setup was. Now I can just use my Greenworks string trimmer to keep the grass neat along the border and I don’t have to wrestle with getting the mower and string trimmer in-between each rose bush!
GREENWORKS GIVEAWAY

If you want more info on any of Greenworks’ fantastic and easy-to-use lawn and garden tools, head to your local Lowe’s to check them out. I can highly recommend everything we’ve tried so far, and I just love that they make it so much easier for us to get our yard ready for summer.
If you want a chance to win one of three $300 gift cards to Lowe’s to pick up your own Greenworks tools (and, who doesn’t want to win?!), head over to Greenworks’ Instagram page and follow them, then like their post about the giveaway. You can tag friends in the comments for additional entries. GOOD LUCK!