
Moody Beadboard in the Entry
Our entry is feeling so much more complete now that I added some tall wainscotting and I’m so excited to share the progress today!
Ahhhhh!!!
So! Much! Better!
I’ll confess to you that any time I wrap up a project and then declare that it’s not done and I need to add something else…I get really nervous.
What if I was wrong?
What if I add the next thing and it looks awful and I regret it and wish I had left well enough alone?!
Well…
That happens sometimes but not today!
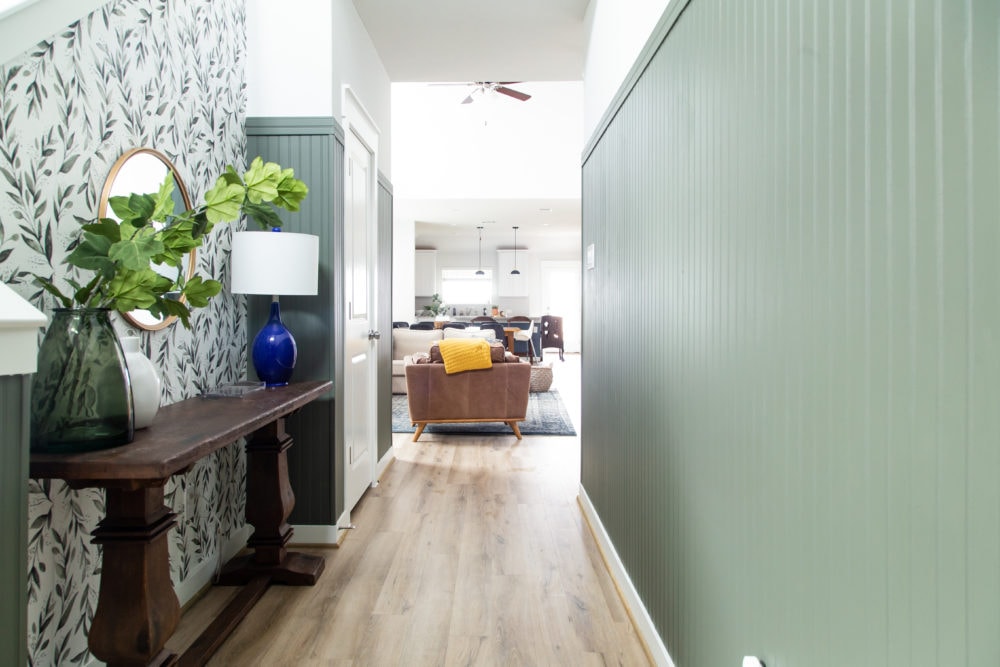
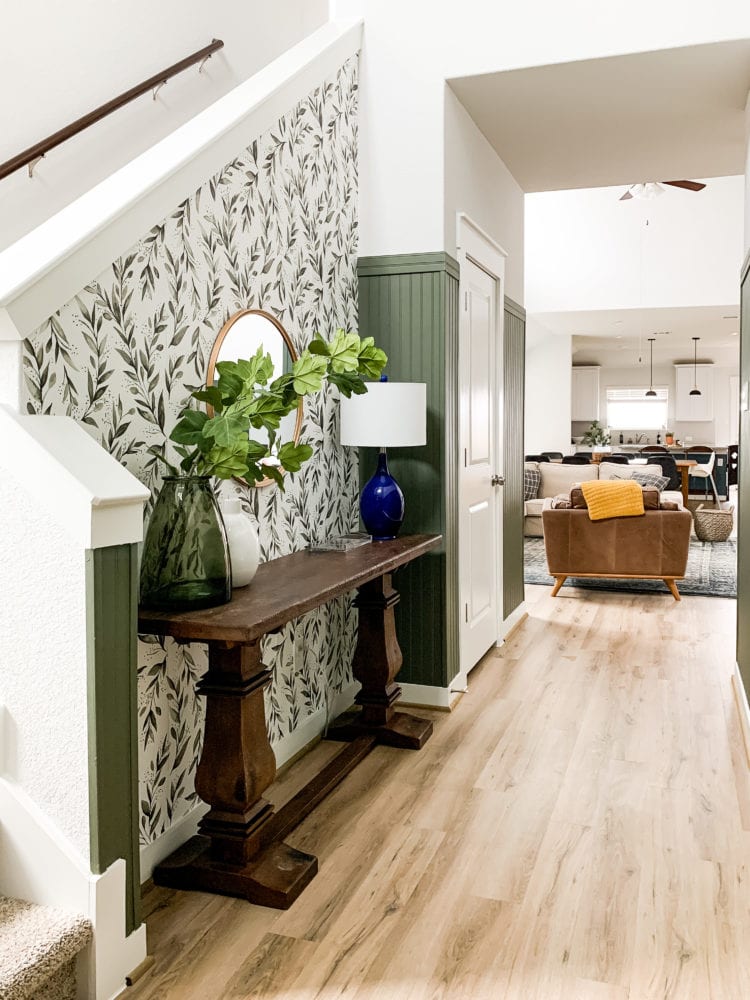
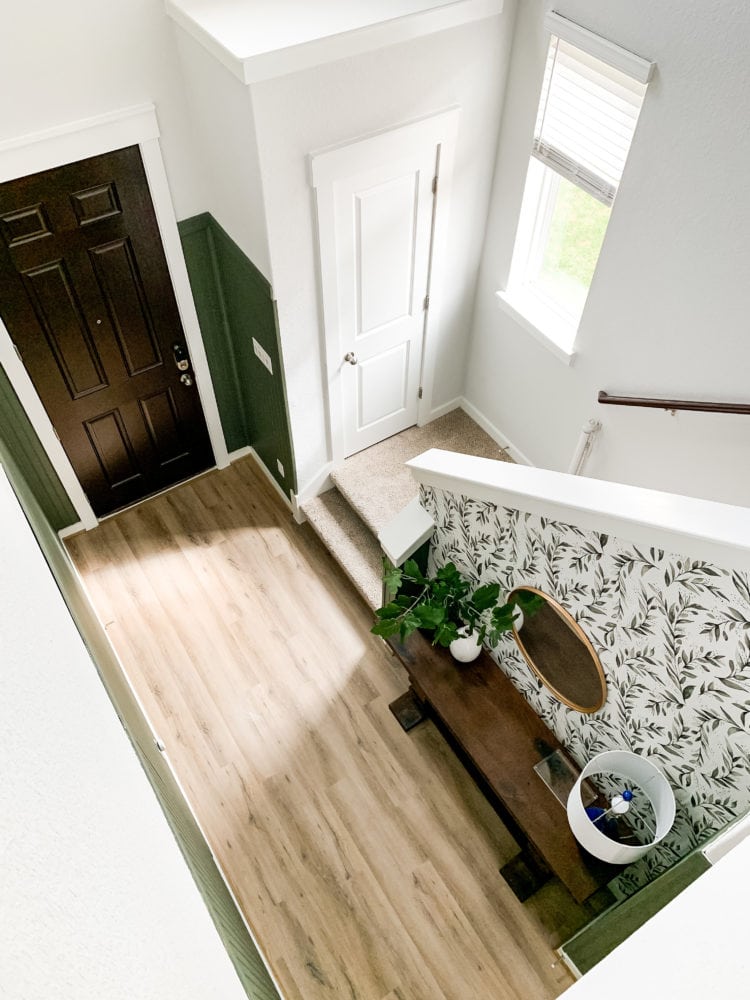
There was a tiny part of me that questioned if doing 6′ tall beadboard in our entryway was the right way to complement the wallpaper we’re obsessed with or if it would just take away from the special feeling that nook gives you. But, with every step I took on this project I was just more and more convinced that this was the right move.
Confused? Let me take a quick step back to do a recap if you missed anything.
When we moved in, this entry was a total blank slate. Earlier this month, we gave the staircase nook a makeover. Then, I shared that I felt like things weren’t quite finished and I detailed the list of things I still want to do here.
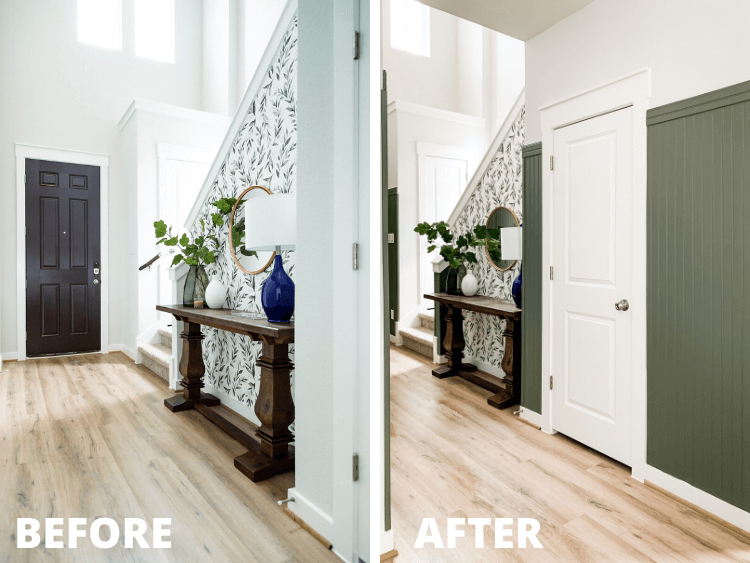
And now? Let’s have a before and after…
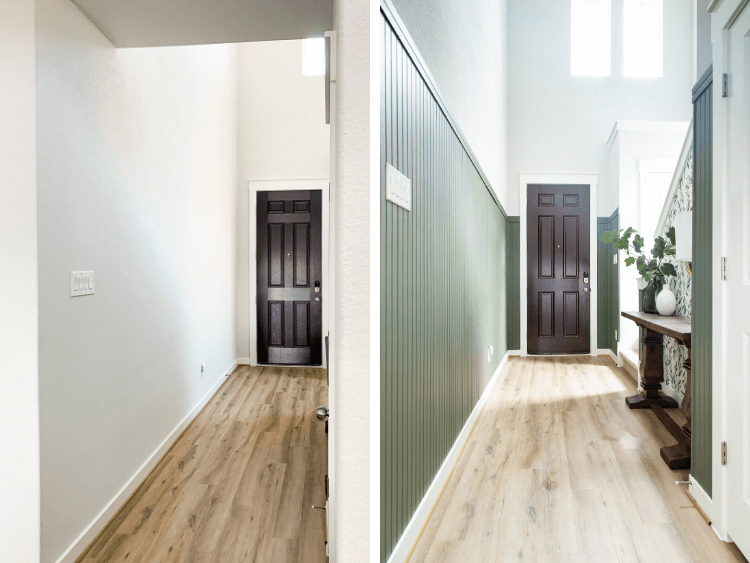
Eeeek!
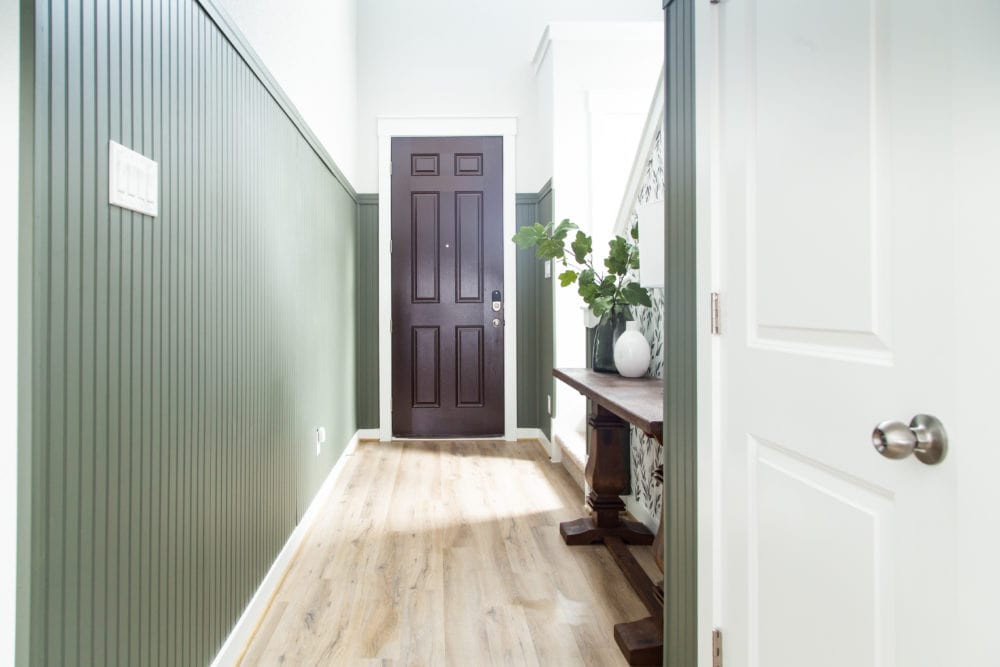
I’ve worked with beadboard a lot in my time – we’ve used it in all three of our homes now, and it was in three separate spaces in our second house! But, this was my first time installing the taller stuff (I usually stick to the traditional shorter beadboard) and I’m so glad I decided to branch out and try this. It feels so grand and statement-making when you walk in the door, but it also helps bring the tall ceilings down a bit and makes sure the space still feels cozy and welcoming.
Long story short? I’m obsessed.
installing tall beadboard in the entry
For this project, I used 4X8 sheets of beadboard paneling (also referred to as wainscot). Beadboard typically comes in a few different styles:
- Individual planks
- 32″ x 48″ panels (which is what we’ve used in the past)
- 48″ x 96″ panels (what we used this time)
The panels end up being quite a bit cheaper than the planks, and while I’ve always enjoyed the look of the 2.5′ height, I wanted to try something different because our ceilings are SO! TALL!
I didn’t want ours to be a full 8 feet tall – that felt a little excessive – so I played around with a few different heights and I landed on 6′.
I had a lot of questions on Instagram about if there’s any rule of thumb for how tall to hang it the simplest method is to remember the rule of thirds – it will look best if you keep the paneling at about 1/3 (or 2/3) the height of your ceiling.
So, if you have an 8′ tall ceiling, stick to the typical 32″ panels OR go tall and do it at just over 5′.
We have 20-foot ceilings, which means that 1/3 of that height is just over 6.5 feet, which explains why 6′ is the height I ended up being happiest with – it just naturally looks best to follow the rule of thirds!
Remember that you DO NOT have to strictly follow this rule – if you want to go a little taller or shorter (like we did!) that’s fine. But, it’s a good starting point if you’re feeling stuck and not sure where to begin.
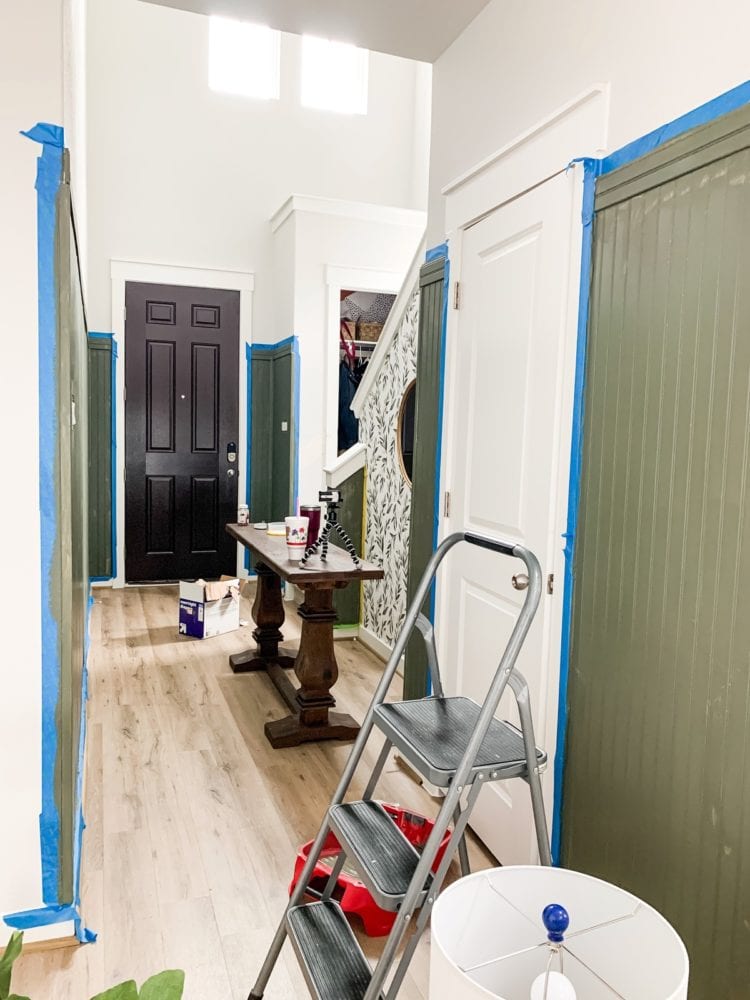
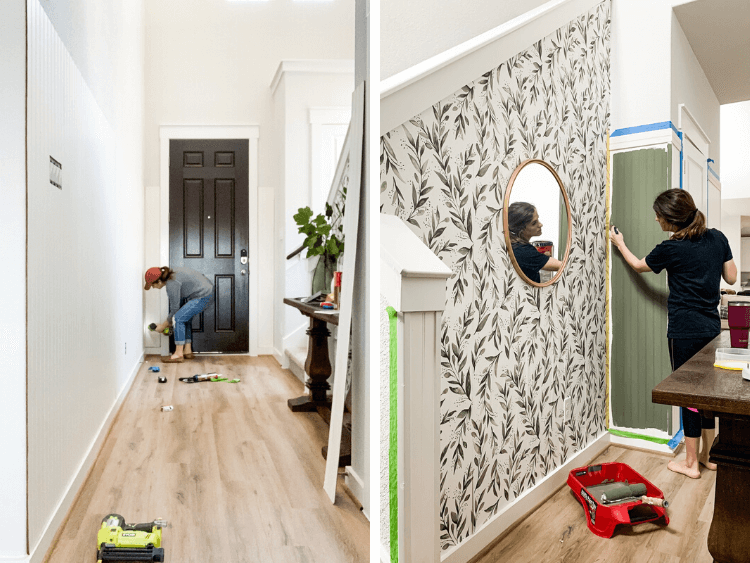
I’ve already written an entire post on how to install beadboard paneling, so I’ll just point you in that direction if you’re looking for a tutorial. The biggest difference between this project and my previous ones was simply that I needed to cut each panel down to 6′ tall before I installed them. Other than that, it was the same!
Once I installed the beadboard, I caulked all of the gaps (and the seams where the panels met!) and painted the whoel thing Bonsai Trunk by Behr. It’s a deep, moody olive green that changes color and tone throughout the day and it makes my heart so happy. It’s the perfect color for this space, and it really makes a huge statement when you walk in the door!
Another small detail you might notice is that I removed the small, awkward hand rail that was by the front door. There are only two stairs before the lower landing, and that silly little thing drove me crazy every single day. Yes, it was probably building code for it to be there, but if we ever decide to move we can just replace it – no big deal!
Worth. It.
This project really fully played itself out over on my Instagram stories, and I saved it all to a highlight for you! So, if you missed anything you can watch it over there and see the project unfold from start to finish.
Next up on my to-do list for this space is painting the door and figuring out what I want to do to finish it off. Do I want to add a rug? How about art? And where should I hang it? Just above the stairs, or on the beadboard wall too?
So. Many. Options.
Entry Sources
- Beadboard Color: Bonsai Trunk by Behr
- Wall Color: First Star by Sherwin Williams
- Peel & Stick Wallpaper
- Console Table
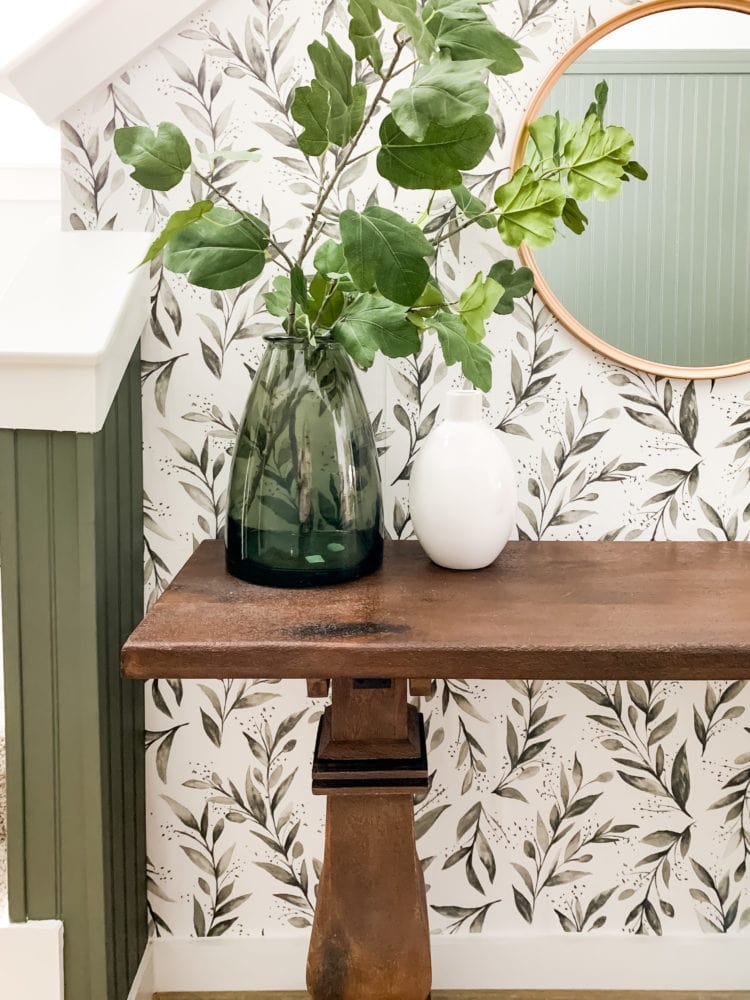
- Round Gold Mirror
- Blue Table Lamp
- Glass Vase
- White Vase
- Candle
- Acrylic Tray
- Baby gate

Hi! I live in Denison, TX so hi neighbor! I love your hallway. I am wanting to do something kind of similar to our newbuild home as well. I keep changing my mind on how/where to start. My hubby and I are working on building (mostly hubby) a mini-mudroom set up and I’m thinking of beadboard behind it-and then down my hallway as well (hubby doesn’t know that is on my radar at this point. 😉 I do also think I might then put it in bathrooms as well to add some dimension and style. I love the picture frame wainscoting but we have orange peel textured walls-and it’s messing with every single idea I want to do. Sigh. I love that you have the board and batten in your hallway and the beadboard in other spaces. I have thought about combining a couple of different wainscoting in my home too!
I love your entryway table! Did you design and make it?
Hi! No, it’s from Home Depot, but I believe it’s not available anymore.
I think the other readers are right about adding a runner. Leave the trim white but paint the door white. If it’s possible to continue the bead board up the stairs I would. Also some type of ceiling pendant light over the door . Nice
I’m not sure how this works, but I think the nook decor/wallpaper and painted bead board make your hallway look wider! It’s definitely becoming a statement entry. Just beautiful!
Looks great! When I first looked at the photo I thought you had painted the door a deep plum color. That would be a punch of color! 😁
Love it!
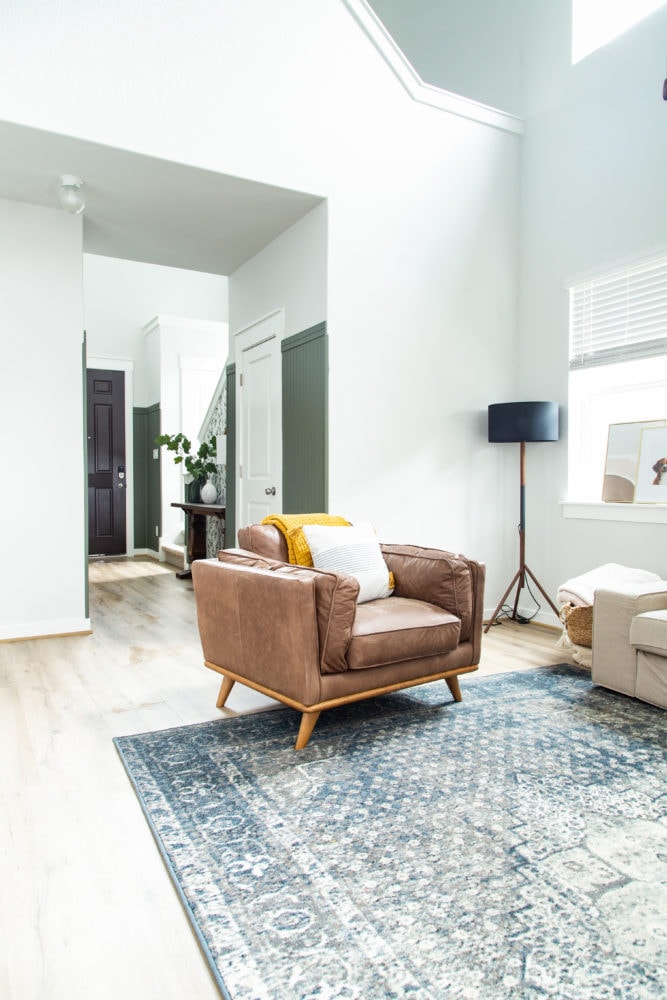
I vote Yes rug. No art. (I think you said photos going up the stairs? Which would be awesome. Also art in the wall behind the sofa to keep your eye moving into the living space when you enter).
So fun! Can’t wait to add box molding to my entry!!
Looks great! My opinion (since you asked, haha)- definitely add a runner. Don’t add art to the beadboarded walls, but do add art up the staircase wall like you had mentioned.