
The Thrift Shop Challenge: Rusty Metal Bar Stools
Last updated on April 17th, 2019 at 09:41 am
It’s time for the first ever Thrift Shop Challenge! I took some rusty metal bar stools that I found at our local Goodwill and turned them into something gorgeous for our living room. And now? We finally have bar stools by our bar!

Friends! I am so excited to bring you today’s post. It’s been a long time in the making, and I’ve been anxiously waiting for today for what feels like forever.
If you follow me on Instagram, you’ve probably heard me mention the thrift shop challenge that I’ve been putting together with a few of my friends – well, the day is finally here and I can’t wait to show you my project and see what everyone else did.
No clue what I’m talking about?
Let me catch you up.
What is the Thrift Shop Challenge?
Do you remember the good old days of blogging when us DIY and home decor bloggers spent the majority of our time scouring garage sales and our local Goodwills for furniture to make over? It used to be a huge thing, and it was so much fun. Well, we all grew up, our styles changed, and so did the blog world as a whole – and now, it’s a lot less common to find those kinds of posts.
Well, I miss ’em.
So, I decided that I’m starting a quarterly DIY challenge called the Thrift Shop Challenge. Each season, I’ll invite several friends to head out to their favorite thrift shops and find a gem that needs a little love. We’ll all transform our pieces and share them on our blogs – and then? We’ll invite you to join in! We’d love for you to take on the challenge yourself and share your photos on Instagram (using the hashtag #thriftshopchallenge) or your blog if you’ve got one!
Basically, we’re reviving the thrifty side of blog makeovers and I’m so pumped about it.
Today is challenge number one. Scroll to the bottom of this post when you’re done reading to see all of my friends who are participating in the fall challenge with me and be sure to head over to their blogs to give them some love. Then, head out to your favorite thrift shop and join in! It’s going to be fun.
Let’s do it.
How to Transform Rusty Metal Bar Stools
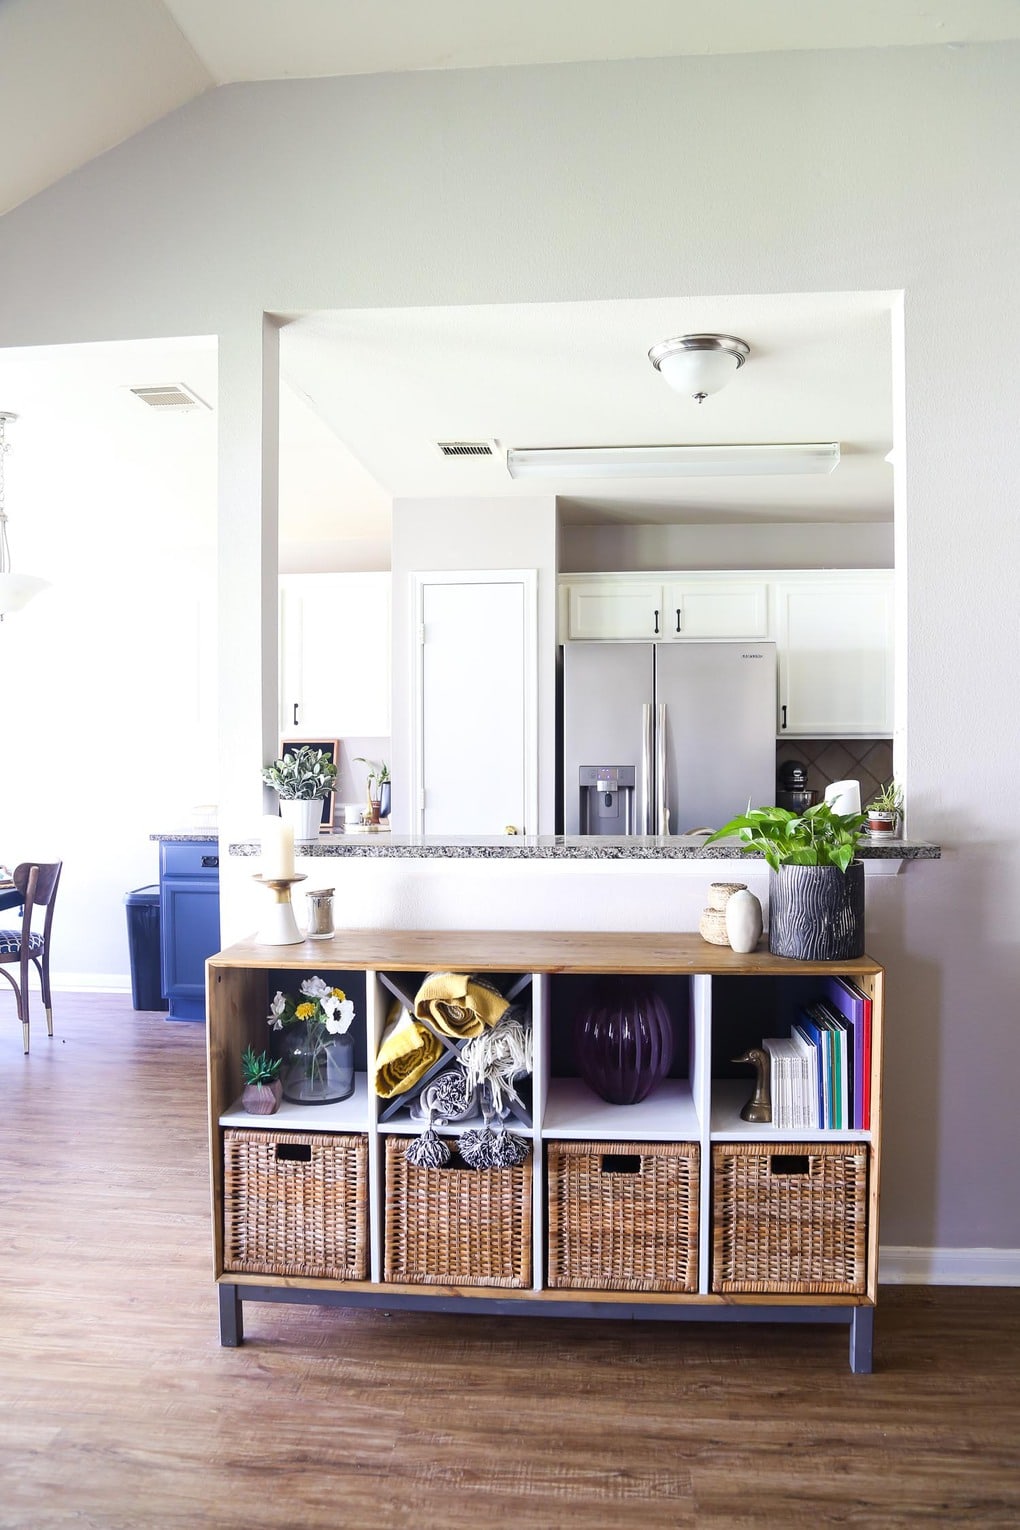
If you’ve been reading a while, you’ll know that I’ve been looking for bar stools for our living room for forever. We used to have a sideboard under the small bar that separates our living room and kitchen, but it took up too much room and always looked cluttered – I wanted something a little more functional, so I’ve been trying to figure out what bar stools would be the best option for quite some time. I shared a bunch of options on the blog a while back, and I really liked a few of them but nothing felt perfect.
So when this challenge rolled around, I was really hoping that I’d be able to find something that would work for the space. I wasn’t super hopeful, but after 4 or 5 Goodwill trips over the course of a few weeks, I scored big.
This post contains affiliate links. Click here to read my full disclosure policy.
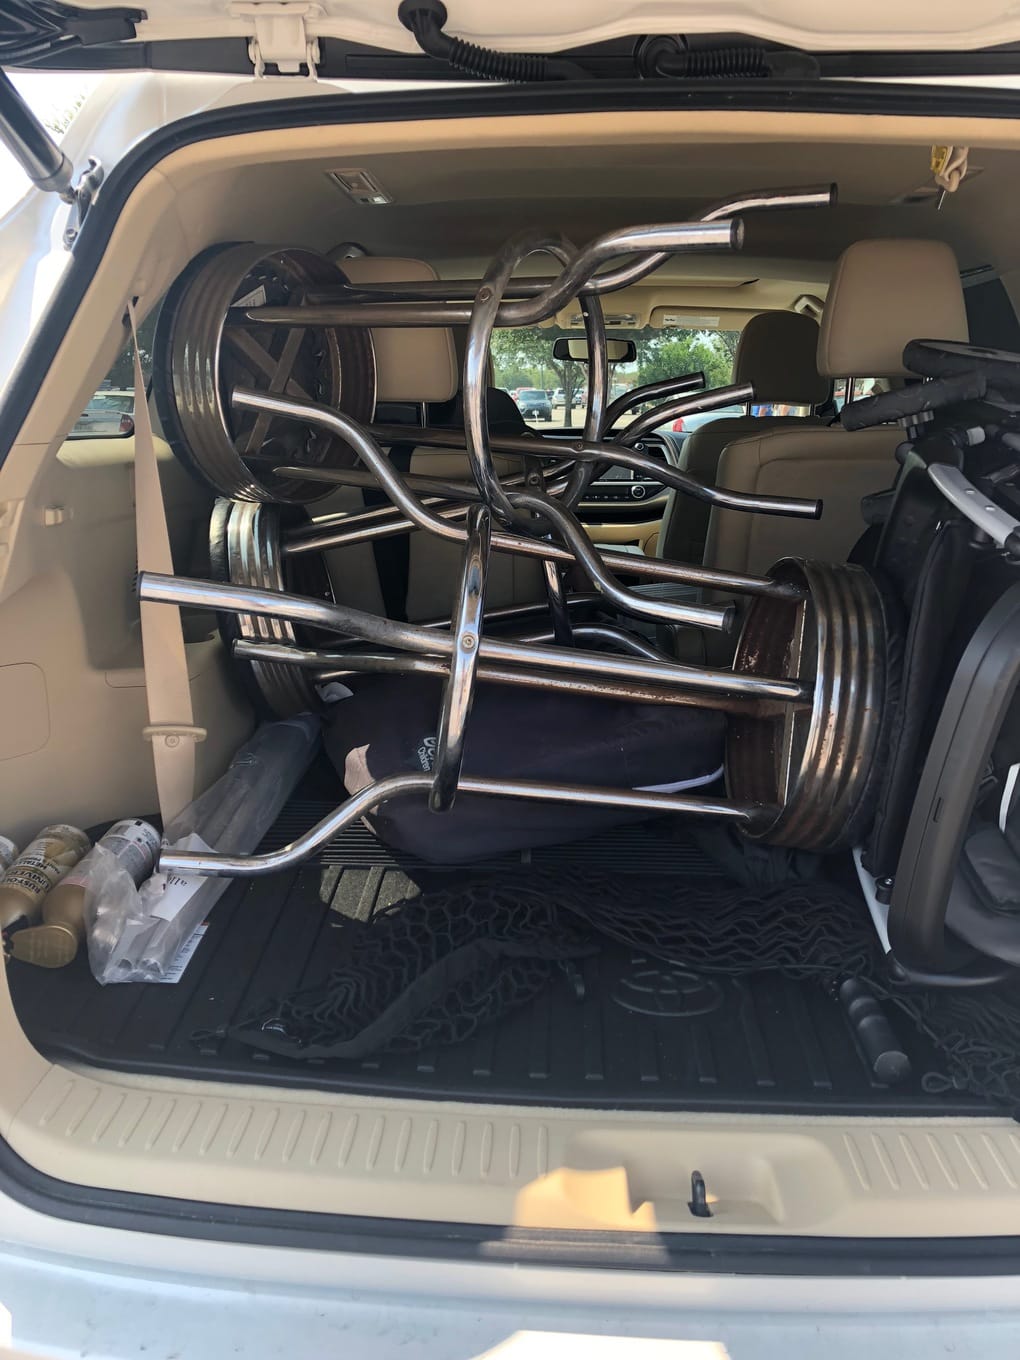
I found these metal barstools at the Goodwill right next to my house for just $10 a piece. They were in pretty rough shape with lots of rust and dirty leather seats, but I knew that with some love they could be amazing. So, I loaded ’em up in my car and got to work.
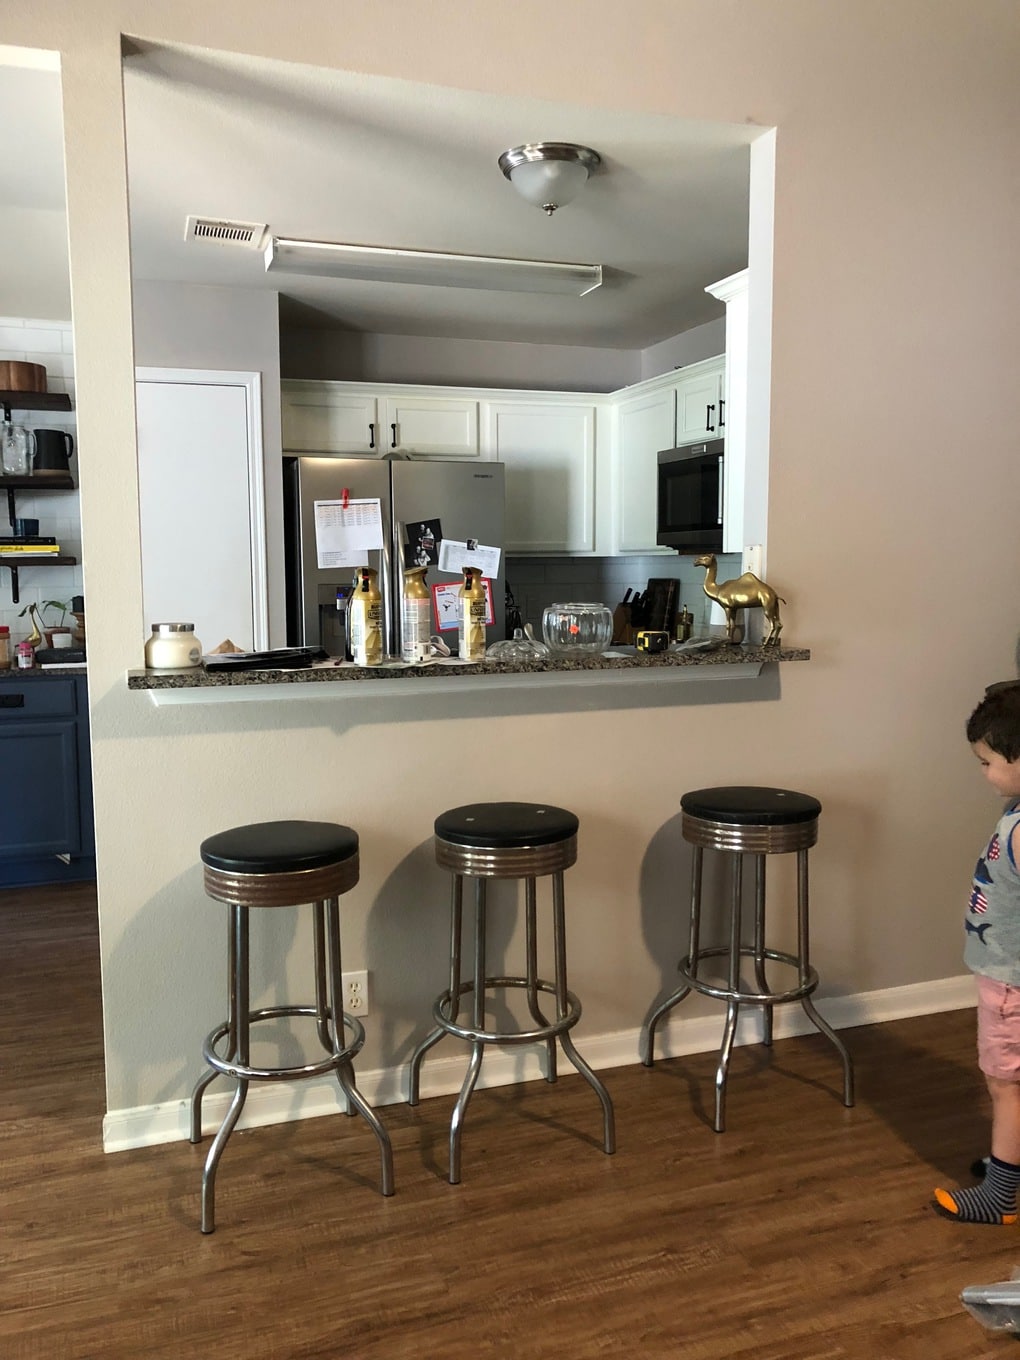
Step one was to make sure they actually fit in the room. I wanted to be sure they were tall enough and that we actually liked having bar stools there. Thankfully, that was a slam dunk – they were the perfect size, and I couldn’t believe how much the swap from a sideboard to bar stools opened the entire room up.
Now, it was time to prep them for a makeover. The metal was pretty rusty, and I didn’t want to just paint over it so it called for some serious scrubbing. Corey picked up a bunch of cleaning supplies for me and I spent an hour or so one afternoon giving these little guys a serious cleaning.
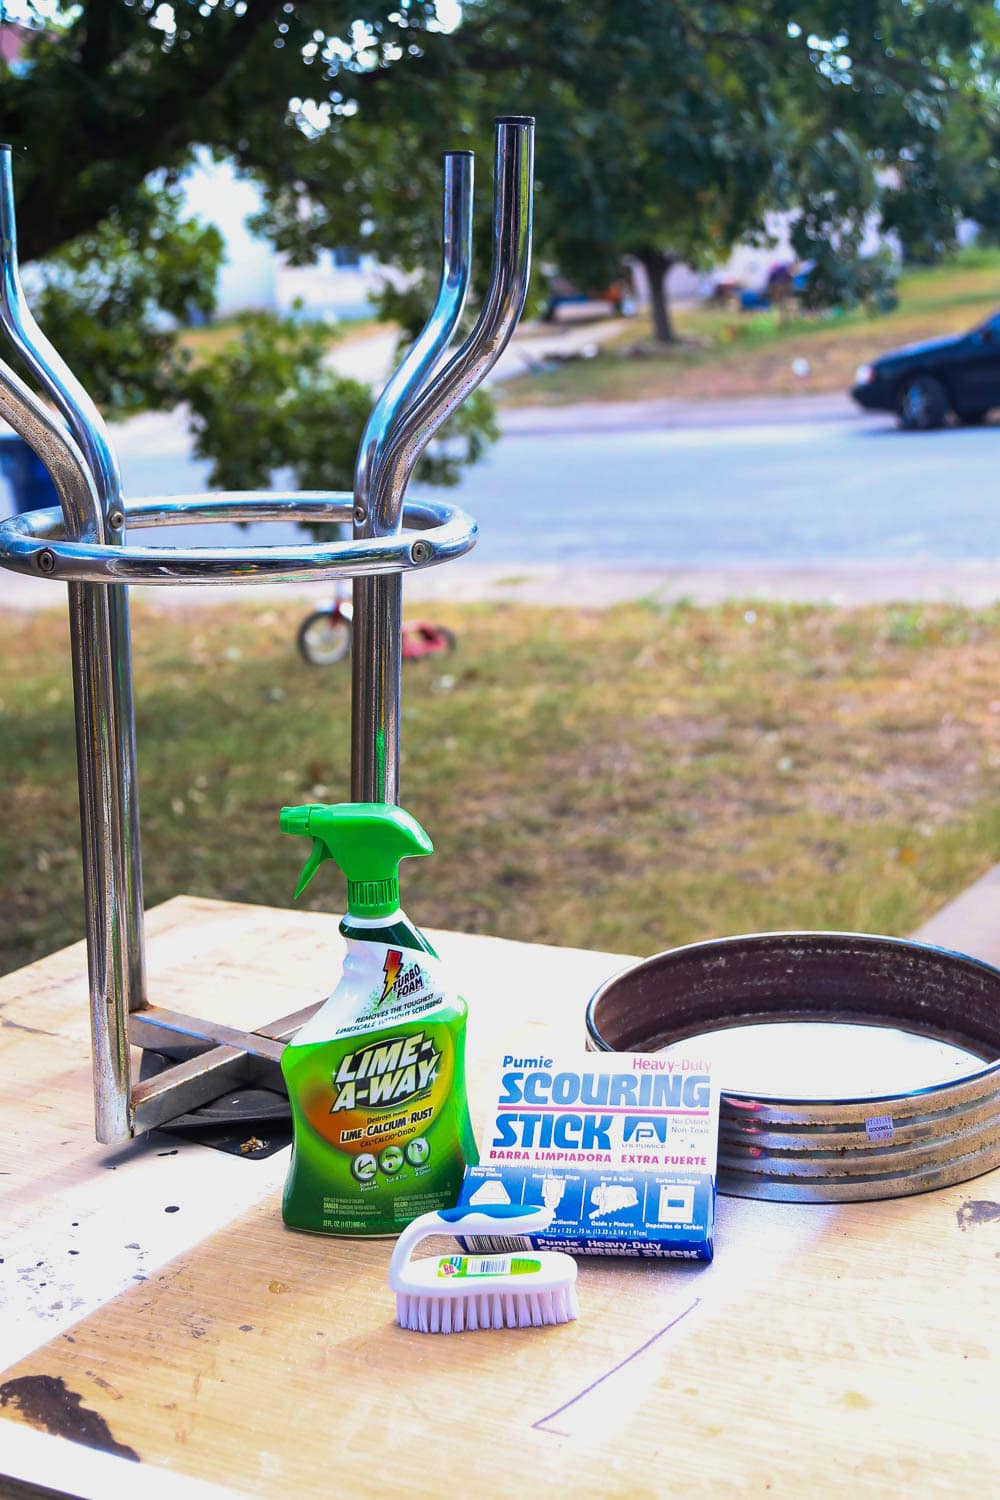
Here’s what I used:
- Lime-A-Way
- Pumie Scouring Stick
- A scrub brush
- (Not pictured) Rubber gloves
After a little trial and error, I found that the best method was to spray a section with the Lime-A-Way and give it a thorough scrubbing with the brush. Then, I went over that same section with the scouring stick until the rust was gone.
After I had cleaned the whole thing, I rinsed it off with the garden hose and (if necessary) repeated the entire process until it was totally clean. It took quite a bit of time, but I managed to remove almost all of the rust, and the stools were looking so much better when all was said and done.
Next up, it was time to paint. I started off by giving the bar stools a coat of Rust-Oleum’s Rusty Metal Primer – it’s perfect for metal that isn’t in the greatest shape, and since there was a bit of lingering rust that I wasn’t able to get out I figured I’d rather be safe than sorry. We used the same primer when we gave our (super rusty) outdoor bar cart a makeover and it’s still looking great, so I know I can trust it to work here.
Once the primer dried, I gave them all a few coats of metallic gold spray paint and suddenly they looked a lot better.
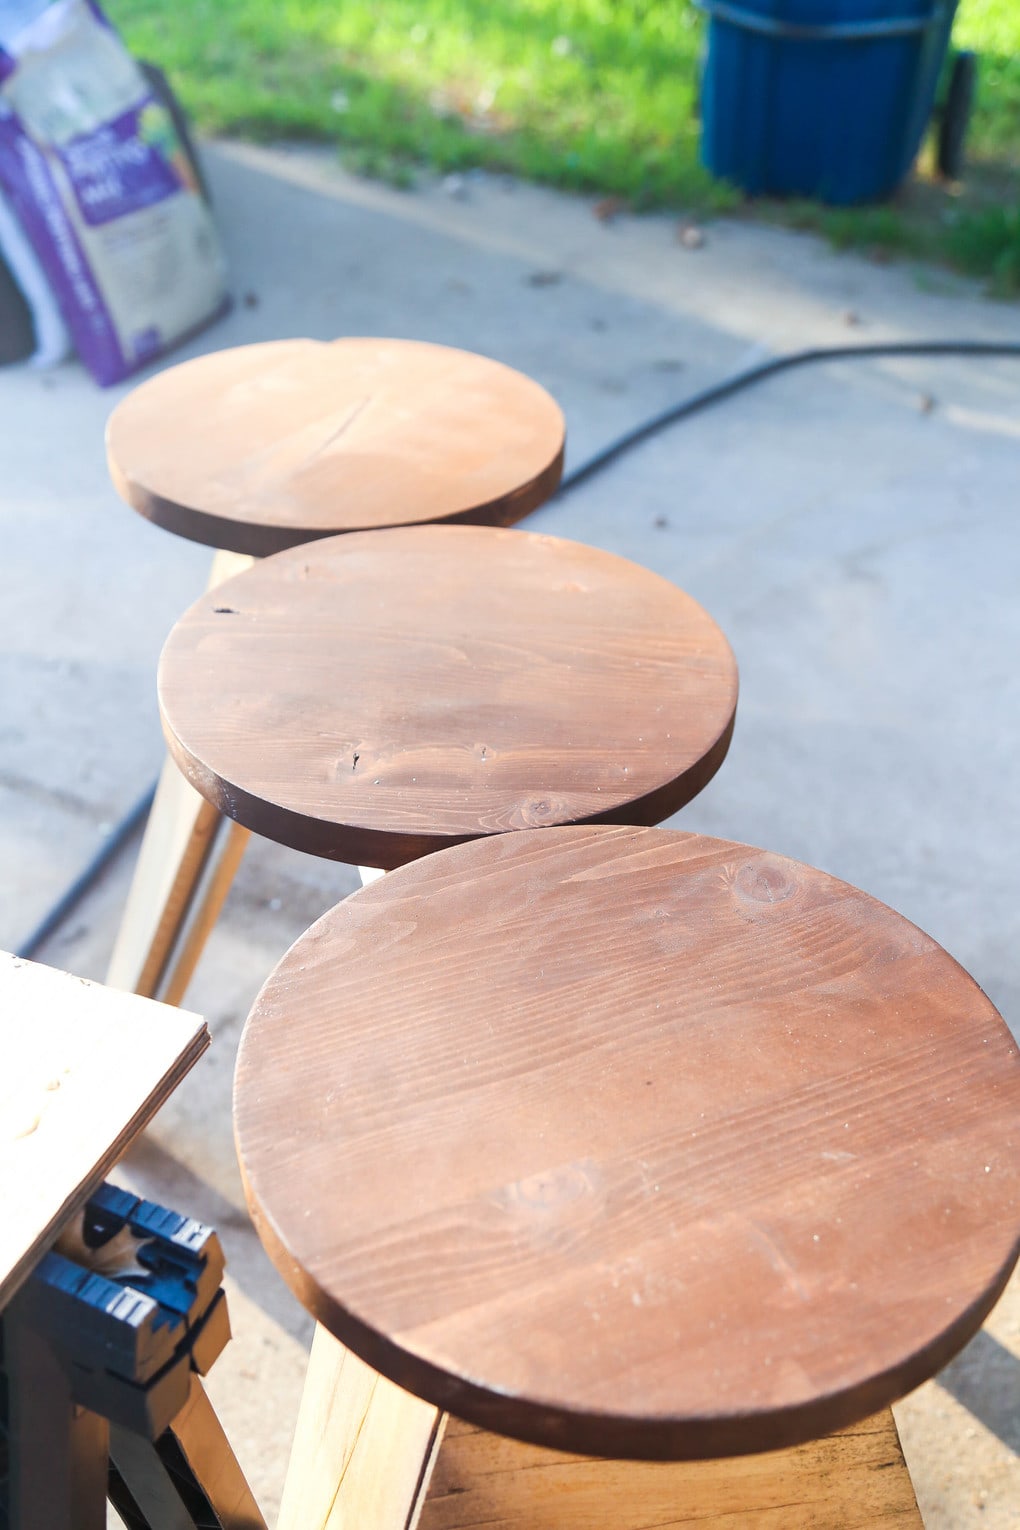
For the top of the bar stools, we went back and forth a bit before landing on the perfect solution. We considered just re-upholstering the original seats, but we really wanted these to be durable and we already have so many fabric surfaces in our living room that we really wanted to bring in a different element. In the end, we decided that wood seats would be the best bet – they’re super durable, they’d be a great contrast to the gold, and they’ll blend right into the rest of the space.
We snagged some 1.5″ thick project boards from our local home improvement store and Corey cut them into circles using the table saw and a homemade jig. I won’t even pretend to be able to fully explain it, but it was actually super simple – here’s a video that shows the full process he followed if you want to try it yourself! It was much faster than using a jigsaw would have been, and produced much smoother results.
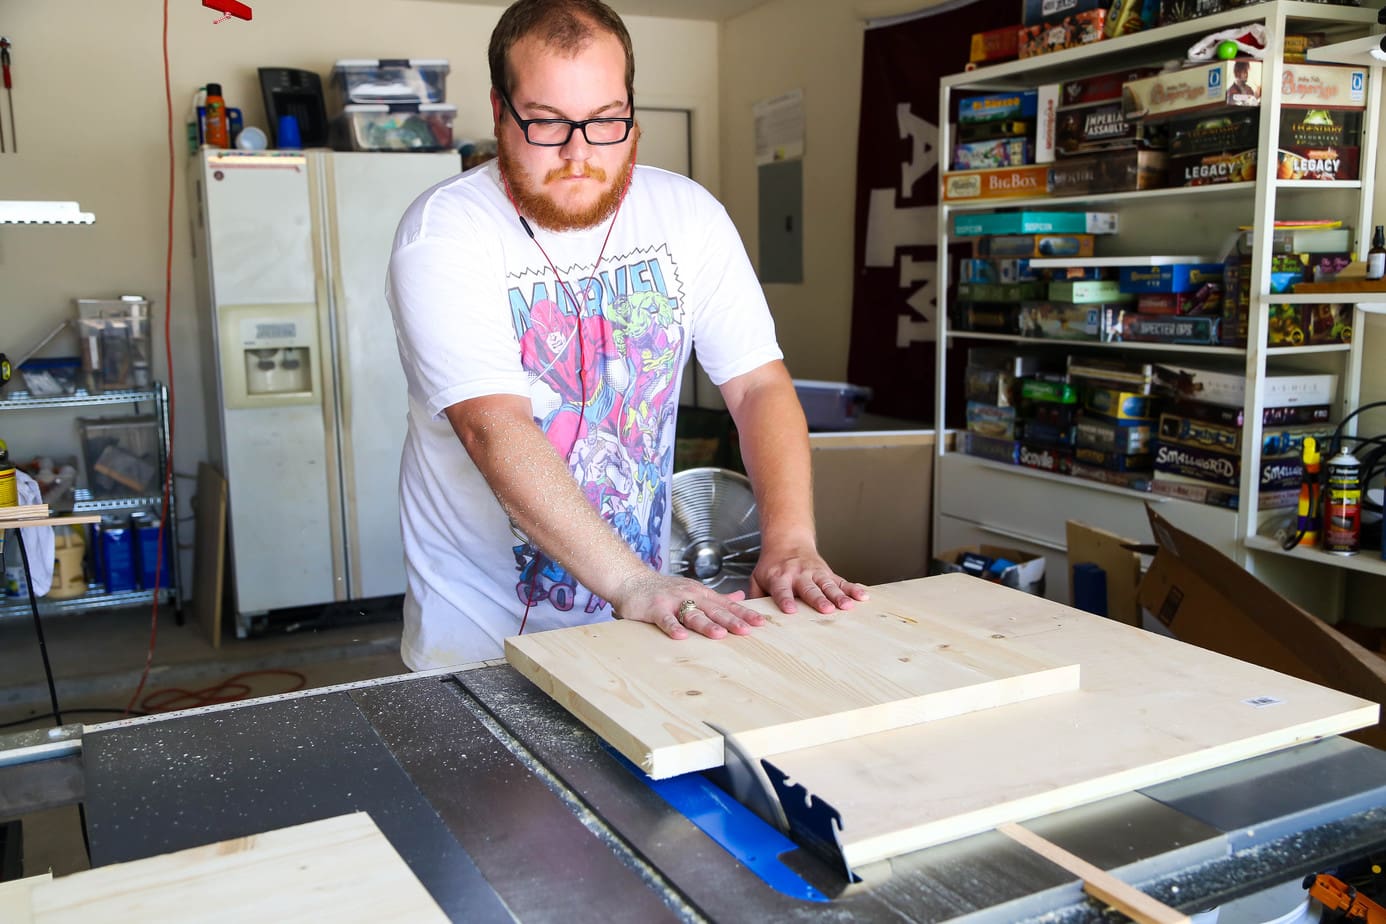
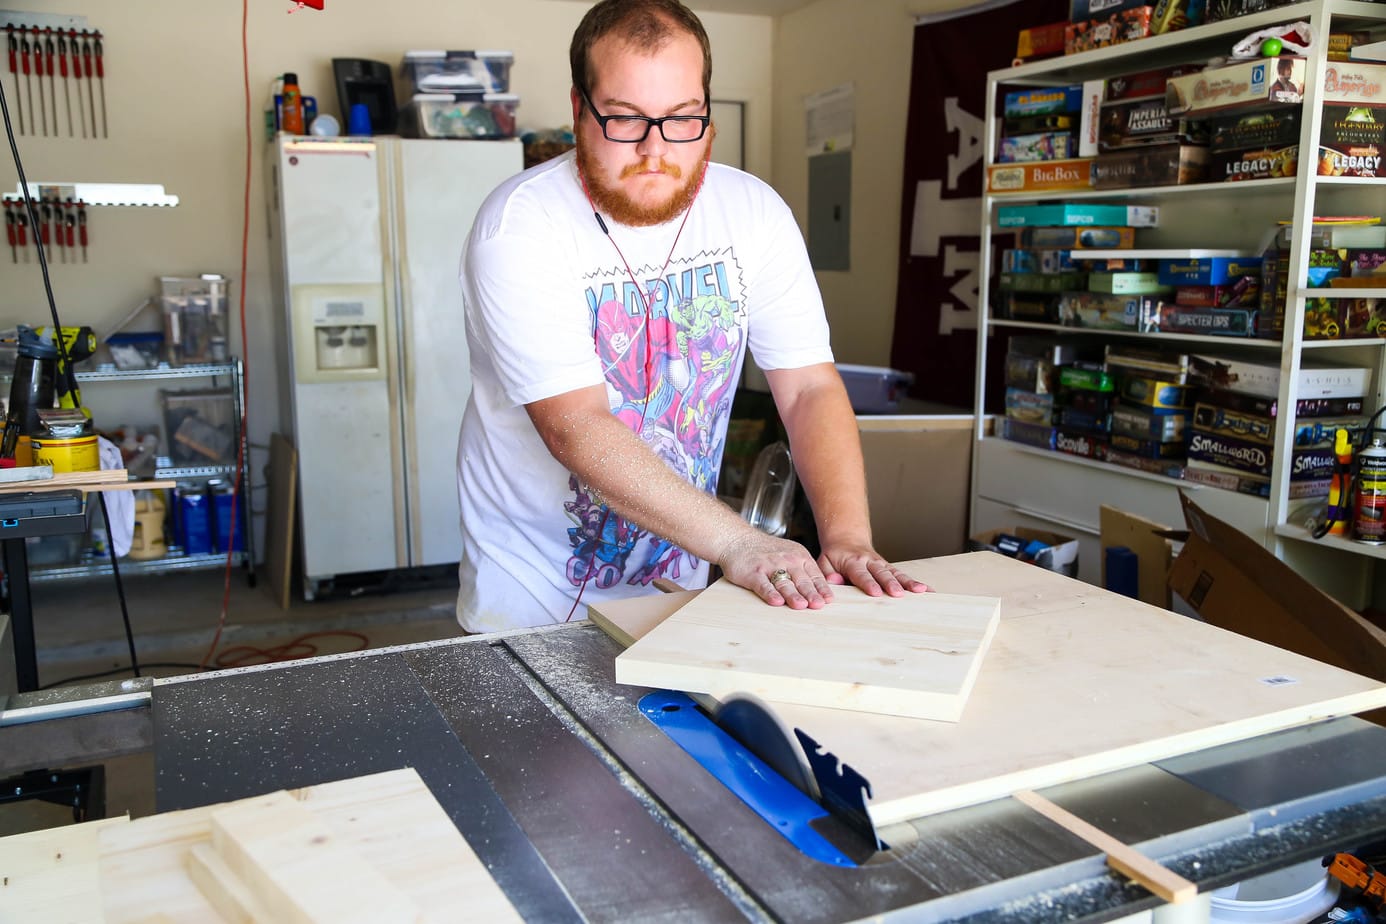
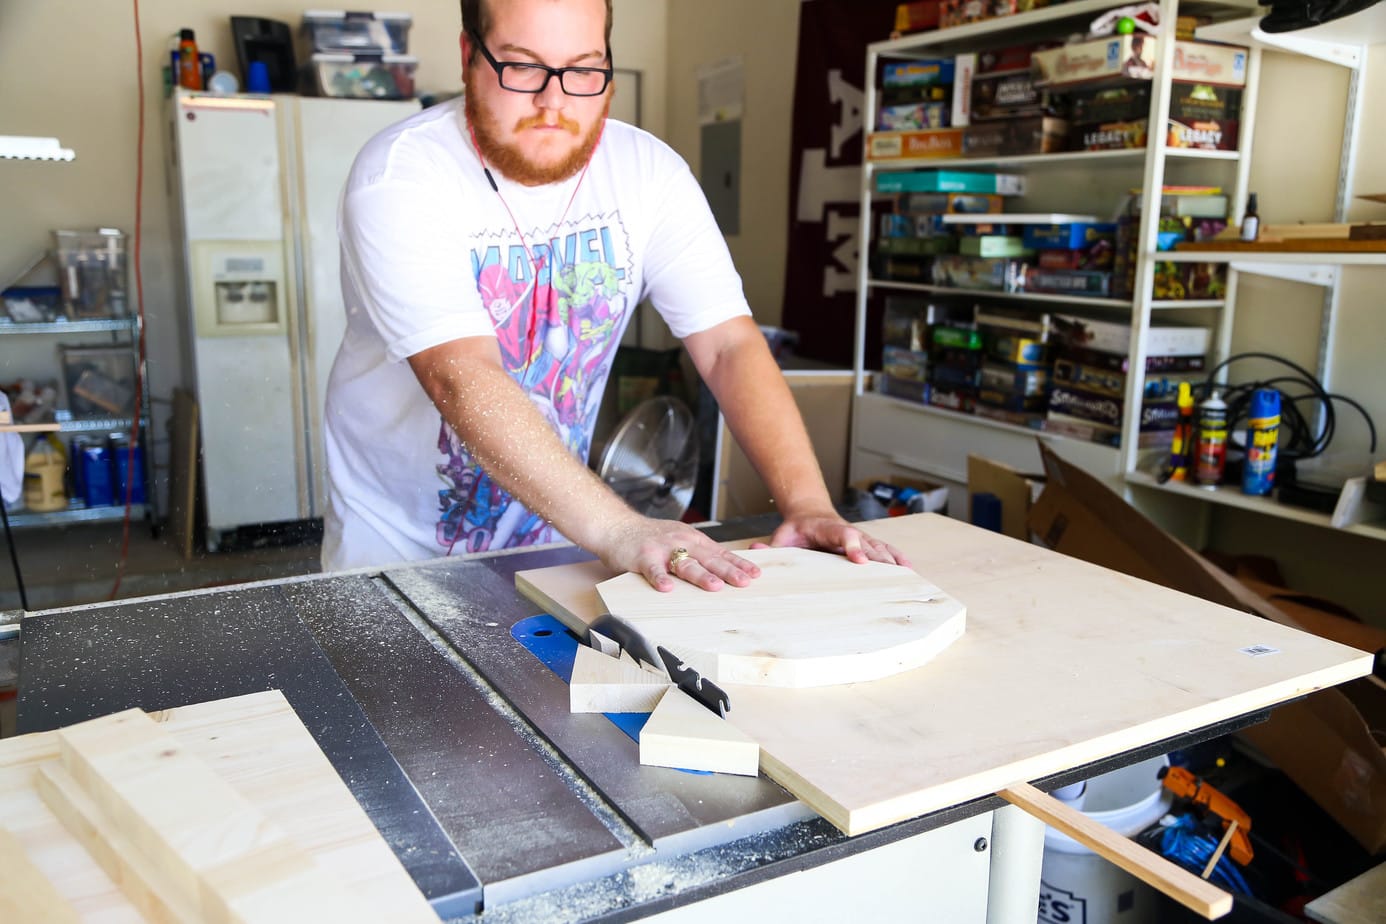
Once the circles were all cut, we sanded them down and I stained them with Varathane’s Dark Walnut stain. After it dried, they got a quick coat of this polyurethane and they were ready to be re-assembled.
I’ve gotta say, it felt so good to get back to my thrift-store-flipping roots.
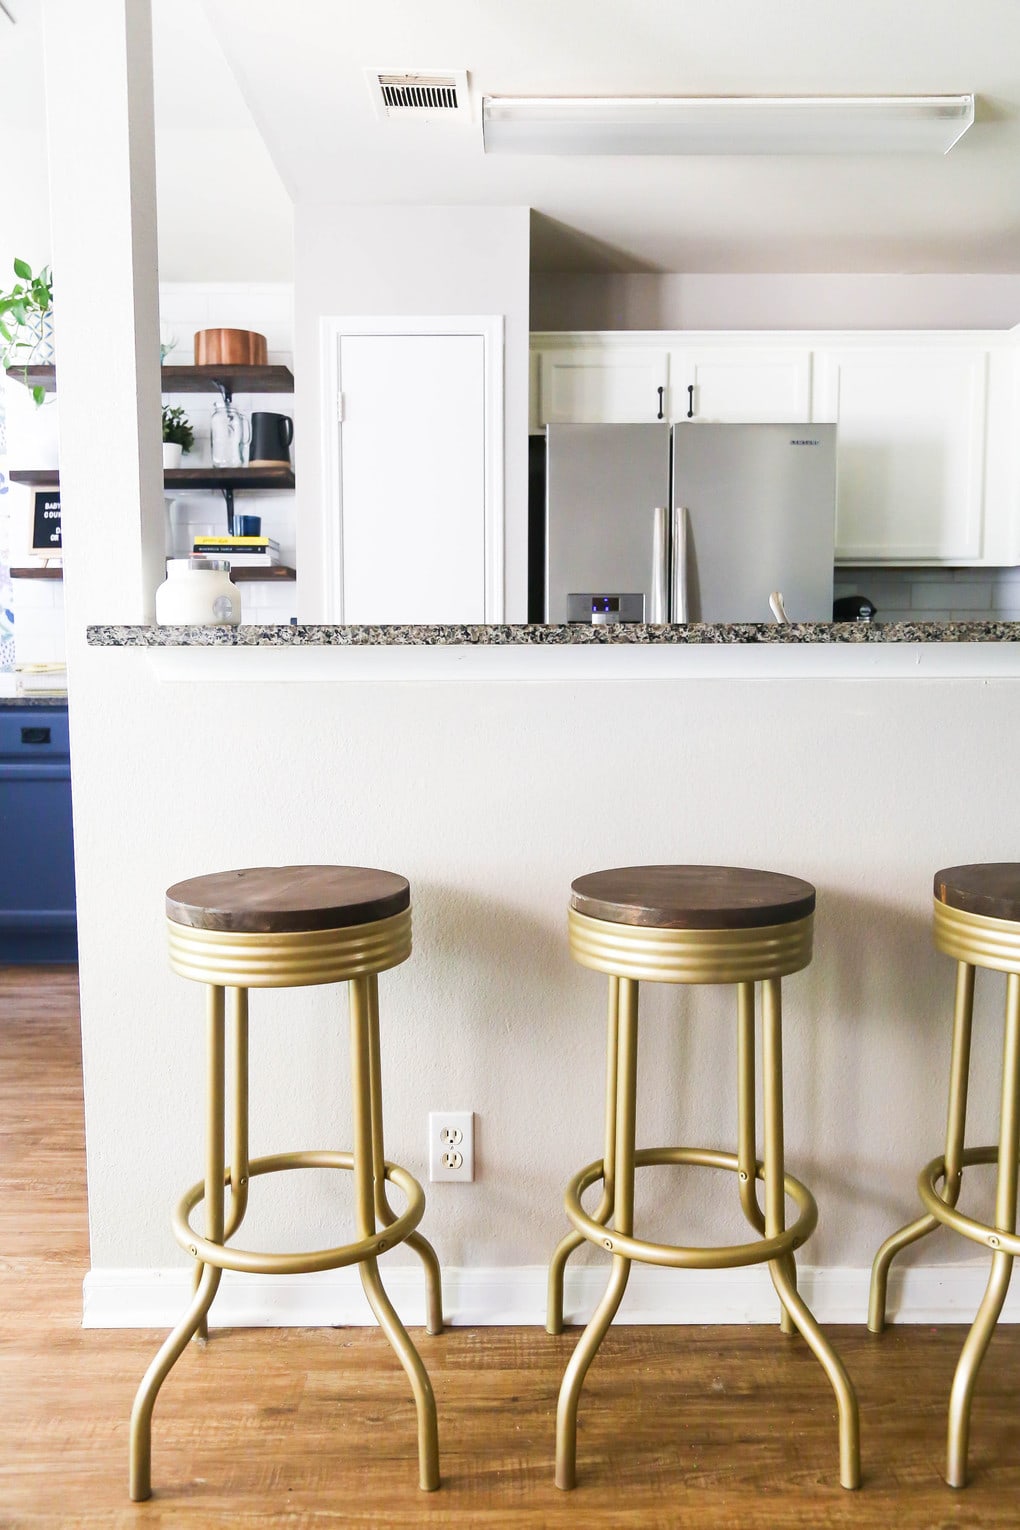
Can you even believe that transformation? They look totally different, and it’s honestly hard to capture in photos because you can’t quite see just how disgustingly dirty they were before I got my hands on them.
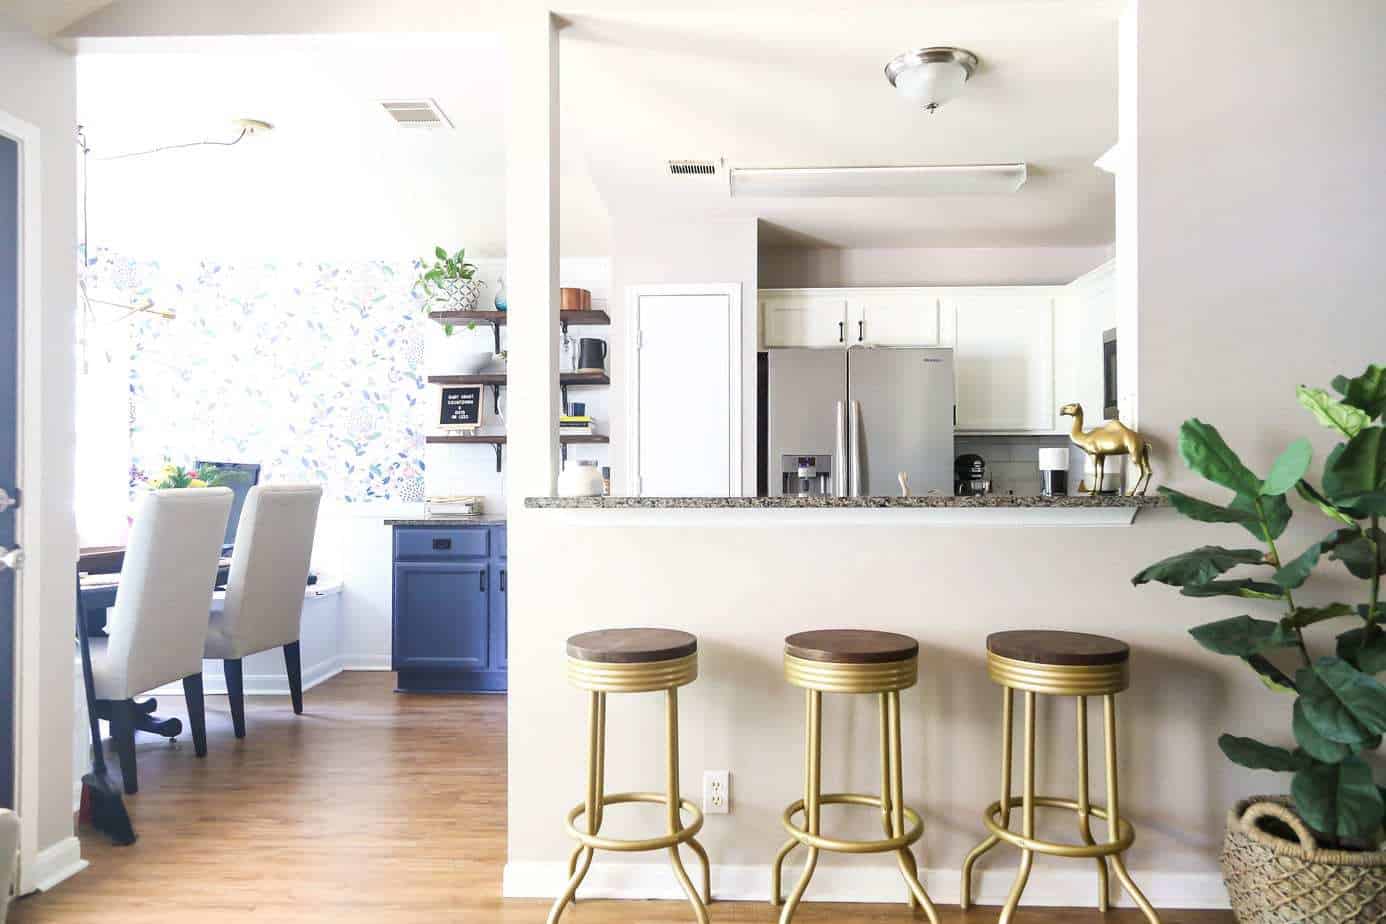
We’ve had these guys in our living room for a few weeks now, and we’re loving them. It makes it much easier to chat while one person is working in the kitchen (since our kitchen isn’t really large enough for multiple people to hang out in), and the entire living room feels significantly larger without the sideboard there anymore. As a reminder, here’s what the room looked like before we added the bar stools:
And here’s how it’s looking now:
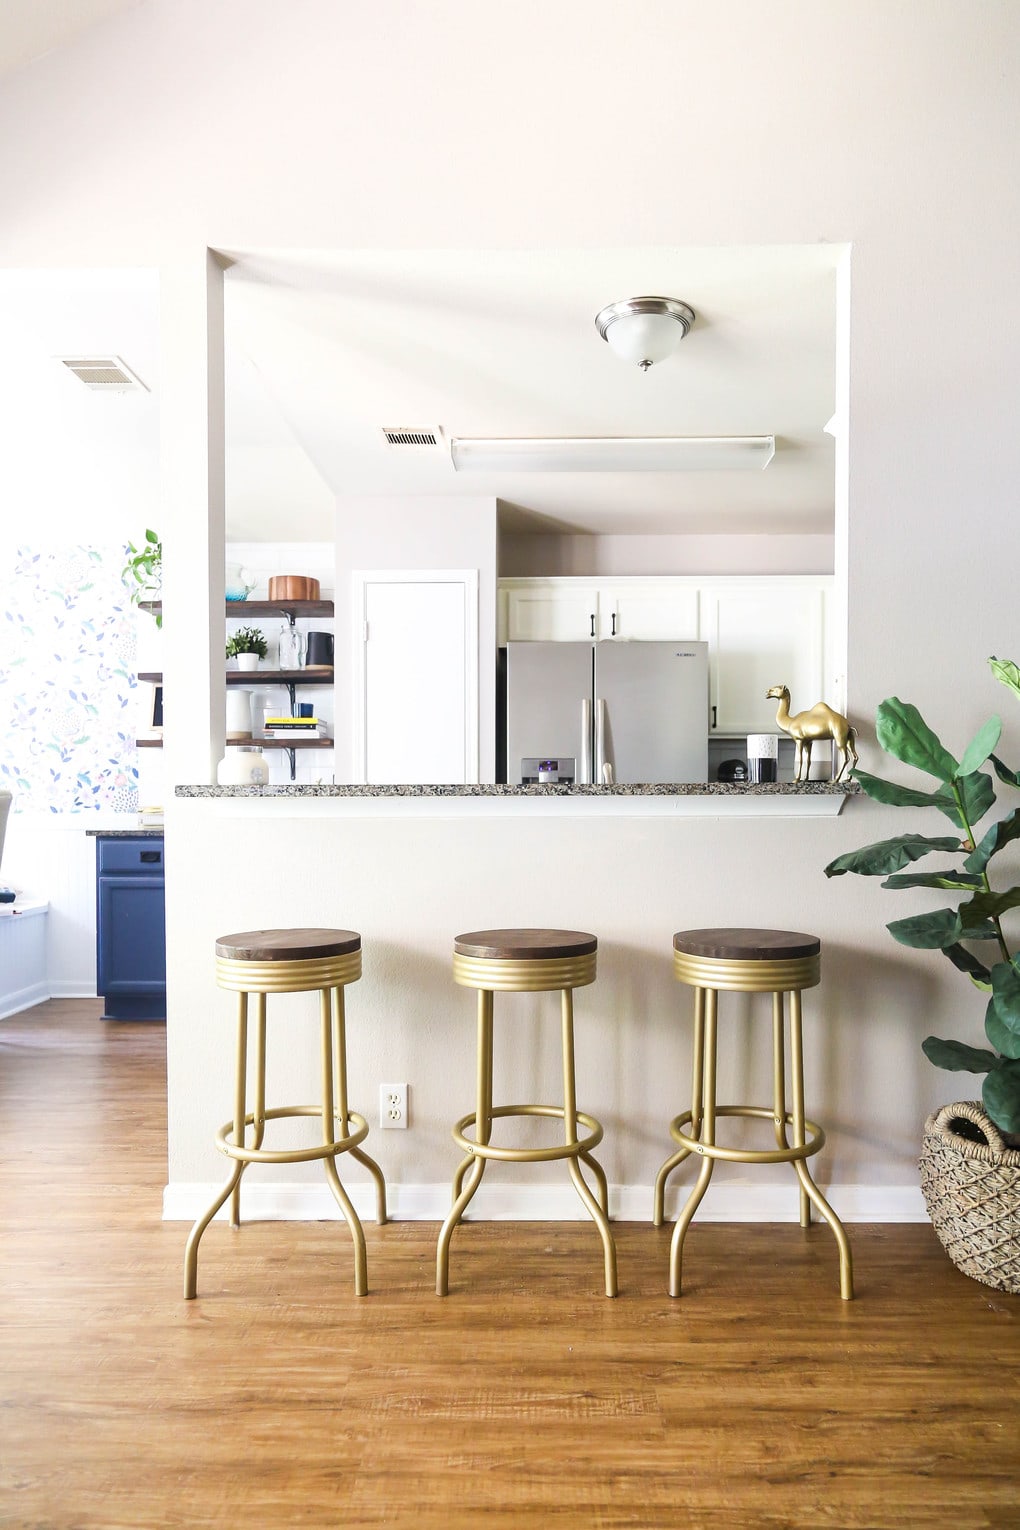
So, so much better.
Fall 2018 Thrift Shop Challenge Posts:
Now, are you ready to see the rest of the projects? Get ready to have your mind blown because there are so many fun ideas here! Click around to the rest of my friends’ posts and enjoy their thrift shop makeovers, then be sure to join in if you want! As a reminder, the hashtag on Instagram is #thriftshopchallenge – just tag it (and be sure to tag me @loverenovations as well if you want to be sure I see it!) when you share your photos – you may even see some of our favorites pop up in our feeds! Of course, if you have a blog and want to join in, we’d love to have you as well! Just be sure to let us know if you decide to share so we can send some love your way!
Alright, I’ll shut up now – here are the other posts:
- A Crafted Passion: Thrift Store Play Kitchen Makeover
- Green With Decor: How to Paint Thrifted Candlesticks
- Home Beautifully: How to Upcycle a Shabby Chic Mirror
- Small Stuff Counts: Thrift Store Lamp Makeover
- Making Manzanita: White Pumpkin Decor
- Love, Create, Celebrate: DIY Modern Wind Chimes
- Amber Oliver: Painted Thrift Store Frames
Does yard sale finds count?
Absolutely!
Love these!! I didn’t realize from IG that it was a wooden seat, but I love that! Such a easy addition!
Love how these turned out! They look sooooo good at your bar.
I love them, they turned out so cute! The wood tops completely change the vibe!
Tania