
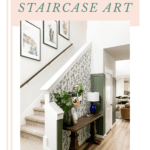
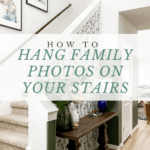
How to Hang Photos on Your Staircase
Last updated on March 26th, 2026 at 11:52 am
Hanging pictures on stairs can feel tricky because of the angle, but there’s a simple way to get it right. In this guide, I’ll show you exactly how to hang pictures on stairs, including the best height, spacing, and layout tips for a staircase gallery wall.
Hanging photos on your stairs can be a really great way to add some visual interest and a personal touch to your home. But, if you’ve never done it before it might feel a little intimidating! It doesn’t have to be hard, though. Today, I’m walking you through exactly how to hang pictures on stairs, including the best height, spacing, and layout tips to make it look intentional.
How to Hang Pictures on Stairs (Step by Step)
Materials Needed
- Frames (these are my favorite)
- Painter’s Tape
- Butcher Paper (wrapping paper or newspaper works fine too!)
- Tape measure and pencil
- Level
- Hanging supplies (I love to use these)
Map the Angle of Your Staircase
Use painter’s tape or a level to create a visual line that follows the slope of your stairs. This will guide your entire gallery wall and help keep you on track.
Make a Plan
Make a play by laying out your frames on the ground. This helps you visualize what it will look like before you hang anything, and ensures you’ll end up with a layout you like.
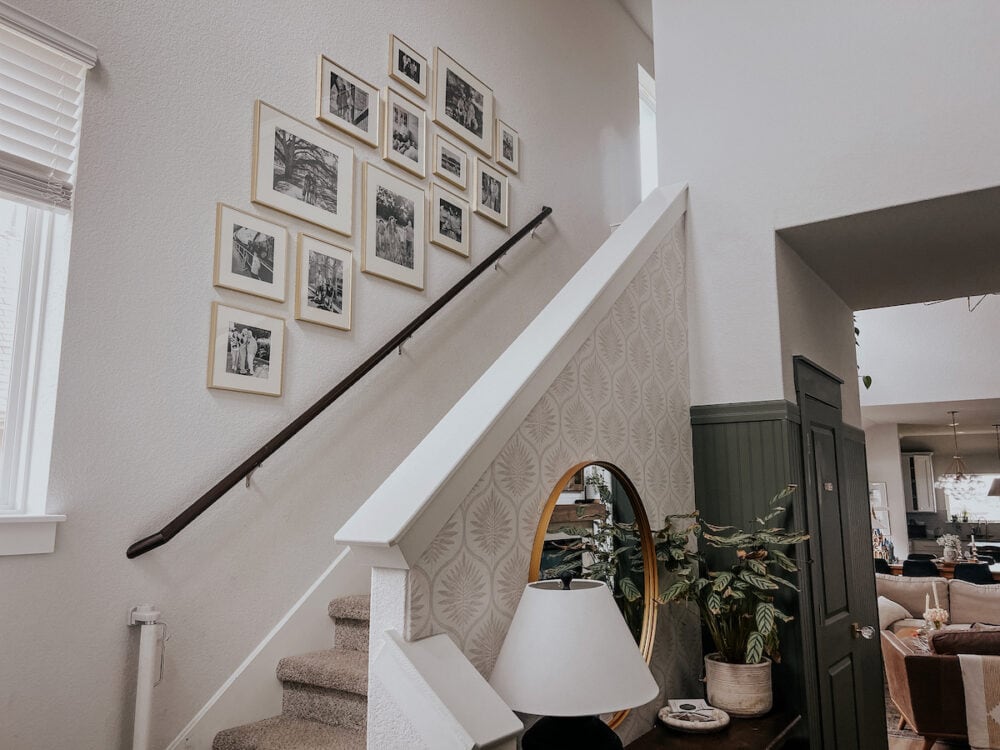
If you’re doing an entire gallery wall, it’ll take more time and finagling to get it exactly right. A few tips to keep in mind:
- Spacing of about 2-3″ is ideal
- For a staircase gallery wall, an organic shape is going to be easiest!
- Use a mix of large frames and smaller frames for a dynamic look
- Pick one focal point (like a large frame or a favorite photo) and work outward from there as you plan.
- You can use all matching frames for a cohesive look, or frames of mixed textures if you want something more eclectic.
- I like to have all of my photos printed in black and white so things don’t feel too busy.
Create Paper Templates
Next up, use your kraft paper (or whatever you’re using) to trace out each of the frames you’ll be hanging using a pencil. Cut them out and you’ve got the perfect template to make hanging your gallery wall much easier.
If you’re only hanging a couple of frames, you can skip this part!
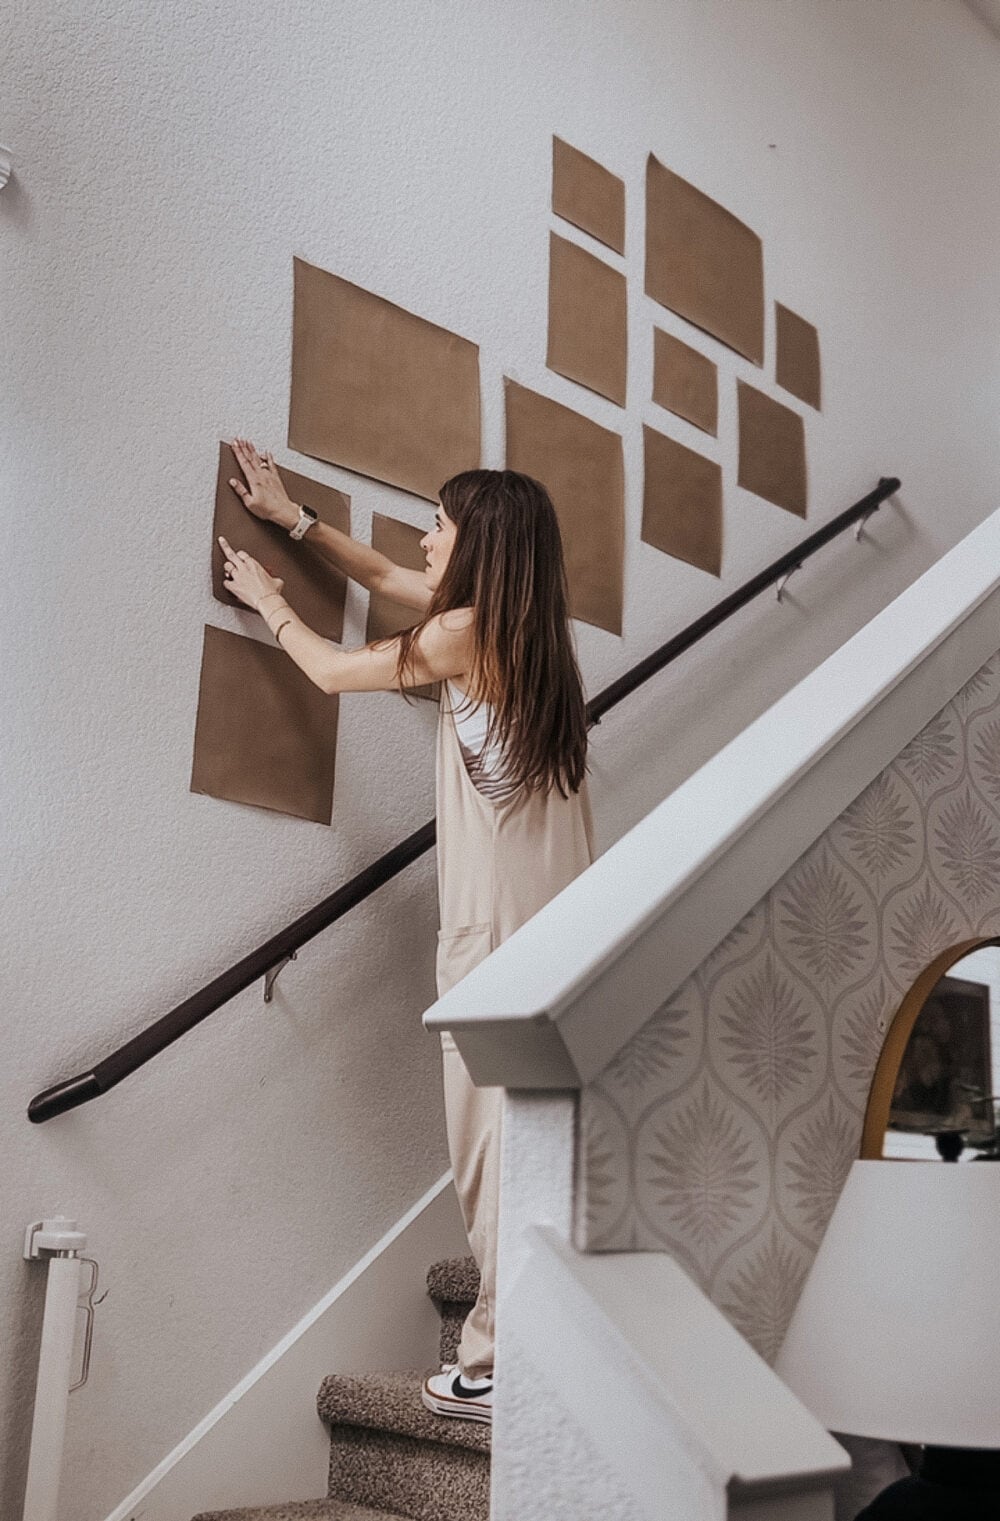
Hang Your Paper Templates
With your templates ready to go, use painter’s tape to hang them on the wall. This might feel like an extra step, but it’s going to serve two really important purposes. First, it allows you to visualize your gallery wall on the staircase wall before you put a single hole in the wall. You can adjust and tweak to your heart’s content without messing anything up! Secondly, it’ll make hanging the art much faster and easier.
A note: when it comes to the height of your gallery wall a good rule of thumb is to have the center of it be around eye level (57-60″).
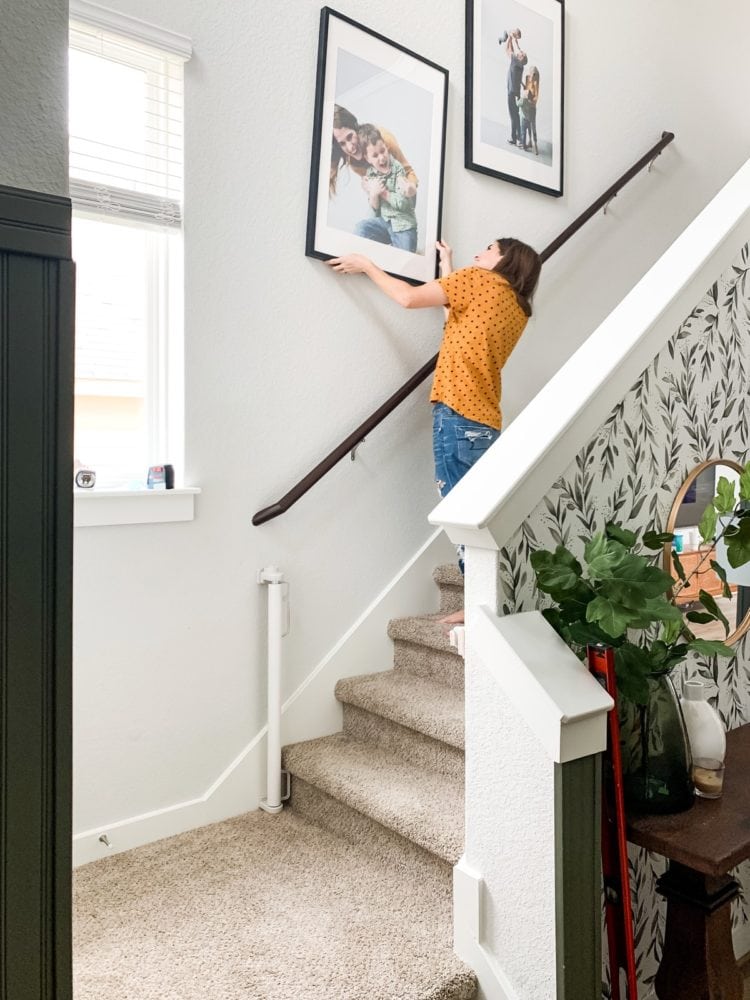
Hang Your Art!
Now you’re ready to hang! Using nails or your favorite picture hanger, insert your hanger directly through the paper and into the wall. If you’re nervous about this part, it can help to mark directly on the paper where you want each nail to go before you start!
I like to start in the center of my gallery wall and work outwards when I’m hanging. I step back every few pictures and make sure I like how it’s looking before I keep going.
Once you’ve got your hangers in the wall, you can hang the frames and remove the paper. And just like that, you’ve got a beautiful gallery wall going up your staircase!
Other Notes + Tips for Hanging Art on a Staircase Wall
- Another great look is to have just three large prints going up the wall. For this method, you should hang the middle frame first, and aim to have it sit around 57-60″ from the ground. We did ours about 4″ apart when we did this and it was the perfect spacing!
- Don’t be intimidated by the holes in the wall. If you make a mistake, it’s really easy to patch them!
- A grid of photos is a little more complicated to do, but can be a really beautiful look! I highly recommend planning this one out in advance and using paper templates to get it right!
Common Mistakes When Hanging Photos on Stairs
There are a few easy mistakes that can make things look “off” (even if you can’t quite figure out why). Here are the biggest ones to watch out for:
1. Hanging everything at the same height
This is probably the most common mistake. On a staircase wall, your frames shouldn’t be lined up straight across. Instead, they should follow the angle of the stairs. That’s what makes the layout feel natural and intentional.
2. Ignoring the 57–60 inch rule
Even on stairs, height still matters. Try to keep the center of your frames around 57–60 inches from the stair tread so everything feels comfortable to view as you walk up and down.
3. Inconsistent spacing between frames
If the gaps between your frames are all over the place, the whole gallery wall can feel a little chaotic. Aim to keep spacing consistent. Generally, 2–5 inches apart works well.
4. Starting without a plan
It’s tempting to just start hammering nails, but taking a few minutes to map things out (even loosely) makes a huge difference. Use painter’s tape or lay your frames out on the floor first to get a feel for the arrangement.
5. Hanging things too high or too low
Because stairs change your perspective, it’s easy to misjudge placement. If something feels “off,” it’s often because it’s sitting too high above eye level or too low to align with the rest of the layout.
FAQs About Hanging Pictures on Stairs
What Height Should Pictures be on Stairs?
Around eye level is a great rule of thumb! Between 57″ and 60″ is where most people land when hanging photos on the stairs. In a gallery wall, this would apply to the center of your gallery. That being said, it’s all about what YOU like. If you put up your template and you don’t love the look, just adjust! When it comes to decorating your home, there are no rules.
How Should I Arrange Photos on Staircase Walls?
A few common strategies are:
- A free-form gallery wall
- A grid gallery wall
- Trio of photos
- One large photo
- A diagonal line of multiple photos
- “Salon style” – a gallery wall that’s really tight and fills in the whole space!
How Far Apart Should the Frames Be?
I like to keep my gallery walls spaced at no more than 2-3″. You can go up to as much as 5″ if you want, but beyond that things are going to start to feel disjointed!
This Feels Hard – How do I Choose Frame Sizes?
If you feel really intimidated by picking out the frames, you can grab a pre-made kit right here!
Other Art Tips & Tricks
Need some more tips for gallery walls and art in your home? I’ve got you covered.

Hi! This is exactly what I want to do above my stairs. Did you use a ladder on the stair to do the screws? That’s the part I’m stuck on- I can’t figure it out.
A ladder should definitely do the trick if you can’t reach!
This looks great! Thanks for sharing. I’ll have to check out Walmart for photos. Haven’t been to them in years for that.
I find that an even easier method to hang pictures is to use builder’s paper or brown wrapping paper as templates. Trace your framed picture onto the paper; cut it out; and, use poster putty to position it on the wall. This method makes it easy to see how the finished project will look and avoids making holes in the wall before you finalize the arrangement.
Where did you get the mats for the frames?
They come with the IKEA frames
Appeals to both my OCD and Tetris skills. lol haha! Wish I had stairs! 🙁
Nice tip! Majority of us are hanging photos just to cover patches on the wall. But this one is pretty neat AND just perfect symmetry. Didn’t know the “proportioning” is actually the hard part.