Our New Staircase Gallery Wall
Lately, I’ve had a bit of an itch to add some more family photos to our house. I’ve been thinking about unique ways to display family photos, and brainstorming where I can add more to our own house. The photos going up our staircase wall were getting really dated, so I decided it was the perfect opportunity to get some new photos and create a staircase gallery wall!
A staircase gallery wall is something I’ve been considering for so long but kept putting off. It felt hard, expensive, and overwhelming. But, once I actually decided I was going to do it, it was so easy and I remembered why I love gallery walls. Huge impact, very little effort. Doesn’t get much better than that!
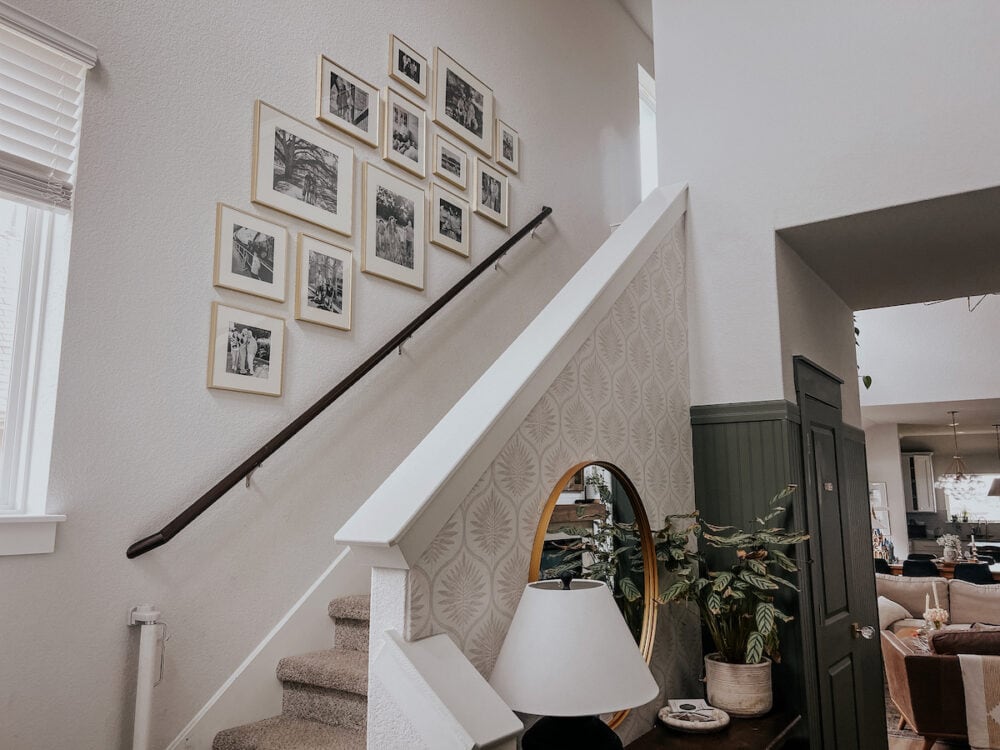
Today I’m going to walk you through the steps I took to hang this gallery wall because I can promise you it’s probably less scary than you think it is! I love seeing all these sweet photos when I walk in the door every day. Plus, if it’s possible, it makes the ceilings feel taller and even more spacious.
How to Hang a Staircase Gallery Wall
Here’s What I Used:
(Size for the frames is the matted size, without the mat they can hold larger photos)
Step One: Plan Out the Gallery Wall
You’ll want to start by planning out your staircase gallery wall. There are a lot of different ways to do it, but this method was the easiest I’ve tried so far.
Start by grabbing one of each of your frames and tracing them onto the butcher paper. I didn’t know how many frames I wanted before I started so I just ordered a few so I had the exact sizing. Then, once I finished planning I ordered the rest of them!
If you don’t know how many photos you want (this was me!), just cut out a random amount. You can always either not use them or cut more out. Of course, if you have a collection of art or frames you already know you want to use, you can just trace those and then get to planning.
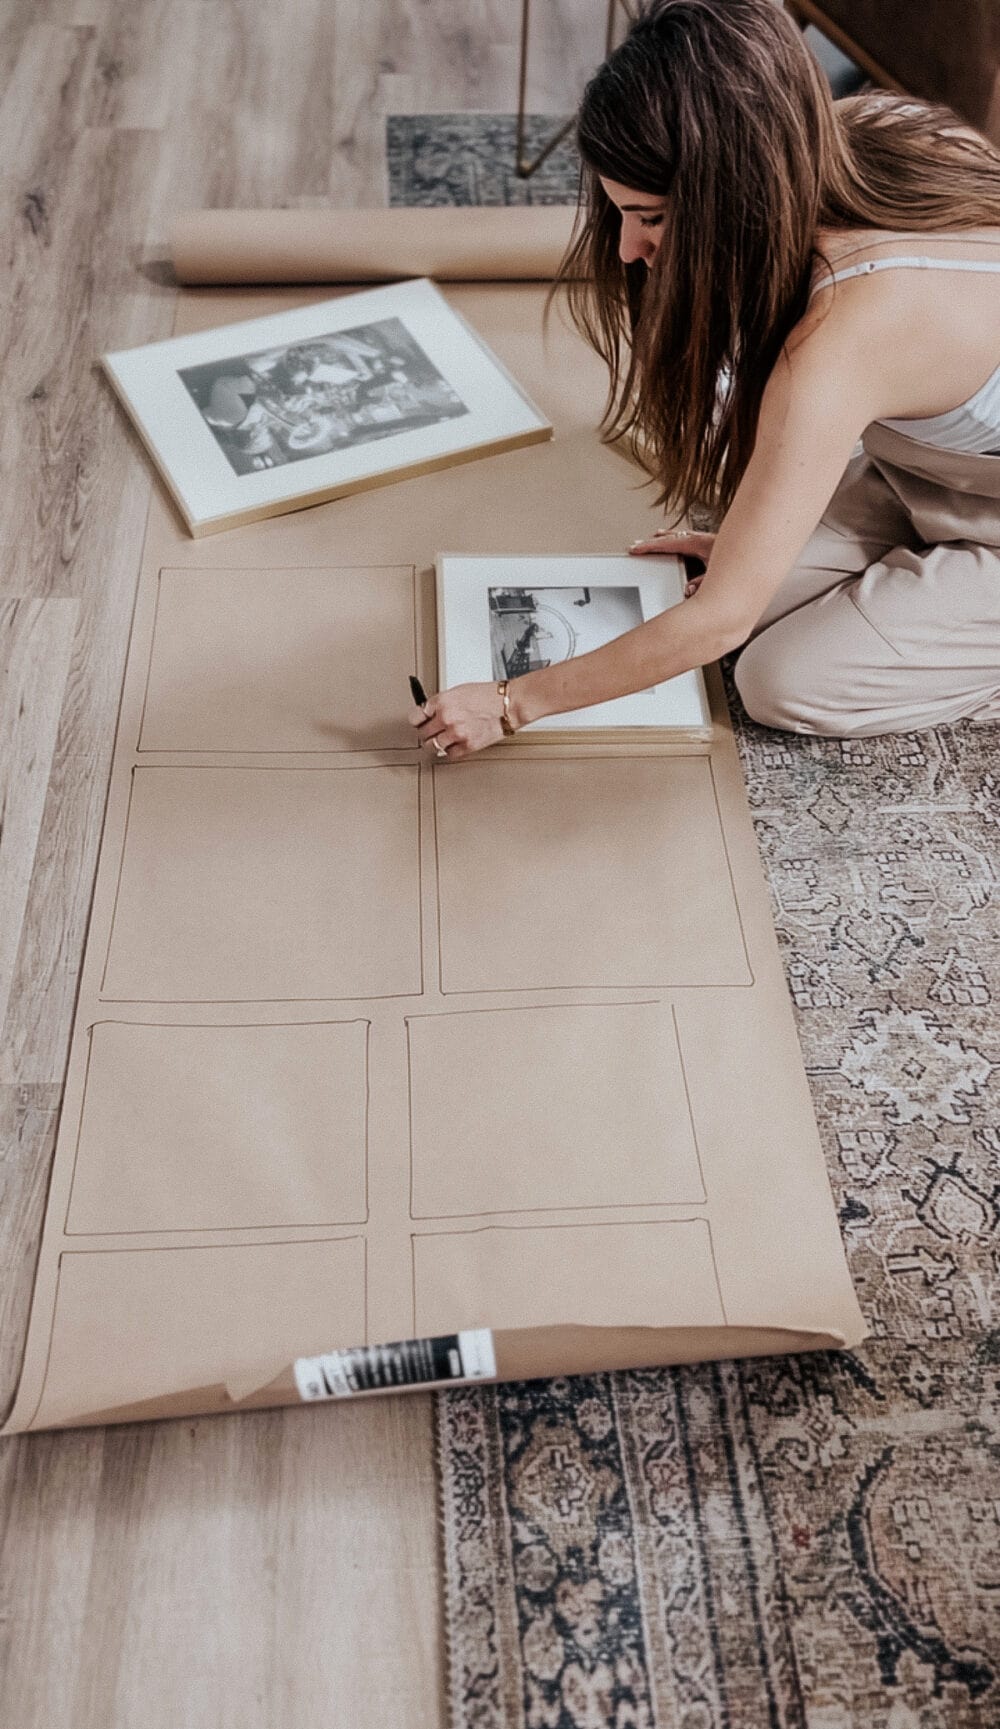
Once you have a bunch of traced frames, it’s time to get planning! This is where you might start to feel intimidated, but just trust the process. I recommend starting with your largest frames, spread them out in the space you want to fill, and then get working to fill in the gaps.
This is a lot of trial and error, and I feel like it always looks better if you don’t overthink it. Just tape stuff up, stand back to look at it, and move it if it looks funny. I did use a measuring tape to try to maintain a distance of about 2.5″ between each frame, but this part is less about being exact and more about getting a general shape to work with.
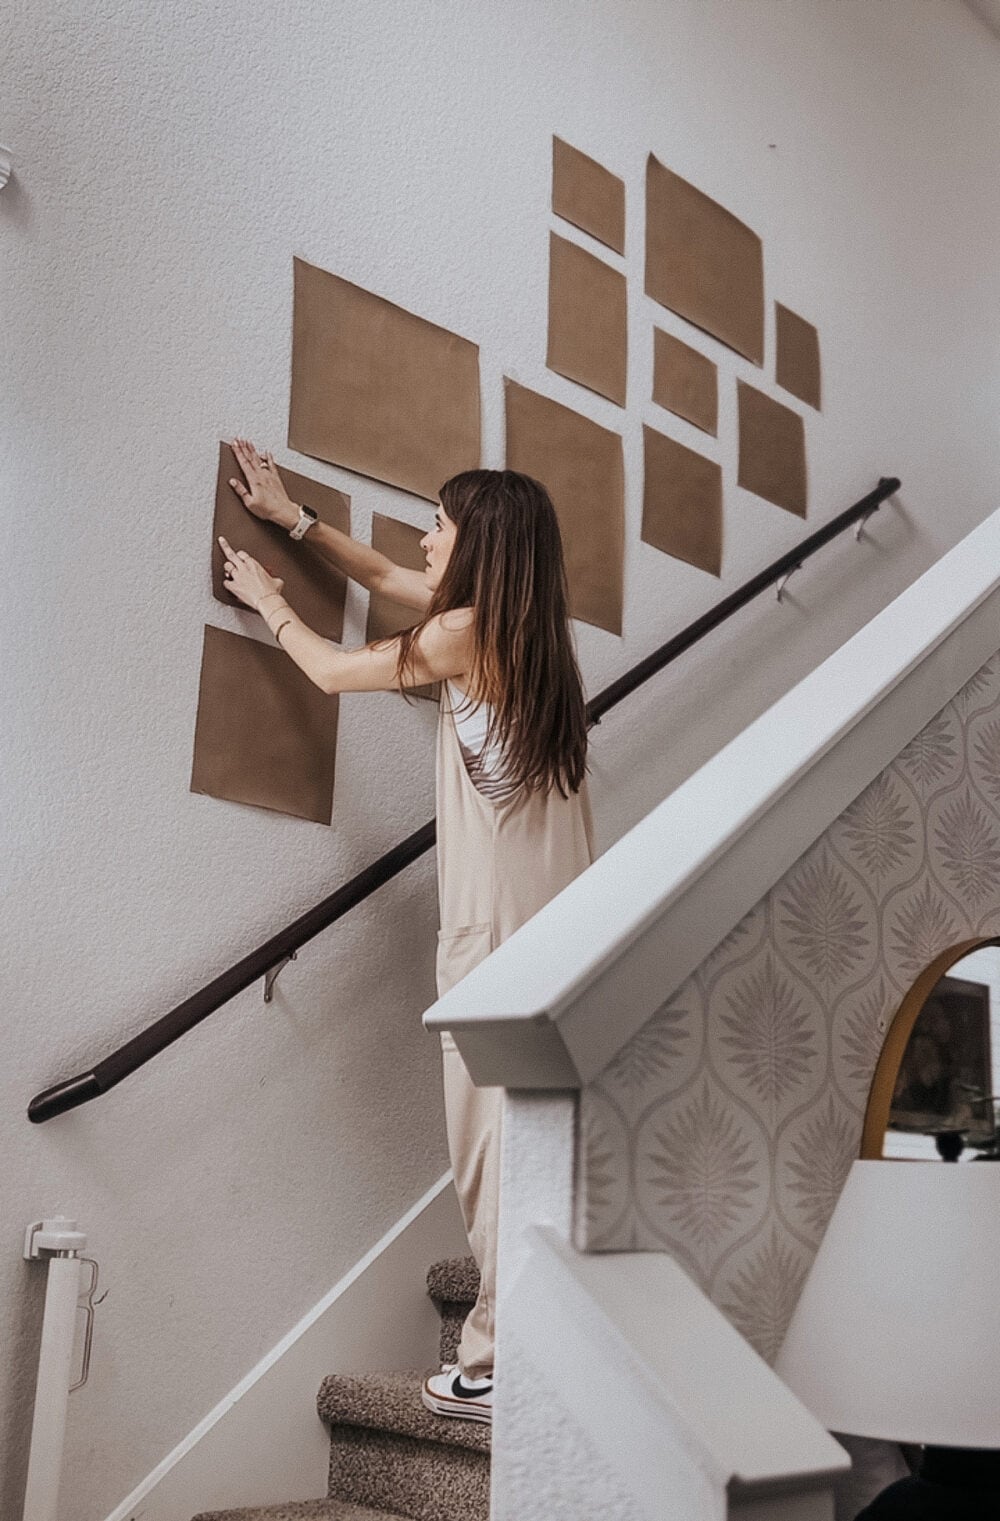
I lived with this setup for a few days to make sure I really liked it. Frames aren’t cheap, so I didn’t want to buy a ton and end up decided to scrap the entire thing or do something else. Thankfully, I still loved the plan a few days later so it was time to hang my frames!
Step Two: Print Photos + Gather Frames
My next step was to print out my photos and gather my frames together. Again – if you are starting with a collection of frames and art that you want to use, you’ll swap the order of these!
I always use Walmart to print my photos. They have a matte printing option that I love, and I’ve always had good luck with the quality of their prints. I chose a bunch of family photos, converted them to black and white (this can also be done when you’re ordering the photos), and then had them printed.
As for the frames, the ones I used are linked above in the materials section. They’re affordable and I was really happy with the quality!
Step Three: Hang the Gallery Wall!
Once you’ve got everything all planned out, it’s time to hang it! I like to use these hooks to hang photos – it makes it so quick and easy. I love that I don’t even need any tools to hang something with them! Of course, if you run into a stud (I did once or twice), you’ll need to use some regular nails or screws.
Click here to learn how to hang anything!
When hanging your gallery wall, I recommend starting in the middle-ish and working your way out. If you were super meticulous with the placement of your butcher paper frames, you can simply mark on the butcher paper where the hanger is and stick your Monkey Hook into place! Personally, I wasn’t very meticulous. I tried to get each of my “frames” about 2.5″ apart, but I wasn’t always perfect. So, after I hung the first frame I worked off of each frame and measured to be sure they’d land at a consistent spacing.
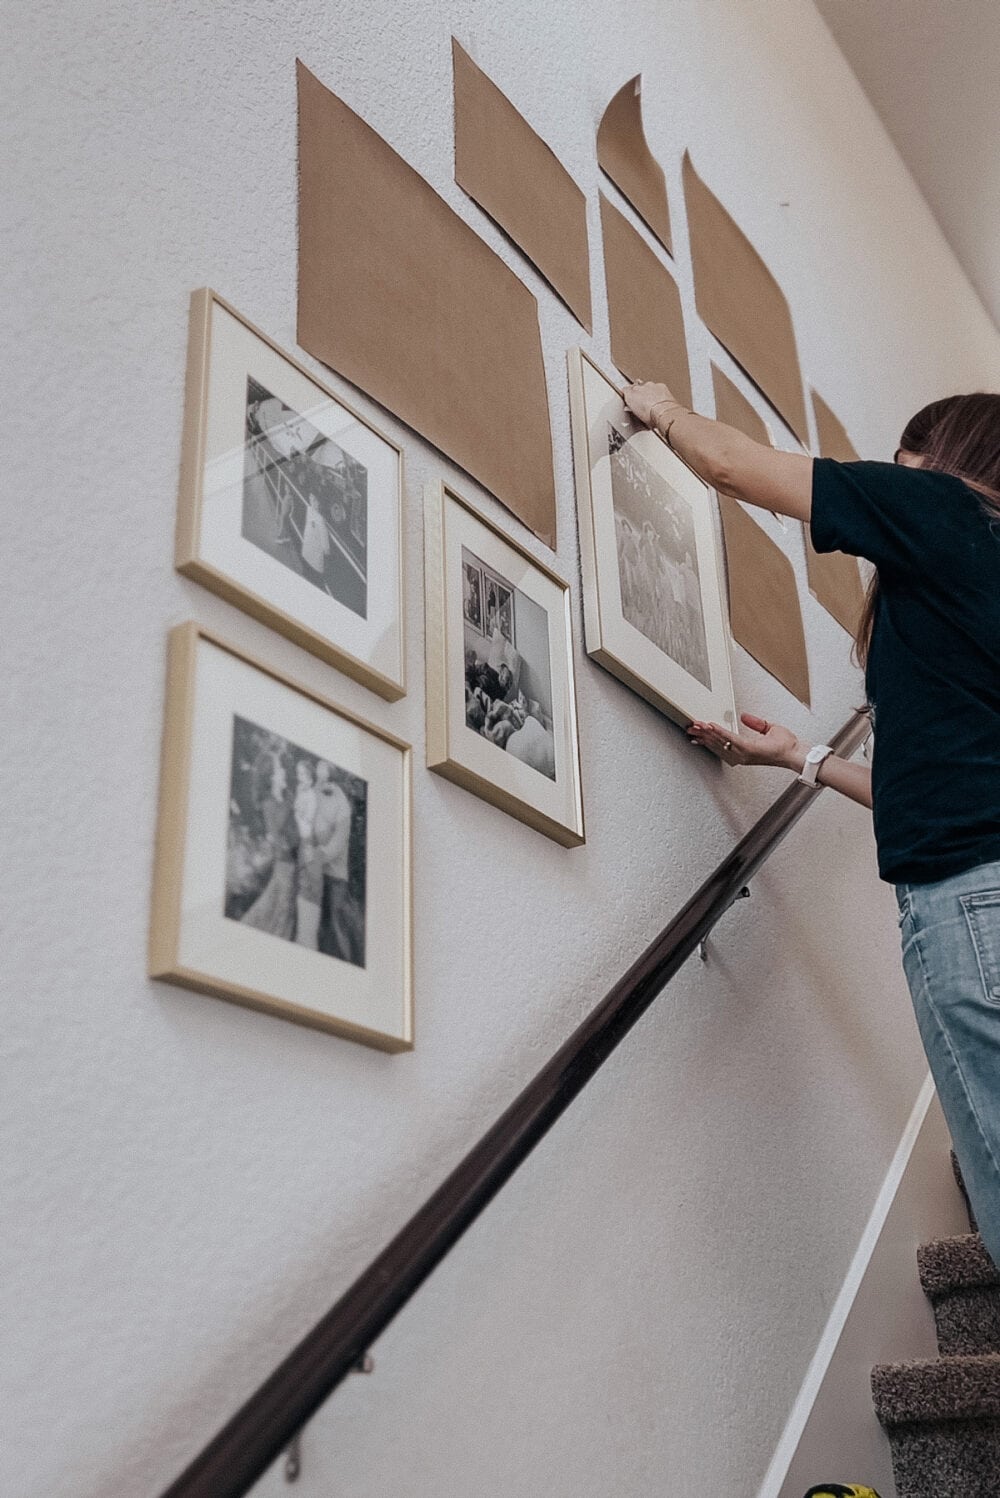
For example, if the hanger was 5.5″ from the edge of the frame, I’d add 2.5″ to that for the spacing. Then, I’d measure 8″ from the edge of the last frame I hung, and that would be where the hook needs to go! I’d mark it on the butcher paper, insert my hook, and I’m good to go!
This part of the process is, of course, tedious. But, all told it only took me about an hour total to hang all 13 of my frames! So, it’s not that bad.
Step Four: Enjoy Your New Staircase Gallery Wall!
Once everything is all hung up, you’re ready to bask in the glow of a job well done. I am so incredibly happy with how the new gallery wall turned out. It’s so nice to have some fresh photos on the walls that reflect our family, and I constantly find myself pausing to admire them. Actually, everyone in the house does. If we’re being honest, it’s caused some traffic jams.
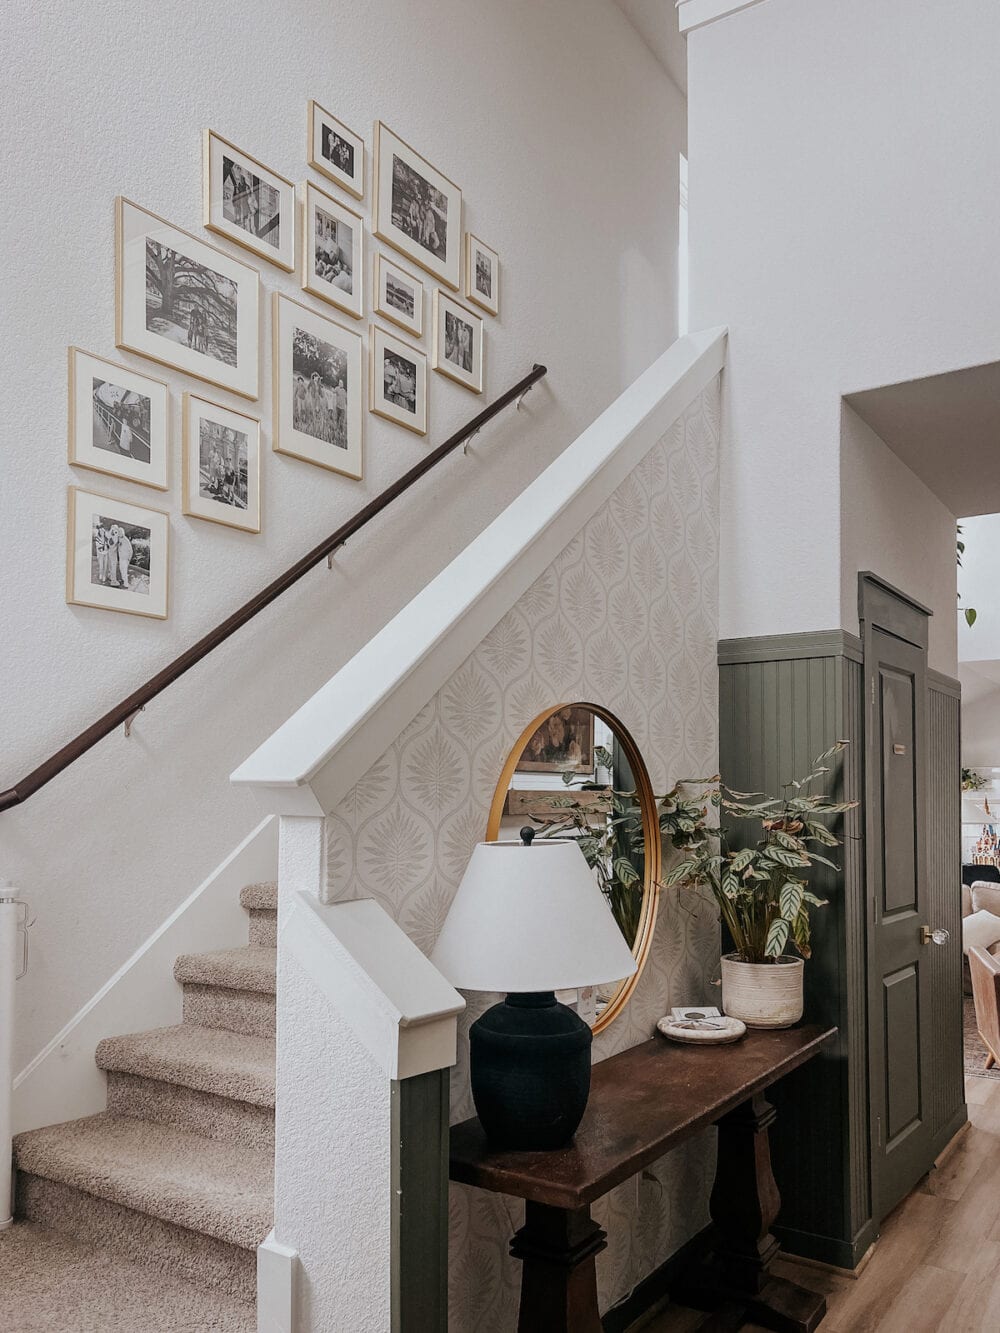
I don’t know if it’s something about getting older or what, but I’ve been more and more sentimental lately and having aaaall these family photos on the wall brings me so much joy! There’s even a little room to grow if I decide to make it even bigger…we’ll see!
