
How to Install a Rain Barrel in Your Gutter Downspout
This is a project I’ve wanted to try for years and I finally did it! Did you know you can use a diverter to install a rain barrel in your gutter downspout? I’m going to show you exactly how to do it!
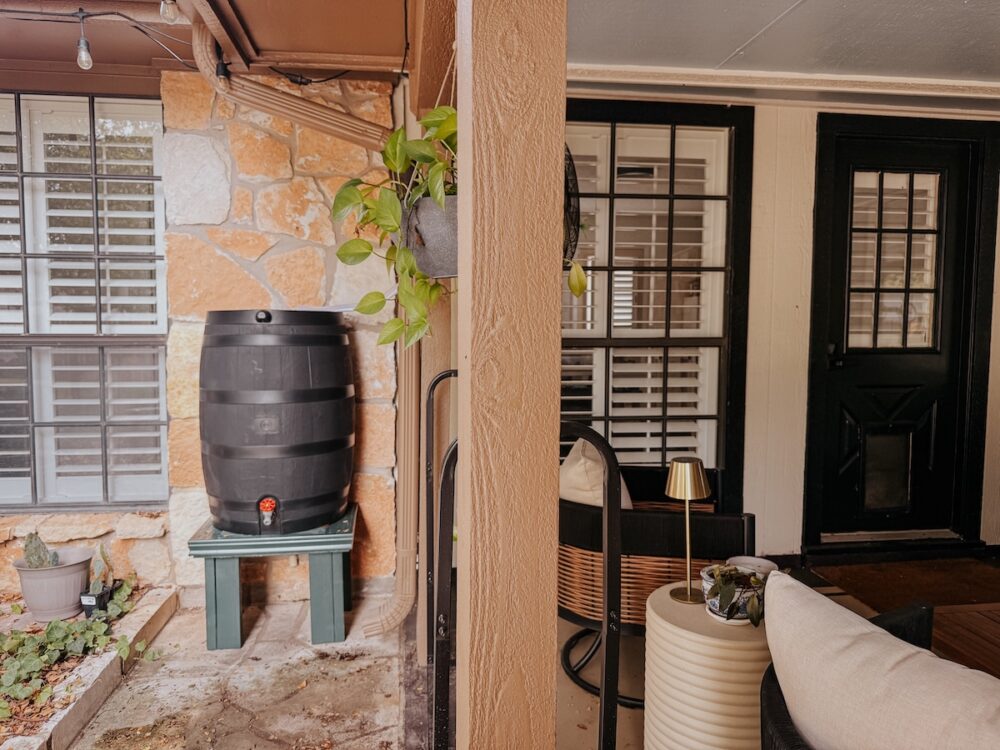
Why Install a Gutter Rain Barrel?
There are a ton of reasons why you might want to install a rain barrel in your yard, but the most important is that it’s a fantastic, eco-friendly way to get water for your garden or flower beds! Depending on how much rain you get, a rain barrel could lower your overall water consumption, which is a perk for the environment and for your water bill!
Depending on your home, it can also be a great option to help reduce the water that ends up on your patio or sidewalk. In the area I installed mine, our patio tends to flood when we get heavy rain. With the rain barrel, most of the water is collected instead and it helps keep the patio much drier. It could also help prevent erosion of soil, if installed where that’s a problem. Obviously, this one isn’t applicable to everyone but it was a huge perk for me!
Video Tutorial
I put together a quick video of the process of building the stand and installing the rain barrel. If you like to watch things come together that way, just hit play below and you can see all the details! Links and more information can be found below in the full, written tutorial.
How to Install a Rain Barrel: Diverting Water from the Downspout
I honestly expected this to be a lot more difficult than it was. It took me less than an hour from start to finish, and it was so simple. Here’s a breakdown:
What You’ll Need:
- Rain Barrel
- Downspout Diverter
- Hacksaw
- Caulk (not required, but I recommend it!)
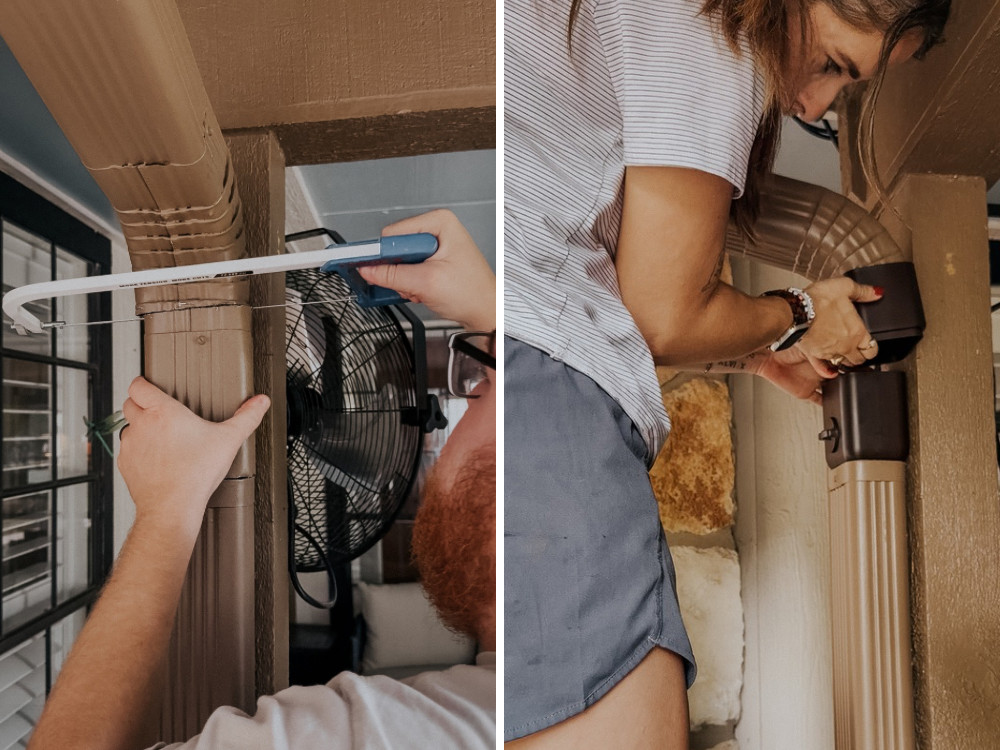
Installing the Diverter:
Your downspout diverter will come with directions – I recommend following those! But, I’m going to give you an overview of how I did it based on the instructions for my own diverter. It’ll give you an idea of what to expect.
- First up, find the spot on your downspout to cut. You want it to be at least 15″ above where the top of the rain barrel will sit.
- Use your saw to cut a 6.5″ hole in your downspout at the spot you determined. Don’t stress too much about making it exact or perfect – the diverter will hide any imperfections!
- Remove the 6.5″ section of downspout.
- Insert the top piece of the diverter into the top section of downspout, and slip the bottom section into the bottom. Fit them together. They don’t necessarily click into place or anything – they just fit together and are easy to pull apart if needed!
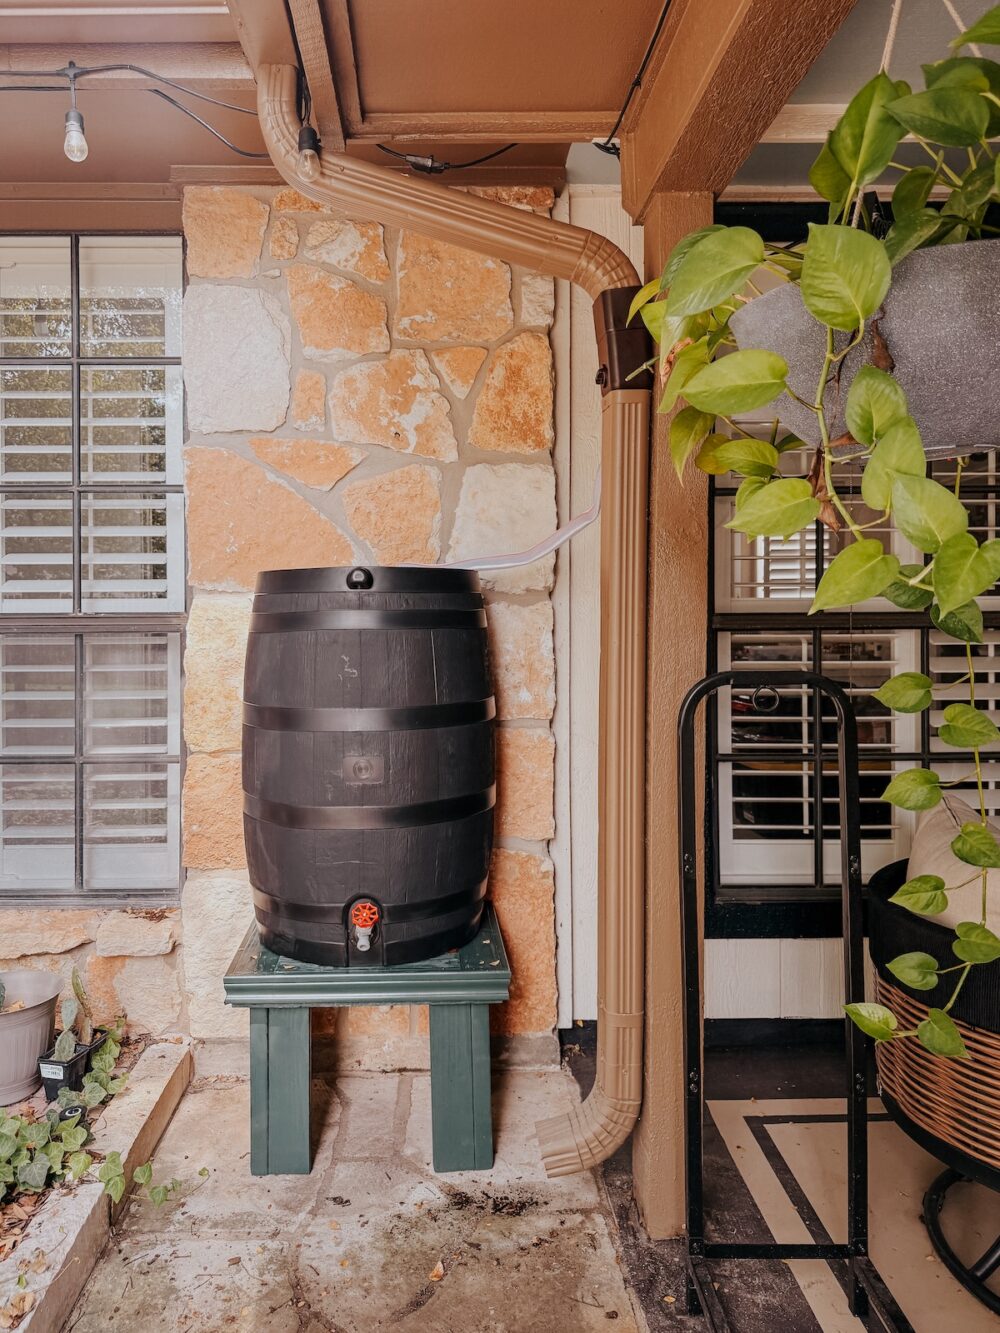
- Cut the hose to the appropriate length, then insert one end into the downspout diverter. Rest the other end on the top of your rain barrel, where the filter is.
- If desired, caulk around the top and bottom of the diverter to help hold things in place and help it last longer. This isn’t required but I think it’s a great idea to help make sure it sits securely and doesn’t shift over time.
And that’s it! I recommend grabbing a pitcher of water and pouring it into the gutter to test out your setup before you caulk, in case anything needs to be adjusted. Now all that’s left is to wait for some rain!
Creating a Rain Barrel Stand
I wanted to lift my rain barrel up off the ground a little bit. This was partially so there isn’t any grime buildup underneath it, but also because I wanted it to be easier to access the rain water spout. There are lots of different rain barrel stands you can buy online for pretty cheap, but I decided to build my own with a couple of 2x4s and a little bit of scrap wood I already had in my garage.
Here’s a quick overview of what I did:
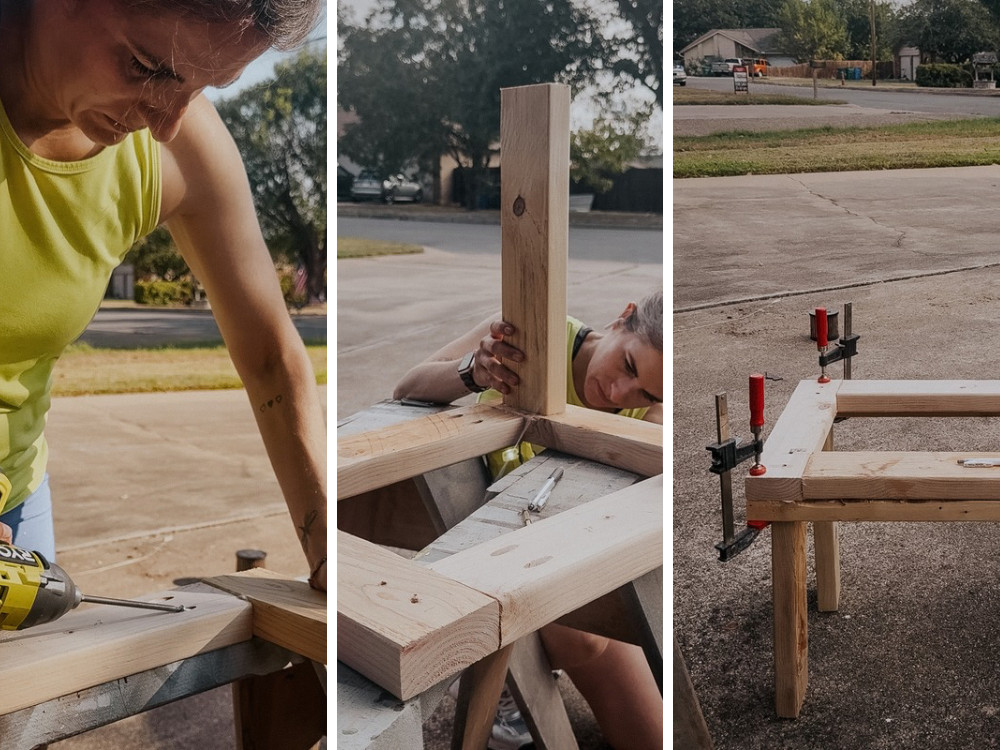
- I started by measuring the bottom of my rain barrel and determining that I wanted my stand to be 21″ wide by 17″ deep.
- I cut two pieces of my 2×4 to 17″ and two pieces to 13.5″ to create the top of the rain barrel stand.
- Using pocket holes and wood glue, I assembled the four pieces into a rectangle.
- Then, I cut six pieces for legs – I went with 16″ high, but you could do more or less depending on your needs! I made a mistake with a cut and didn’t have enough to do two leg pieces on all four sides – if you buy an extra 2×4 (or make sure not to make any mistakes!), I’d recommend two leg pieces per corner.
- Attach the leg pieces by drilling from the top of the rain barrel and into the ends of the legs. I put two pieces together to create an L shape on 2 of the 4 legs (again, I would have done all 4 if I had enough wood). I used wood glue to help hold things in place, too!
- At this point, you’ve got a rain barrel stand! You can leave it as is, or keep going if you have some scrap wood.
- Finally, I added a small 1×2 piece all around underneath the top pieces with wood glue and attached some scrap trim to the front of it. This is purely aesthetic and just added a little texture to make things look nicer!
- Finally, I caulked the seams, painted the entire thing, and sealed it using Spar Varathane!
I can write a separate blog post with more details if there’s interest, but it was a really simple project that I kind of just made up as I went. If you don’t have the confidence to try this, I highly recommend just grabbing a rain barrel stand on Amazon!
Is it Legal to Capture Rain Water?
Despite there being a rampant rumor on social media that collecting rainwater is illegal, it is legal to collect rain water in all 50 states! You can get more details for your specific location here, but there are no states that fully outlaw it, and most have zero restrictions around collecting rainwater.
Tips for Using Your Captured Rain Water
You can use your harvested rain water to…
- Water plants
- Clean outdoor sidewalks and furniture
- Maintain a compost pile
It’s not generally recommended to use collected rainwater for edible plants, as it can have residue (bird droppings, etc.) from your roof. But, it’s great for flower beds, outdoor and indoor plants, and more!
Winter Maintenance
If you live in an area where it gets below freezing in the winter, you’ll want to make sure to winterize your rain barrel before the cold season starts!
To do that, simply:
- Fully empty out your rain barrel (expanding ice can crack the barrel!)
- Leave the spigot open (so any water that ends up in there can drain back out)
- Detach the hose and close the diverter (to allow all water to go down the downspout as normal)
- Clean any filters, and remove any debris so it’s ready to go come spring!
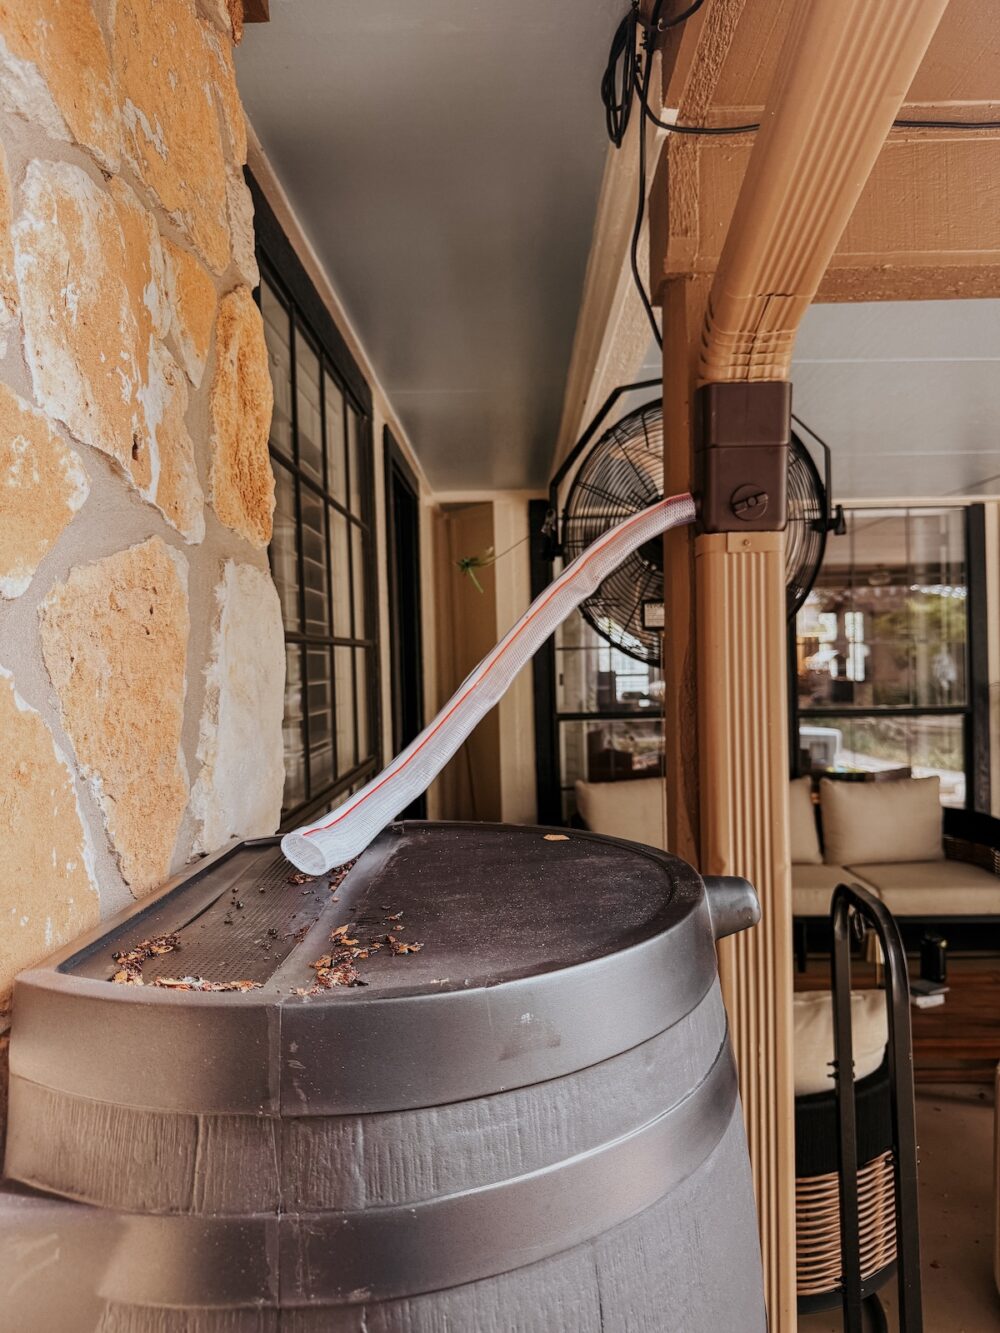
And that’s all you need to know about using a downspout to install a rain barrel! This was a fun project and I’m so excited for our next big rain so I can see how much it collects. I have a feeling that I’ll be installing more of these in the future, especially now that I know how simple it is to do.