
How to Build a Simple DIY Raised Garden Bed
Looking for some simple DIY raised garden bed plans? I’ve got you covered! Here are all the details on how to build an elevated garden bed.
If you have a small backyard, or one that’s already got a lot of trees, or even super rocky dirt (hello, Texas Hill Country!), creating a garden can be tricky. That’s why I love using raised garden beds. It makes it so much easier to find the room to garden, and it’s easier on your back, which is always a win. I’ve built a couple of different DIY raised garden beds in the past, so today I’m showing you how!
Raised Garden Bed Plans
Before we get into the nitty gritty, if you’d like to get a simplified version of the tutorial and just get some printable plans, I have you covered! You can click here to grab my printable raised garden bed plans, which will guide you step by step through the process.
Choosing a Design
There are dozens of different ways to make a raised garden bed. Some people build them directly on the ground, some do them a little more elevated.
Personally, I like a raised garden bed that stands up on legs. This helps avoid any weeds getting through, and it’s easier to tend when it sits up a little higher. That being said, it’s much harder to add a drip irrigation system or anything like that when it’s off the ground!
Take the time to consider your specific backyard and your needs for a vegetable garden before you dive in. There’s no right or wrong way to add garden bed planters to your yard. You can use bricks, concrete blocks, or cinder blocks to create your raised bed garden if you prefer. I’ve also seen gorgeous beds made from pallets! Get creative and have fun with it…and if you want to just copy my design, read on for the details!
Video Tutorial
If you prefer to watch things come together via video, I put together this little video with footage from my Instagram stories. It’s a great way to get a better visual of how things come together. But, be sure to read on for the tweaks I would make to my garden bed plans if I were doing it again today!
How to Build a Raised Garden Bed
Materials & Tools
- (12) 8′ cedar 1×4 boards
- (4) 8′ cedar 2×4 boards
- 1 roll of 2′ wide chicken wire
- 1 roll of landscaping fabric
- Kreg Jig (Optional, see note at end of post)
- Drill
- Staple Gun
- Corner Clamps
- Stain or paint
Note: The type of wood you use for a raised bed can be a hot topic. I went with cedar, as it’s a rot-resistant wood and doesn’t have added chemicals. Pressure-treated lumber is also an option, but can be a bit controversial. Prior to 2004, chromated copper asenate (CCA), was the most commonly used preservative. It was banned for consumer use by the EPA, so now it’s been replaced with alkaline copper quaternary (ACQ). It makes pressure-treated wood less toxic, but can still leech copper into the surrounding soil. Just something to keep in mind when you’re making your choices for your raised bed planter.
Cut List
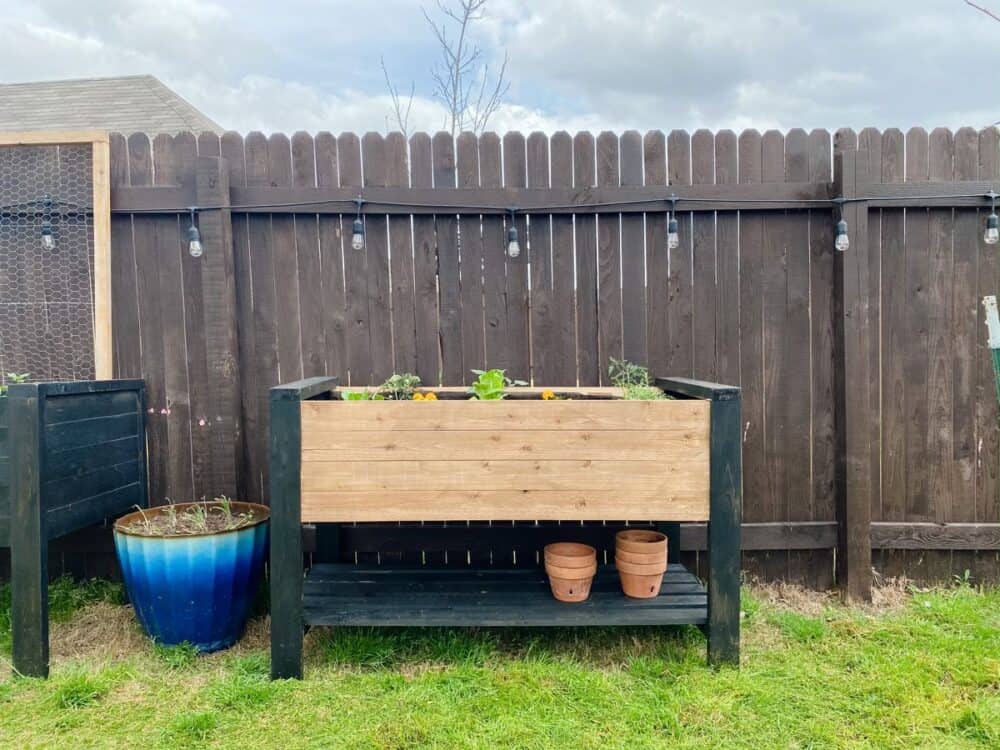
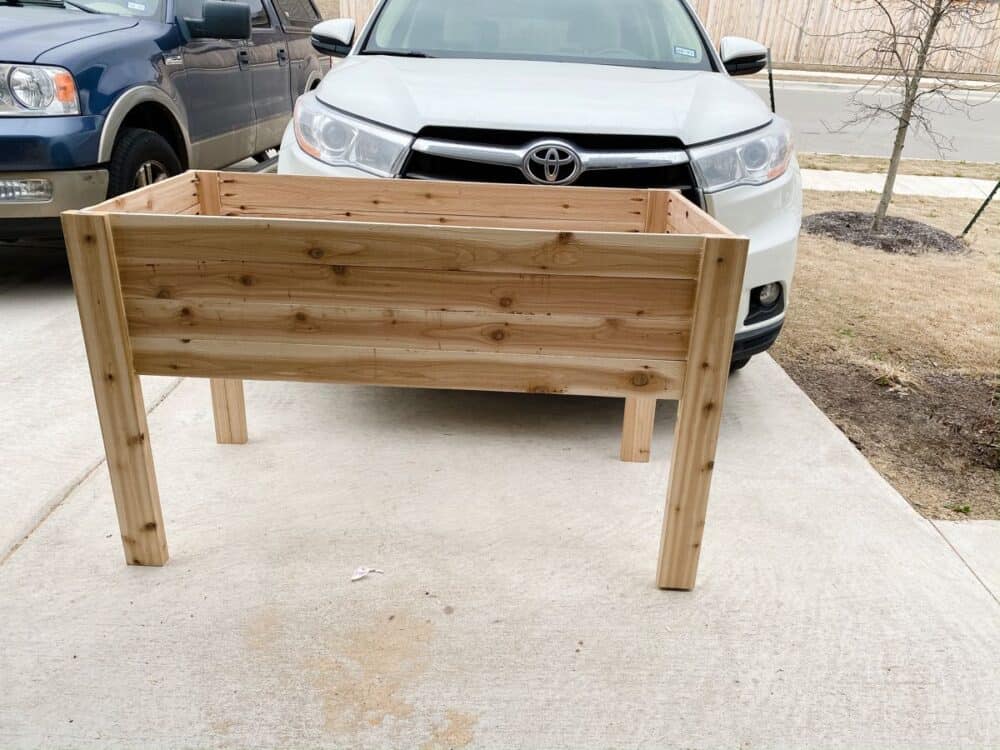
The interior of my garden bed is 2′ x 4′, and it’s 33″ tall. You can adjust any of the sizing to fit your space.
To make a raised garden bed with the same dimensions I did, you’ll need to start by cutting:
- (6) 1×4 cedar boards to 2′
- (6) 1×4 cedar boards to 4′
- (4) 2×4 cedar boards to 33″
Step One: Creating the Short Sides
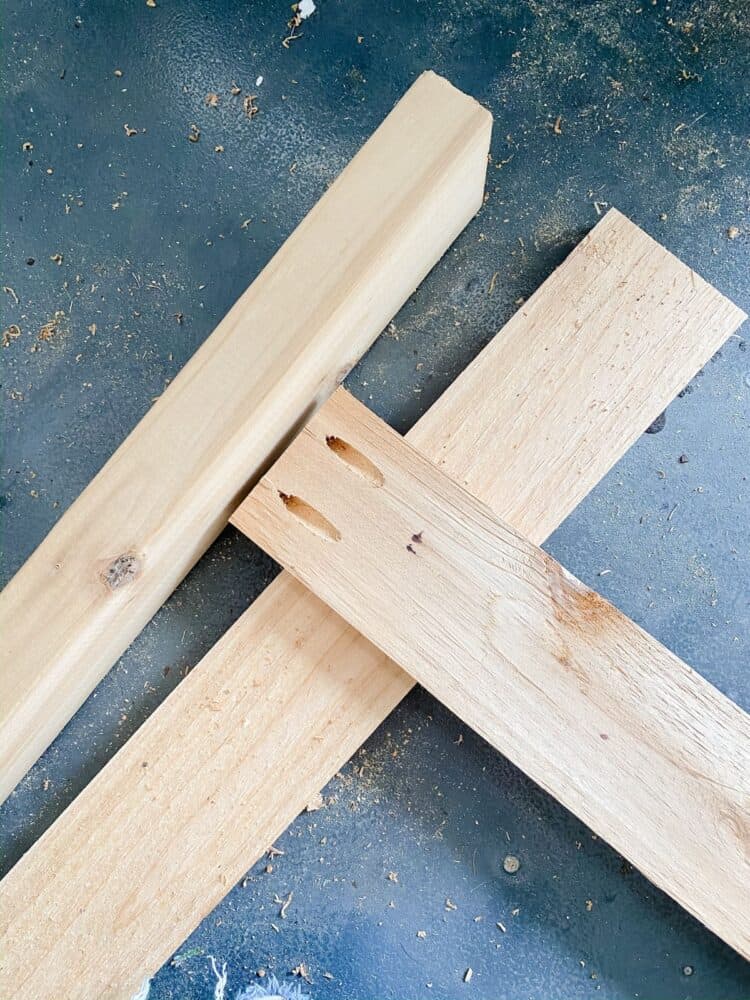
I used my Kreg Jig to help ensure that all of the screws and holes on my garden bed are hidden. If you don’t have one, I’ll add a note towards the end of the post to demonstrate how you can accomplish this build without one! Learn how to use a Kreg Jig here.
Drill two pocket holes in each side of all of the 1×4 side slats. Then, attach them to the long edge of the 2×4 using wood glue and pocket hole screws. I laid a 1×4 board underneath my slats as I was attaching them so that they weren’t flush with the front of the legs.
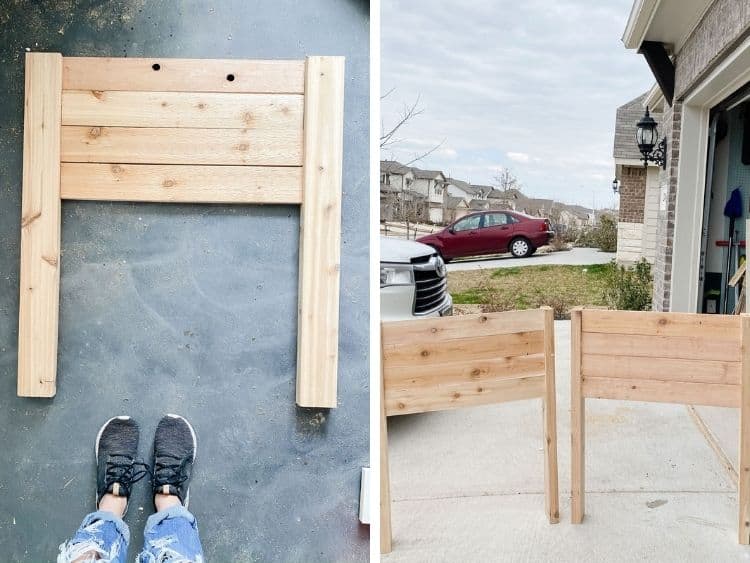
Attach four slats, pushed so that they’re touching one another, between two of the leg boards to create one side for the planter. It should look like the picture above when you’re done.
Step Two: Creating the Long Sides
Once you have the two shorter side pieces done, you’re ready to attach them together using the 4′ boards. Drill pocket holes into each side of the longer slats, then attach them to the side pieces using the same method as above.
It can get a little tricky to keep everything straight and square as you work. I just used some scrap wood to help prop everything up and assembled it on its side.
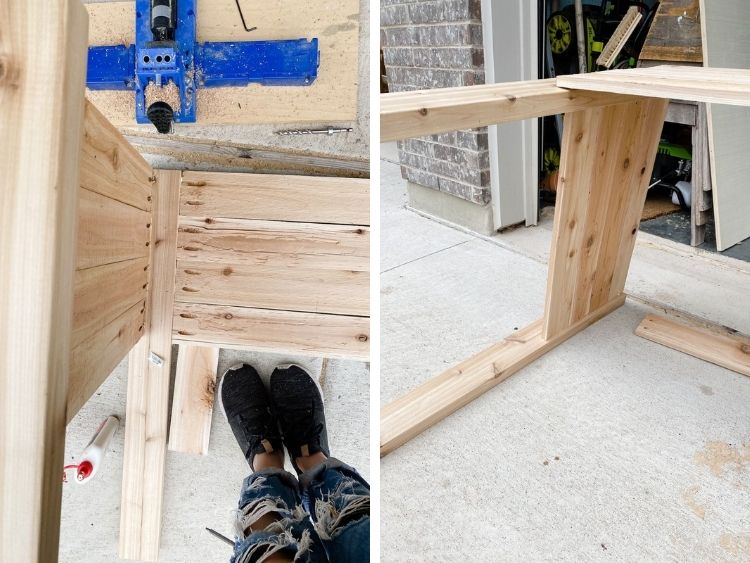
With all of the side slats done, it should be looking like a raised garden bed!
You know, just without any sort of base, supports, or way to plant anything.
Before moving on, you can also add a 2×4 piece along the top of each of the short sides to trim it out and add a nice detail – this is totally optional, but I think it looks nice!
Step Three: Adding Supports to the Raised Garden Bed
This is the most important thing we’ll talk about here, as a lack of proper support ended up being the demise of my planter boxes. This is vital, so don’t skip it!
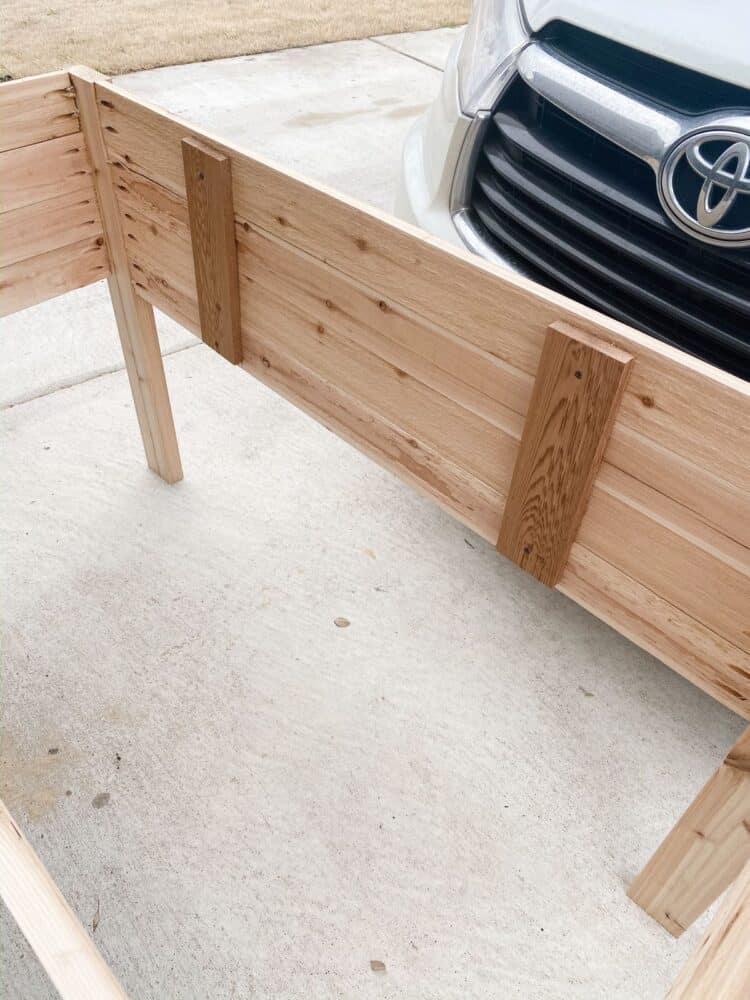
- Start with supports on the sides. I recommend using scrap 2×4 pieces. Attach three or four to each of the long sides, and one to the short sides. Make sure to screw it into each slat on the planter for added stability.
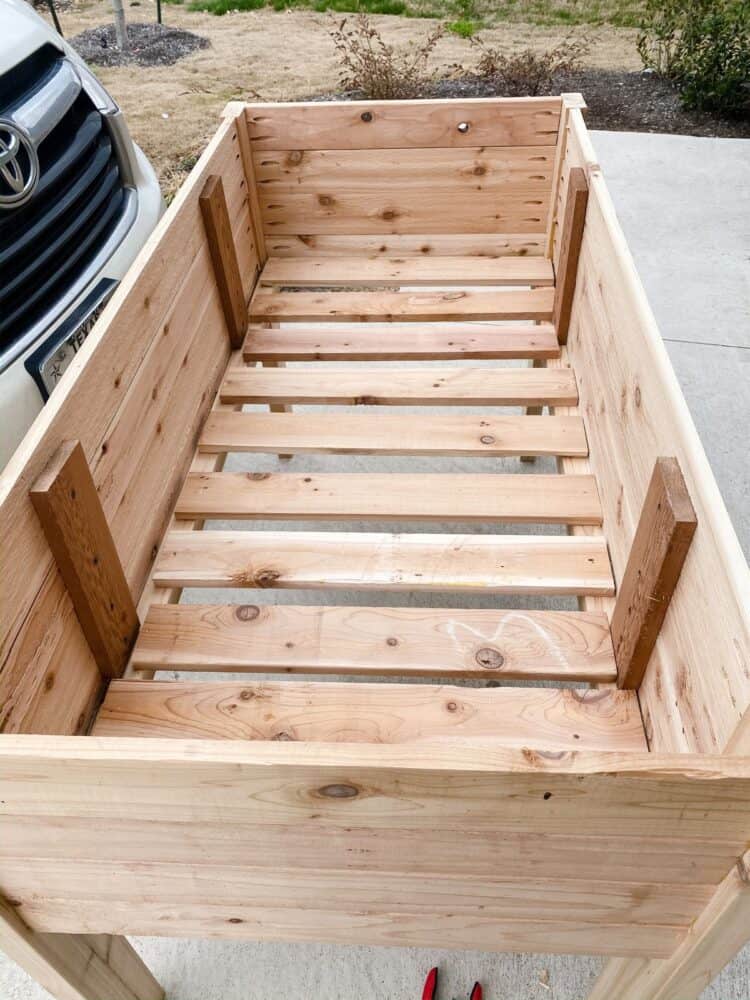
- For the bottom, I ripped a 2×4 cedar board in half to create two 2×2 cedar boards. I cut them down to fit the long interior sides of the planter, and used wood glue and screws to attach them along the bottom side of the planter.
A quick note: you should always pre-drill your holes (especially with smaller boards like these 2×2 ones) to avoid having the wood split!
With two long support pieces along each of the long sides, you’re ready to add in the bottom slats. You’ll use the scrap 1×4 pieces to cut down slats that fit in the bottom of your garden bed, and nail or screw them into the 2×2 support pieces.
Leave some space between each slat to create drainage holes.
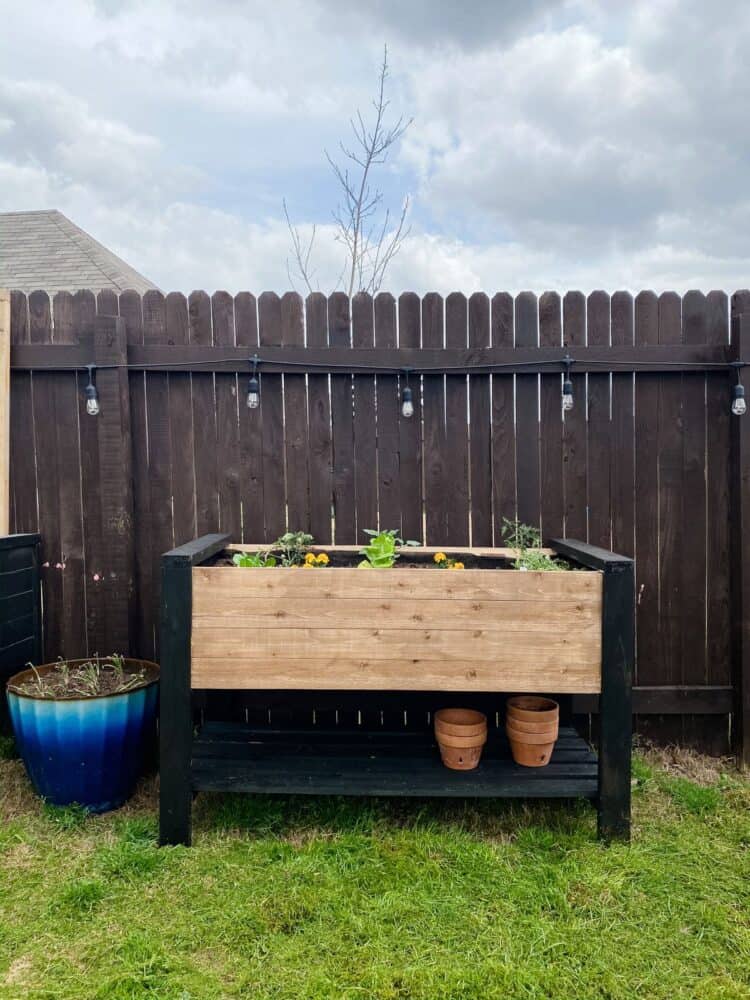
Step Four: Add Bottom Shelf (Optional)
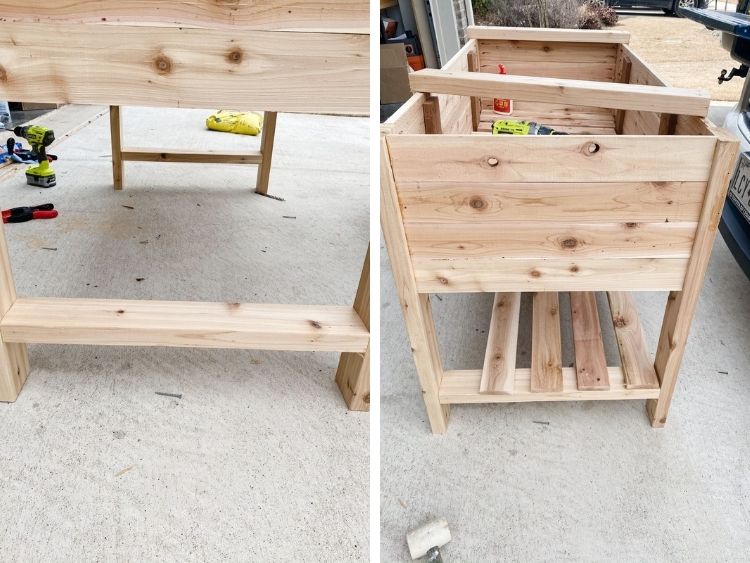
This is an optional step, but one I highly recommend! It adds more stability, and it’s very functional.
I kept this shelf really simple – I used two pieces of 2×4 cedar, cut to fit between the two short sides. I attached them with wood glue and pocket holes from underneath.
Once those were attached, I cut 5 pieces of 1×4 cedar to fit the entire length of the planter, so they were flush with the ends of the support pieces I just added. Then, I placed them evenly spaced across the supports and nailed them into place!
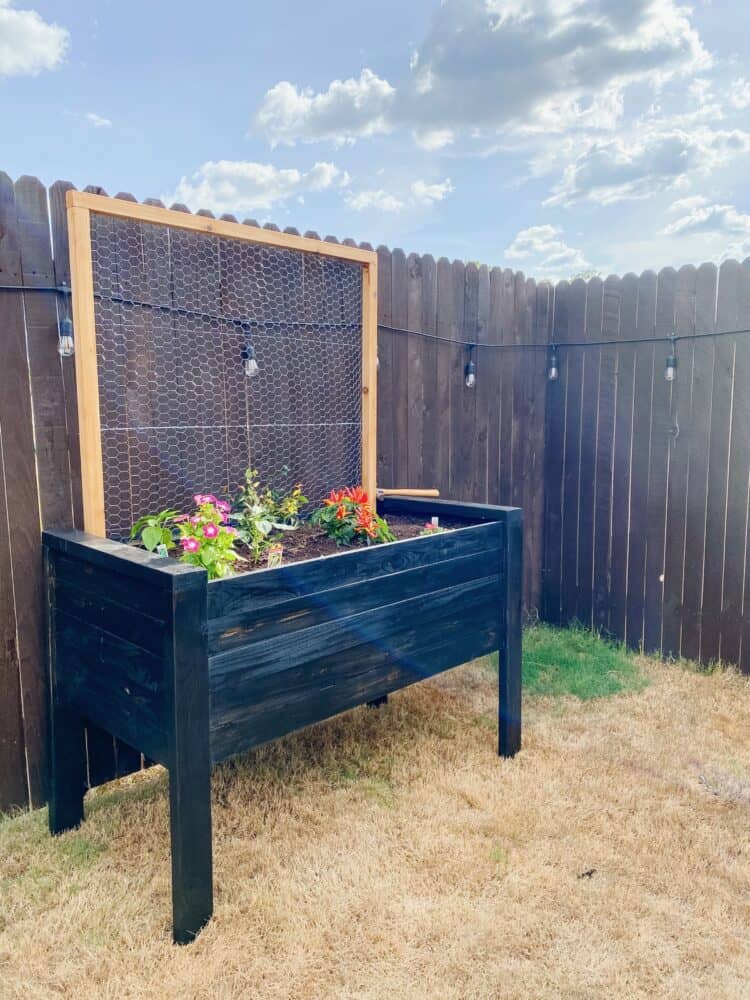
Step Five: Add a Trellis (Optional)
If you’d like, you can build a trellis out of 2×2 boards and chicken wire, to allow the taller plants to vine a bit! It’s really simple to add, and gives some much needed support to plants like tomatoes and jalapenos.
You can see my trellis in action below.
Step Six: Stain or Paint
You can absolutely leave your planter raw cedar if you love the look – cedar is great for outdoor garden beds and being exposed to the elements, and it should hold up just fine without any special sealing!
I wanted to make mine a little prettier, so I stained all of the 2×4 pieces (and the slats for the bottom) with Ebony stain, and I used this Aged Wood Accelerator on the side slats.
I didn’t seal my planter at all, but if you want to seal yours I’d recommend you use Spar Urethane.
Step Seven: Lining the Raised Garden Bed
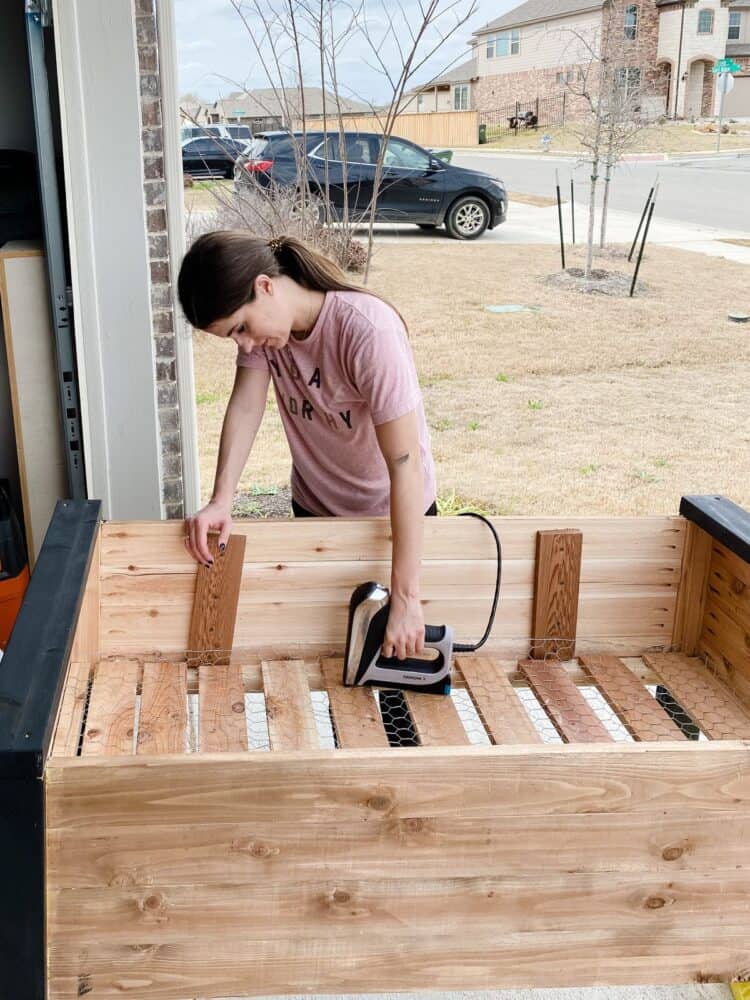
I used 5/16″ staples to attach a layer of chicken wire along the bottom of the planter. Just place the chicken wire down and use the staple gun to attach.
Once the chicken wire is in place, you’ll use the staple gun again to line the entire interior of the garden bed with landscape fabric or hardware cloth.
Step Eight: Get Planting in Your Garden Bed!
And finally, you’re ready to fill up your DIY raised garden bed and add your plants! It took me about 8 bags of gardening soil to fill it up. If you make yours shallower, you’ll be able to drop a bag or two.
plants to try…
Garden beds are great for…
- Tomatoes
- Salad greens (lettuce, arugula, spinach)
- Cucumbers
- Jalapenos
- Herbs (including thyme, basil, and cilantro)
- Carrots
- Potatoes
- Onions
- Beans
- Beets
- Peas
And so much more! Just remember to choose a high quality garden soil. You can also consider adding compost for added nutrients over time.
Can I Build A DIY Raised Garden Bed Without a Kreg Jig?
Yes!
If I were building a garden bed and I didn’t have a Kreg Jig, I would probably just start with the leg pieces and screw or nail the slats to the outside using deck screws.
Then, if you want to hide the corners, you can attach some 1×4 boards vertically to meet in the corner and hide the ends of the boards!
hello I in the process of building a similar cedar raised bed based on your design. My overall dimensions are 88″ width, 25.5″ depth and 31″ tall; its about 19 cubic ft. I didn’t use pocket holes but used deck screws, my legs are on the inside, and i used 6 legs, also added 6 lap joints attached to the 6 legs to support the inner, load bearing cross beams. I’m planning to finish it with Osmo decking oil. Thanks for the inspiration! I’m curious how yours held up over time?
Mine held up great! I did end up wishing I had added some additional supports inside as we had a bit of warping after a few seasons, but it sounds like you’ve got that covered!
Since yours are so deep, I recommend burying a bunch of big empty water bottles at the bottom of your planter to take up space without adding weight. It’s worked great in some of my giant planter pots! 🙂
Thank you for the detailed information. I ‘m preparing to start my first raised bed. In the past I have only planted in the ground but now with the info. you provided, I will try something new.
Thanks again for the pics & details,
Amanda Swiderek
Hi Amanda,
I like your raised garden bed design a lot and I plan to use it to build one for my wife. However, a 4’x2’ size is a little small and I wanted to modify it to build a 6’x2’ size. Do you know if support legs in the middle would be sufficient to support the additional weight of soil? I also like the shelf idea because it gives the structure added strength. Please let me know as soon as you are able. Thanks in advance!!!
I would add some additional support if you’re making it larger – mine had some issues with support after a few seasons of supporting the weight of the soil. So, maybe a bit of extra framing on the inside would be helpful!