Our Little Tikes Cozy Coupe Makeover
It’s #thriftshopchallenge week and I’m so excited to be sharing all of the details of how I took a couple of Little Tikes pieces from the thrift store and gave them some love so they aren’t such, um, eyesores in my backyard!
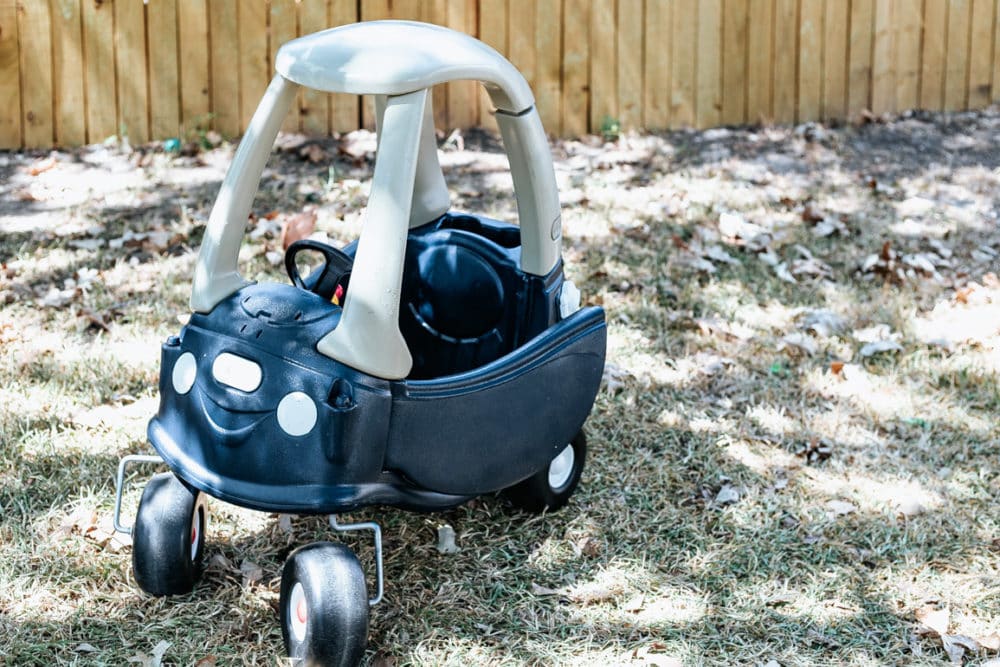
Welcome to the Fall Thrift Shop Challenge!
I’m so, SO excited to be sharing this little project with you today, along with a bunch of other projects from my super talented friends.
No clue what I’m talking about? Let me catch you up – every few months, a few of my friends and I get together and share a fun thrift store makeover. We do it to hopefully inspire you to try something new and out of the box, and to remind you that you don’t have to spend a ton of money to create beautiful things for your home.
We have a couple of new friends joining us today, and I think you’re going to love all of the makeovers. I’m going to share mine first, then at the bottom of this post you can see links to all of the other blogs, so you basically have your reading for the day totally set for you – get ready to be inspired!
little tikes cozy coupe makeover
I found one of the classic Cozy Coupe cars at my local Goodwill and, on a whim, decided to see if it would be something Grant was into. I placed him in the car, and, well, I’m sure you can guess the rest of the story.
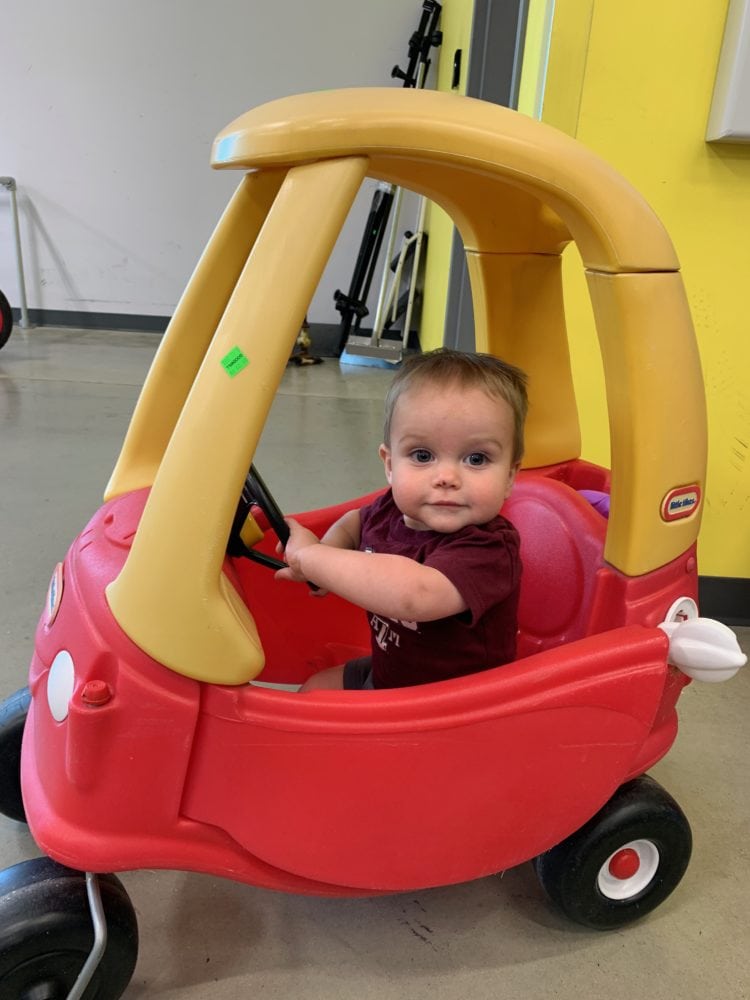
He threw a mega fit when it was time to leave and I had to get him out of the car, and it was clear that this was going to be a new favorite toy. I happened to find it during a big 50% off sale at our Goodwill, so I only paid $6 for it!
I found a ton of really cute ideas and makeovers all over the internet for these little cars, but I really wanted to keep ours simple. I’m not super crafty when it comes to painting designs and making things cute, so I decided to skip turning it into a police car or a fire truck (although, those are both adorable!) and just stick to something that wouldn’t be an eyesore in the backyard and could grow with him a bit.
I’ll go ahead and warn you – I’m really glad I didn’t go over the top with this, because this project ended up being quite a bit more challenging than I expected! Here are a few tips to make it easier for you than it was for me:
Tips for painting a cozy coupe
- You should start by cleaning the car, and I recommend making sure you do a really thorough job. I figured a general cleaning with some basic soap and water would be fine, but if I was doing this again I’d start with some TSP for a more heavy duty clean. This plastic doesn’t want to accept paint, so the cleaner you can get it the better.
- After cleaning, I think next time I would try sanding a bit – especially on the top of the car. I’d stick to a really high grit sandpaper (no less than 320 or so), and give it a light hand sanding, just to prep it to receive paint a little better.
- Once the car is prepped, the biggest thing to know when doing a project like this is that you should use a spray paint that’s specifically formulated to work on plastic! The 2X line from Rust-Oleum is what I’d recommend.
- I’d also recommend priming it first, even if you’re using a spray paint for plastic. I had a few areas that chipped when I was putting it back together, and if I was doing it again I’d absolutely take the time to prime beforehand.
Hopefully with those tips, it’ll be a little smoother for you.
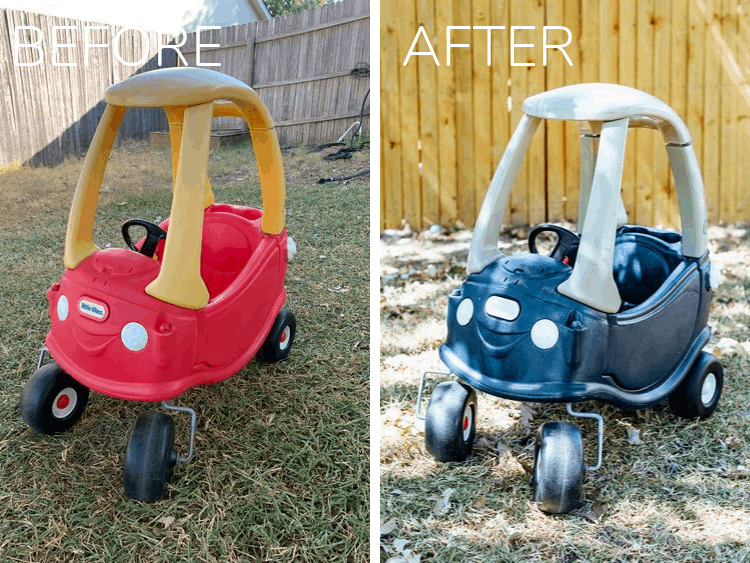
I started by taking the car apart. It sounds simple, but this was probably actually the hardest part! I was terrified I was going to break it with all of my yanking and pulling, but thankfully it all came apart without too much trouble.
The problem came when we tried to put it back together. After talking with a bunch of you on Instagram I learned that these are apparently notorious for being difficult to assemble – if I was doing this project again, I’d honestly just leave the car intact and tape it off for each color!
Once I had it taken apart, I cleaned it (again, read the tips above to see how I should have cleaned it) and once it had dried it was ready to be painted. I used Midnight Blue and Fossil, both from Rust-Oleum’s 2X line!
When you’re spray painting, always remember to stay about a foot away from the piece you’re painting and keep your arm moving at all times. Multiple thin coats is always better than one thick one! You can put several coats on within a few minutes of each other, and in fact you should either do all of your coats within 1 hour, or wait a full 48 hours before adding another coat. I’ve learned this lesson the hard way – many times. If you don’t wait, the paint can crack, so I like to just put the coats on about 5 minutes apart until it’s covered, and then allow it to dry fully.
Once it had cured for a few days and I knew I wouldn’t mess it up when I put it back together, I simple pieced everything back together and the project was done!
It’s just that simple!
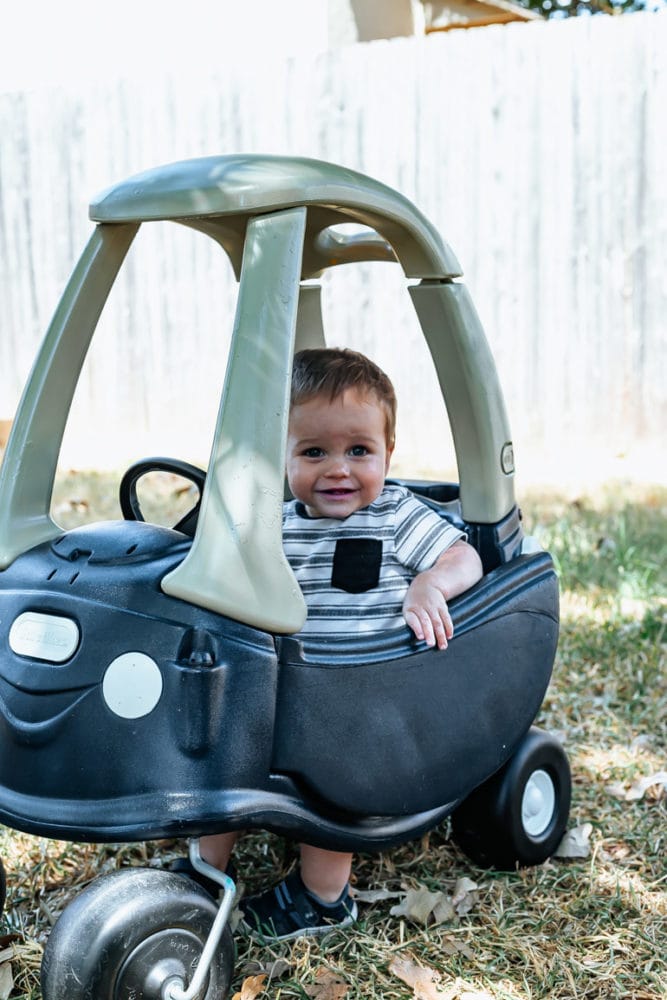
Grant is a huge fan of his new car, and I basically can’t keep him out of it when we’re in the backyard! If only he could figure out how to move it forwards, not just backwards.
Little tikes Basketball hoop Makeover
While I was at it, I also decided to give our Little Tikes basketball hoop a quick coat of paint as well. I wanted to test out how the primer did with helping the paint stick, and I wanted to be able to include the update here for you in case you decide to tackle the project too!
This time around, I primed the toy before I painted it, and I think it made a big difference. Although, I still think cleaning with the TSP and sanding a little bit before painting would have helped even more.
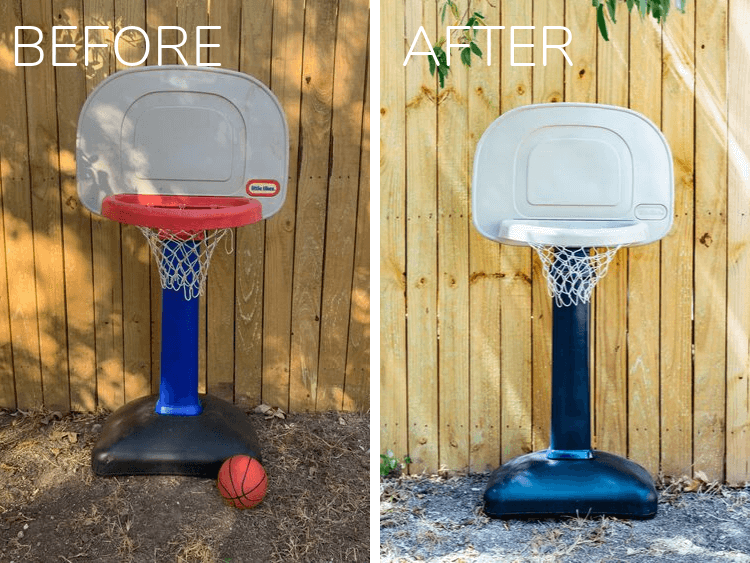
I stuck with the same color scheme for consistency, and once it was all put back together it looked so much better – I know it’s a little silly, but it feels so nice to look out my back windows and see cute toys and things that make me smile rather than brightly colored plastic toys that make me want to cringe.
I’m a big believer in surrounding yourself with things that make you smile, and sometimes that means spending an afternoon painting your kids ugly plastic toys, you know what I mean?!
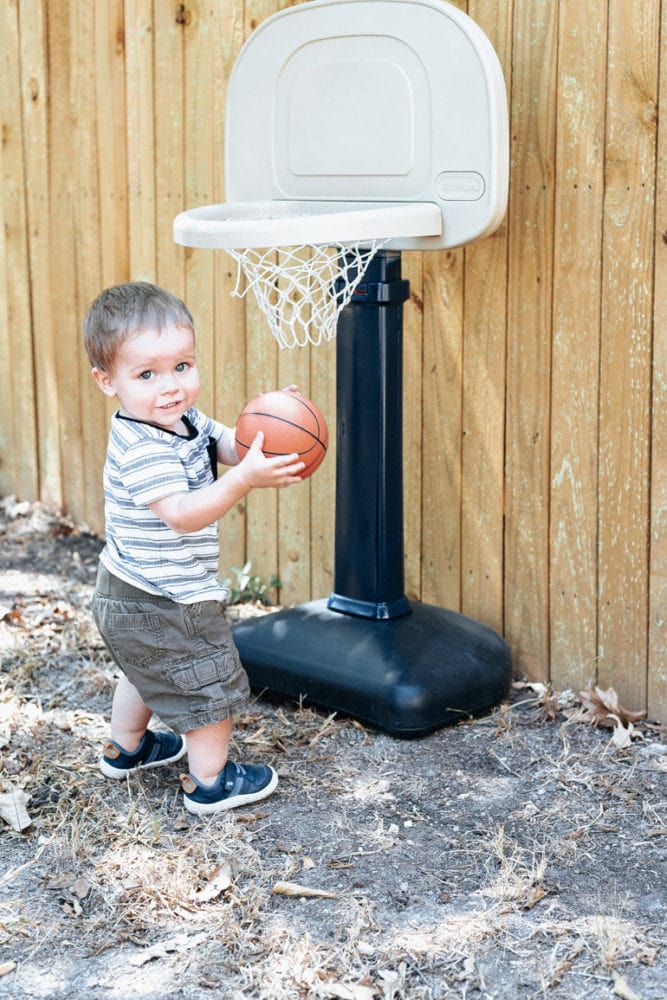
Grant really couldn’t care either way – he’s just happy to have the toys and can’t stop playing with them. I love how excited they make him, and I’m so glad I decided to pick them up!
Alright. now comes the (even more) fun part.
Fall 2019 Thrift Shop Challenge Projects
- Amber Oliver – How to Turn Dresser Drawers into Shelves
- At Charlotte’s House – Flea Market Mirror Makeover
- Green with Decor – Painted Christmas Village House
- Love, Create, Celebrate – DIY Wooden Spoon Rest
- Small Stuff Counts – DIY Pegboard Broom Organizer
- Within the Grove – DIY Book Bin
Happy perusing! Be sure to share your projects (new or old!) on Instagram using the #thriftshopchallenge hashtag. I can’t wait to see them!
If you want to see all of my old Thrift Shop Challenge projects, you can check them out below!
- Fall 2018: Making Over Rusty Metal Bar Stools
- Winter 2019: Metal File Cabinet Makeover
- Spring 2019: DIY Faux Marble Table Makeover
- Summer 2019: How to Turn Anything into a Planter

Hi! I painted one of these, and the paint keeps rubbing off. I didn’t research it before hand, so I didn’t prime or sand. I did a minimal 3ffort clean with soap and water. I used the rustoleum spray paint and their clear finish. I’m not sure how to fix this. Any ideas?
I’d recommend staring over and using a spray primer first!
Can you tell me how you got the hoop out of the backboard to paint it? (Or did you?) i am trying to do this project and can’t figure out how to remove the rim from the backboard! Ahh! 🙂
I just took the net off and left the hoop part attached!
Okay, this is the cutest thing ever!! We want to get one of these cars, and now I may have to paint it when we do! Thanks for organizing such a fun challenge!
This is Arthur’s favorite toy at school! Looks great!