
DIY Faux Aged Lamp {with Joint Compound!}
Last updated on July 25th, 2024 at 01:02 pm
Learn how to create a simple DIY aged lamp using joint compound and…DIRT. That’s right. A dirt lamp. Let’s get into it!
Do you ever do a room makeover in stages and when you finish it, you realize something you added at the beginning just isn’t working anymore?
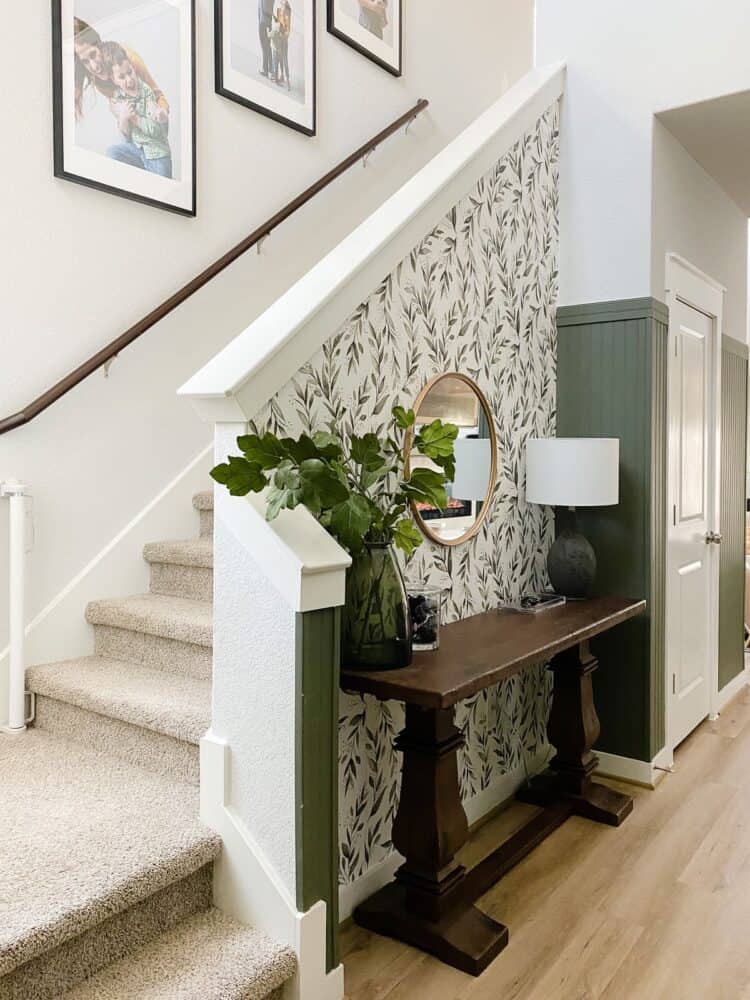
Take, for example, my entryway. We did a phase one, and then later came back in and added some moody beadboard paneling, and then we added some photos going up the stairs. The finished space is one of my favorite parts of my entire house, but once all was said and done I pretty quickly realized the blue lamp (here’s a link for it!) I had originally picked for the space just was not working for me anymore.
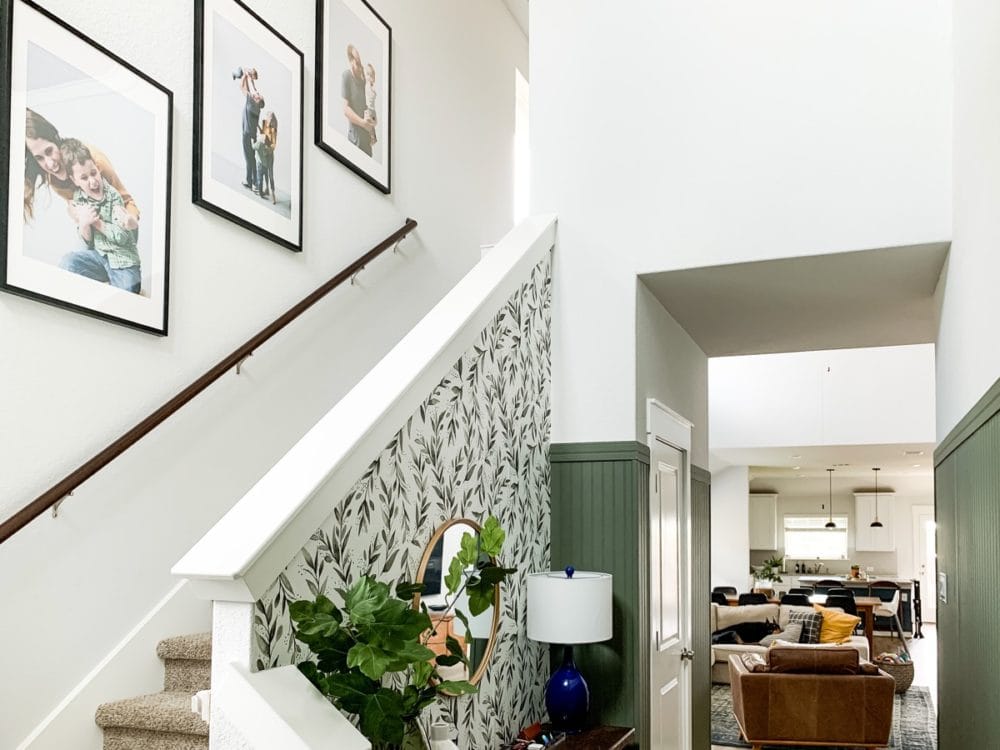
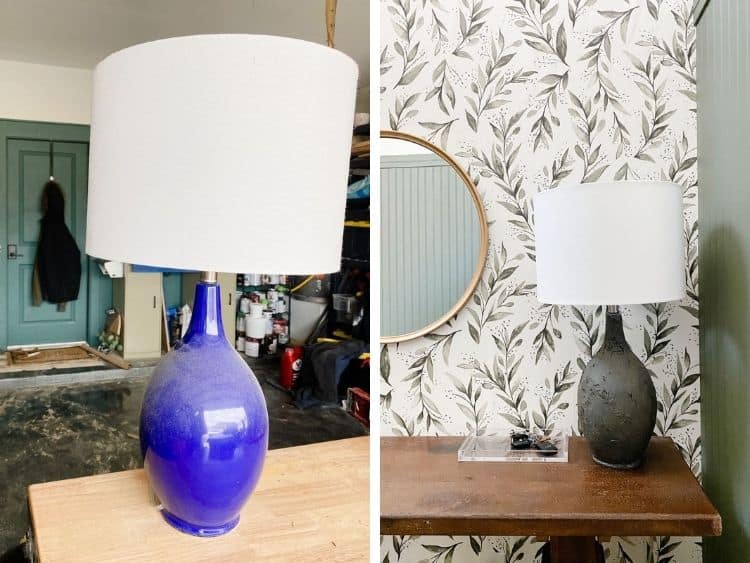
I love the shape of the lamp and it was in great condition. So, I wanted to keep it but just give it a fresh look that fit the space a little better. I wanted it to be a neutral color (so it could layer into the space rather than competing for your attention). And, I wanted it to feel a little more aged and not so shiny and new.
I decided to try a couple of techniques I’ve watched a lot of other people do on Instagram but haven’t tried myself. I figured, worst case scenario I could just scrap the whole thing and find a new lamp. But, I had a good feeling about it.
And thankfully, my good feeling was right because I LOVE how it turned out!
Read on for the details of this (incredibly simple) makeover!
DIY Faux Aged Lamp
Materials needed:
- Lamp (this would also work nicely on a vase!)
- Joint compound
- 220-grit sandpaper
- Plastic putty knife
- Paint (I used Carbon Copy by Behr)
- Dirt (yes, I said dirt)
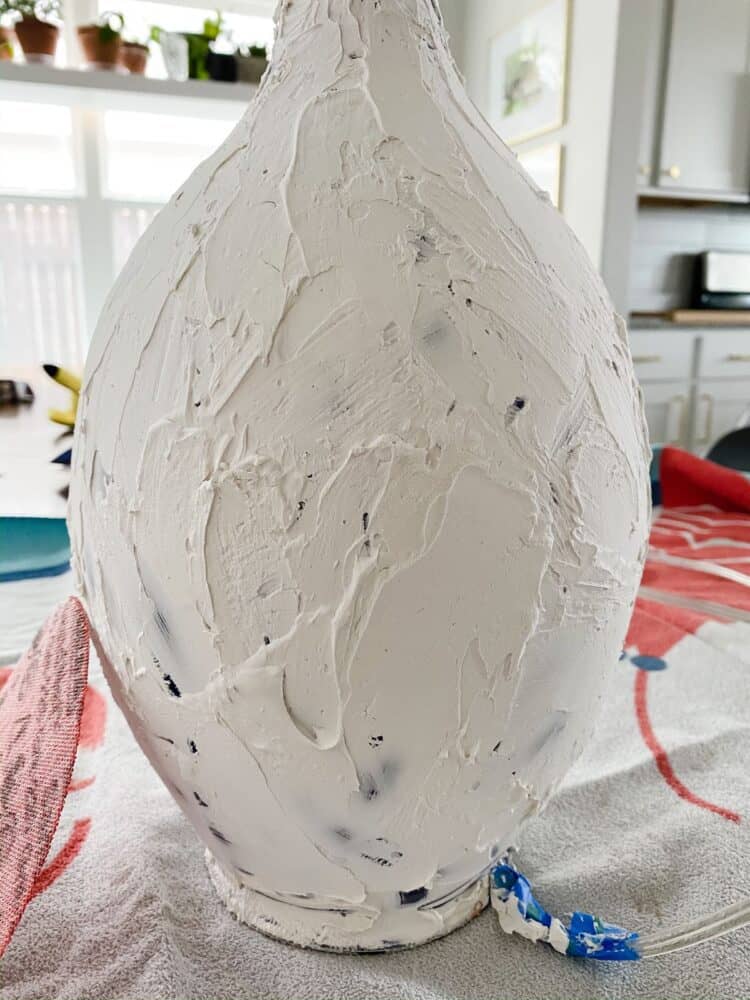
Step One: Add Joint Compound
I started by lightly sanding the lamp to scuff up the ceramic surface and help the joint compound stick a little better.
I used a plastic putty knife to spread the joint compound all over the lamp. There is no real technique here other than “cover it up”. You want some movement and texture. You don’t want it to be perfectly smooth!
I did two layers of joint compound. Be sure to let the first one dry fully before you apply the second. You don’t have to cover every inch of the lamp, since you’ll be painting it. Just go for a nice, textured look with some good movement. Perfection is totally overrated here.
Step Two: Paint
Once your second coat of joint compound is dried, you’re ready to paint. You can spray paint, but I decided to go with a paintbrush because I wanted some brush strokes and imperfections in the paint job too – remember, my goal was to make it look aged, so some messiness is a good thing.
After allowing the paint to dry, things are gonna get a little weird.
And, you’re going to have to just trust me on this one…
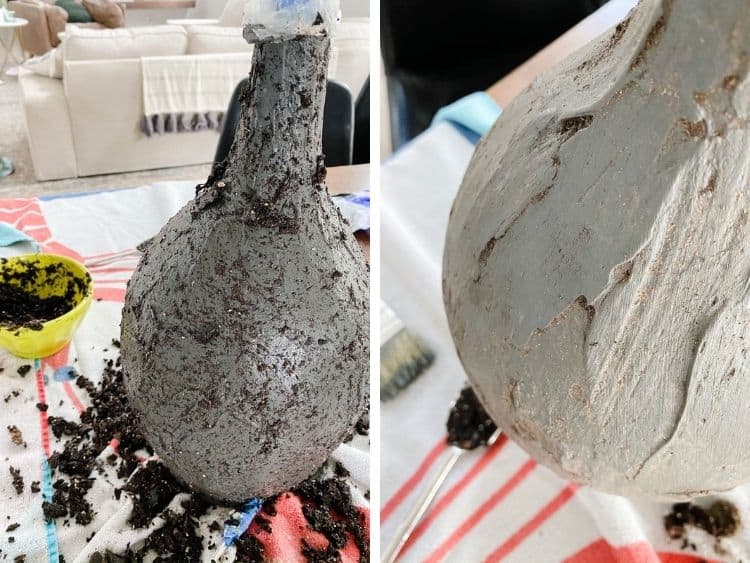
Step Three: WHAT?
Your next step is to rub some mud all over it.
I know. I know.
Hear me out – once you paint the joint compound, things will still feel a little “new”ish. I felt like the paint job really needed some dimension, and mud was the way to go. I grabbed some dirt from my backyard and added a bit of water to it (you don’t want it to be too wet, or it won’t stick). Then, I rubbed it aaaaaaall over the lamp.
After letting the dirt dry fully, take a towel and (gently) rub off the extra dirt. Most of it will flake off, but some will have settled into the grooves and lines of the paint to really add some dimension to the paint.
See?
Then, just plop the lampshade back on, put your lamp in place, and bask in the glow (literally) of a (faux) antique lamp!
This was a really fun and light little project – which, honestly I needed something simple and kind of silly after my giant fireplace project! I really love how it turned out, and I think the lamp layers into the space so much better now.
If you love the idea of a DIY aged lamp but don’t want to get so messy, check out this DIY textured lamp I did for my bedroom – it has a similar vibe but involves no actual dirt, hah!
Why didn’t you show a close up of the after?
I don’t always catch every photo people might want to see! 🙂