
DIY Thrift Store Lamp Makeover
Last updated on March 3rd, 2023 at 10:14 pm
Friends, it’s Thrift Shop Challenge time! This is one of my favorite posts to write each season because it’s always such a stretch for my creativity and I really love a good challenge.
If you’re new here, let me catch you up. Once a season, I gather a few of my blogging friends together and challenge everyone to head out to the thrift store (or a garage sale, or heck, their own garage!) and find something to give a makeover to. It can be big or small, simple or complicated, but the bottom line if you have to give something a new life and purpose in your home.
If you want to catch up on past challenges before you read on, here’s all the fun we’ve had so far:
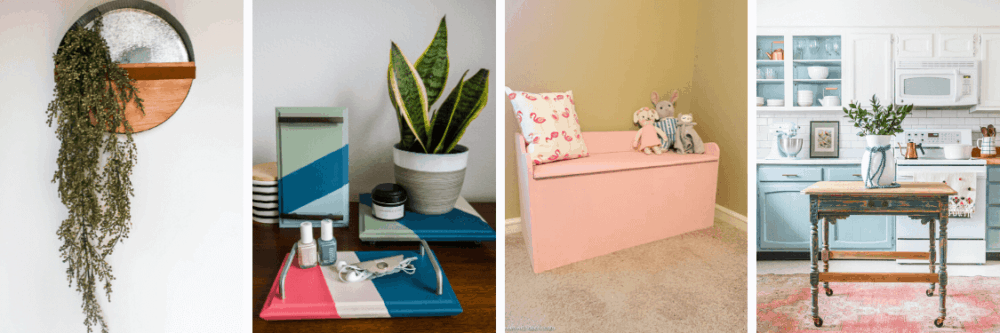
- DIY Metal Bar Stool Makeover
- Thrifted File Cabinet Makeover
- How to Turn Anything into a Planter
- Faux Marble-Topped Table
- Little Tykes Cozy Coupe Makeover
And today, it’s the Winter 2020 challenge and I’ve got a really fun project for you! Be sure to read all the way to the bottom of the post to see all of my friends’ projects as well – you’ve basically got a full day of fun projects ahead of you!
This season’s Thrift Shop Challenge was honestly one of the most challenging times I’ve had so far in terms of shopping – I really struggled to find something that I wanted to show some love to and the pickings were pretty slim everywhere I went.
But then, on a whim one day I popped into Goodwill after I dropped Grant off at school and I saw these (I only grabbed a photo of one, but there were two matching lamps):
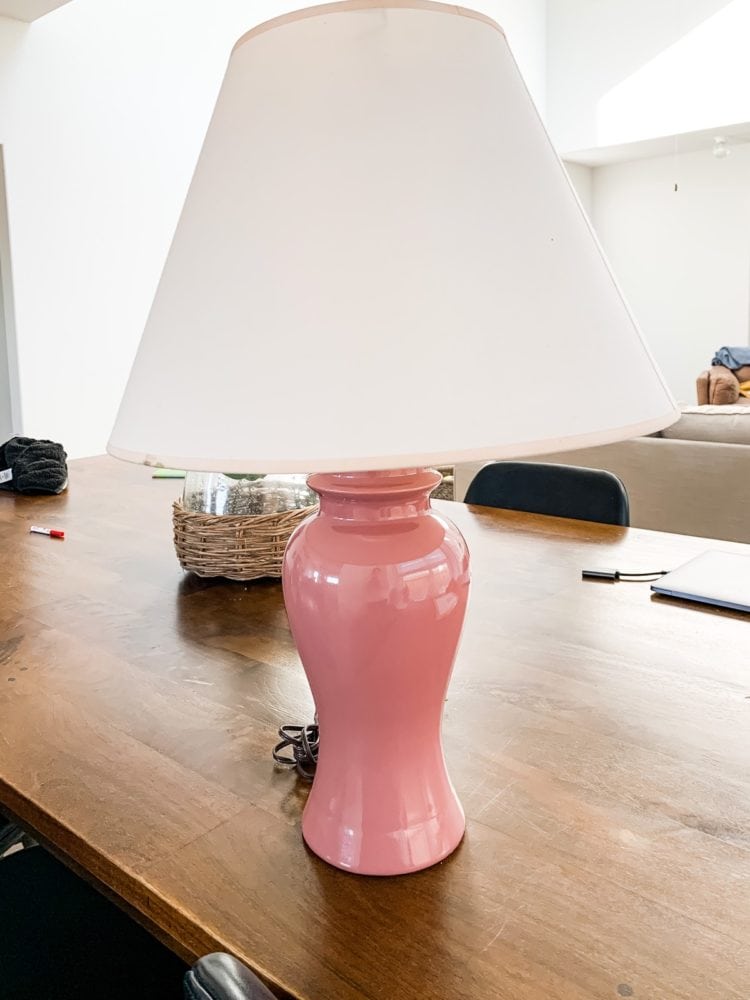
They caught my eye immediately but I honestly walked past them about 5 more times, thinking about them every time, before I finally decided to pick them up and go for it. It’s rare to find a matching lamp set at any thrift store, and I loved the shape of these. For just $7 each, it was pretty much impossible not to get them!
I’ve been gathering ideas for lamps for our bedroom for quite some time now, but I’m pretty picky when it comes to table lamps and I had been having a hard time finding something I loved. The shape of these was exactly what I was looking for, and I knew that with some spray paint and fresh lampshades I could turn them into the perfect lamps for us.
DIY thrift Store Lamp Makeover
Materials:
- Rust-Oleum Flat White Primer
- Rust-Oleum Stone Creations in Bleached Stone
- Rust-Oleum Flat Black Spray Paint
- Rust-Oleum Matte Clear Spray Paint
- I also purchased new turn knobs for the lamps because they were missing…
- …and I got these lampshades because the old ones were damaged and stained.
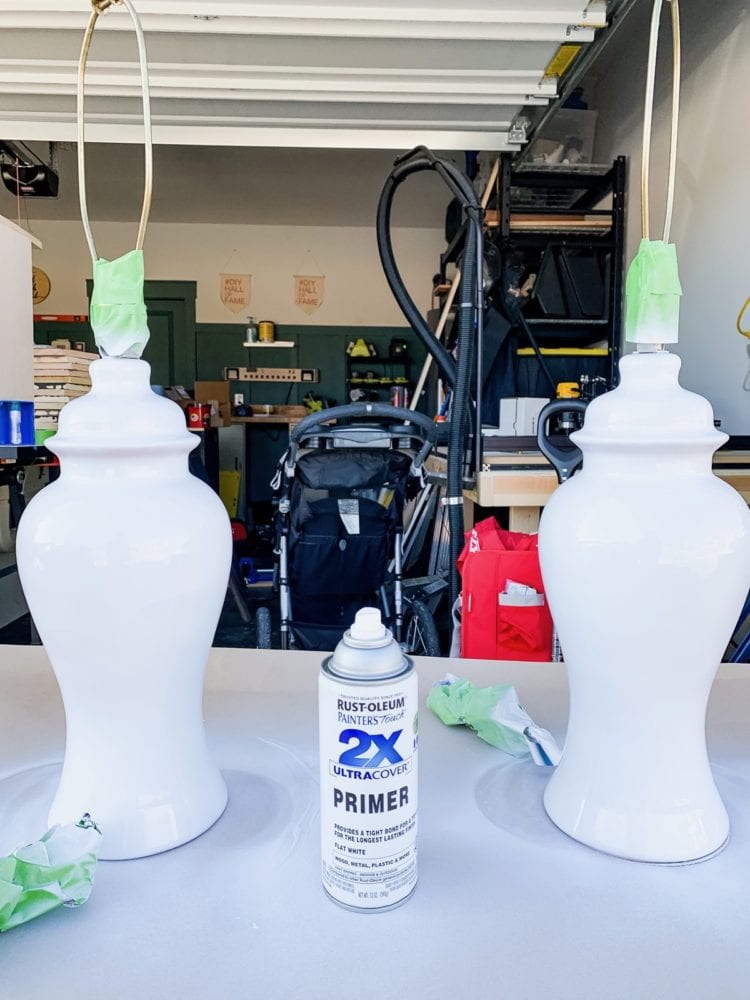
Step one was to prime the lamps. I’ve seen a lot of people skip this step when painting glass lamps or vases, but it’s so vital! Ceramic is very glossy and smooth and it can be hard for paint to really adhere (especially since you can’t really sand it to rough it up like other surfaces). Primer will create a great base surface for the paint to stick to, and will help ensure your project lasts a lot longer.
Apply 2-3 thin coats of primer just a few minutes apart, then let it dry for the recommended amount of time (generally, you’re supposed to add a top coat within an hour or wait for a full 24 hours).

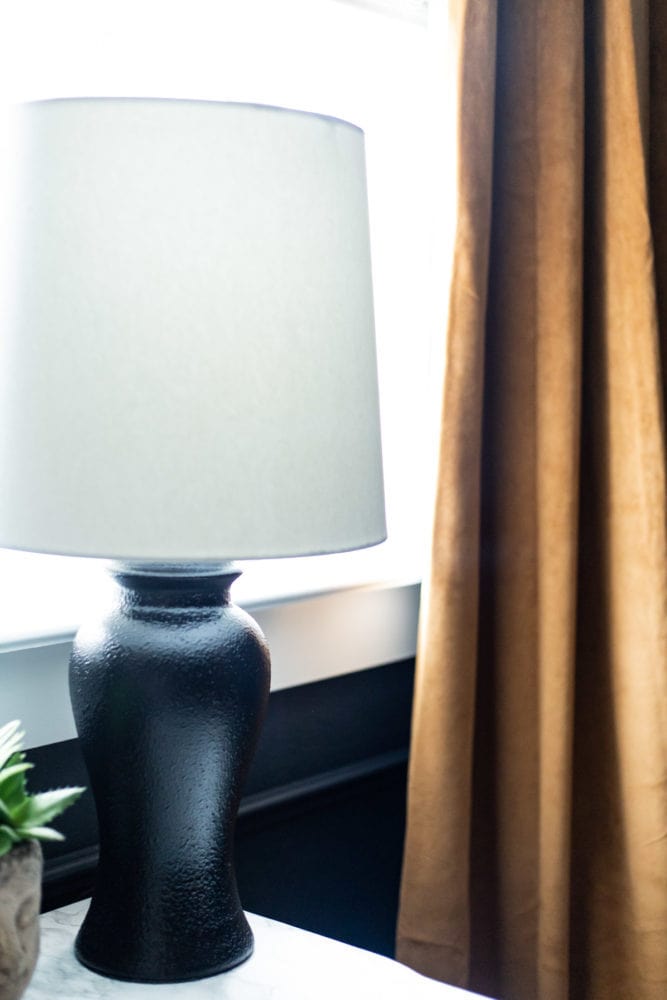
After priming, you’re ready to add some texture! I really wanted these lamps to have a rough, bumpy texture that made them feel old and weathered. I hadn’t ever worked with textured spray paint before, but I found it to be really easy (and so fun!).
You can spray it on a little bit thicker than regular spray paint, because it’s thicker and less likely to drip (and you want some variations in the finish anyways). I did notice that the color doesn’t cover as well as regular paint will (so if you’re leaving the color of the textured paint – which is a great color – you may need to paint a similar color as the base coat first, or just plan for extra coats) and it takes a lot longer to dry than regular spray paint.
I gave it a couple of hours between coats, and then I let it dry overnight before doing a top coat. You probably wouldn’t need to wait quite that long if the weather is warmer, but in the cold weather it will take quite some time to get fully dry.
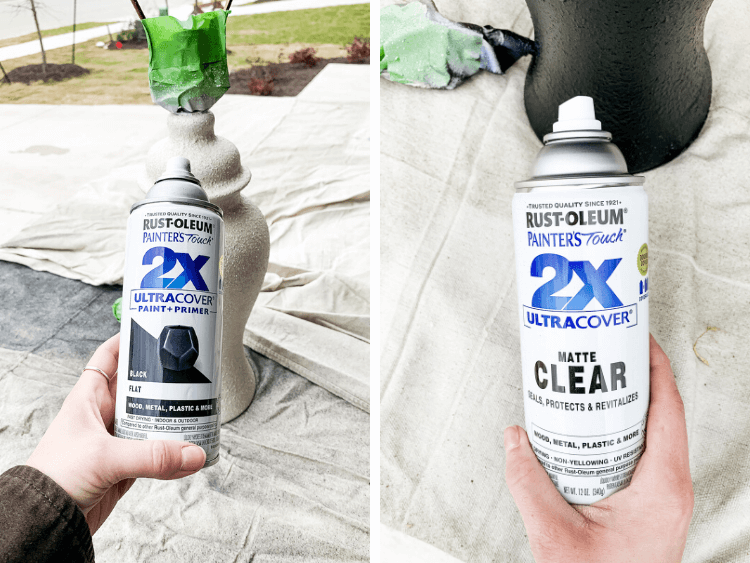
Once your texture is dry, you’re ready to paint it whatever color you want! I went with flat black spray paint, but I saw a few other people do similar projects with craft paint and hand-brushing it on for a more imperfect look. This was gorgeous too, so do what makes your heart happy!
I gave the lamps a few coats of flat black spray paint (flat paint is key here to keep these looking really antique and beautiful and not like a faux finish). Then, once that dried I sealed it with a matte clear coat!
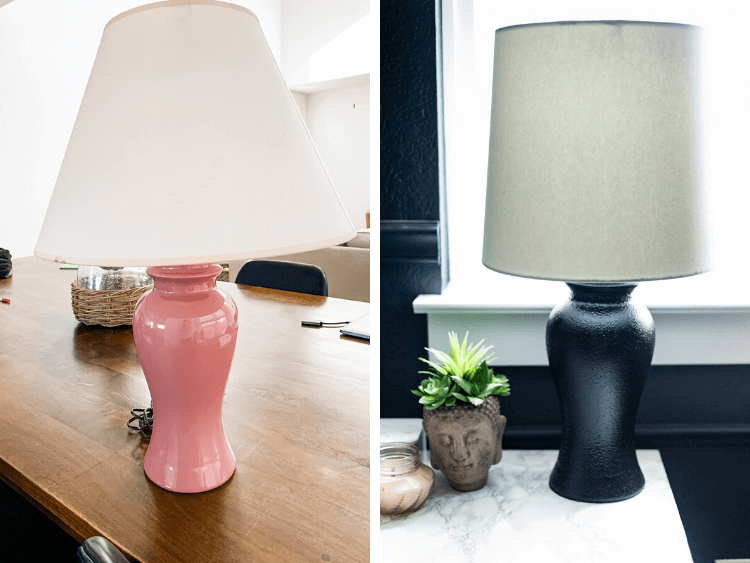
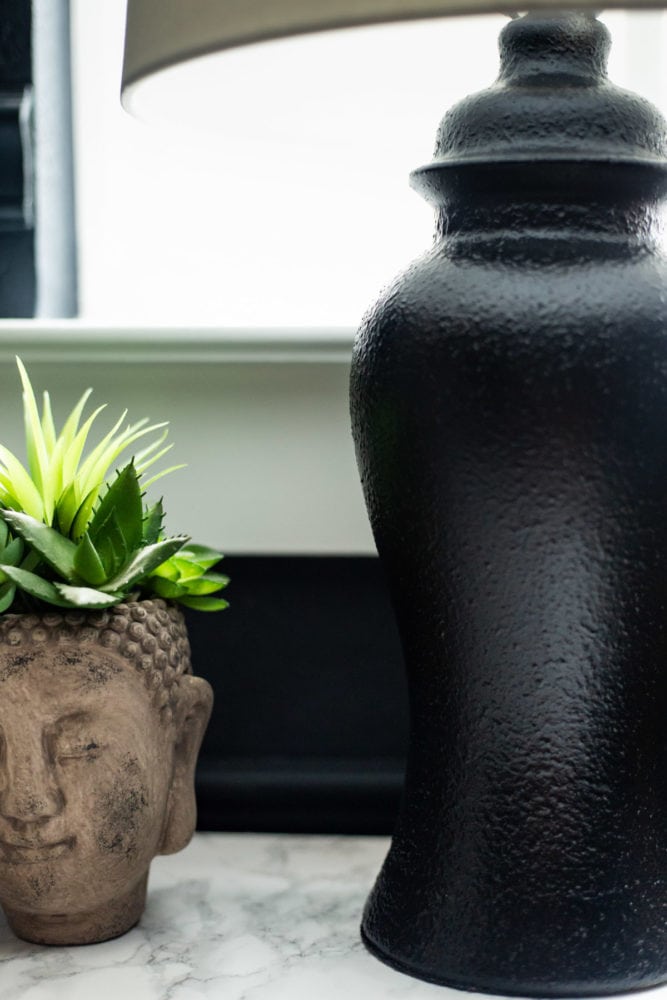
After all that, all that was left was to add the new turn knobs and replace the shades and I was left with a pretty stunning before and after!
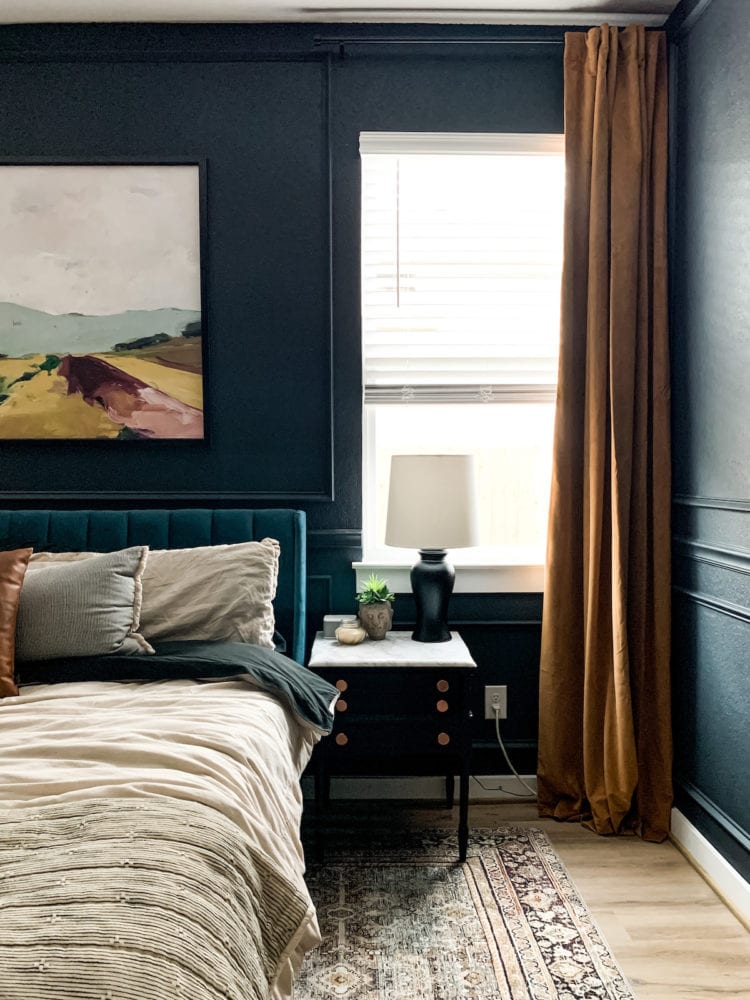
Our new nightstands aren’t actually complete yet (soon!), so I can’t show you the lamps in our room yet bu stay tuned for that later this month. We’re hoping to wrap up the nightstands by this weekend (fingers crossed!) and I can’t wait to get them in place.
This was such a fun and easy project and it really reminded me of my thrifting roots! When I first discovered spray paint (in college!), I literally spray painted all the junk from the thrift store all the time. There are plenty of (slightly embarrassing) posts in my archives to prove it.
It’s been a long time since I did a simple little makeover like this and it was just so dang satisfying! And honestly, that’s exactly the point of the Thrift Shop Challenge! It’s to remind us that while it’s tempting to keep up with everyone buying gorgeous new stuff from fancy stores, sometimes it’s (way) better to find something that needs some love and make it exactly how you want it.
Plus, it’s a heck of a lot cheaper! When all was said and done, these lamps came out to just about $40 per lamp – and they would have cost at least twice that if I had purchased them elsewhere!
And now, we get to my favorite part! Aaaaaaaaaaall the projects! Read on to see what all of my friends tackled for this challenge, and be sure to go give them and their project some love today!
Winter 2020 Thrift Shop challenge projects
At Charlotte’s House // Making Joy & Pretty Things // Love & Renovations
Making Manzanita // Small Stuff Counts // Green With Decor // Holland Avenue Home
That a absolutely gorgeous. I recently bought bedside lamps from a thrift store . Plain cream base and shades . Very boring but it has potential. Going to give painting the base a try . Could it work with chalk paint , after priming first I have leftover paint
It’s so fun to transform a thrift store lamp!
Wow! I simply adore the result! You’re sooo creative. I’m a real fan of what you do. Your website is beneficial. Keep up the good work! <3