
DIY Bread + Cheese Boards
Last updated on July 19th, 2024 at 10:02 am
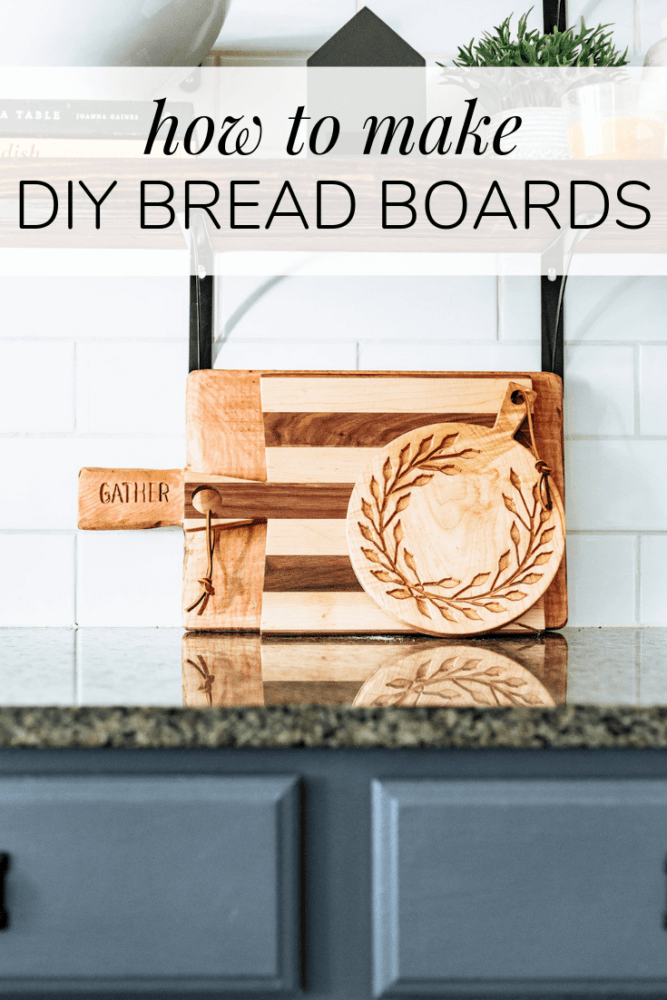
Learn how to make gorgeous, rustic DIY bread boards to use for serving or as a display in your kitchen!

Now that our backyard is almost complete and we have a whole second dining space for entertaining, Corey and I are feeling a lot more motivated to host friends in our home more often. One struggle that we’ve run into, however, is that when we moved to this house we had to get rid of a fair amount of serving and entertaining pieces. We just didn’t have the storage for them in our tiny kitchen. It fits the basics and that’s it.
So, I’ve learned if I want to bring in more pieces for entertaining, they’re going to have to do double-duty and also be able to be on display in the kitchen. And it helps if they’re small or easy to store.
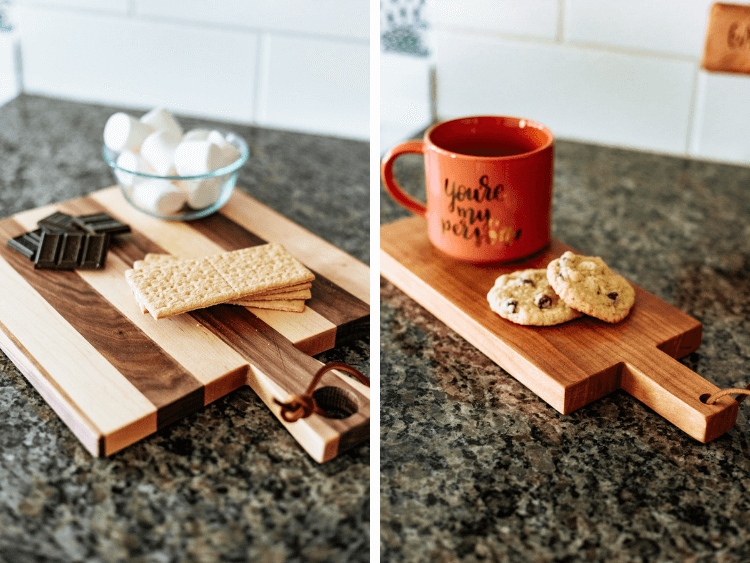
So, when we started planning some late summer gatherings in the backyard, I knew that having some extra serving trays would make life a lot easier. Summer gatherings lend themselves well to a good meat and cheese tray or a pile of s’mores over a big, traditional dinner! So, just having an easy way to transport the food outside is really all you need!
You might remember that I’m teaming up with Inventables this year to show off some really fun ways to use the X-Carve. I figured this was a great chance to do a little more practice with this (still new-to-me) tool. If you don’t have one, you could tackle a project like this with a jigsaw (learn how to use one here!) or a scroll saw. But, the X-Carve certainly makes things a lot easier and more professional-looking!
DIY Bread + Cheese Boards
This post is sponsored by Inventables and contains affiliate links. Thanks for supporting the brands that support Love & Renovations!
Tools + Materials needed
- 1-2″ wood slabs, varying sizes
- Cutting board oil
- Inventables X-Carve 3D Carver
- 1/8″ X-Carve Bit (for the straight cuts)
- 1/8″ 60-degree V-Bit (for the carving)
- Bread Boards SVG File
- Random Orbital Sander
- Sandpaper pads ranging from 80-grit to 320-grit
- Leather string
Cutting the Boards
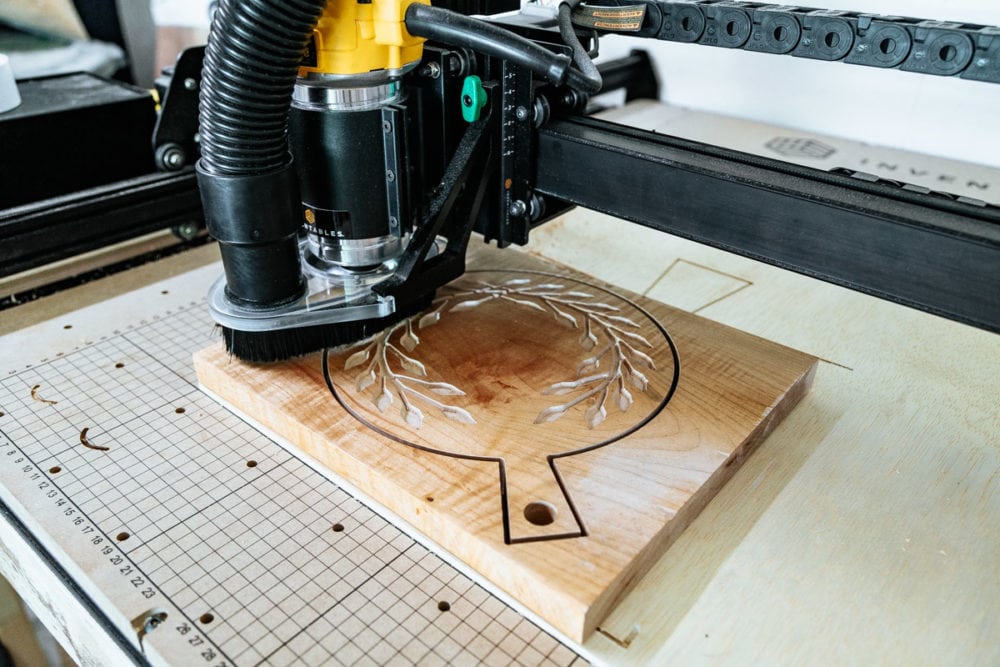
I designed the boards using Inventables’ design program, Easel. We use the free version of the program. It was really easy to create a cut file for this project using their basic shapes and lines. I just pulled up a few rustic bread boards that I liked and tried to emulate some of my favorite lines and shapes. If you want to download the SVG file I used for this project, just click the link in the materials list above and you can cut these exact boards!
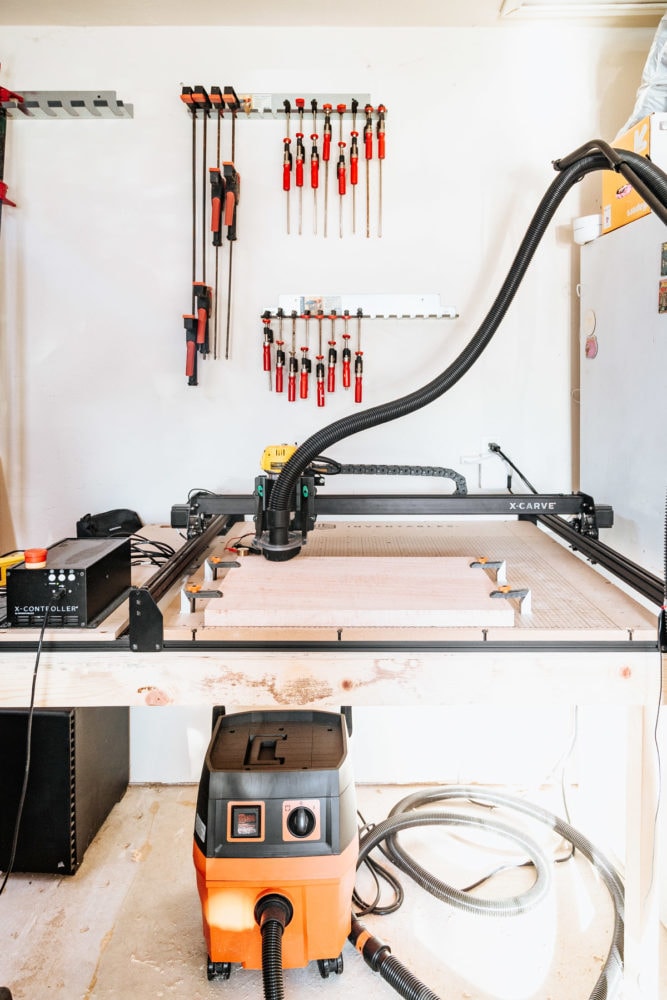
Once I had a few different boards designed, we clamped our wood onto the X-Carve cutting mat and let the machine do the work for us!
This was my first time operating the machine all on my own. It really is incredibly mesmerizing to watch. I’ve had a lot of questions about how the X-Carve works, so I’ll give you a quick rundown.
How to X-Carve Works
Once you have your piece designed and have your computer plugged in to the X-Carve, you choose your wood and clamp it onto the work surface using the pre-drilled holes in the worktop. We’ve found that it’s also really helpful to add some carpet tape to the bottom of pieces that can’t be clamped as well. For example, if it doesn’t line up well with the holes in the table top. Or, if you just want some extra assurance that it won’t move.
The design program, Easel, walks you step by step through prepping the machine to carve your design. It prompts you to set the position of the drill bit and double-check that your material is secure and that your settings are correct. It even reminds you to turn the machine on before you hit “Carve”!
(And let’s be honest, I needed that reminder a few times!)
Once you’ve got everything set up and you hit the “Carve” button, you get to just sit back and watch! You should always stay near the machine while it’s working. But, it’s no problem because I could watch this thing slowly carve out my designs all day long.
Finishing the Boards
After each board was cut, I carefully removed it from the worktop and got to sanding! I started with 80-grit for each board and slowly worked my way up to 320-grit for a super smooth surface.
If you’re just using your bread boards for display, you could stain them at this point. Or, you can always try a food-safe staining technique if you want to alter the color of the wood. I love the natural color of all the woods we chose, so we just used our favorite cutting board oil to seal the boards. It also brings the wood to life a bit. It’s kind of incredible the different just a little bit of oil makes, isn’t it?!
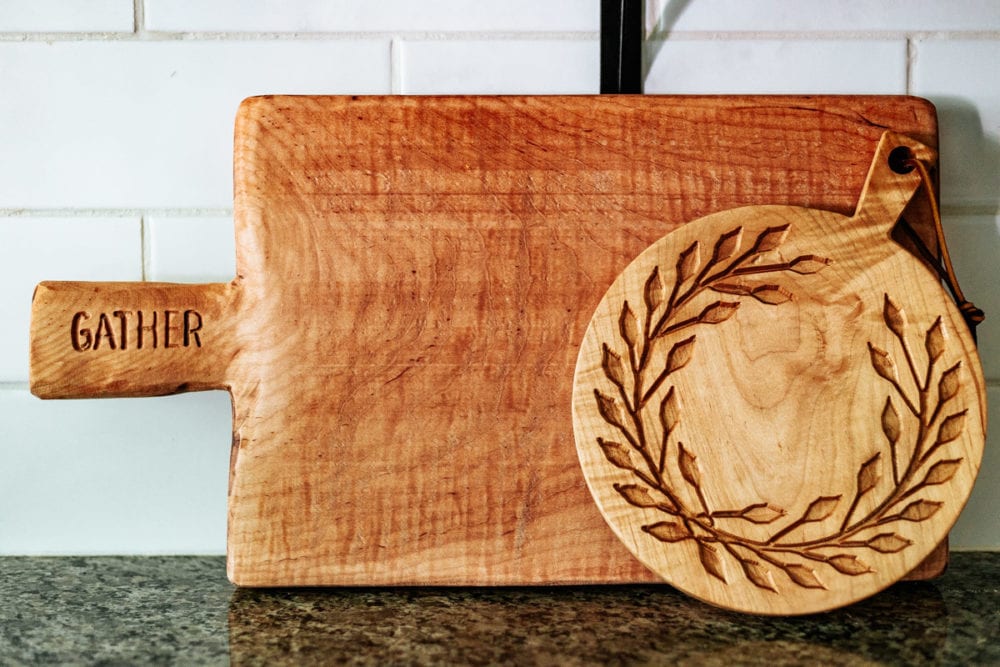
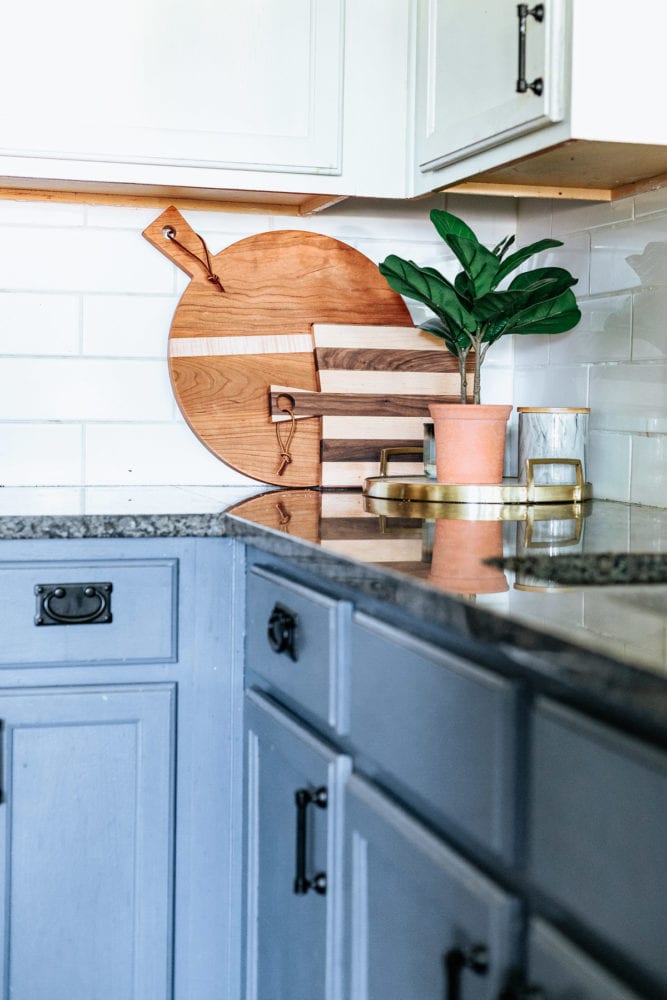
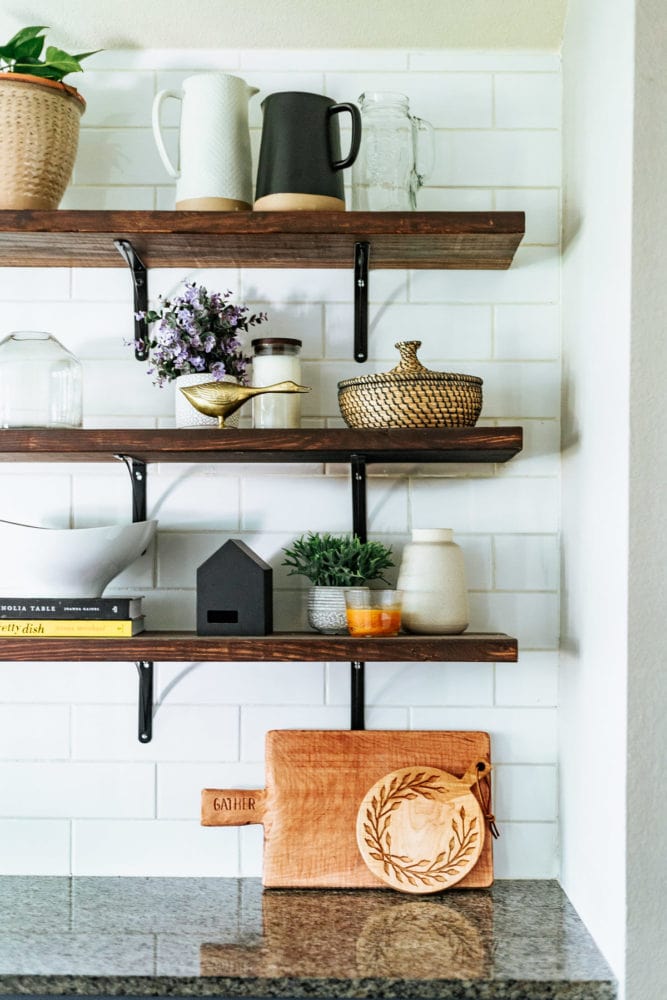
I added a little bit of leather string to each of the boards that has a hole, and, y’all, that’s it! Who knew it was so easy to make a collection of incredibly beautiful bread boards?!
Fair warning, if you’re a real life friend you can probably expect to get one of these babies for every gift-giving occasion until the end of time. I’m officially completely addicted to making them!
I’ve already found myself reaching for these boards all the time for all sorts of stuff. The bigger ones are perfect for bringing plates or food out to the back patio when we’re eating out there, and I even love the small ones to hold a cookie and a glass of milk when we’re lounging in bed binge-watching Stranger Things.
If you want more information on the X-Carve and all of the incredible things it can do, be sure to go check out Inventables’ website!
Hi there! If you EVER decide to sell these bread boards I would be very excited to
buy a set for myself and my daughter-in-law. They are beautiful!!! I love the design
you created (like an olive tree ) and the gather written on the handle on another.
They are not only decorative but gorgeous. Please consider selling the set of three
….I’m sure you’d have a waiting list in no time. If you do decide to do sell some please feel free to contact me. Thanks!
You’re so sweet, thanks Yvette!
It’s like a Cricut for large wood pieces?!?! Sign me UP.