
Easy DIY Floating Desk
Last updated on January 2nd, 2023 at 09:28 pm
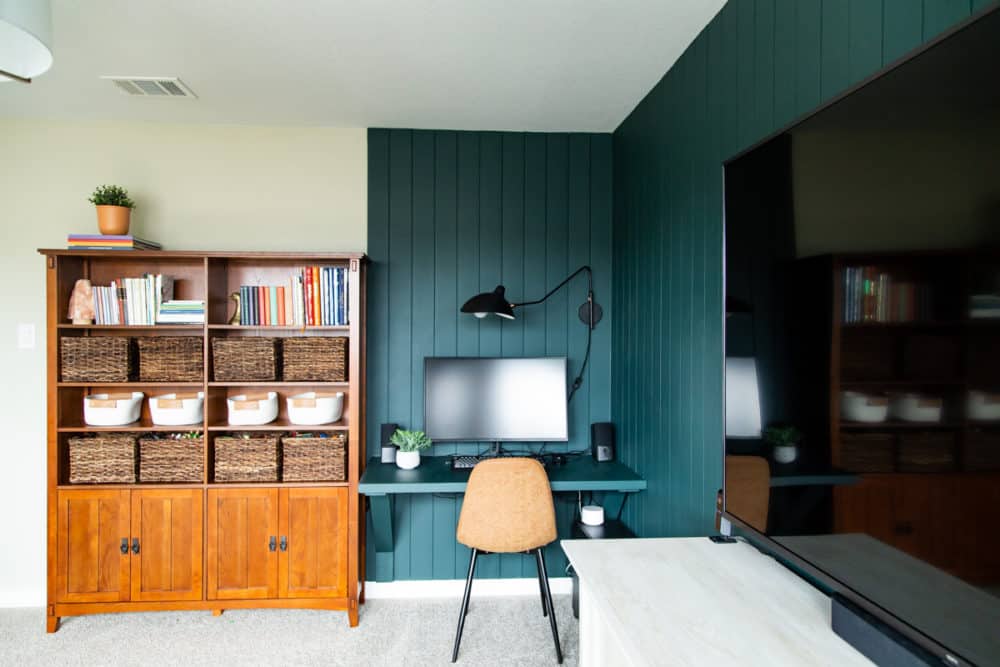
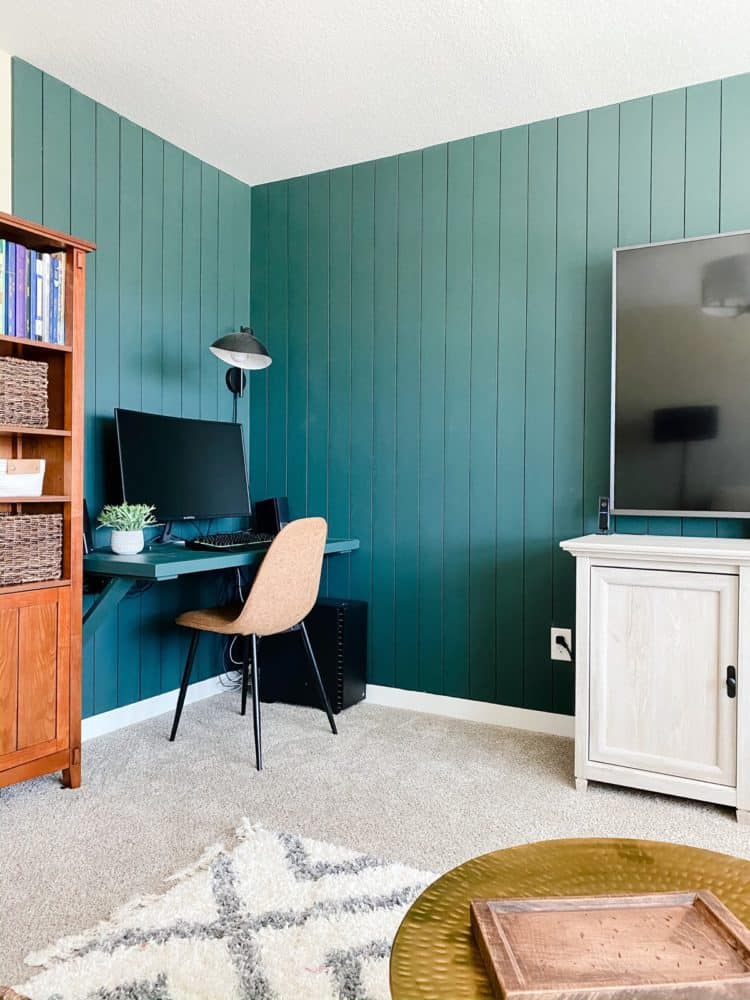
Ready to learn how to build one of my favorite super simple projects? This DIY floating corner desk is so easy to put together and so impactful. It adds so much function to an otherwise unused corner. And, if you ask me, it’s pretty great looking to boot!
When we originally began planning for this playroom space, we wanted to build a long desk along this entire wall. But we quickly realized it made a lot more sense to forego the big desk for now in favor of more toy storage. Someday the desk will be more useful, but for now? It’s all about the toys.
So, we came up with a plan to add a floating corner desk in this part of the room, and it was the best decision we could have possibly made.
Corey built this DIY floating desk over the course of a weekend and I made the last-minute decision to paint it the same color as the shiplap (rather than staining it like we had originally planned). I couldn’t be more thrilled with how it turned out. I love that it blends right into the corner and really complements the space rather than competing for attention.
Plus, it helps that it was really easy to put together! You can get everything you need with one quick trip to Home Depot, and it only takes a few hours from start to finish.
I’ve had multiple requests now for a full tutorial on how we made this desk happen, so here are all the details!
how to build a diy floating desk
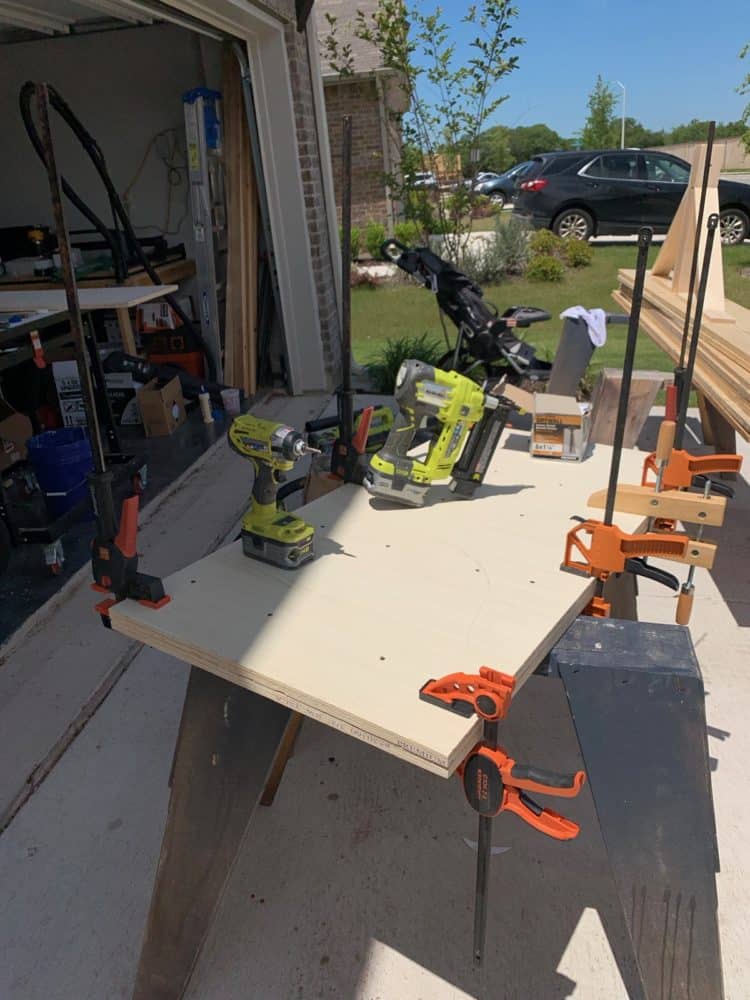
Materials needed
- 1/2 sheet of 3/4″ plywood
- (2) 8′ 1×4 pine boards
- (1) 8′ 1×2 pine board
- Wood glue
- Screws
- Stud finder
- Miter saw
- Drill/Driver
- Nail gun with brad nails
Step One: Build brackets for supports
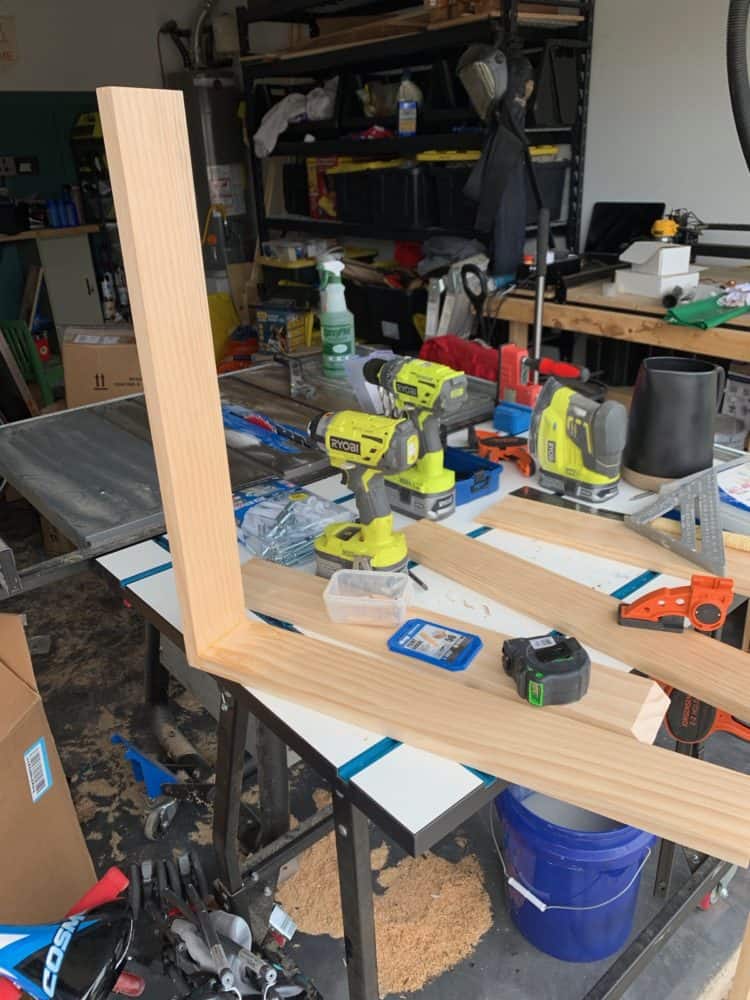
Start by building the supports for the desk. Cut your 1x4s into 4 pieces that are 24″ each. Use wood glue and screws to create an L-shape with the boards, as pictured above.
Of course, if you want slightly different dimensions for your desk, just adjust any measurements given to fit your preferences.
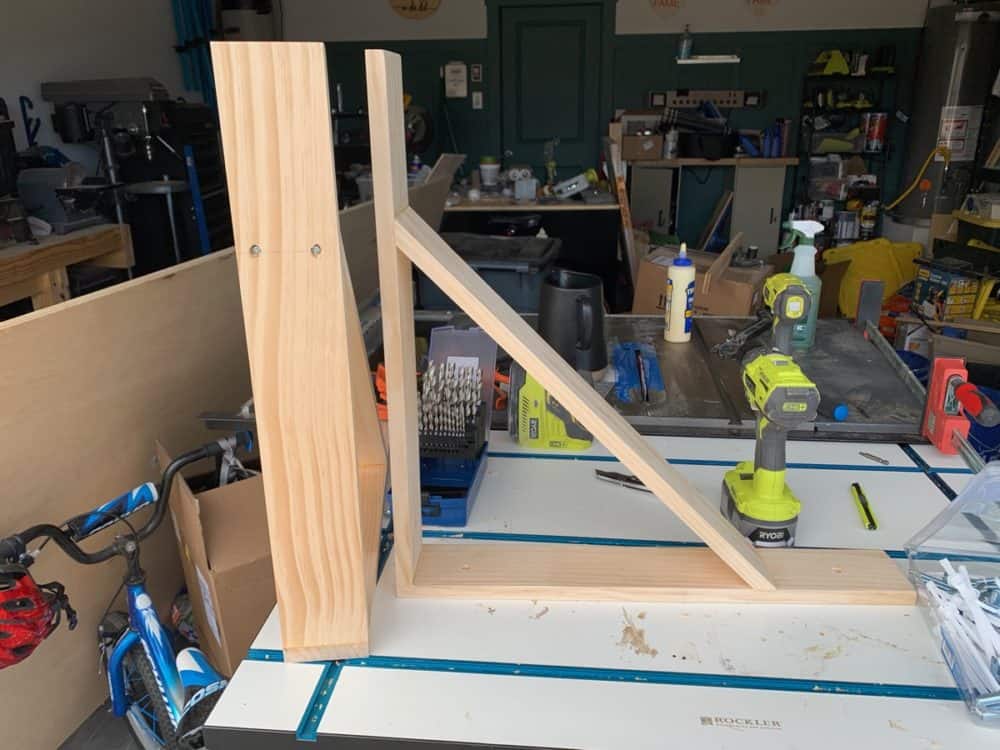
Cut two more pieces of the 1×4 to 24″, and add 45-degree mitered edges to each side (learn more about how to use a miter saw here). Attach the board to the supports as shown above using wood glue. You can also put a pin nail in each side to hold things in place while the wood glue dries. Alternatively, use pocket holes to attach the braces to the L-shaped piece.
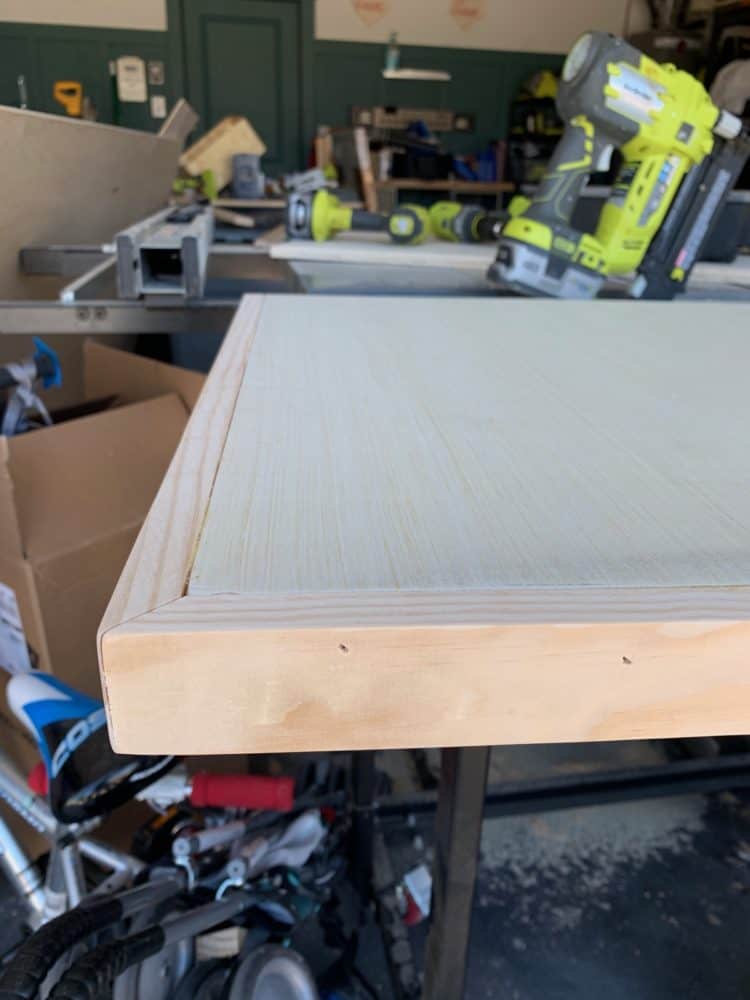
Step Two: Create the Desktop
Create the top of the desk by cutting the 3/4″ plywood into two pieces that are 4’x2′ each. Apply wood glue liberally and screw the two pieces together to form one solid piece. Clamp together while it dries.
Why double-stack the plywood? This helps add a little more stability to your desk and makes it feel a little heftier. You could use just one layer of plywood, but over time it might bow or sag. This way, it’s very sturdy and will last you for the long-run!
Once the tabletop has dried, add trim around all 4 edges with your 1×2 pieces of wood (pictured below). Simply add wood glue to the back of the pieces, then add a pin nail to hold everything in place while the wood glue dries.
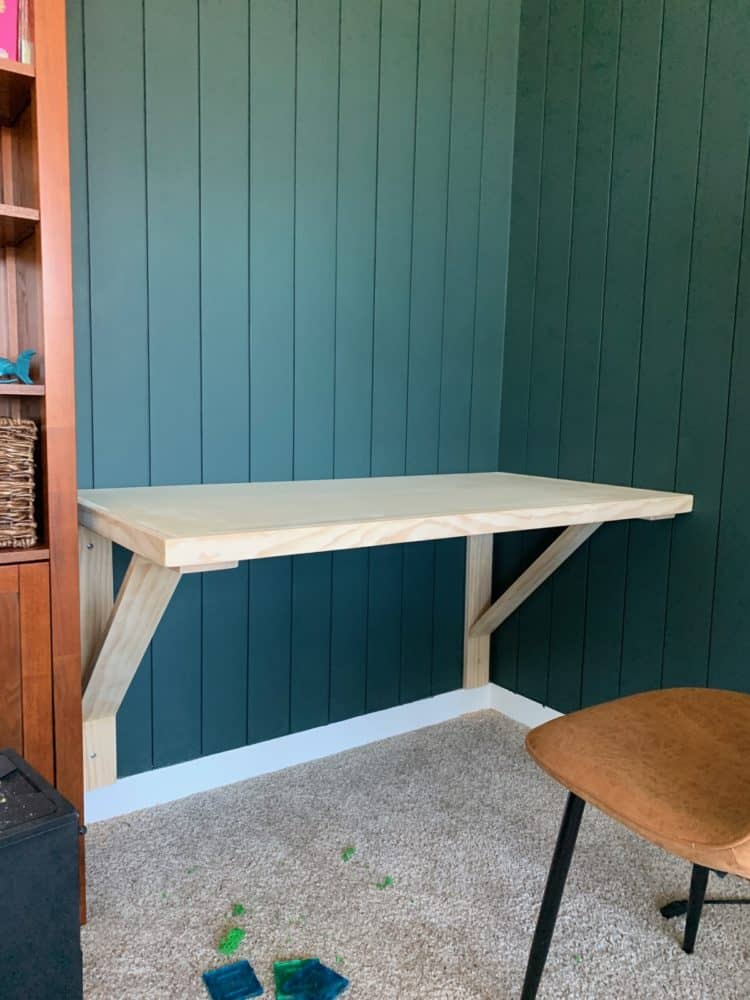
step three: assemble floating desk
Now you’re ready to put it together! This part is just as simple as the rest of the build. Simply attach the supports to studs in your wall using heavy duty screws. Then, add wood glue to the top of the supports, rest the desktop on the supports, and attach from underneath using screws. Done and done!
When you finish, it will look something like this:
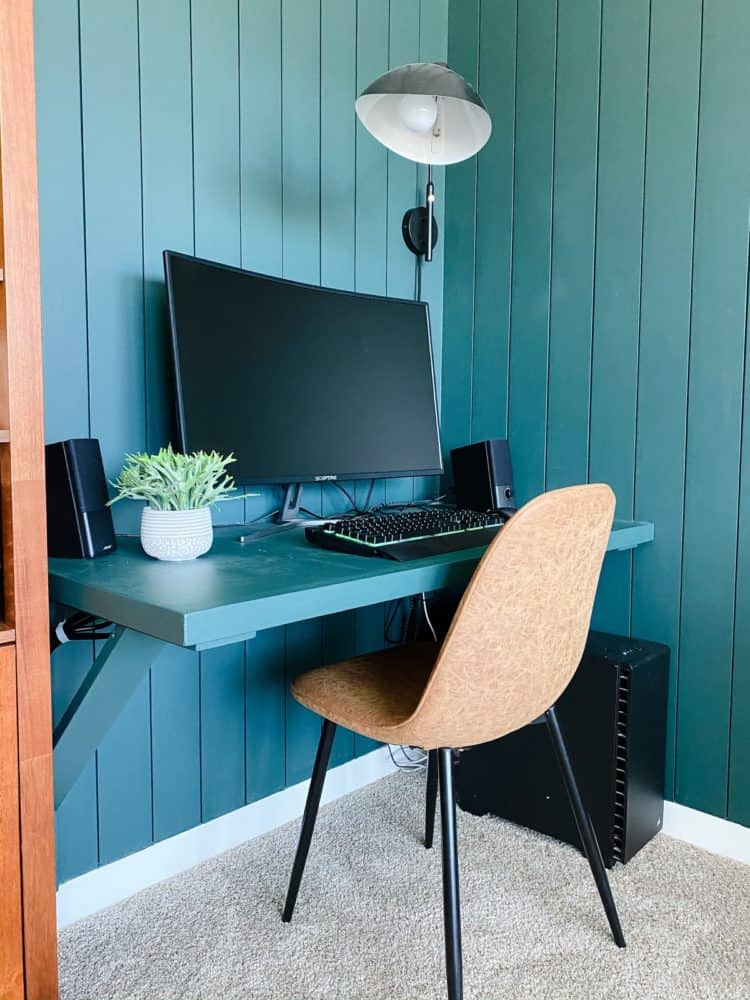
Finally, finish the desk using whatever method you prefer. I caulked all around the edges and painted the desk to match the shiplap wall behind it. The color I used is Black Evergreen by Behr. Of course, you could also stain it!
For a final touch, we cut a hole in the back of the desk using a jigsaw with a hole saw attachment and ran the cords for the computer through it. Add one of these desk hole grommets to the cutout to finish it off!
This compact desk is really a game-changer for us. It gives us a nice desk surface in the playroom for our desktop computer without taking up a ton of floor space. This would be a really great way to create a small home office in a corner of your house, and you could even add some hinge hardware to make the desk fold up when you aren’t using it. This would be a great solution if you don’t have enough floor space for this compact floating desk!
For now, this space functions really well as a spot for Jackson to play video games and for Corey to get a bit of work done. Eventually, I’d love to replace the computer with something a little more attractive (iMac, anyone?!), but for now it’s largely a super functional space and I’m not terribly concerned with how beautiful it is, you know? But, it is beautiful.
If you missed any of the details of this space, click here to see the full makeover of our game room – you won’t believe the before! You can also click here to watch the process unfold on Instagram stories.
And, if you’re looking for any of the sources pictured for this space, just keep on reading!
Sources
- Coffee Table
- Rug
- Media Console
- Bookcase
- White baskets
- Lamp
- Desk chair (similar)
Hello! I know it’s been a few years since this was built, I was just wondering how it was holding up? Also, how is it as a writing/drawing surface? My little one is an art-o-holic!
Hi! It held up GREAT over time. Definitely a project I’d tackle again. It’s perfect as a little art desk!
Thanks for sharing! Can you share what kind of screws you used? The nail/screw wall at the home depot is so intimidating and I never know what I should pick.
Hi, Marie! We used 1″ wood screws for assembling the desk, and anchors for attaching it to the wall! I need to do a big post about choosing screws – it really can be overwhelming!!!
Hey, it is a great idea of saving space and utilizing a limited space. Thanks for sharing!!