
Rustoleum Rock Solid Review
Last updated on April 9th, 2024 at 02:02 pm
It’s finally time to share the big reveal of our garage makeover! We used Rustoleum Rock Solid epoxy floor coating, and I’m in love with the finished result. Keep reading to see our Rock Solid review!
Y’all! I am SO excited to finally share this project with you. I am about to blow your dang mind. Promise.
Corey and I have talked a lot lately about our garage-turned-media-room and how unhappy we were with how it turned out. I wrote a whole post about it last week! Go read that so you have the backstory before you continue. I’ll wait here.
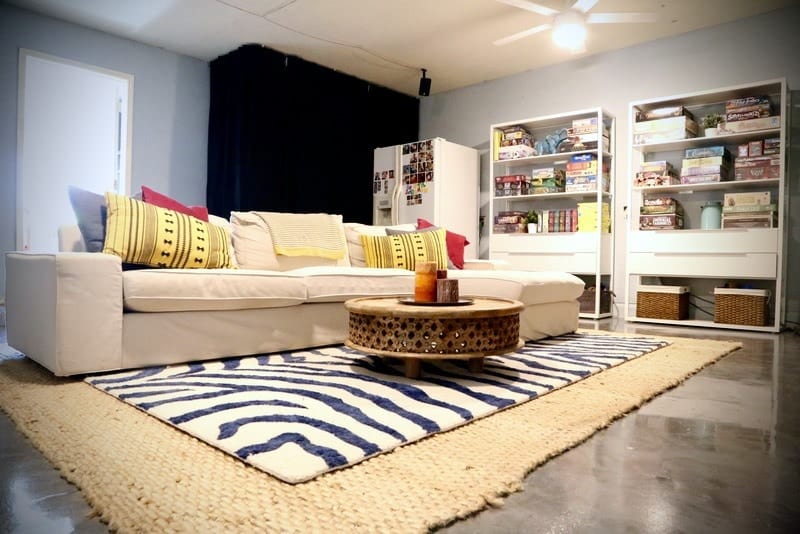
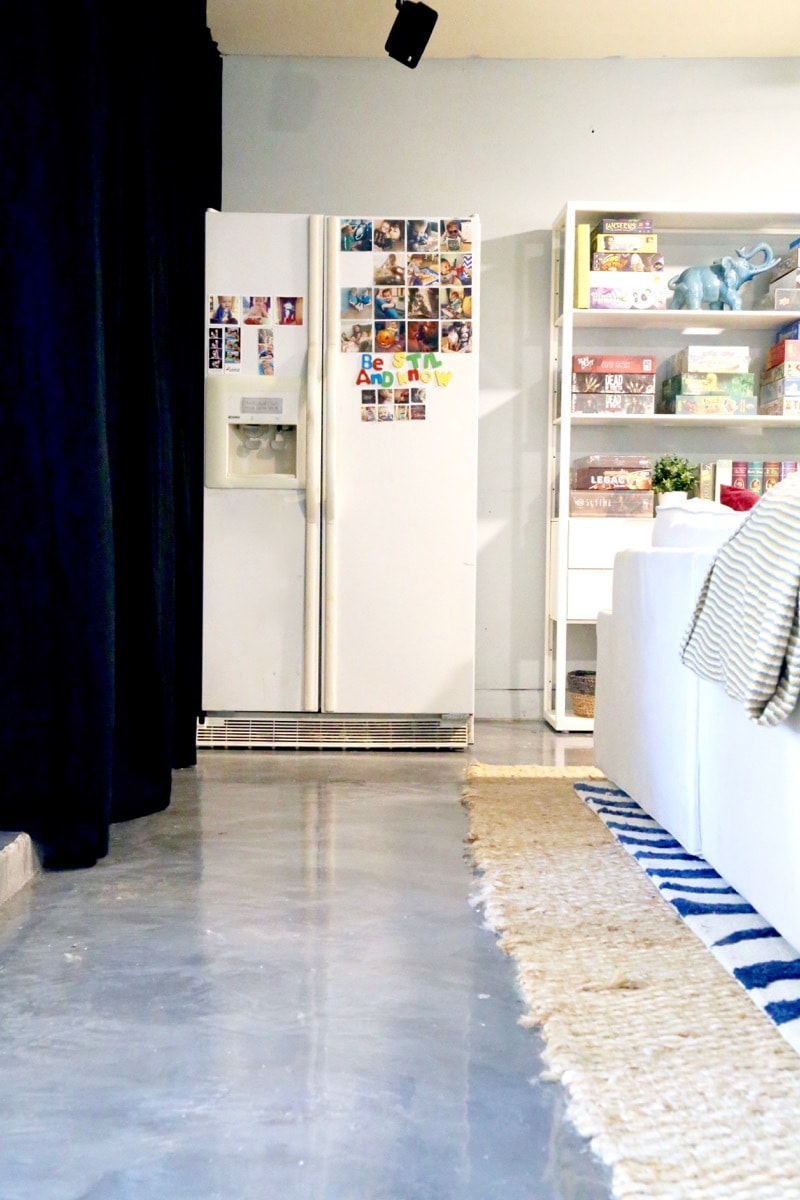
Well, here’s what it’s looking like now:
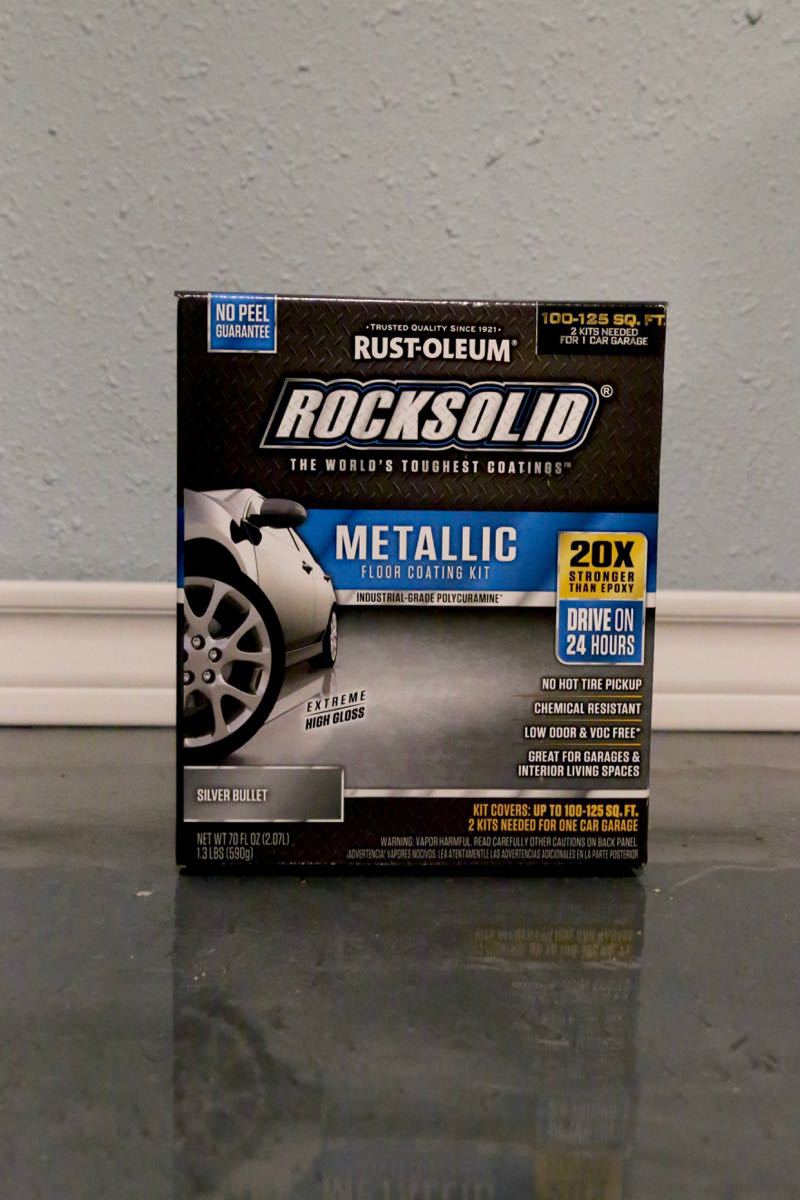
(This post is sponsored by Rust-Oleum and contains affiliate links. But, as usual, all opinions and excitement about the project are all me, y’all.)
BAM. Mic drop.
Are you drooling yet? Because I am. And honestly, I wish I could invite every single one of you over to my house. Then, you could feel this floor and not just see it. It’s so smooth and shiny and wonderful. For the first week or so that we had it, Jackson insisted on taking his shoes off every time we went in there just because he was so dang excited about how it felt.
(I may have done the same thing.)
Rust-Oleum Rock Solid Review
So, let’s chat details. This project was a serious labor of love. Looking back, I sincerely regret that we ever made the decision to paint the concrete in this room a few years back. This project would have been much easier if we would have just left them alone.
But, I digress. Let’s get to the details, shall we?
Step 1: Prepare Your Flooring
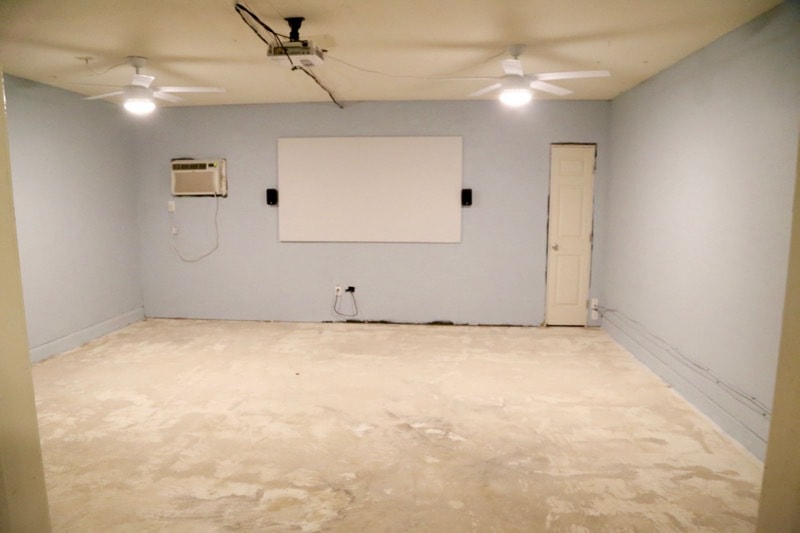
The first step to achieving a sexy garage floor like this (come on, you know it’s sexy), is to remove all of the furniture. Or, stored junk if you’re working in a garage. This might mean that your house will be complete chaos for a while.
It’s awful, but you’ll survive. Promise.
Next on the to-do list is getting rid of the old floor coating. This was the hardest, most ridiculous part of the entire process. What we should have done is just rent a diamond grinder from Home Depot, knocked it out, and called it a day. What we did instead is let several different people talk us out of that and into trying several different (supposedly “easier”) ways, such as using a chemical stripper and just sanding the floor down.
Thankfully for you if you’re tackling this project, RustOleum now has a ReCoat Primer that allows you to add their garage floor coating without all of the chaos. Because this?
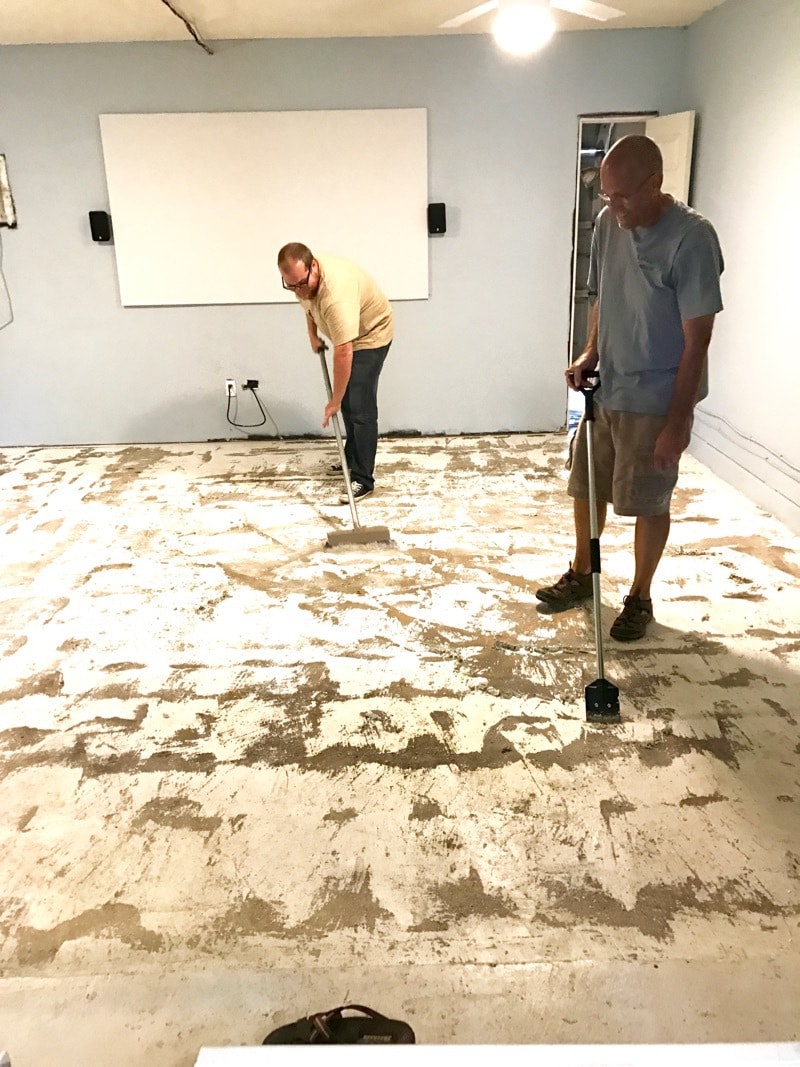
This is not fun for anyone.
After lots of effort, way more time than we anticipated, and a curse word here or there, we finally managed to get the floor ready to go.
Step 2: Apply Acid Etching Prior to Rock Solid
After cleaning off the paint as well as we could, we used the acid etching that comes with the kit to get the floor completely clean. You just pour it on, scrub it in, and rinse it off. It takes a good 24 hours or so to allow the floor to dry afterward. If you don’t wait long enough, you’ll get bubbles in your flooring. So, take the dry time seriously!
Step 3: Apply Rock Solid Epoxy Flooring
Once the floor was ready to go, it was time to start painting on the Rock Solid coating. We were so excited to finally get started! This part was much easier and much more fun than the first part. All you have to do is pour the epoxy on the floor, use the paint roller to spread it around, and then give it some swirls.

Unlike with painting walls, you really want to make sure to have a nice, thick layer here. Don’t be shy with it – you only need one coat, so coverage matters! The swirling is definitely the most satisfying part. I like the more natural, organic look so I went a little wild with the paint roller. There was no real technique, I just swirled it all around until I felt like it looked right.
Oh, and if you’re not painting an actual garage (and don’t have large, easy exits) I’d recommend spending some time thinking about your painting path! I had to pause towards the end and put some thought into exactly how I needed to paint so that I would end up at the door and not paint myself into a corner.
When we finished, I seriously wanted to do a little happy dance. I couldn’t even believe how good it looked.

The next evening, we went back in with a top coat – this isn’t absolutely necessary, but the flooring itself is pretty slick. So, we wanted to use this top coat that has some grit to it to help prevent any slippage while we’re walking around in there. For a garage it might not be as important, but since we use this room as a hangout room and spend a lot of time in there relaxing, it’s important that no one slips and falls. We were particularly worried about our dogs – Hadley, our Doberman, generally refused to come into the room when the floor was painted because it was too slick for her. Now? She’s in there all the time with no issues! Hallelujah!
We used the same strategy with the top coat – mix it up, pour it on, spread it out.
Another day of drying and you’re done!
There are no words for how excited we were to finally bring all of the furniture back in. We did some sprucing up to a few other things in the room while we were at it – as you can tell, we painted the walls (thank GOODNESS!), and we added in two ceiling fans to help brighten the room up. That alone made a ginormous difference in how the room feels. The extra light is a game-changer!
We also grabbed some new throw pillows and accessories – the color combinations in the room before were all sorts of terrible, and this is a much better look.
See the Entire Media Room Saga Here:
- Framing the wall + adding drywall
- Painting the concrete floor (don’t do this! Rock Solid is a way better choice)
- Adding furniture
- Adding floor-to-ceiling curtains
- Adding a fridge to the garage
UPDATE: Click here to see why we had to turn this room back into a regular garage and how it looked once we finished.
I am so excited to finally have this space be an area where we can actually relax and enjoy ourselves a bit, rather than spending the entire time we’re in there thinking about how much I hate it. I have some plans to add some fun art to the room, we still need to cover up the cords on the ceiling, and we need to swap out the old outlet covers – all minor details that will make a big difference in the end! I’m also considering swapping out the zebra print rug for a faux cowhide – what do you think?

Thank you for taking the time to provide such an informative and helpful post.
I am looking to try same rock solid project, I am looking for a mix of colors such as sand, grey, and some black. Do you know where I can go to find what colors to utilize to get my desired effect? Your project came out amazing.
Thank you
Lisa
Hi Lisa – I don’t have any experience with mixing colors at all. You can check out their product page for more info on the colors they offer, but I can’t offer any advice on mixing the colors. Sorry!
I love this! You guys did such a beautiful job!
Can you have these floors and still have your cars in the garage, sorry if its a stupid question. I just wasn’t sure if it would ruin the floors.
Absolutely! It’s meant for garages and other heavily-used spaces. It’s basically indestructible!
Amanda!
Help! What colors did you use? I want to use exactly what you used. Looks fantastic!!!!
Hi, Leslie – Thanks! Here’s an affiliate link for the color we used on the floor! I didn’t save the color card for the walls (bad blogger!) but I have a sample floating around there somewhere, and I can track it down if you want that too. 🙂
I’d love to try this in my garage. I have not painted it, so not sure if the grinding is still necessary.
If you haven’t painted it, you shouldn’t have to grind it!
Hi Amanda, thanks for the post. Your new media room and floor look great. I’ve wanted to try finishing my garage floor but thought it would be too difficult for a DIYer but now I think I could actually do it.
My cave would be a mixture of industrial and farmhouse,plus some modern elements.I love eclectic design no rules for me.I also love rust.o.leum products.
I have been drooling over Rock Solid for awhile now!! Hope to try it someday! Love how your area turned out- nice work!!
Thank you for your enthusiastic post. The information and encouragement is just what we need to inspire us to finally get our garage enclosed into an indoor space (lofted spare bedroom with a laundry room and storage closet). Looking forward to using Rust-Oleum’s Rock Solid.
My ‘cave’ is my garage workshop with a sad chipped and cracked concrete floor. A new metallic floor would bump up all of the new shelves and organizers I built for my workshop this summer!
Wow, your floor looks amazing and I love the decor your added. Looks so much better. I would love it if you would share this awesome makeover at a link party I am co-hosting. I hope to see you there. Have a great week. http://diy180site.blogspot.com/2016/10/dishing-it-and-digging-it-link-party-120.html
Wow, what an amazing transformation, that floor is Amazing. The room is so bright and inviting! I would love to try Rock Solid on my concrete floor! Thanks for the opportunity!
Ooh this looks awesome! Flooring really makes a big difference in a room – I love your coffee table too!
I would love to use this product on my basement floor. It isn’t painted, and this would be a wonderful fix!!
My basement craft studio would look AMAZING with his as the flooring!
this looks great! our garage is rather giant-the boyfriend built it so he could work on his vintage truck in there. i’m sure he’d love this metallic finish. enjoy your super cool space!
b
Our garage would look super amazing and soooo pretty!
Ah! We’re looking to redo our basement this winter and this would be perfect!
Wow what a difference it’s so much brighter!
I’d totally try that.
Amaziing! Love the difference. So much lighter and brighter. What a great space!
Looks amazing you guys! I love how it turned out! Nice work, and thanks for hosting the giveaway! Pinning!
This looks great! Our concrete floor could look much, much better with this idea,….
Your floor looks amazing! Sound like it was worth the hard work.
Amanda…oh, your floor looks beautiful! Like your garage, mine was previously painted so I appreciate your input on the diamond grinder if we go that route.
thanks for the great tutorial.
Have a great weekend.
Lynn
Thanks so much, Lynn!
loooove how it looks!! The room looks completely different!
This looks amazing! I love how it makes the whole space look different.
Thanks Emily! It really does feel like an entirely different room now.
Wow, it looks amazing, Love it.
Thank you!
Wow, this is awesome!
I’m totally using this on our basement. What was the square footage and how much did you use ?
Each box covers about 100 square feet!
We have concrete floors in our house that are stained brown and I can’t stand the color. I love the gray you used and would probably do the same!
This looks amazing…I have seen a few blogs use this product and I really want to try it in our garage. Does it produce a lot of fumes? We have a new born and don’t want her smelling it too much.
It’s definitely smelly! If you’re doing it in your garage, I’d just recommend keeping the garage door open or cracked overnight while it dries, as long as it’s not a humid day.
Love the transformation! I cant get over how good it looks. id love to do this to my garage!
Love it! Looks so relaxgin!
We could really use this in our garage! Looks awesome!
Love this! My husband has a “man room” with concrete floors and this would make it look amazing!
This is awesome! We put a “fancy” coating on our old garage floor and within a few months it peeled up in the spots where our tires always where. 🙁 I would love a pretty rocksolid floor!
Omg it looks gorgeous!!! What a pretty floor!!
Omg this would be an awesome update for our garage!
This would be perfect in our garage! I love it!
Love the transformation! I’d love to try this in our basement!
That is a solid transformation. You can say it’s – rock solid – hahaha
Don’t hate me for the pun
Bahahahaha
I’m not sure it would be feasible in our garage, since it’s enormous. But, I could definitely use this in our mudroom/laundry room. We have painted concrete 😡, and it’s peeling all over the place. This would be a godsend!
Wow! Stunning results, the floor really pops!
This floor is awesome. I know y’all worked so hard, but you killed it! What a great product and space, thanks for saving me the time and making the mistakes first 😉
Wow, that makeover looks amazing! I LOVE that floor! My garage is in desperate need of a makeover and I was wondering what to do with the floor!
It looks amazing! We need to have an OAP Reunion Family Night to break it in. 🙂
Yessss!!!!
Wow, this really does look amazing! I would have never thought it could look that good!
So cool! Could totally use this in my garage ASAP!!
That looks amazing! I love it!
Looks like it was a lot of work, but it’s so much better to have it done since it made you so happy! We’re mid-projects at our house, too. We put a number of things off for ages, but in getting them done we’re SO happy with how they’ve turned out!
It’s so shiny and beautiful! I love it.
Our garage is painted from the previous owners. It is starting to chip in places and I assume it will just get worst. Would love to try this product as it looks great on your floors!
This might work for our unfinished basement!
Well done! It’s one of those “why didn’t i do this sooner?” projects!
looks great
Looks so much brighter now! Overall how long did you have to keep your furniture out of the garage? I’d love to do this but we don’t have anywhere to store all our stuff in the garage, other the on our lawn!
It was longer than normal for us because we had to get all of the paint up. If your floor is already clean, you can probably expect 1 day for cleaning + acid etching, 1 day to let it dry out, a day to paint + another day to dry. So, minimum of 4 days, but maybe longer if it takes longer for the cement to dry.
The garage looks really great! As much of a pain as it must have been for y’all, I’m glad y’all showed us this DIY “fail” — it’s refreshing to see that I’m not alone when I make mistakes and that at the end of the day, it’s just paint!
Could totally see this on our garage floor. Ours is currently a weird speckled paint job? No idea who thought of that! Plus, it might inspire me to paint the walls in there, too!
Thanks so much, Jamie!
The hubs and I just finished our basement last winter. The majority of the space has carpet (for warmth) but we left the bar area with exposed concrete. We painted it but it’s just not holding up. I think this product would save the day!
I would love to do this to our garage! We don’t use it as any type of room (other than storage) but I so think it would make all the difference!
My living room has a painted concrete floor and I hate it! Would love to win this!!
Looks great! I would love to spruce up our garage with this!
Wow! That looks amazing. I would love to add this sort of life to my garage.
Thanks, Robyn!
Well, my cave is in the basement, but I’d actually want the paint in my real garage. The slickness is appealing because it would be easier to clean!