
How to Paint Stripes on a Wall | DIY Bathroom Makeover!
I just finished painting some bold red stripes on my bathroom walls and I’m here to share all the details! If you’ve ever wondered how to paint stripes on a wall, I’m here to tell you it’s not that hard. Promise. Read on for the full guide to painting a striped room.
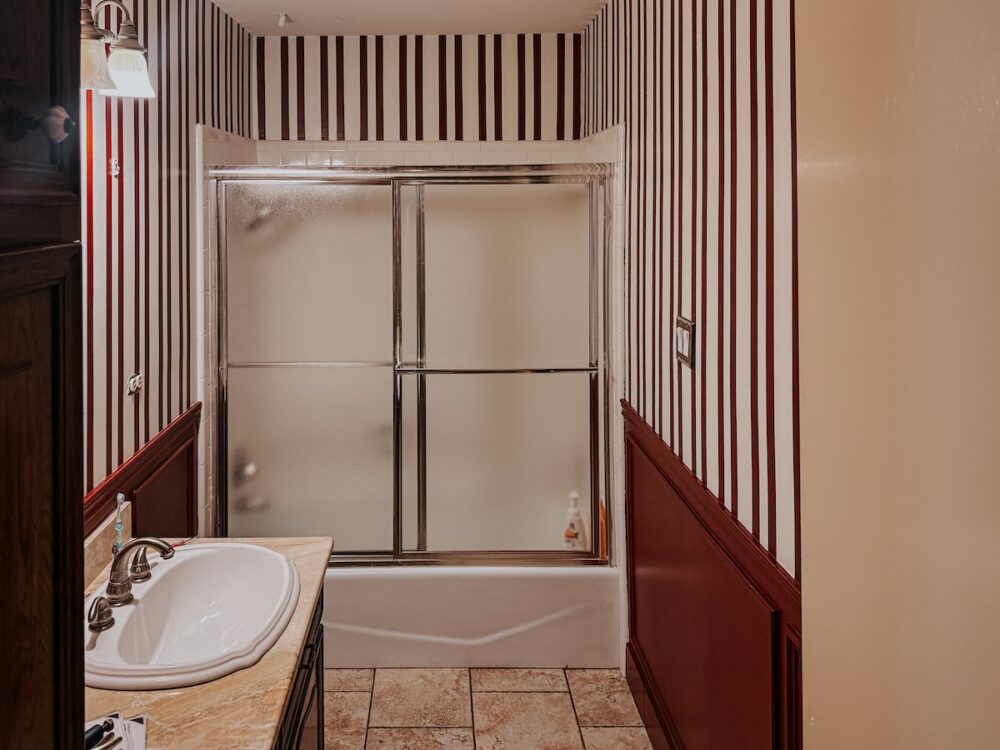
For me, one of the most fun things about doing a quick, budget-friendly makeover in a space is the ability to make some bold choices just for fun. When I’m not spending a huge amount of money on a project, I feel a lot more freedom to branch out and try something new. So, when I was making plans for my boys’ bathroom makeover, it was a no-brainer to embrace some whimsy and paint bold red stripes on the walls. Because WHY NOT?!
Today, I’m showing you step-by-step how I got this look. It’s actually a really easy project – just tedious and time-consuming. But, I promise anyone can paint stripes on a wall! Let me show you how.
How to Paint Stripes on a Wall: Video Tutorial
First up, as always, a quick video walking you through the project. This video will show you how I created the pattern and what it looked like as I taped it off. It’s a quick overview of the entire project from start to finish. If you want more details, including all of the materials I used and all of my top tips and tricks, keep reading!
How to Paint Stripes on a Wall: The Full Guide
Tools + Materials I Used
- FrogTape Delicate Surfaces Painter’s Tape
- FrogTape Multi-Surface Painter’s Tape
- Level
- A damp rag
- Paint roller
- Paint (Vintage by Clare Paint!)
- A tiny paintbrush (for touch-ups)
How to Tape the Stripes
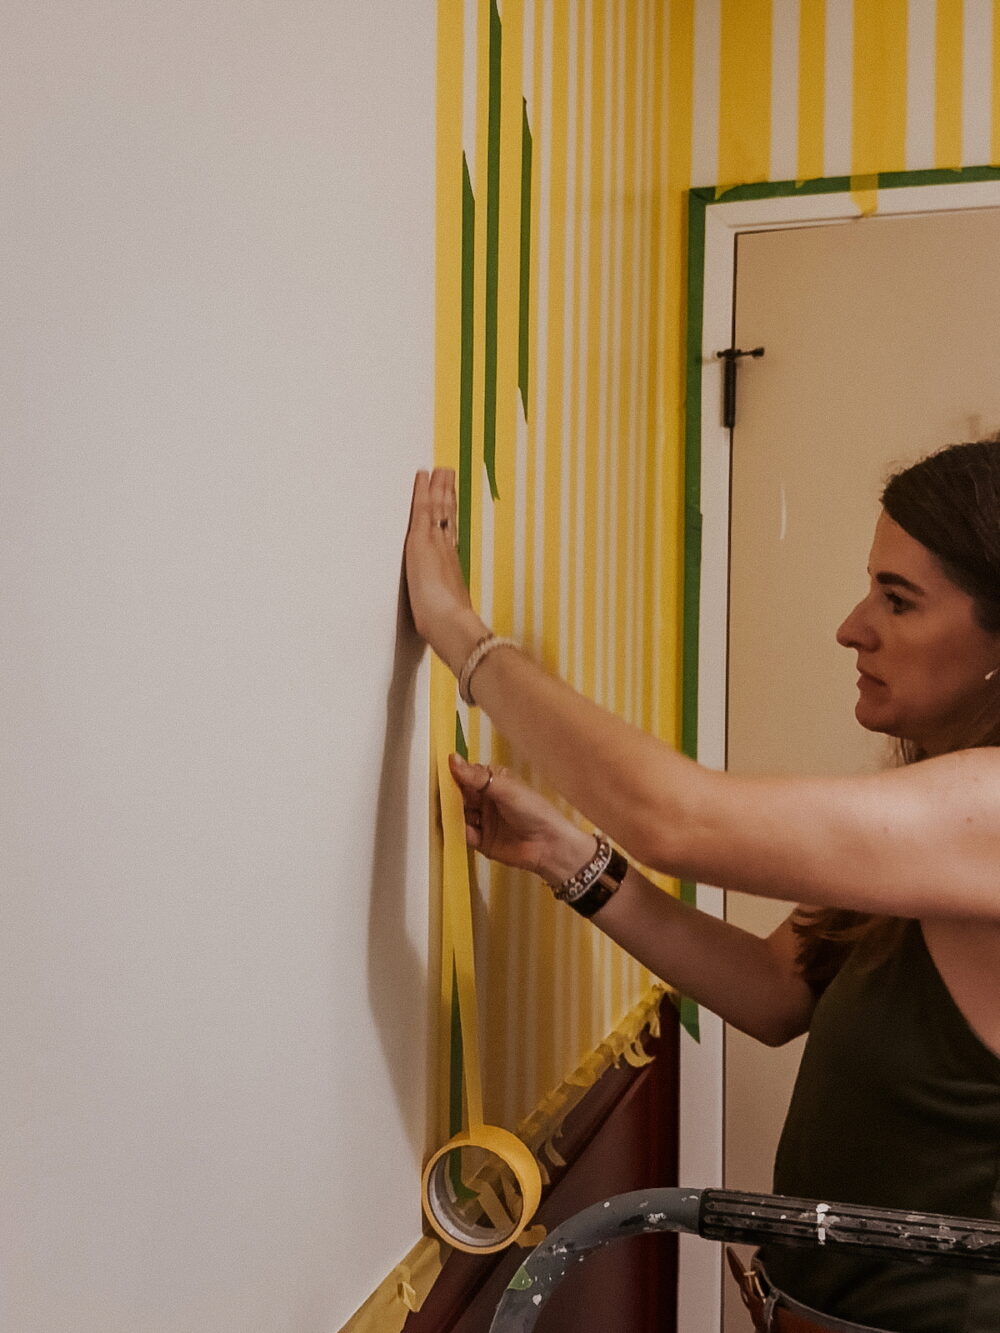
After going around the room and taping off around the ceiling, shower, and vanity, it was time to tape the stripes. I started in one corner and used a level to place that first piece of tape and make sure it was perfectly straight. After that, you won’t need the level again! Here’s the process:
- Rip a few small pieces of Multi-Surface tape and place them along several spots right next to your first piece. Make sure they are perfectly lined up along the edge of that tape, without overlap or gaps. It will take a few rows before you get the hang of this, but it’ll get faster!
- Once your spacer pieces are placed, put your next piece of Delicate Surface tape, making sure to line it right up against your spacers. Again, the more careful you are with lining things up here, the better the finished result will be.
- Place a second piece of Delicate Surface tape right up against the first one, to create a larger stripe. I ripped some extra tape in half and placed a third piece along the seam between these pieces. It just helped make sure that no paint seeped in-between as I painted! It’s not a requirement, but it might save you some touch-ups later.
- Continue working around the room, placing your spacer pieces, then your stripes. You can re-use the spacer pieces as you work (I did!) to reduce tape waste. It can be helpful to use your level to double-check that things are straight every once in a while, but it’s not completely necessary!
- Continue working until you’ve made your way around the entire room!
- Grab a credit card or driver’s license and run it along all of the edges of the tape. This will help make sure everything is fully flush to the walls and you don’t have any edges peeling up.
- Finally, grab a damp rag and run it all over the tape, focusing on the edges. This helps activate the technology in the painter’s tape that seals it to the wall and reduces bleed through!
Working with textured walls?
My walls are smooth since I just skim-coated, but if you’re working with textured walls, I recommend one more step! Grab your base wall color (the white, in my case) and paint over all of the edges of your tape. Let that dry before painting the stripe color. This ensures that if there is any bleed-through, it’ll be the wall color! It saves a ton of time on touch-ups and is worth the extra dry time.
I’m sure you’re wondering – how long did this actually take? Maybe not as long as you’d expect! I didn’t track it completely, but I think it took me about 3 hours or so over the course of two days.
Paint the Walls + Remove the Tape
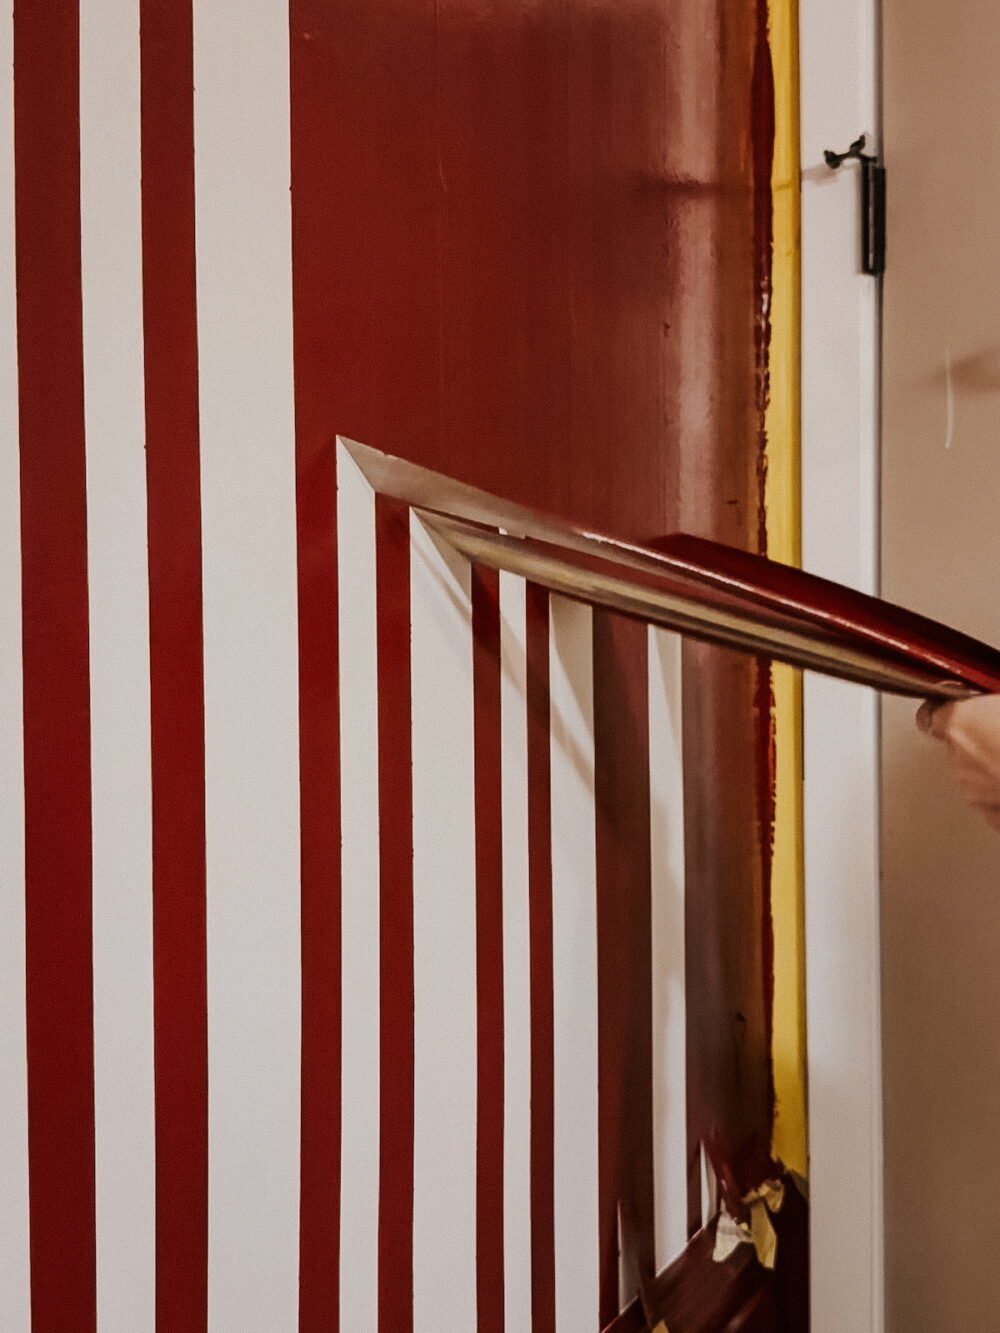
After all the work applying the tape, it feels almost anti-climatic to paint because it goes so fast! It only took me about 15 minutes to go around the entire room and paint the first coat of paint. You’ll probably need two coats of pretty much any color you work with. Let the first one dry for a couple of hours before painting the second, then remove the tape as soon as you finish the second coat. If you wait for it to fully dry, you can end up with some peeling edges!
Pull the tape up slowly and steadily, being careful not to get any wet paint on the unpainted portion of the walls. Or on yourself. Or all over the entire room. It can be a messy process.
Touch Ups
Give the paint a bit of time to dry before you start your touch ups. No matter how careful you are, you will probably have at least a few areas that the paint bleeds through or is imperfect. I grabbed a tiny flat-edge paintbrush from my kids’ art closet for this! Work really slowly and keep a steady hand, going around the room to touch up any areas that need it. It took about 45 minutes or so for me to work my way around the entire room.
And then? Well, it’s time to enjoy the results of all your hard work!
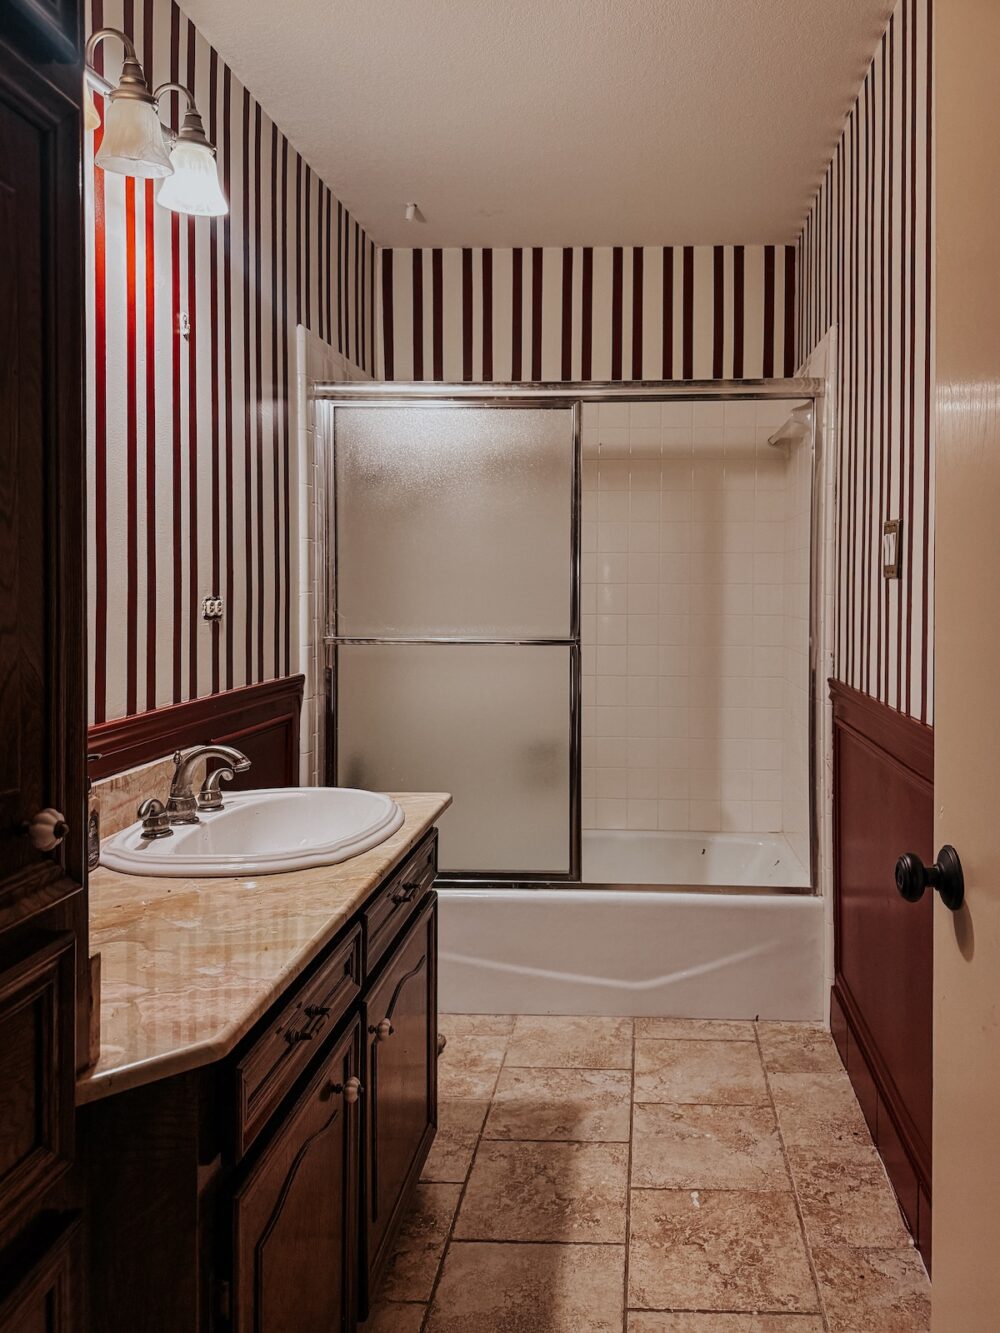
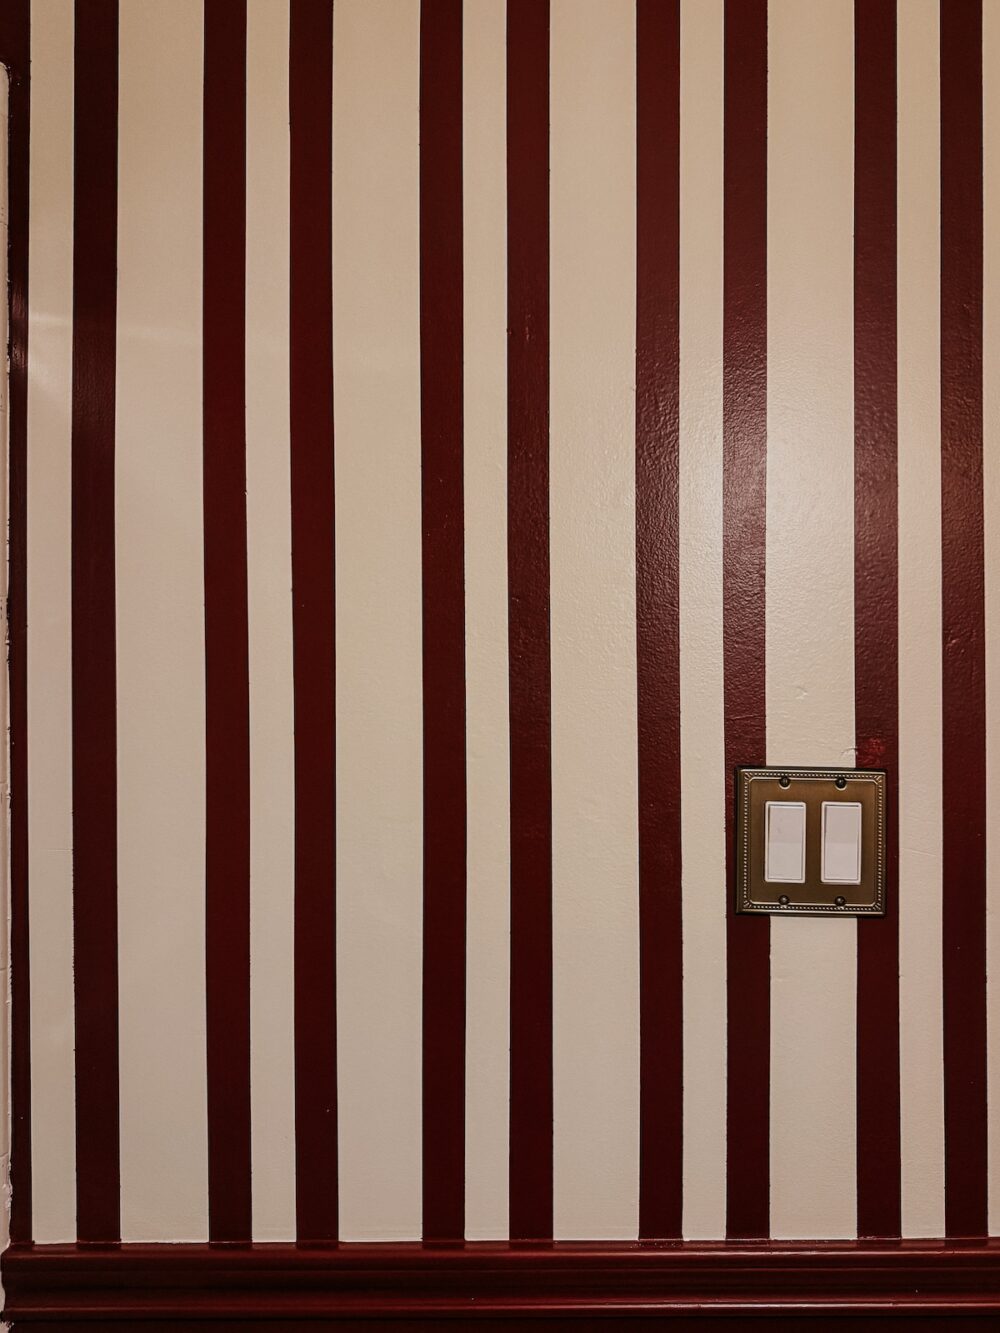
I was really nervous about this project because it was such a big time commitment for a really bold design. But, I’m so glad I decided to give it a shot. It feels playful and unique and hte kids are thrilled to have a bathroom that has had some love poured into it. And we aren’t done yet! I still have to replace a few fixtures, put the mirror (and some art) up, and add some peel and stick flooring!
I can’t wait to share the rest of the bathroom refresh, but for now I’ll just be enjoying these cute stripes and my first-ever red room!