How to Make Mini Christmas Villages
If you want a really fun DIY project that’s affordable and super beginner friendly, this one is for you. These mini Christmas villages are made from small Christmas ornaments, and they only take a few minutes to put together.
From January through September, I don’t consider myself a very crafty person. But the moment October 1st rolls around and all of the fun holiday festivities begin, I’m all about the crafts. A few years ago, I made this really cute spooky Halloween village using some simple wooden house ornaments. I re-shared it on Instagram this year and a ton of people saw it and shared it, and it got me thinking that it’s high time I make a Christmas version. So, I did.
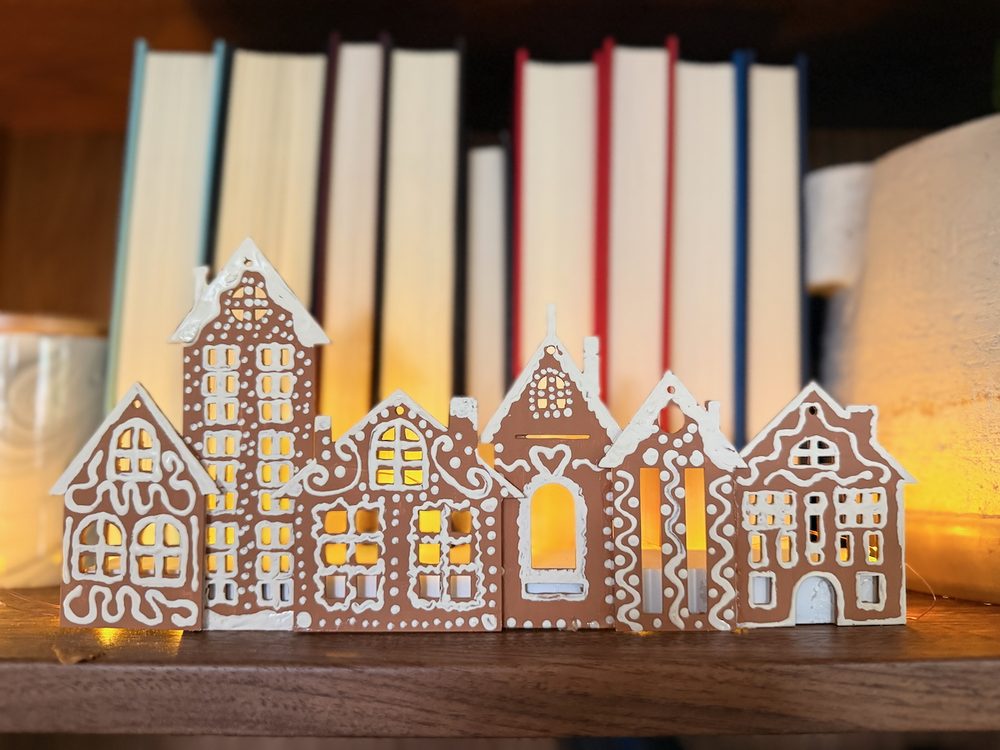
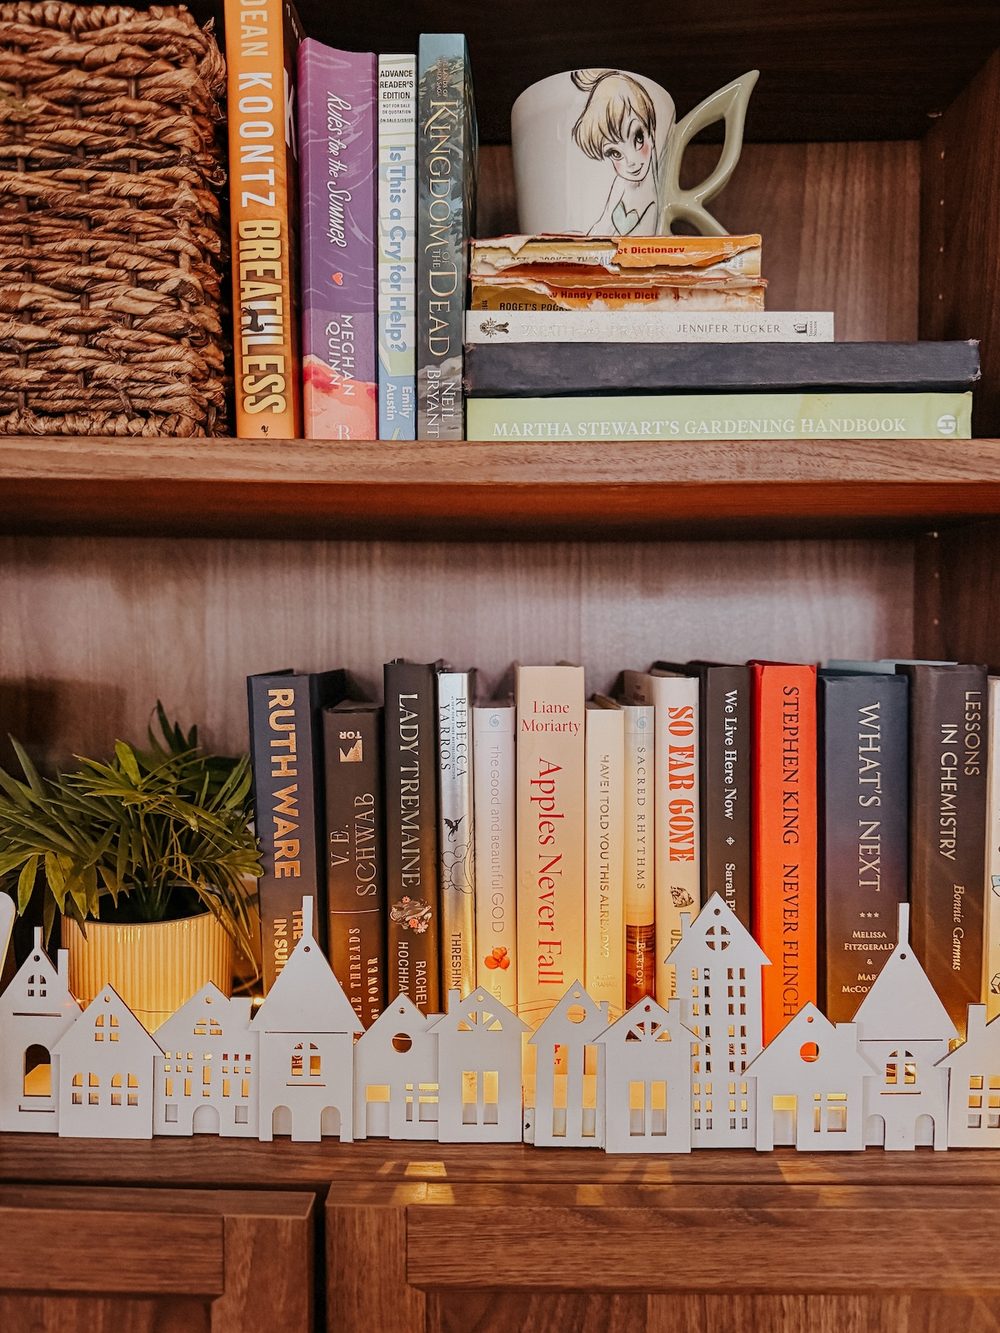
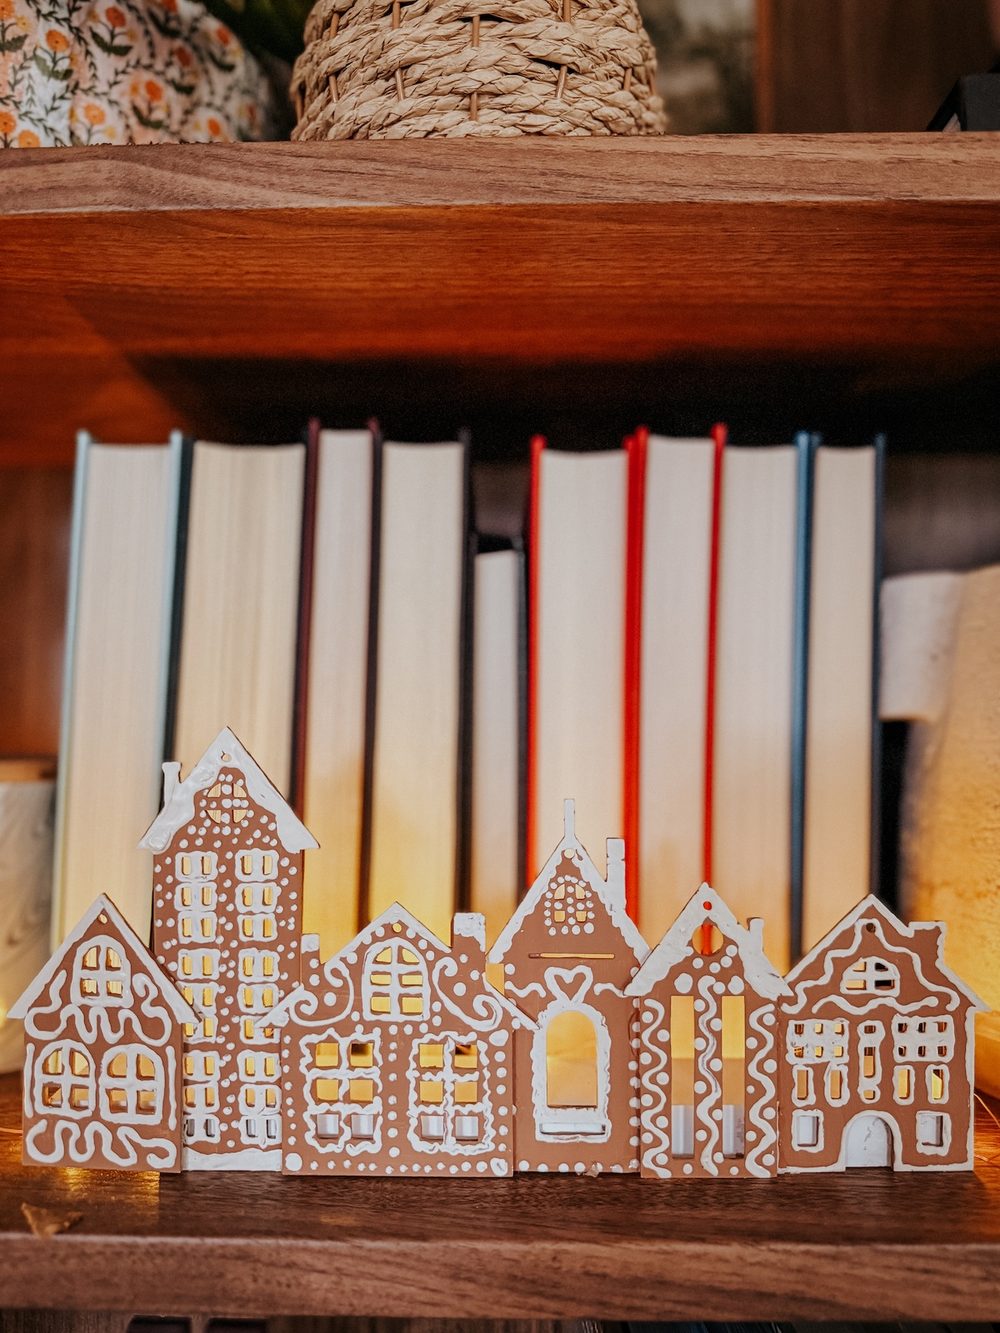
This is such an easy project, and I even made two versions – a plain white one and a gingerbread house version! I used the small houses this time around, but last time I used the big ones – so you can choose whichever one fits your space best. This would be a really great craft to take on for a girls’ night or to do with your kids during the holiday season!
Mini Christmas Village Video Tutorial
I put together a video while I was working on this so you can see how it all comes together. It’s so simple and will give you some ideas for how to paint the gingerbread houses.
How to Make a Mini Christmas Village
Materials Needed:
- House Christmas ornaments (small or large are fine, I used small here!)
- A piece of 1×2 wood, cut to the length you want (these are 11″ long)
- Acrylic paint + small paintbrushes (I used golden brown and vanilla)
- Super glue
- Fairy lights
Step One: Prep or Paint the Houses
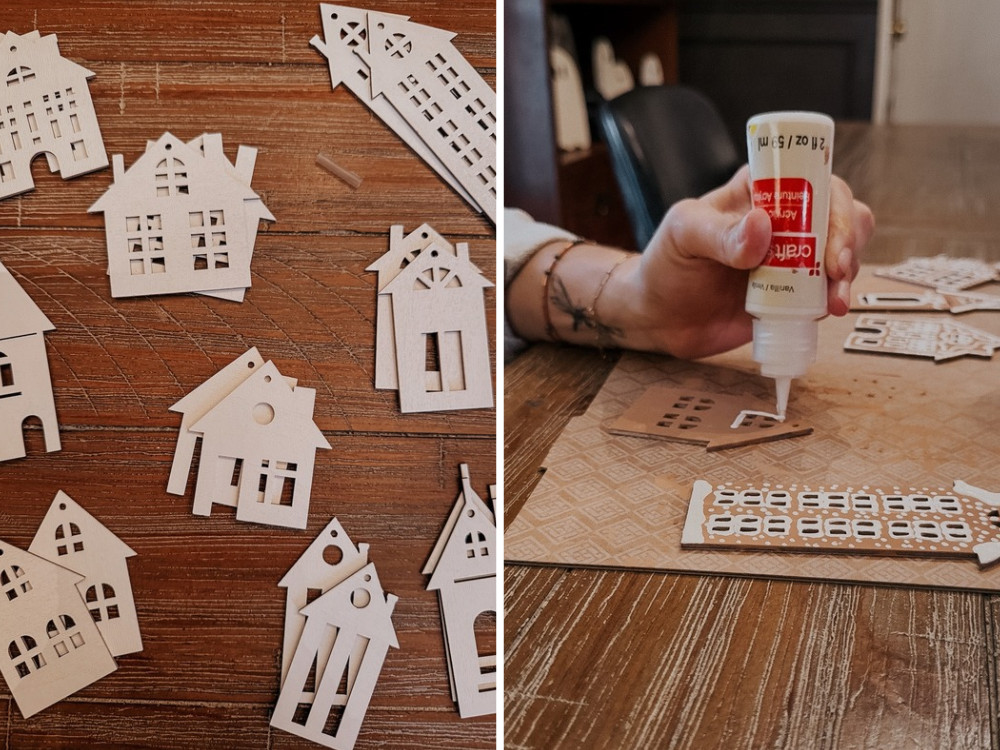
If you’re going for the plain white houses, you can leave them as they are out of the package. If you ordered the wood ones, I’d recommend spray painting them white (it’s much faster than using acrylic paint and will give better coverage). You could also paint on other details like little wreaths, trees, or other Christmas decorations!
For the gingerbread houses, you’ll start by painting them fully brown. I like the CraftSmart Golden Brown color for gingerbread houses – it’s the perfect color! Give it plenty of time to dry between coats, and at least 30 minutes to dry before you start adding the white.
Once it’s dry, grab your white – use an acrylic paint with a pointy tip to make it easier! Creating the gingerbread detail is so simple and really foolproof. Don’t overthink it – just outline things like doors and windows, add flourishes, and add little spots that look like snow. You can get inspiration from this post with my DIY gingerbread treat bags, or you can just look up images of gingerbread houses or gingerbread house illustrations to get you inspired!
This part might feel stressful if you haven’t tried it before, but I promise it’s almost impossible to make it look bad. Just keep adding dots and swirls until you like it.
Step Two: Lay Out the Houses On Your Wood
Once your paint has dried, grab your 1×2 piece of wood and lay out the houses to test how you want them to sit. I like to overlap every other one to create a layered look. Spend a couple of minutes planning out how you want them to sit to ensure the heights and patterns feel varied. This pack comes with two of each type of house, so I like to make sure those are spread out, then I vary the heights and widths of the houses as I work.
Also, go ahead and decide which ones will be the top layer and which ones will be the bottom layer!
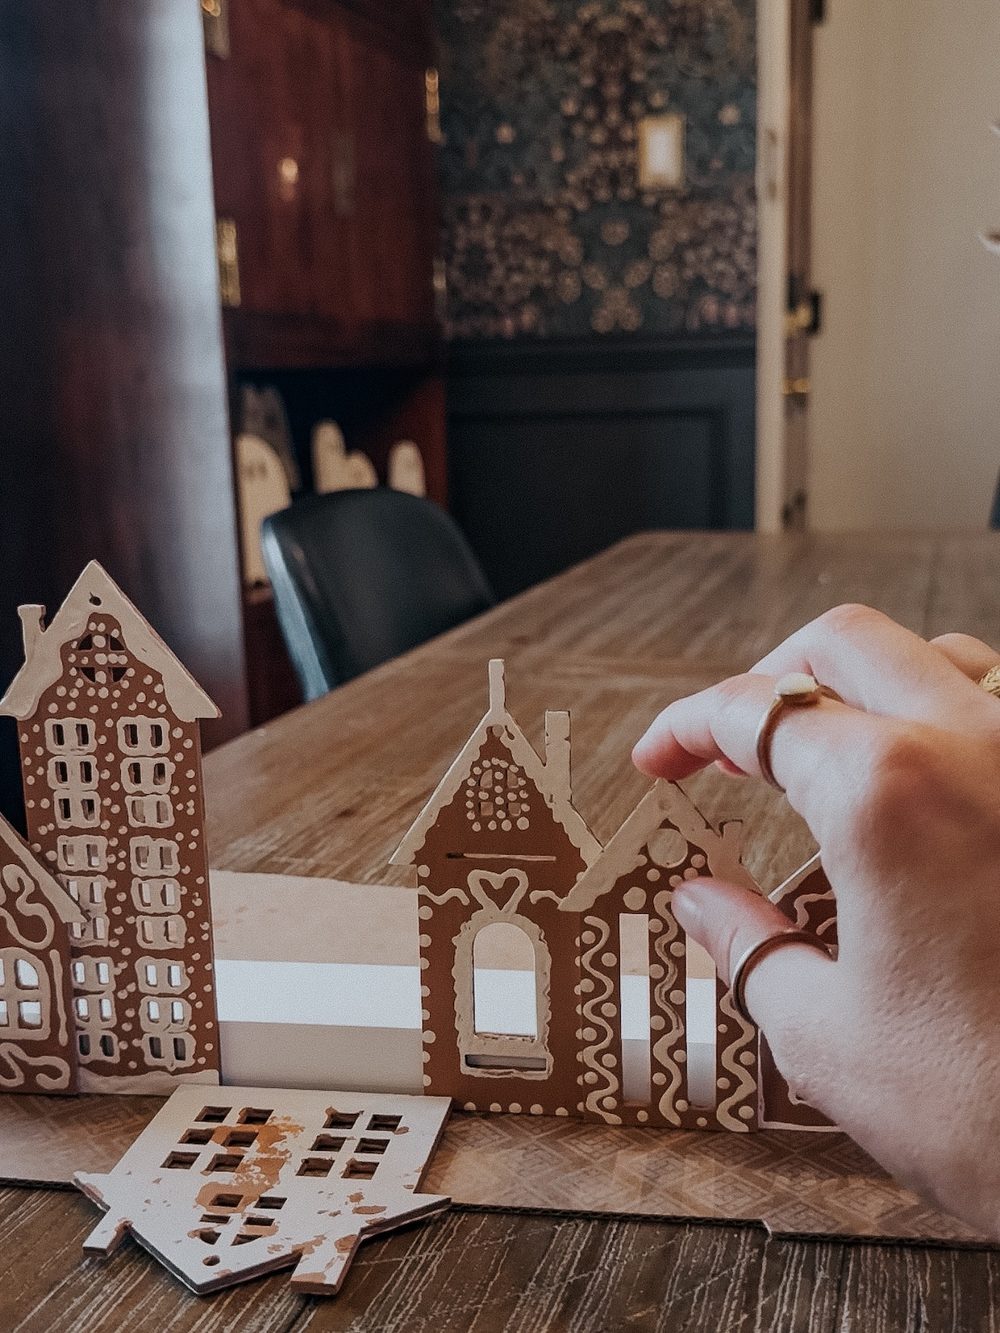
Step Three: Glue the Houses in Place
Once you’ve planned it out, you’re ready to glue the houses on! I like to use super glue because it’s fast drying and works really well with this material. I used wood glue when I did the Halloween village, and it worked great for the wood toned houses but not for the ones that come already painted.
Start by gluing on the houses that will be the first layer (so, for me, it was every other house), then add glue just to the sides of the other houses to layer them on top! It can take a couple of tries to make sure where you place the glue works and it all sticks, but since these are really lightweight you don’t need the glue to be everywhere for it to stick!
Step Four: Add Lights!
And finally, you’re ready to display your mini villages with some twinkly lights! I like to use these battery-operated fairy lights – I have them all over my house during the holidays and they bring me so much joy. I just layered a strand behind the houses and hid the battery back behind other things on the shelf.
If you have some small bottle brush trees, it would look really cute to layer them in around the village too! This is a really simple concept that you can adjust and add to as much as you want, which is my favorite type of DIY!