
The Easiest DIY Paper Bag Snowflakes
Learn how to make the easiest (and most impressive!) paper bag snowflakes ever. This project is so fun to do with your kids!
Have you ever made paper bag snowflakes? Back when I was a teacher, this was a big thing. I’d spend hours making tons of paper snowflakes to hang up in my classroom. When the kids came back to school after Thanksgiving break, they were all hanging from the ceiling tiles! It was a bit like a winter wonderland.
Despite how much I loved making these all those years ago for my classroom, it took me years to realize I could make them for my house, too! But, a few years ago, I decided it was time. And now, every year when I put them up, I can’t stop swooning at how magical they are. And the best part? It’s so easy!
Let me teach you how.
How to Make Paper Bag Snowflakes
All you need is…
- A mix of brown and white paper bags (you’ll need 7 per snowflake)
- I just use plain brown paper bags from the grocery store
- Here are the large white paper bags I used
- And here are the small ones!
- Hot glue gun (regular glue works fine too, but this is much faster)
- Scissors
- Tape, if you want to be able to easily save them for next year.
- A stapler (helpful for hanging!)
- Push pins (also for hanging)
Step One: Glue Bags Together
You’ll start by gluing 7 paper bags together.
Make sure they’re all facing the same way, with the bottom of the bag facing up. Add glue in the shape of a “T”, along the bottom of the bags, and then down the center, as shown below.
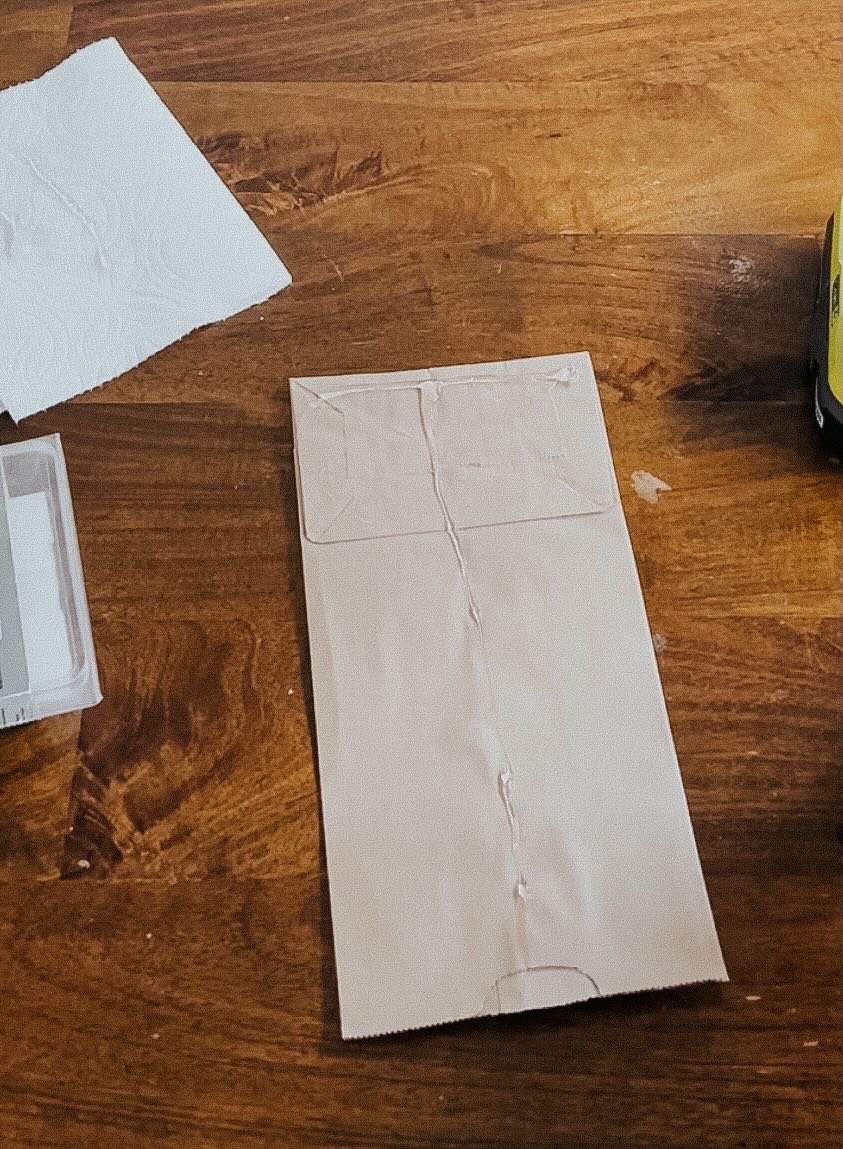
Once you’ve added glue to the first bag, press the next bag on top of it. Repeat, until you have a stack of seven bags glued together.
Step Two: Cut Snowflake Shape
Now, cut out the shape for your snowflake. There’s genuinely no right or wrong way to do this. You’ll want to start from the top of the bag and cut off the corners – you can cut in a straight line, a curved line, or any kind of line you want.
For extra detail, you can also cut shapes out of the sides of the bags. Below are a few photos that show you some cuts I made and the snowflakes that resulted!
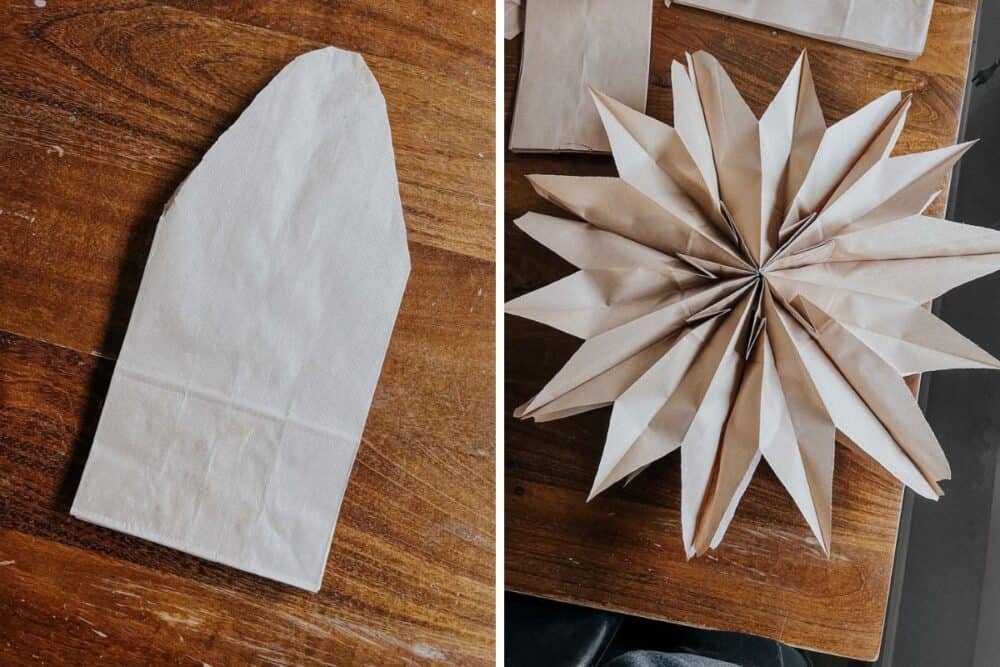
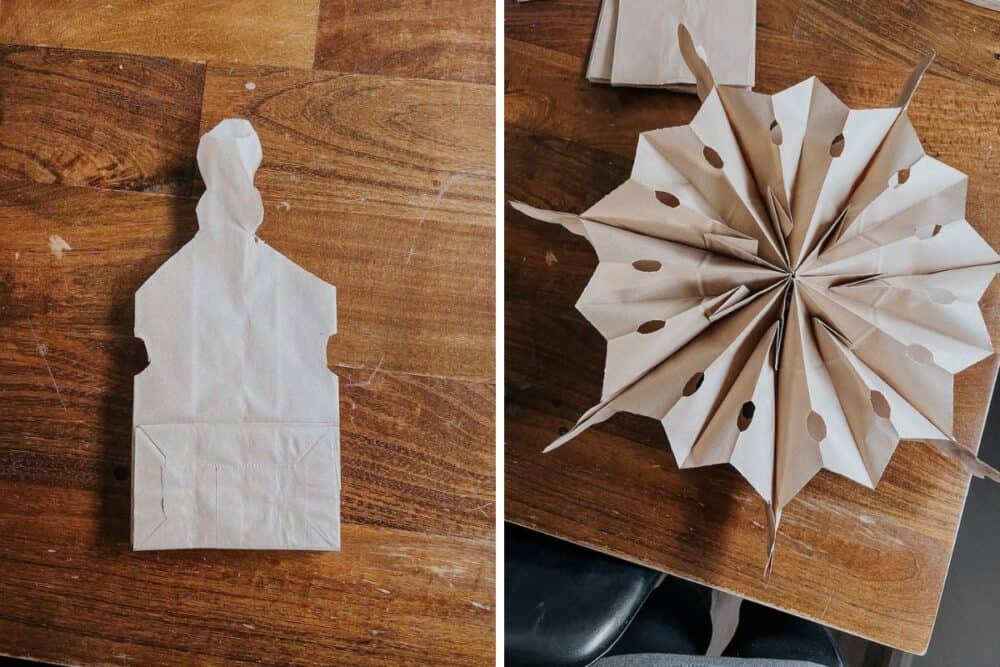
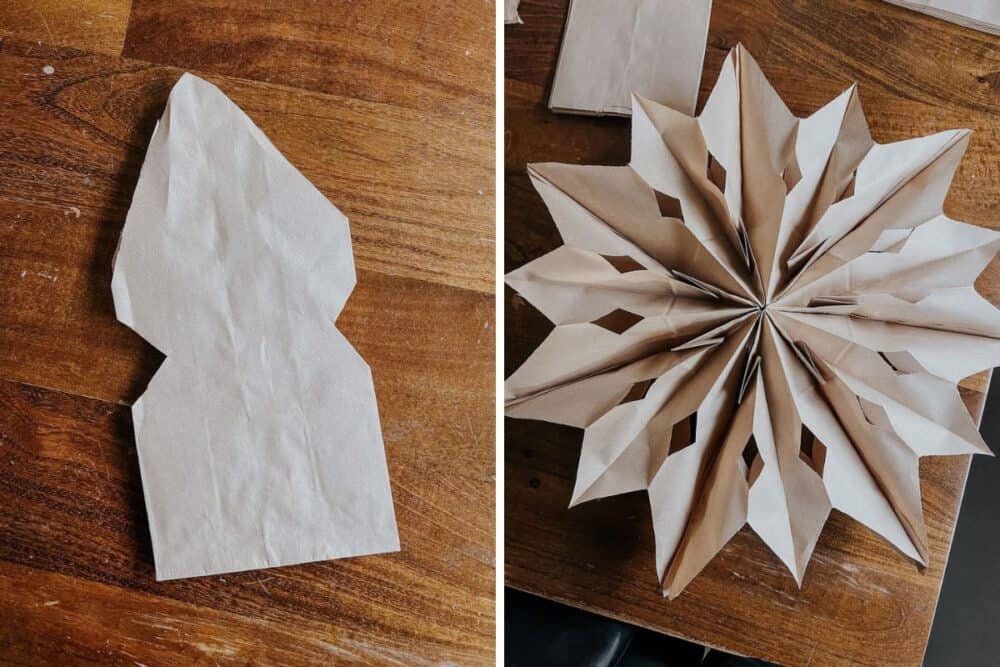
You get the idea – it’s easy! Just make sure you have some sharp scissors and don’t think too hard about it.
Step Three: Assemble Snowflake
Now, you’re basically done! All you need to do is grab the top of each side and pull it apart to create the snowflake. I like to hold them together with tape, so it’s easy to take them back apart and store them flat for next year!
Just roll up about three pieces of tape and place them in a T-shape along one side of the stack of bags (just like you did with the glue), then open it up and secure! If the tape doesn’t hold, a staple will do the trick.
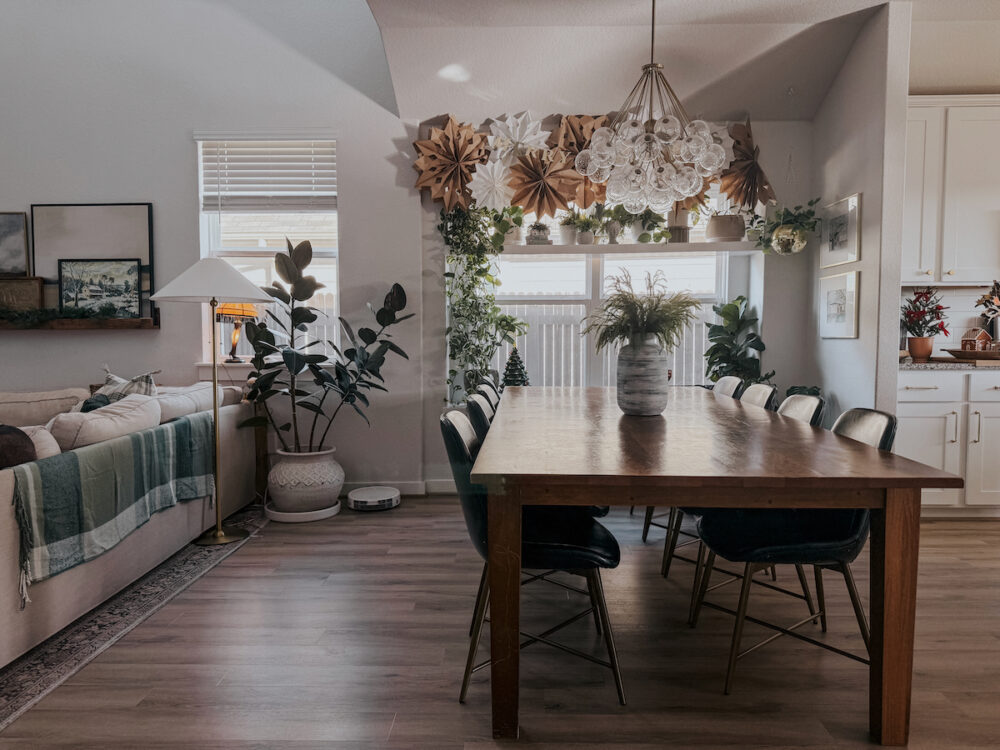
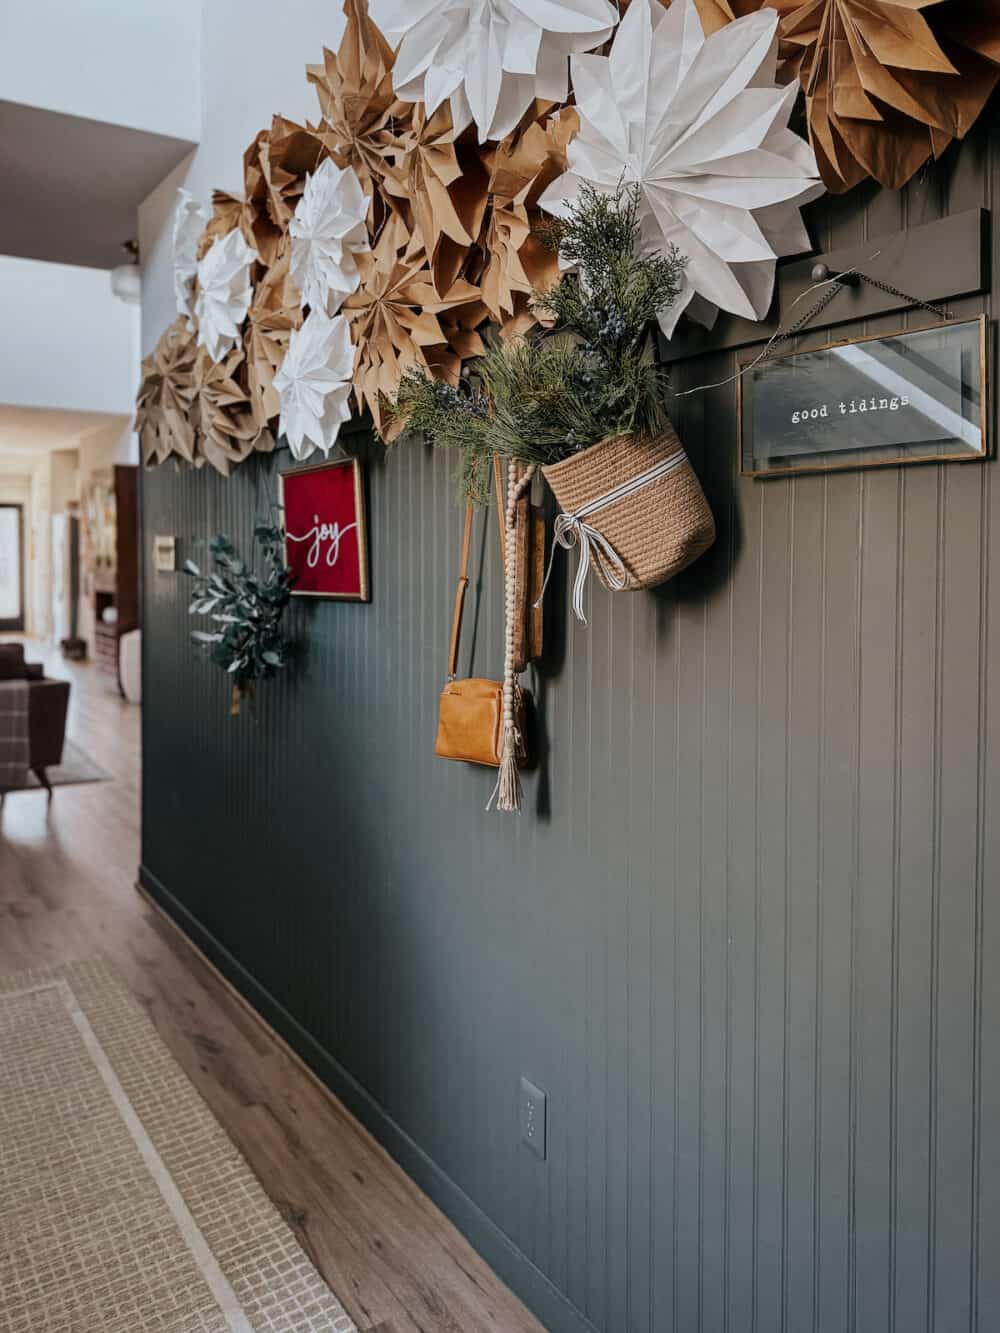
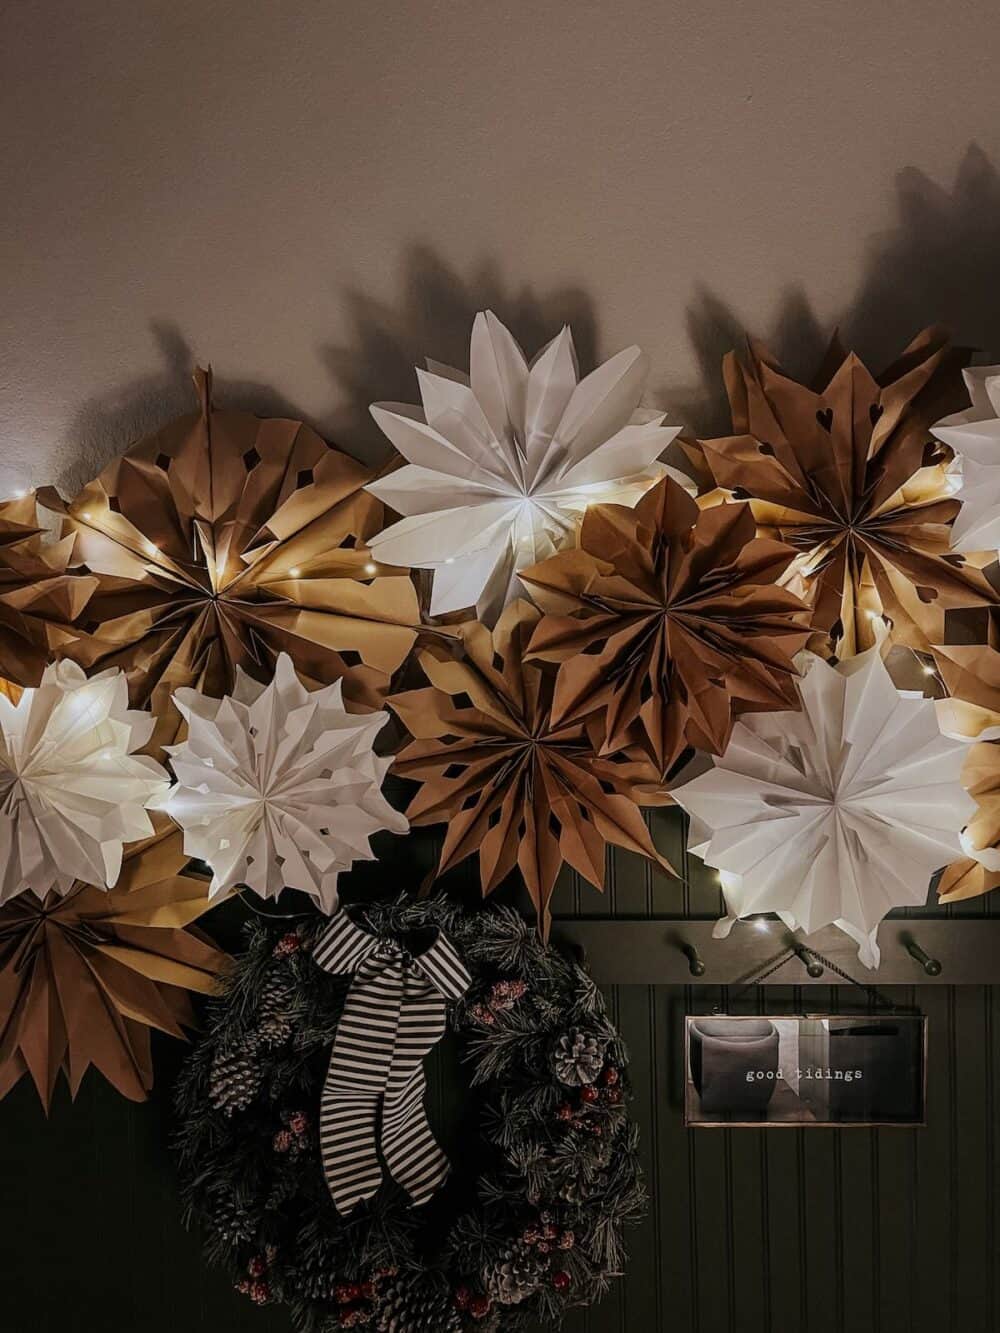
Step Four: Hang Your Paper Bag Snowflakes!
Now, you’re ready to hang it up! You can add string to the top and hang from the ceiling, or you can do what I do and hang them up on the wall!
I typically use thumbtacks stuck through the back of each snowflake. For the ones that are layered on top of other snowflakes, I either staple or tape them together. I’ve been using this method for three years now and I’m still using the same snowflakes, so they hold up really well!
And that’s it! This is a super simple project and I am SO GLAD I decided to try it. It’s one of my favorite things to re-create every year, and I love hearing from those of you who have tried it, too!
Quick tip – if you want to add an extra magical touch, just add some of these little battery-operated lights and they’ll sparkle all season long.
I made a snowflake from Christmas lunch sized bags at Christmas time. It looks so nice I still have it hanging up in my front window.
Simple, eady instructions, thank you.