
DIY Scrap Wood Christmas Trees
Are you ready for the simplest, no-real-skills-needed DIY wood Christmas trees you’ve ever seen in your life?! Today, I’m throwing it waaaaay back and sharing all of the details on these cute little scrap wood Christmas trees that I created way back in December of 2017. If we’re being honest, these might be the only piece of decor I still have from 2017. My tastes have changed a lot since then, but these still fit right in.
Seven years later they still make me go all heart-eyed when I pull them out!
There are dozens of different ways you can create your own wood Christmas trees. In fact, these aren’t the only ones I’ve made – I’ve also made these wood plank Christmas trees and this adorable kid-friendly tree.
But, spoiler alert, these are the only ones I still have. These would make a great gift, or just the perfect addition to your regular holiday decor.
Let’s jump right in, shall we?
This might be the simplest tutorial for wooden trees you’ll ever find. It requires no nails, no screws, no wood glue, and no fancy craft supplies. It’s just you, some wood, and a jigsaw. It’s that easy!
Easy DIY Wooden Christmas Trees
Materials Needed
I made all of my trees using a 2×12 (you can use any kind of wood). If you want smaller trees, you could buy a couple of different sizes of wood, but I recommend sticking to boards that are 2″ thick!
Trace the Christmas Tree Shapes
Start off by grabbing your board and tracing the shapes for your trees. I did a variety of shapes for mine, and I promise it’s less scary than it looks.
First, let’s start with how I drew the shape for the more traditional-looking trees. You’ll need a straight edge of some sort – I believe I used a lid to a tupperware box. A level works great, too! You just need something that will help make sure you draw a straight line. I used my straight edge to trace the general shape I wanted (basically, a triangle). Then, I drew horizontal lines where I wanted each tier of the tree to be. The final step was to use my straight edge to create some angles connecting the horizontal lines.
Clear as mud? Here, this picture might help:
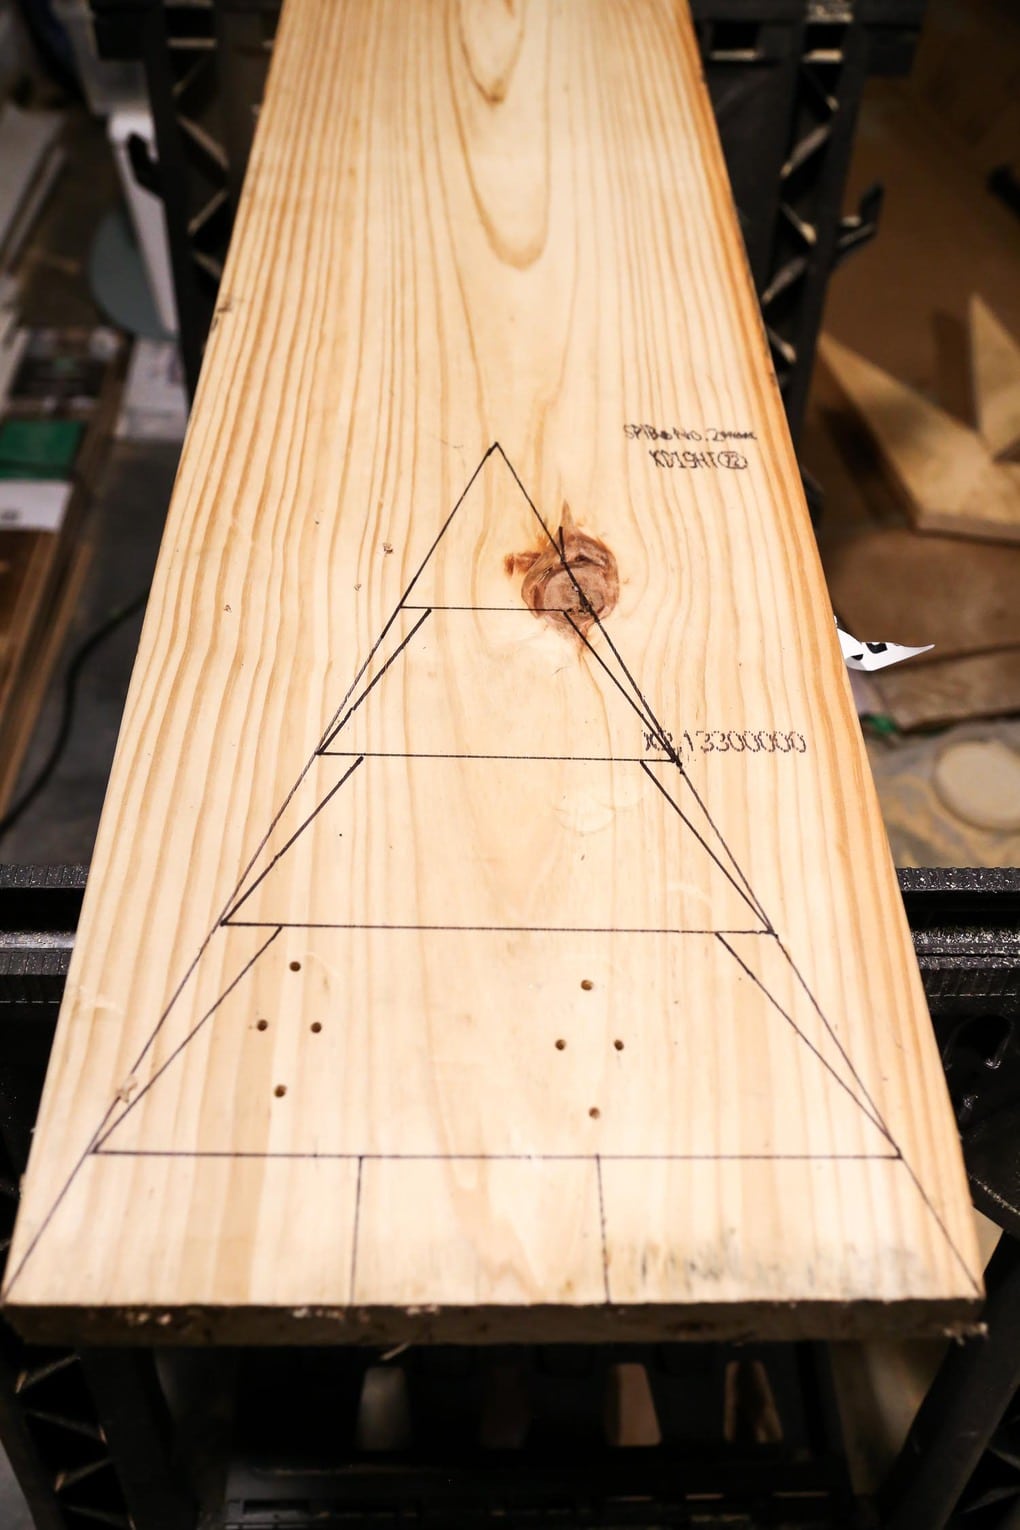
This doesn’t need to be too precious or perfect – a little bit of imperfections in the shape of the tree just adds whimsy and character, and there’s nothing wrong with that. Don’t worry too much about finding the perfect degree angle or anything. Eyeballing it is fine!
For the other trees, I just drew a large triangle – sometimes I added a stem on, sometimes I didn’t. There wasn’t much rhyme or reason to the sizes and shapes that I drew – I just kept working until I had what I felt was a good variety and a good number of trees. When all was said and done, I used about two 6-foot boards to cut all of these out.
Cut Out the Trees
After you’ve traced the shapes you want, it’s time to cut them out! I used a jigsaw for mine, but the simpler shapes could also be cut out with a circular saw.
If you haven’t ever used a jigsaw before, don’t worry, I’ve got you covered with this full guide to how to use a jigsaw. You’ll just use the blade to follow the Sharpie or pencil mark and try to hold it as steady as possible.
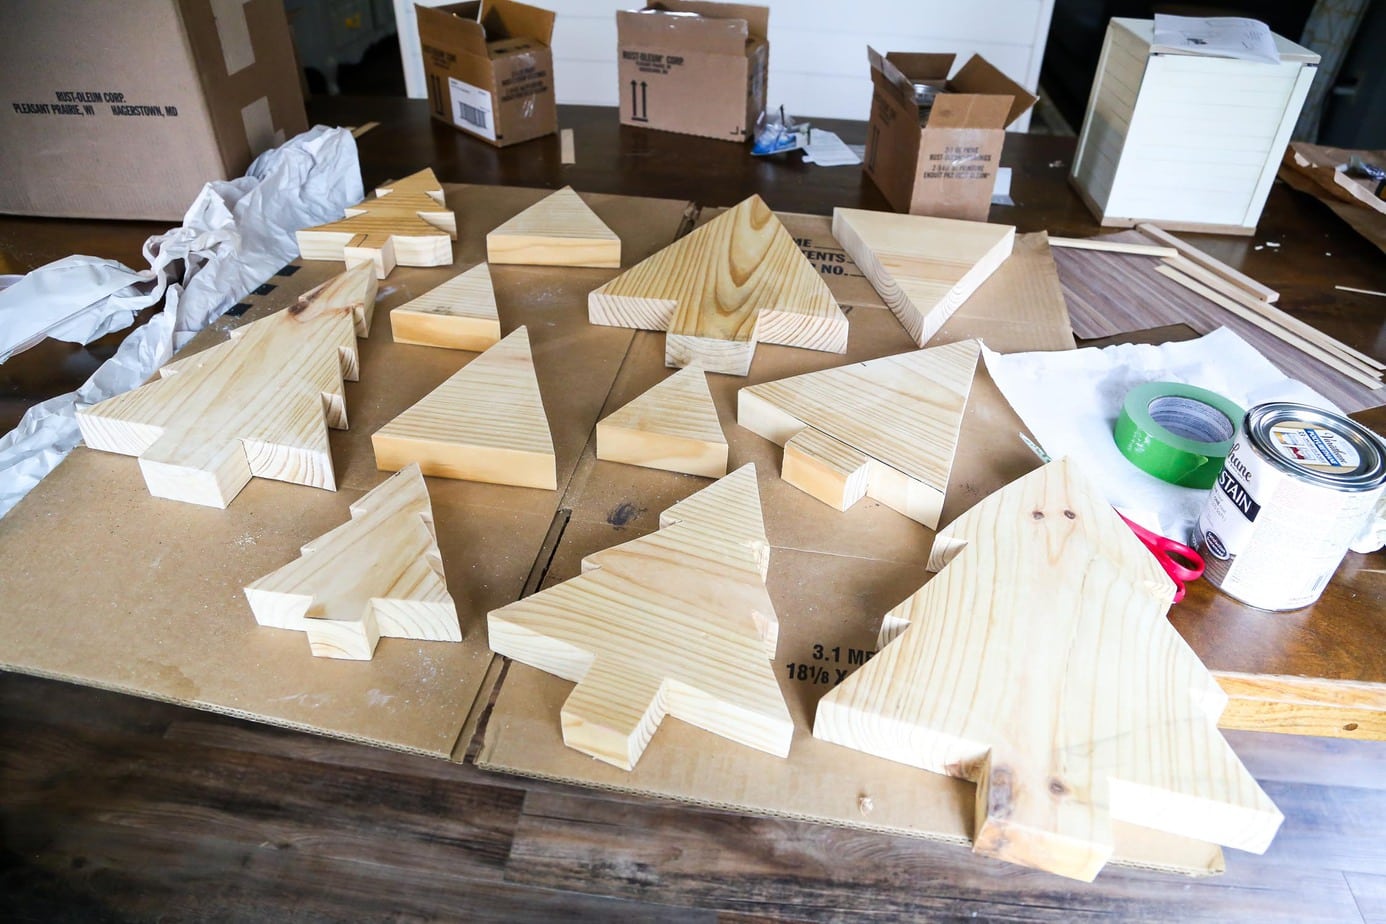
Sanding + Staining
You’re almost done. Seriously, this is the simplest project.
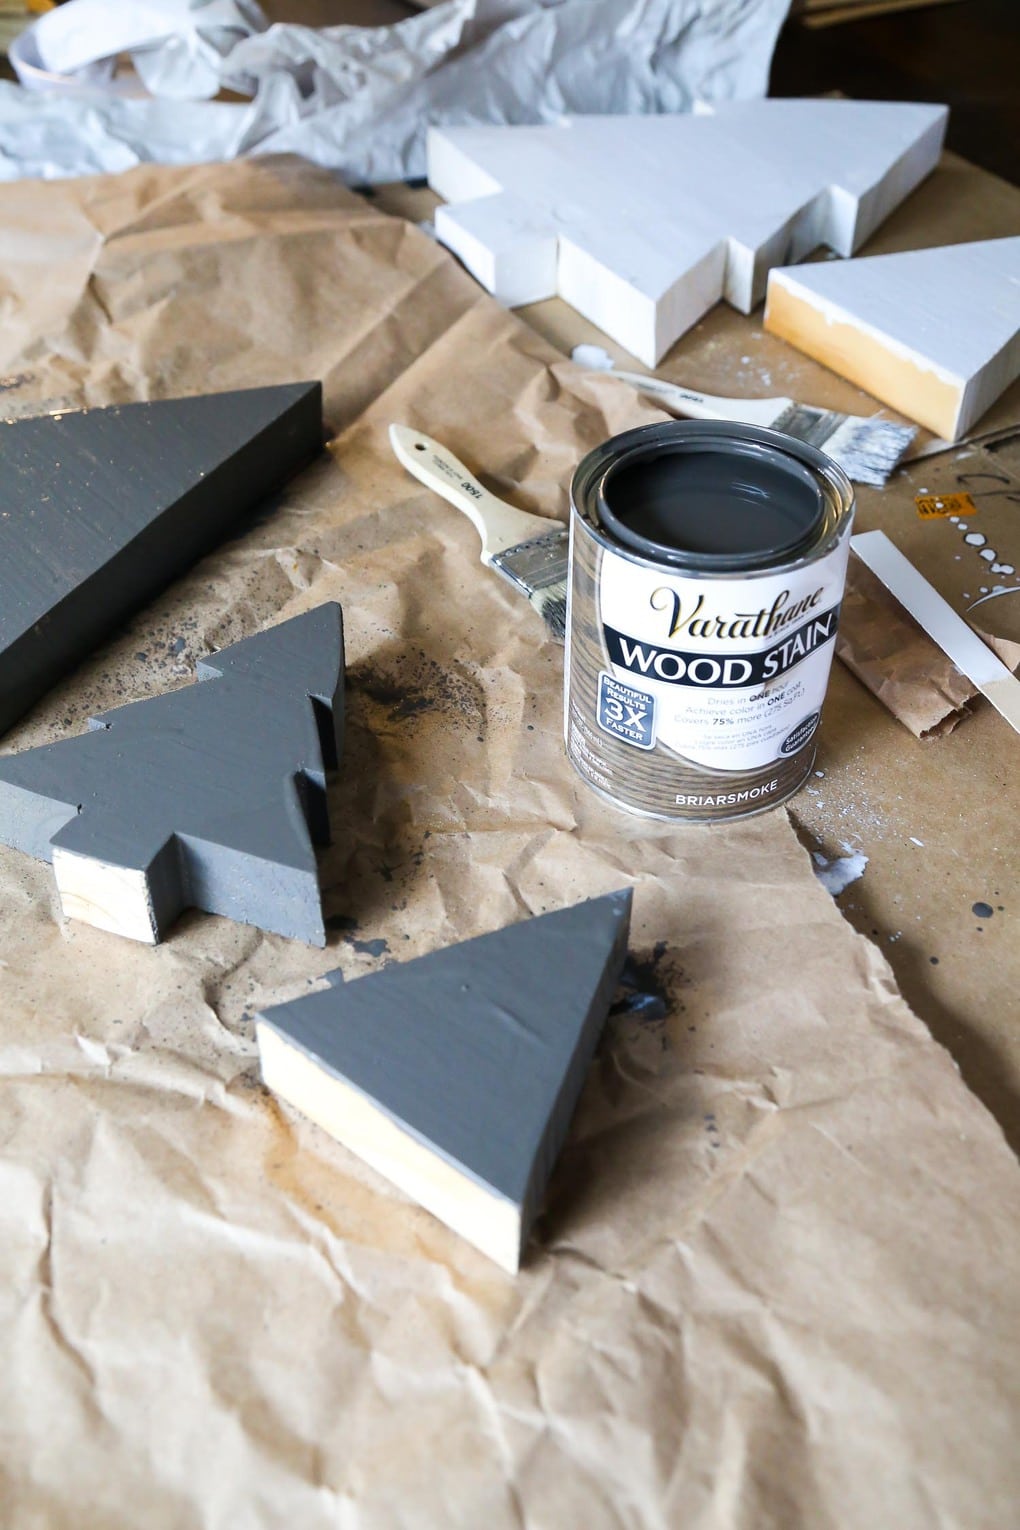
The first step of finishing is going to be sanding. There will definitely be some rough edges after you finish cutting. So, start with a low grit sandpaper (like 60 or 100) and slowly work your way up to at least 220 grit. You’ll notice that with each grit you go up, the wood will get smoother and smoother!
After sanding, it’s time to stain or paint. Of course, you can also leave them natural wood and it would look beautiful! I stained mine in a variety of neutrals.
The stain colors I used are:
And that’s it! Let your mini wooden Christmas trees dry and you’re ready to do display them for the whole holiday season. This is such an easy project that has brought me so much joy for nearly a decade now. It’s rare for seasonal decor projects and purchases to survive that long as styles shift, but this one definitely stands the test of time!
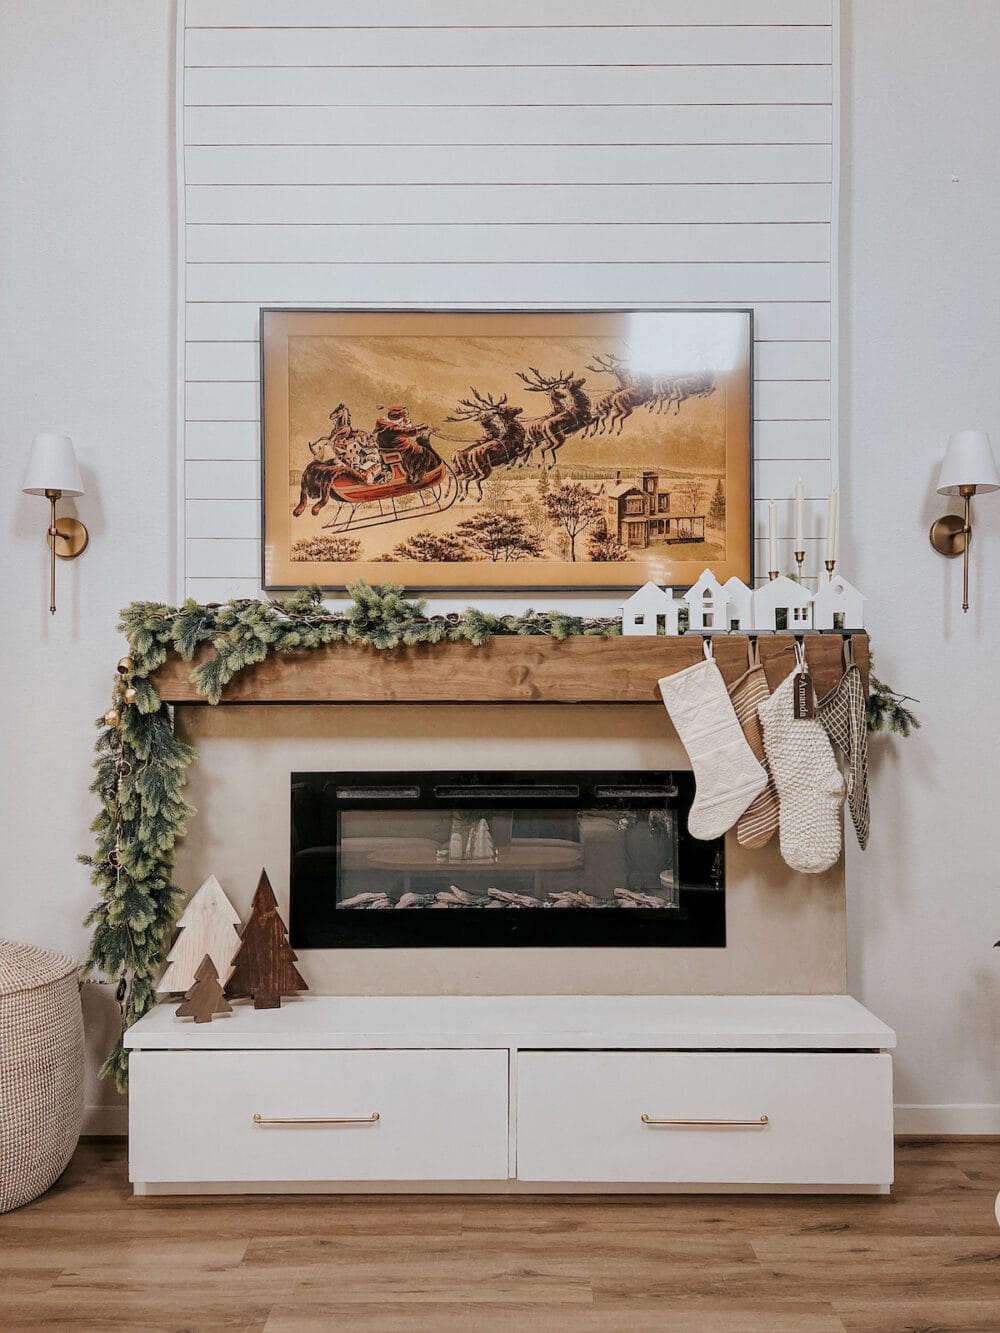
Of course, it feels wrong to share this throwback post without also showing off how they looked on our mantel way back in 2017.
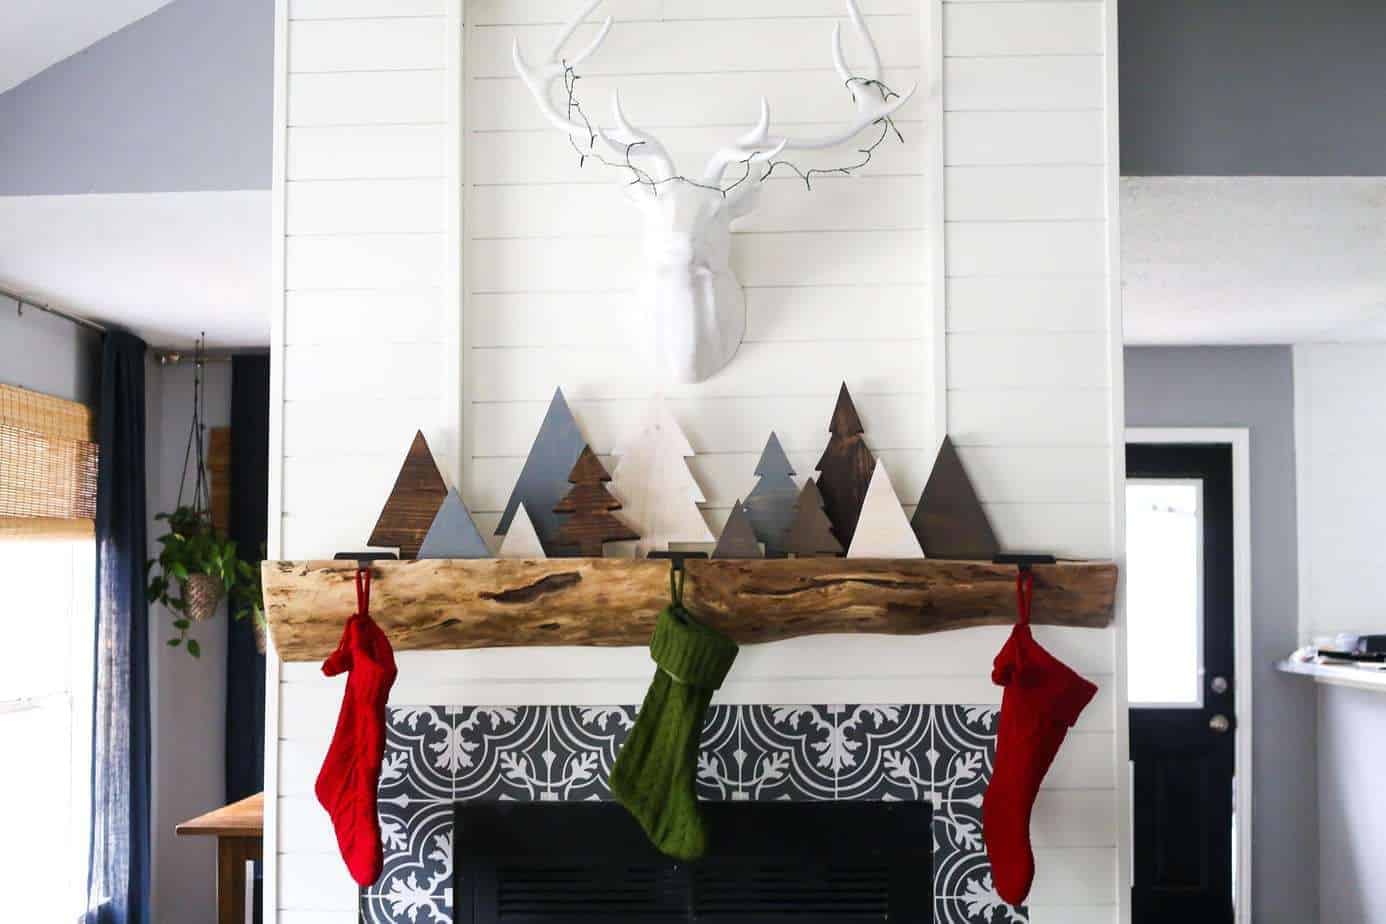
Man, I miss that fireplace.
If you’re looking for a really easy project to tackle this year, I promise this is a great one to start with. I’ve been willing to pack these up and move with them twice now, and I’m still happy to pull them out every year.
Sometimes the simplest projects really are the best, aren’t they?!

I love this idea, my brother works at Rockler and they have this fabulous bin of scrap wood that you buy by the pound, and they have some beautiful woods such as Purple Heart. Needless to say, I am going to make some of these trees for my mantle.
Love the trees, but I especially love the layout of your fireplace, the mantel setup, and the faux deer head…😍 Did you make the head-mount yourself, or did you buy it? I’ve been working on my own for a while now, but I feel like I never get the antlers right, and yours are gorgeous!!! Lmk how you did it, or where you found it, please. Thanks so much!
Thanks, Ashley – I did not make it, it’s from Z Gallerie a few years back. I’m not sure if they sell it anymore, but that’s where we got it!
You didn’t perhaps trace the trees and scan into PDF files? That would take all of the guess work out. These look amazing.
Thanks,
Greg
I didn’t! But, they’re very easy to design on your own with the steps I listed, and a bit of variation is a great thing- you want them to look rustic! 🙂
Did you, by chance, record your self cutting out the trees and sanding them? I am new to this and would feel more confident watching it being done before I attempt this project, Thank you.
Hi Barb – I didn’t take a video of this particular project, but I do have a video on how to use a jigsaw! It involves a similar project, so it may help. You can see it here.
These are so cool! I love the look of all of them spread across your mantel! Thanks for linking up with Merry Monday – I’ll be featuring your DIY trees at our upcoming party 🙂
Thanks, Emily!
Hi Amanda! This is such a cute project and what a great use of leftover wood pieces! Your color picks are awesome and I will definitely be pinning this to make the trees but to use your color choices too. Keep the inspiration coming! 🙂
Thanks, Samantha!