
DIY Cedar Planter with Built-In Bench
Last updated on July 19th, 2024 at 08:07 am
Looking for a simple but beautiful way to store some plants in your yard? This DIY cedar planter bench is a beautiful solution that can be flexible to meet your needs!

One of my goals for the backyard this year was to build some moveable planters and plant stands. I’ve really been wanting to work on my plant game a bit. If you’ve been around for a while you’ll know that I’ve never been all that awesome at keeping plants alive. But, I sure do like to try! And, one of these days I’m determined to have an actual verifiable green thumb.
I just finished up a gorgeous cedar planter bench for the backyard. I wanted to share the tutorial because this is a super simple build that I did all by myself!
I’ve been working for about two years now on (slooooowly) learning some woodworking skills and getting myself comfortable with doing a bit of building. So, this project was hugely intimidating for me. It didn’t turn out completely perfect. I had to get creative and change my plans at the last minute (it didn’t originally include a bench!). But, I’m really pleased with how it turned out!
How to build a DIY Cedar Planter Bench
Materials Needed
I used plain old white wood for this project. If you want to make it a little more durable, pressure-treated wood is your friend.
Step One: Assemble the Side Panel of the Bench
The first step is to build the four sides of the planter. You can modify it to be any size you want. I originally measured mine to fit under our bay window, but later realized the ground is too sloped to be a good spot.
You could do a square planter or any other size that fits your needs! I haven’t decided where this will live full-time. But, for now it looks pretty cute along our back fence. I’ll give the following directions in the dimensions that I used, but just know that you can change them up however you’d like.
- For the two long sides, I cut two 1X3 boards to 50″
- For the two short sides I cut two 1X3 boards to 16″.
To assemble a panel, I laid out the top and bottom board on my workbench spaced 20″ apart (measured from the top of one board to the bottom of the other). I clamped the boards to the table when I could to hold them in place. I also measured across multiple spots to be sure the boards were consistently spaced.
Then, I added some wood glue to the boards and nailed in a row of Cedar Safe planks. You’re looking at the back of the panel, so you’ll place the boards with the back side facing up. Fit them together using the tongue and groove, then nail into place at the top and bottom.
When you flip the finished panel over, it should look something like this:
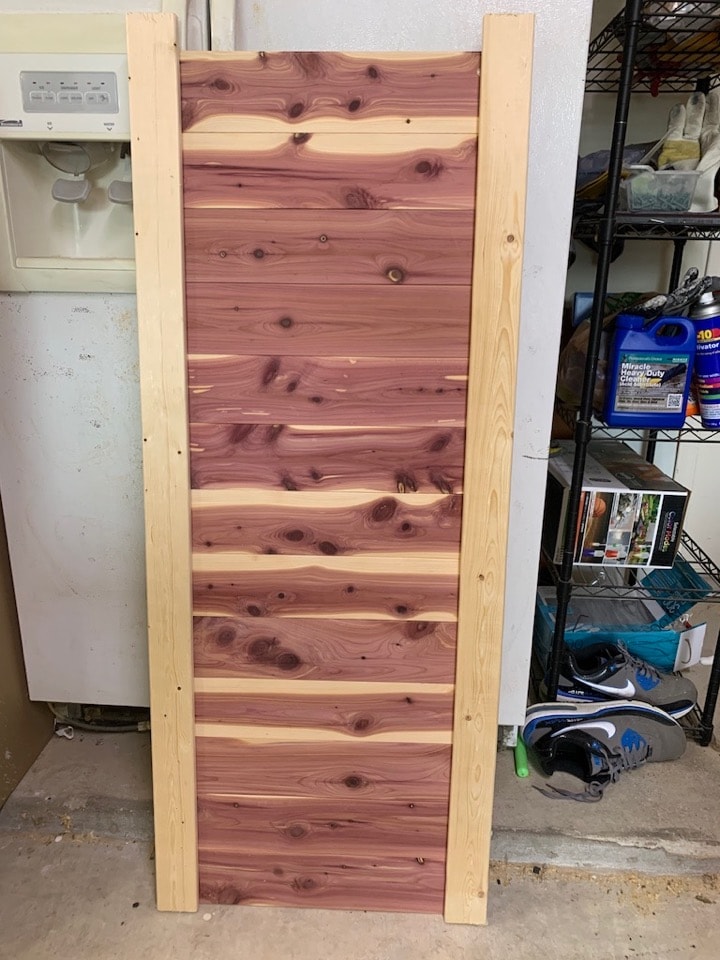
Be sure that the cedar planks go right up to the edge of the top and bottom piece, but not any further. Lining things up exactly is key to avoiding any gaps!
It might be an obvious note, but remember that if you’re building a square planter, your four panels will all be the same size. If you’re building a rectangular planter, you’ll have two long panels and two short ones.
Step Two: Attach the Planter Legs
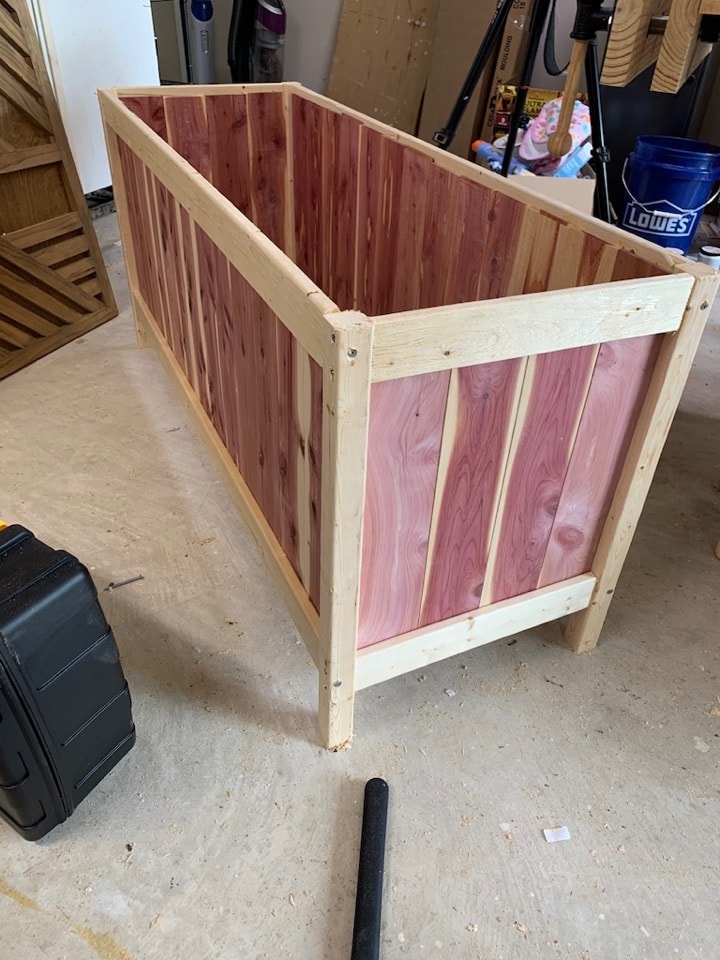
Once you have assembled your four panels, you’re ready to start putting things together. Grab your 2X2 boards and cut four legs at 24″ each. Use your drill (be sure to pre-drill a hole first!) to attach the two of the legs to either side of one panel, like so:
You could also use pocket holes here, if you prefer!
I chose to attach the legs to the two short panels first, then attach the long panels. If you’re making a planter as big as mine is, you’ll probably want a second person to help you attach the long panels. It wasn’t easy to do solo!
To attach them, just apply some wood glue, then pre-drill a hole, then add a screw. Once you’ve attached all four sides to the legs, you’ve got a (mostly) finished planter! We just need some finishing details.
Step Three: Attach Slats to the Bottom
You have a couple of different options here, depending on how you want to use the planter and whether or not you’re building a bench. Remember that this project is endlessly customize-able.
- If you want to plant directly in the planter bench, you’ll need to reinforce the sides with some additional 1X3 boards. The cedar planks are thin and may not be able to handle the expansion of the soil. If you add a few boards running horizontally down each side, that should be enough to keep them sturdy. Then, follow the process I detail below, adding in some gardener’s cloth afterwards.
- If you want to just add plants in planters to the planter (which is what I wanted to do), then you’ll follow my process below. I added my slats towards the very bottom of the planter so I can have a variety of different-sized pots in here, but if I were doing it again, I’d probably install the slats closer to halfway up. This thing is deep!
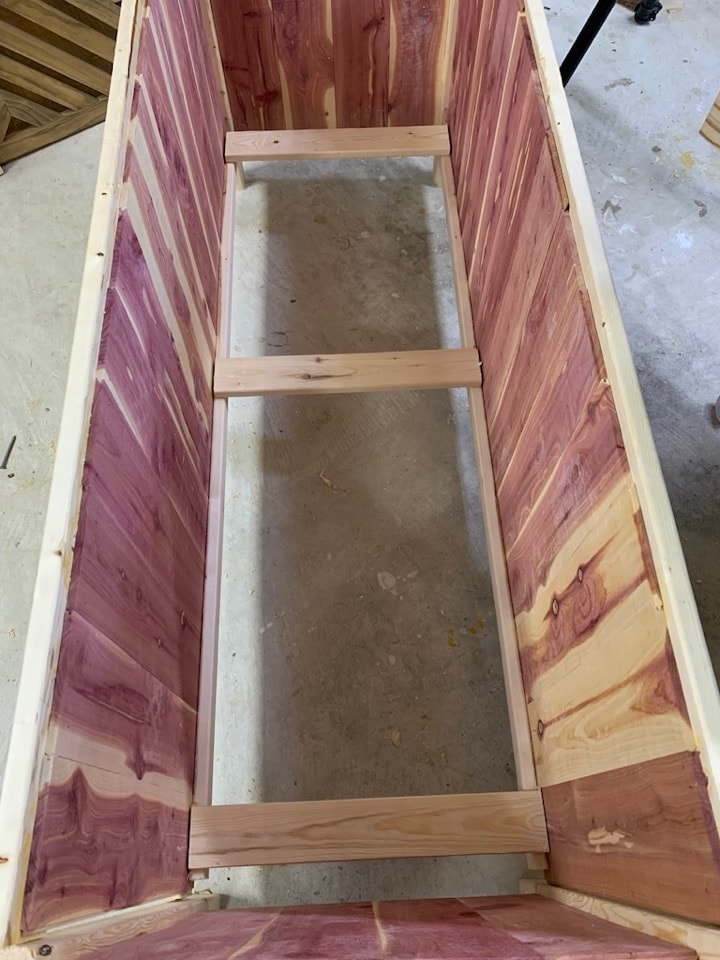
Cut a 1X2 board into two pieces that run the length of the inside of your planter – for me, this was about 50″. Attach the board inside the planter running horizontally. I used wood glue and nails to attach it.
As noted above, I installed my slats at the very bottom of the planter – this means that if I’m using a plant with a smaller pot, I’ll need to put something on the slats to raise it up a bit. But it also means that I can use a really large plant in here without having to worry about the pot showing! So, if you want the flexibility of using any size pot you want, just do the slats at the bottom and plan on having some pavers or scrap wood to raise the pots up as necessary. If you don’t want to have to deal with that, I’d recommend installing the slats about halfway up the planter.
After installing the brace on either side of the planter, you can use the rest of your 1X3 boards to cut some slats that rest right on top. I also attached these with nails, but you could just set them in place if you prefer.
Step Four: Add a Bench
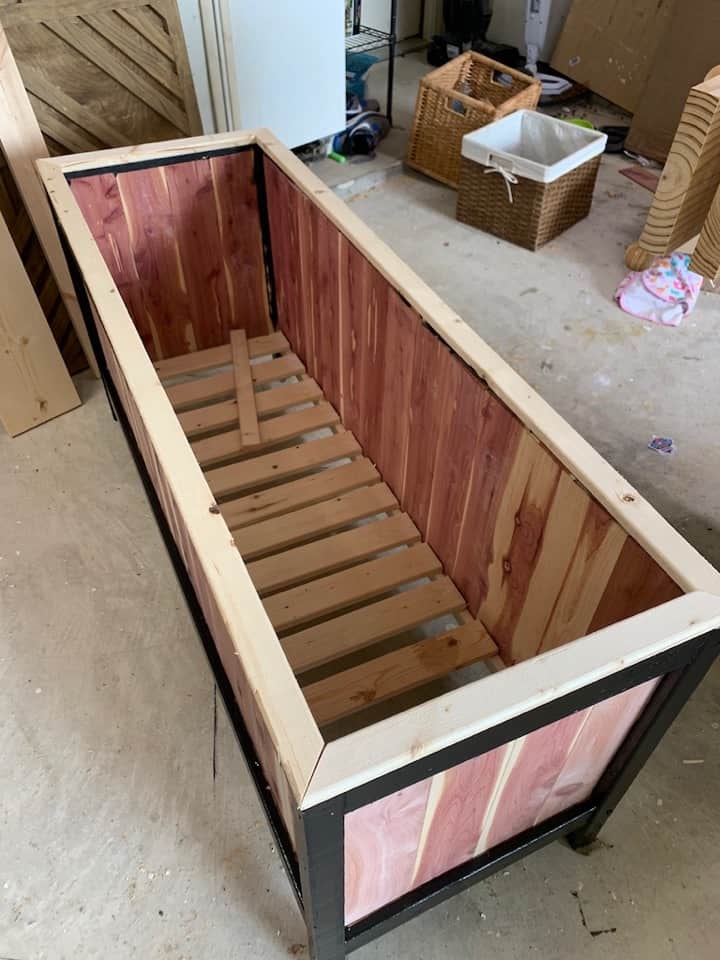
You can’t call it a DIY planter bench without adding the bench part, can you?! You might notice that in these next few photos, part of the planter is already painted. That’s because my original plan was to stop here. But, once it was done I realized I had gotten a little carried away and it was really big. It also felt a little unfinished, and a bench in the middle seemed like the perfect solution.
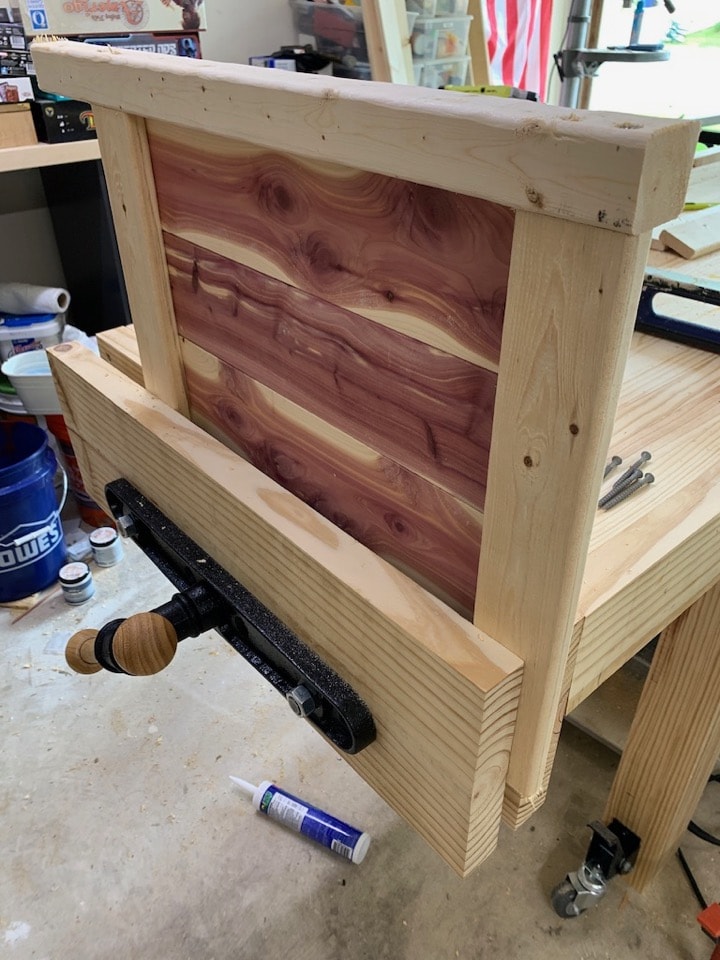
I started by trimming out the top with some 1X2s. This is a good thing to do regardless of if you’re adding a bench. Cut mitered corners and attach using glue and nails. I also added screws at each corner for some added stability.
Once the top was trimmed, I added an 18″ cleat on either side of the bench right in the middle, right underneath the trim piece.
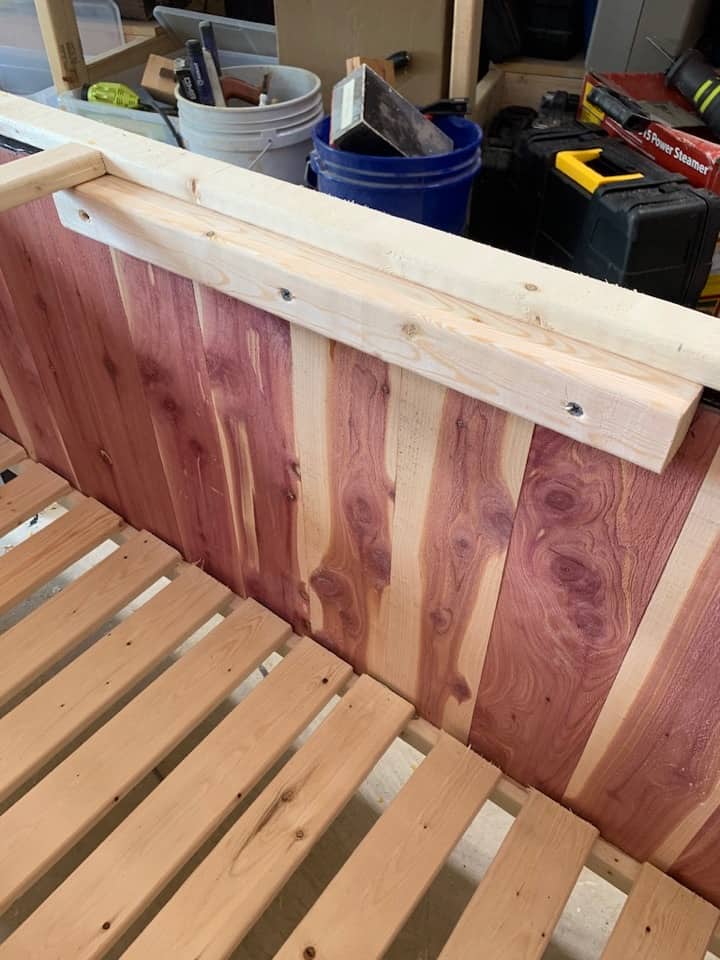
Finally, I added the slats for the bench. I just used a spare piece of cedar to space out my boards, but be sure to measure to make sure the spacing works for the size of your cleats.
I attached the bench planks directly into the cleats using my brad nailer and a bit of glue. Then, I trimmed out either side with a 1X2 piece laid vertically instead of horizontally.
Step Five: Paint and Seal
Finally, I painted all of the wood around the planter and on the bench (I left the cedar alone). This is a good way to seal the wood and protect it from the elements, and it looks great!
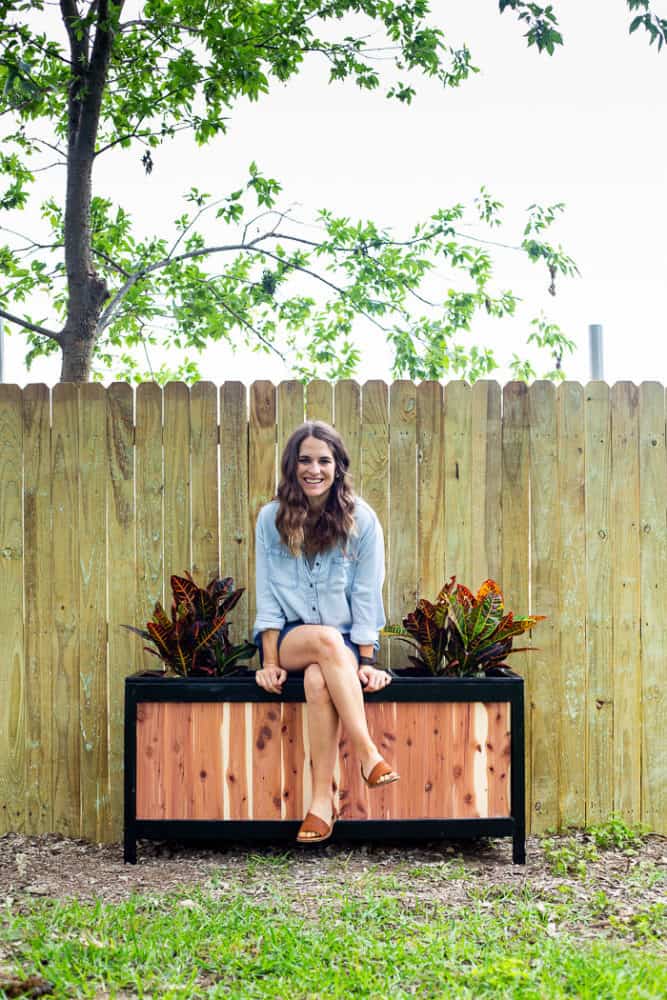
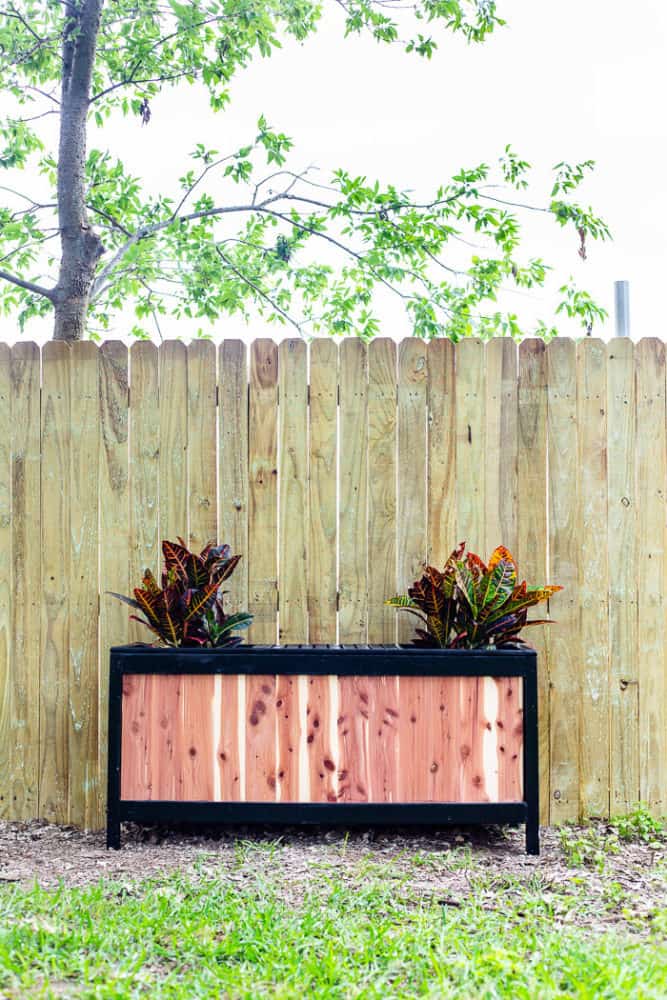
A wood planter like this is going to do best when it’s kept under some sort of covering and not directly exposed to the rain. I set it up by the fence for the photos here, but I’ll probably play around with a few different spots in our yard until we land on the perfect place to keep it.
After I painted the wood, I sealed it using Spar Urethane, which is the best sealer to use for anything that will be kept outdoors.
Once everything dried, I was ready to fill it up!
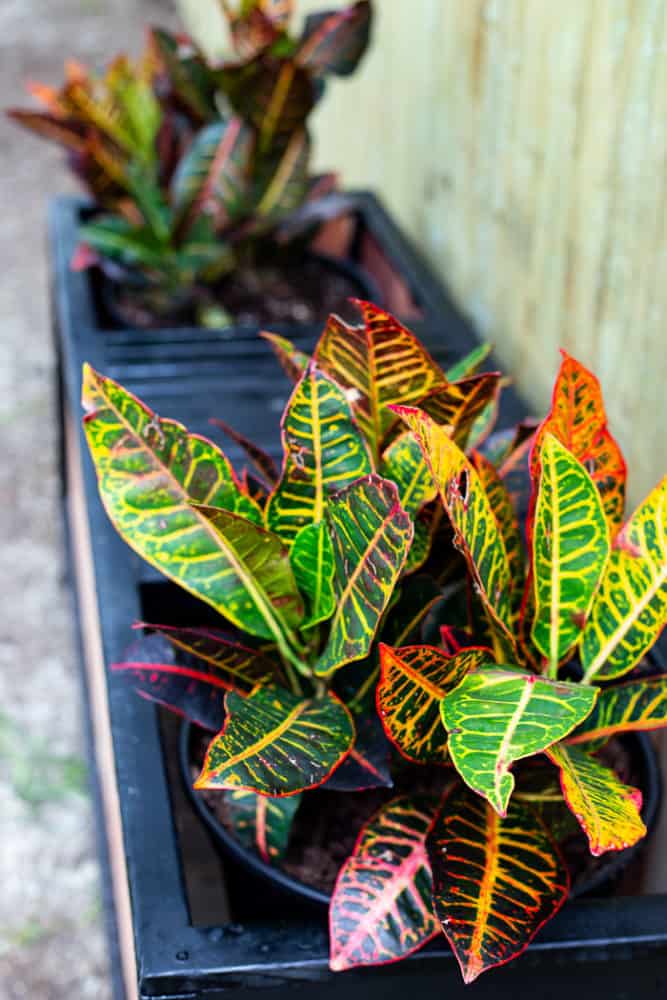
I planted some cute little Croton plants in tall planters and just put one on either side of the bench. I love how it looks but even more, I love that I can change it up anytime I want (or, you know, when the plants die). These can grow to be around 3 feet tall, so I think if I’m able to keep them alive long enough to get nice and big, it’ll look amazing!
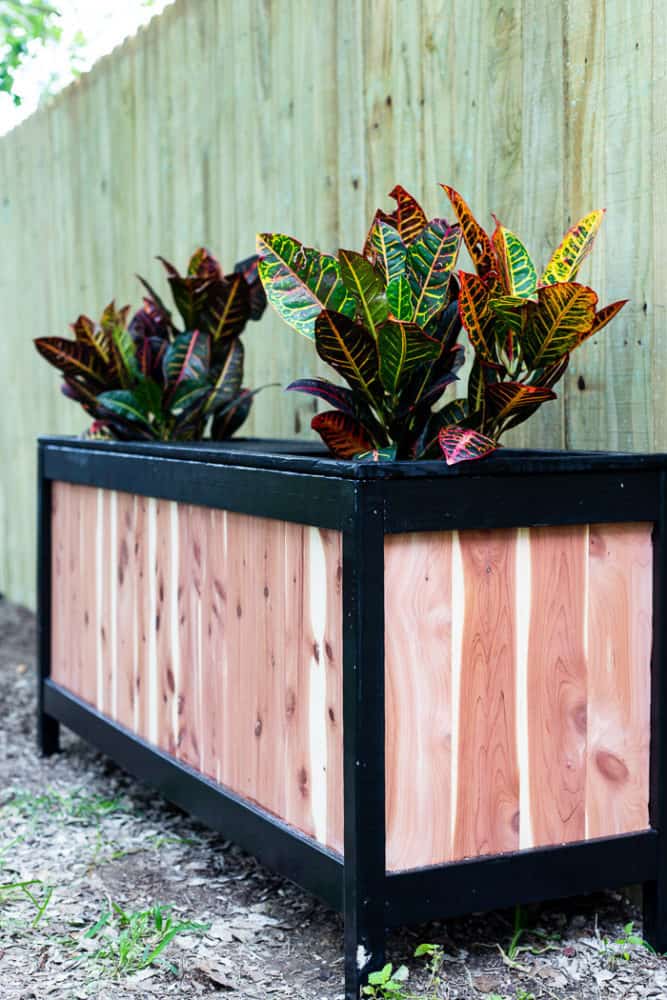
I’m so, so proud of myself for whipping this guy up all by myself, and I really love how it looks in the yard. I feel like things are finally coming together in our yard, and I’m just getting started!

You may find your garden skills improve by planting beds rather than pots. I find beds need far less babying and constant watering than potted plants.
We do have a garden bed – I find that my potted plants actually tend to do better, but I’m always looking to improve my skills. 🙂
Your shoes are super cute! I like the bench/planter too. Its very nice. 😊