
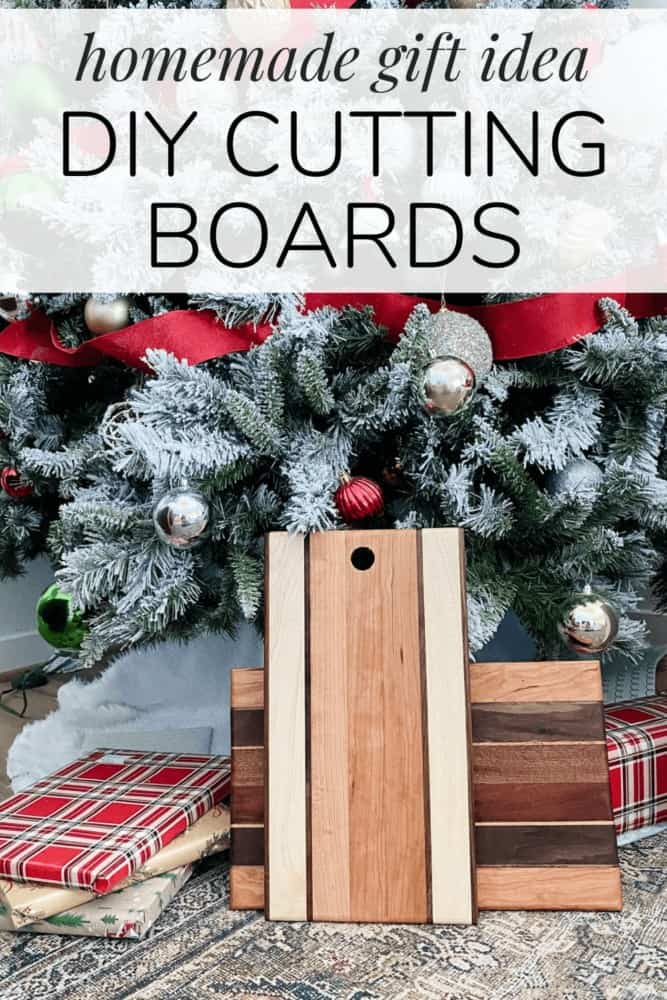
Easy Gift Idea: DIY Cutting Board Kits
Last updated on July 1st, 2024 at 08:45 am
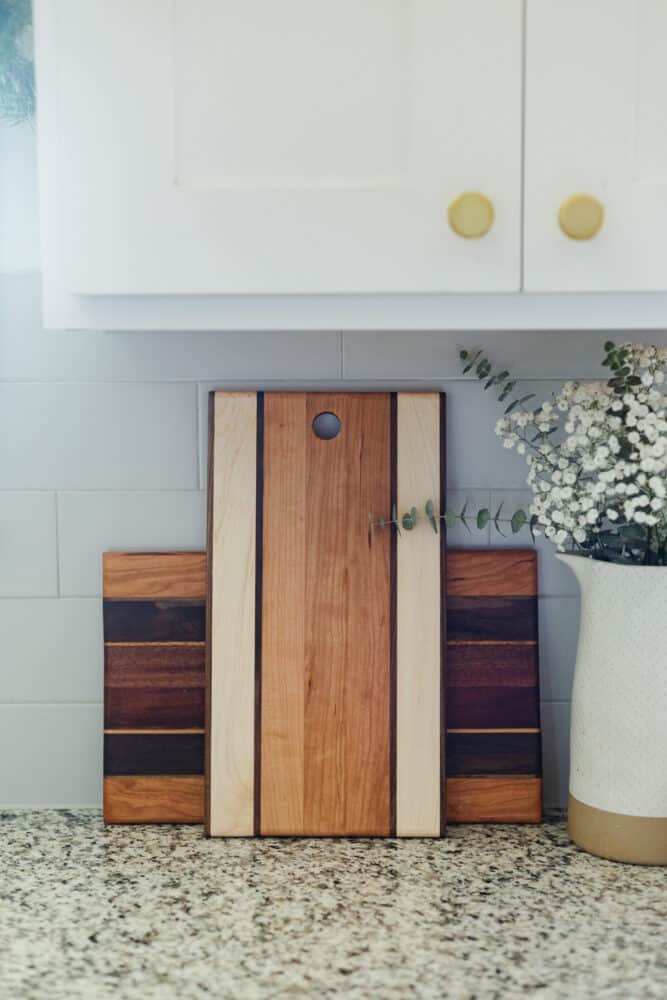
Learn how to make these gorgeous (and so simple) DIY cutting boards from a cutting board kit. They’re a perfect DIY Christmas gift idea!
This post is sponsored by Rockler.
I’m always a huge fan of DIY gift ideas. But, to be honest, I always struggle to come up with ideas that really feel like a good gift. I want it to be beautiful and useful and fun to make. That’s just a tall order, you know?
But you know what’s always a good DIY gift idea? A cutting board! Everyone needs them! They can be used for actual cutting, for serving food, or just for display purposes. Plus, it feels so fancy to be able to say you’re gifting a loved one with a custom wood cutting board, you know?
I love to work with our friends at Rockler this time of year to share some fun DIY gift ideas. They never disappoint with their kits and plans for beautiful gifts. You can see a whole list of 5 genius ideas right here. You can also see some fun DIY gifts I made with the lathe a few of years ago!
How to Use a Cutting Board Kit
Tools & Materials
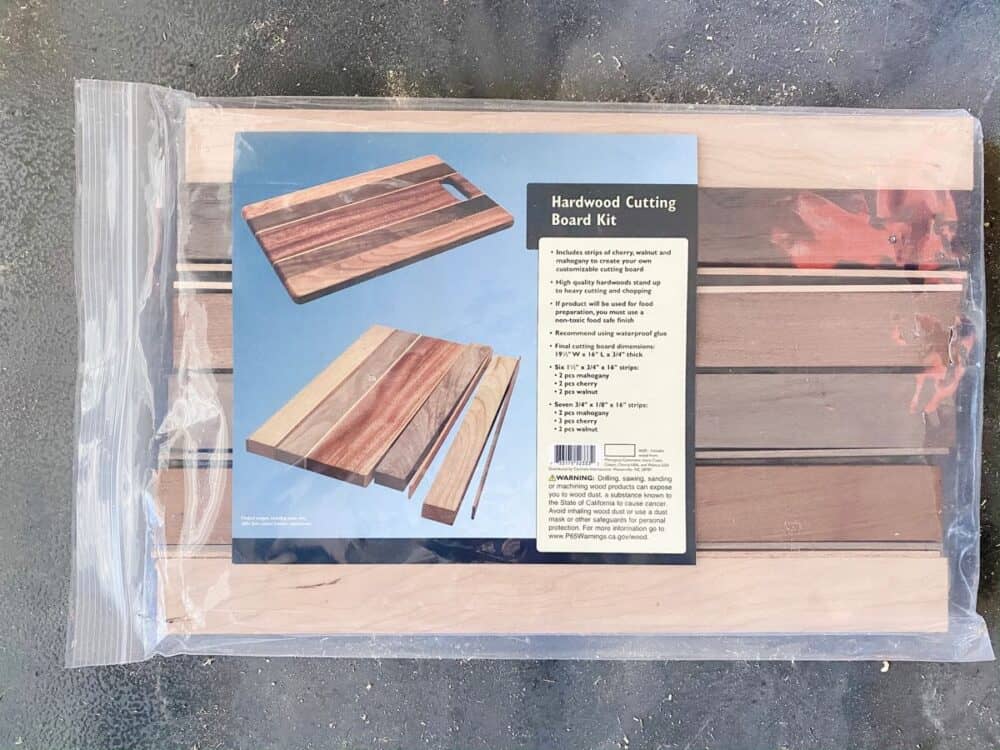
- I used this 8.5″ X 16″ cutting board kit and this 9.75″ x 16″ cutting board kit
- Wood glue
- (Optional) Silicone glue keeper and silicone glue brush
- (Optional) This silicone mat is a great place for your cutting board to dry without leaving a sticky mess behind
- Clamps
- Orbital sander + sandpaper
- Cutting board oil
- (Optional) You can add these non-skid bumpers for a fancy upgrade!
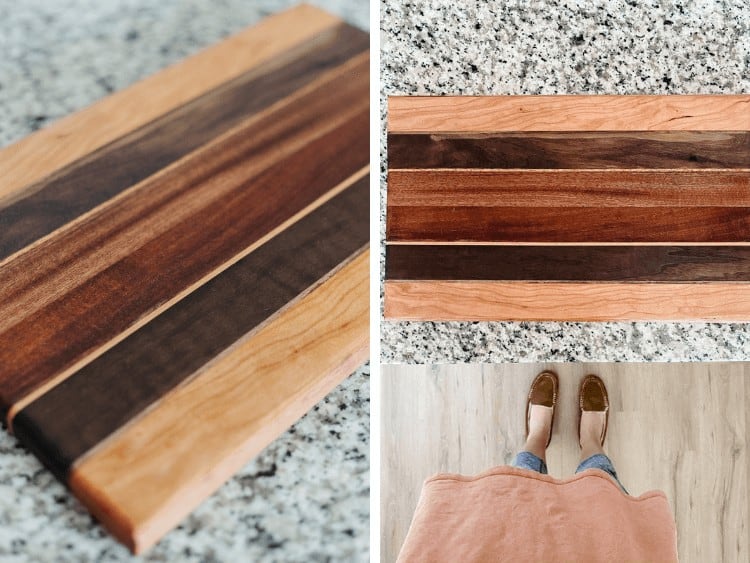
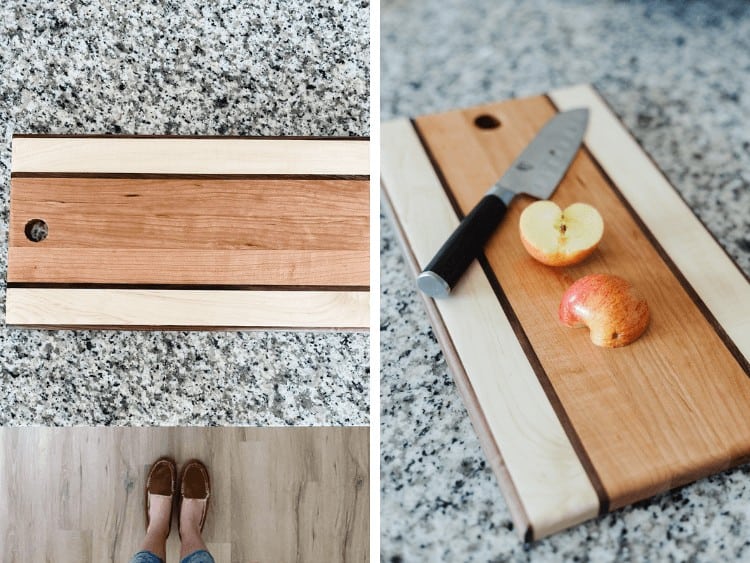
Step One: Plan Pattern
Your first step is to figure out what pattern you want to place your wood blocks in. I played around with mine quite a bit – you can get really creative with it! You could even combine a couple of cutting board kits if you want to make an extra large board.
Once you’ve chosen your design, it’s time to start gluing. I like to have some extra control when I’m applying wood glue. So, I usually use the silicone glue keeper I linked above. It helps make sure I don’t get too much glue on. That’s extra important when you’re going to have to sand off all the excess glue later! Plus, it is easier than squeezing it directly out of the glue bottle.
Heck, the glue keeper and a little silicone glue brush would make a great stocking stuffer by themselves!
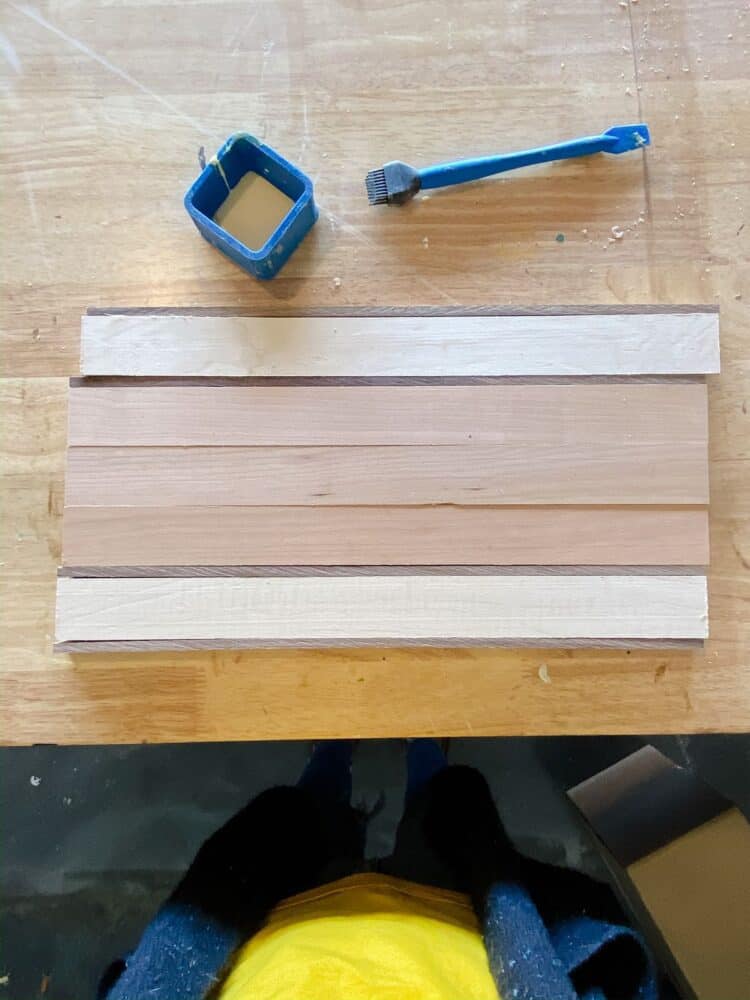
Step Two: Assemble Cutting Board with Glue
Simply apply your wood glue to the sides of your wood pieces, then clamp them all together in the pattern you’ve chosen. Try to make sure the ends line up as closely as possible and everything is sitting flush and flat. Pretty much any errors you make here are fixable with sanding, but it’s always easier if you take the extra time to make sure things line up nicely.
After clamping it, be sure to wipe off the excess glue that squeezed up through the cracks – it’s always easier to get it off now than it is later once it dries.
Once the cutting board is glued, clamped, and clean, give it a few hours to dry.
Step Three: Sand and Finish
Now comes the satisfying part – sanding! When you first take the clamps off, things might look a little concerning. There will be some excess glue, maybe a couple of lumpy spots, and it will just look like a bunch of pieces of wood glued together.
That’s ok! It’s supposed to look like that!

Sanding is where the magic happens. Start with an 80-grit sandpaper and use that to do the majority of your smoothing and leveling. This will take off a good amount of material, so it’s what you want to use to remove any excess wood glue, or to sand down pieces that are slightly higher than others. Slowly work your way up in sanding grits until you reach 400-grit. Be sure to thoroughly sand at each step – this makes a big difference, and nobody wants splinters in their cutting board!
Note: You can also use a planer for the initial sanding step if you have one!
Once it’s all sanded down, you get to do some customization.
I decided to use a router to round off the edges of my board, and on one of them I drilled a 1″ hole to add some leather string. You could cut the board into a different shape, you could paint a design or pattern on (only if you’re using it for display and not food, obviously), or you could wood burn a design in it. Have fun and get creative – this is where the cutting board really starts to feel custom!
I kept my boards pretty simple because I haven’t decided what I want to use them for yet, and I honestly love them as they are. The colors of the wood are so rich and beautiful, and once I added on the cutting board oil the pattern really started to shine.
We’ll for sure be using these guys next week at our Thanksgiving dinner (I always make a big charcuterie board for appetizers, and these are perfect for that!), and I may get a wild hair and decide to make a few more as gifts, too!
Here’s a link to the cutting boards again, and if you want even more handmade gift ideas, be sure to browse Rockler’s gift guide. There’s genuinely something for everyone!