
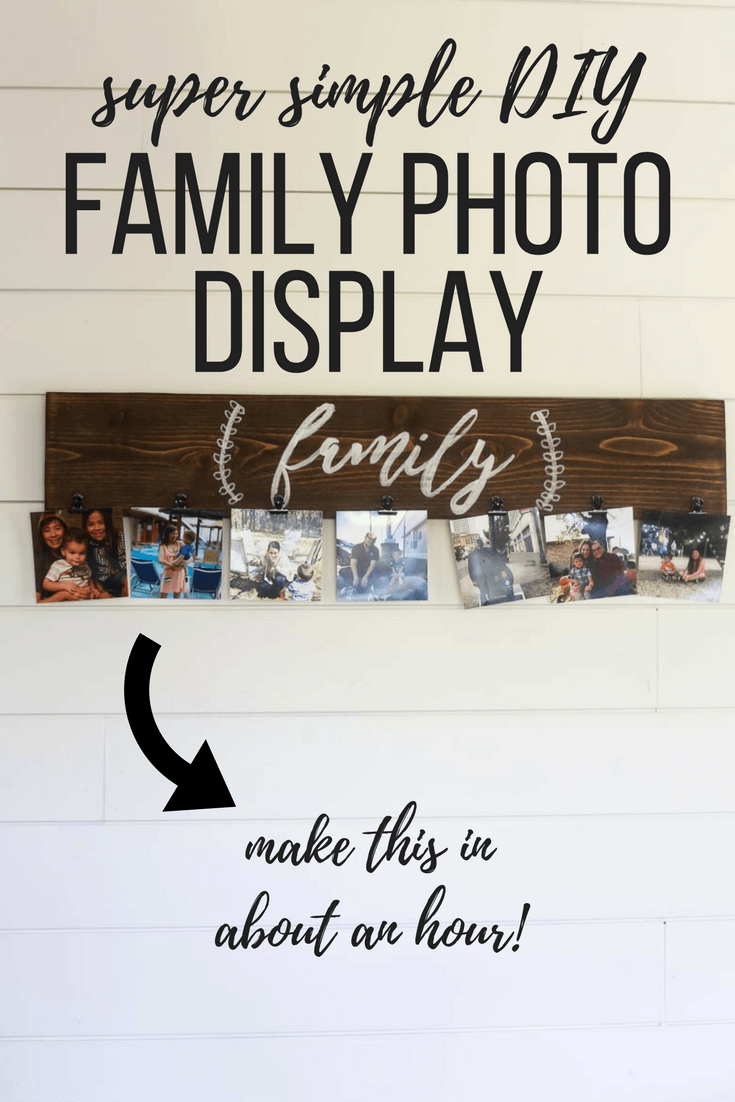
Super Simple DIY Photo Display
Last updated on March 3rd, 2023 at 05:31 pm
Friends, I have a Friday gift for you. Today, I’m sharing probably the easiest and fastest DIY idea ever. Seriously – ever! And, even better than that, it’s a really great idea for a gift (the holidays are coming up!) – I made this for my mom for her birthday, and it was super simple to put together, but looks so cute! So, if you’re looking for an easy DIY photo display idea, or if you just need a fun and crafty way to pass the time this weekend, I’ve got you covered. Oh, and a bonus? It’ll only take you about an hour to make it.
You’re welcome.
This post contains affiliate links. Click here to read my full disclosure policy.
Easy DIY Photo Display
Materials:
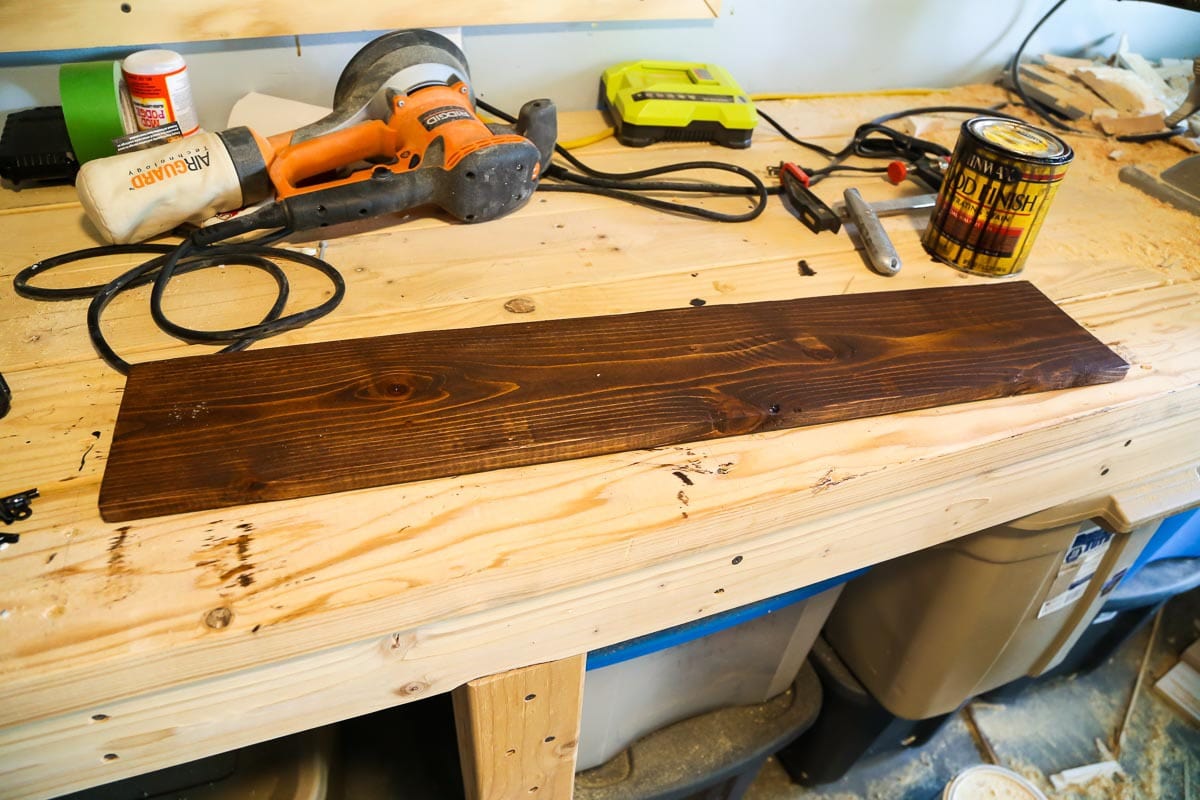
1×2 board, cut to desired length
Wood stain (this is what I used)
Paint pen
Small binder clips
Hot glue gun
Family photos
Printer + paper
Instructions:
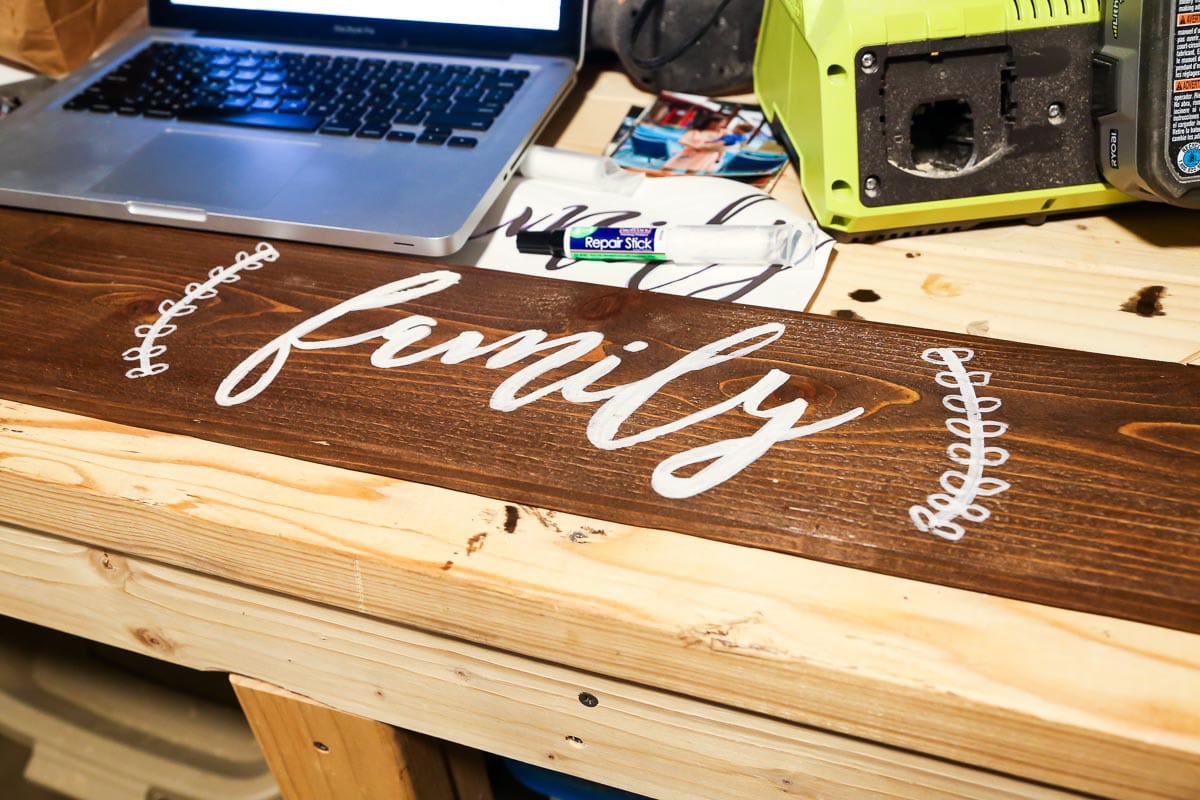
Start off by staining your wood board. I just used some scrap wood I had lying around (we constantly have a ton of random wood pieces from various projects, and I’ve been on a mission lately to use ’em up). Be sure to sand it first so you don’t end up with splinters.
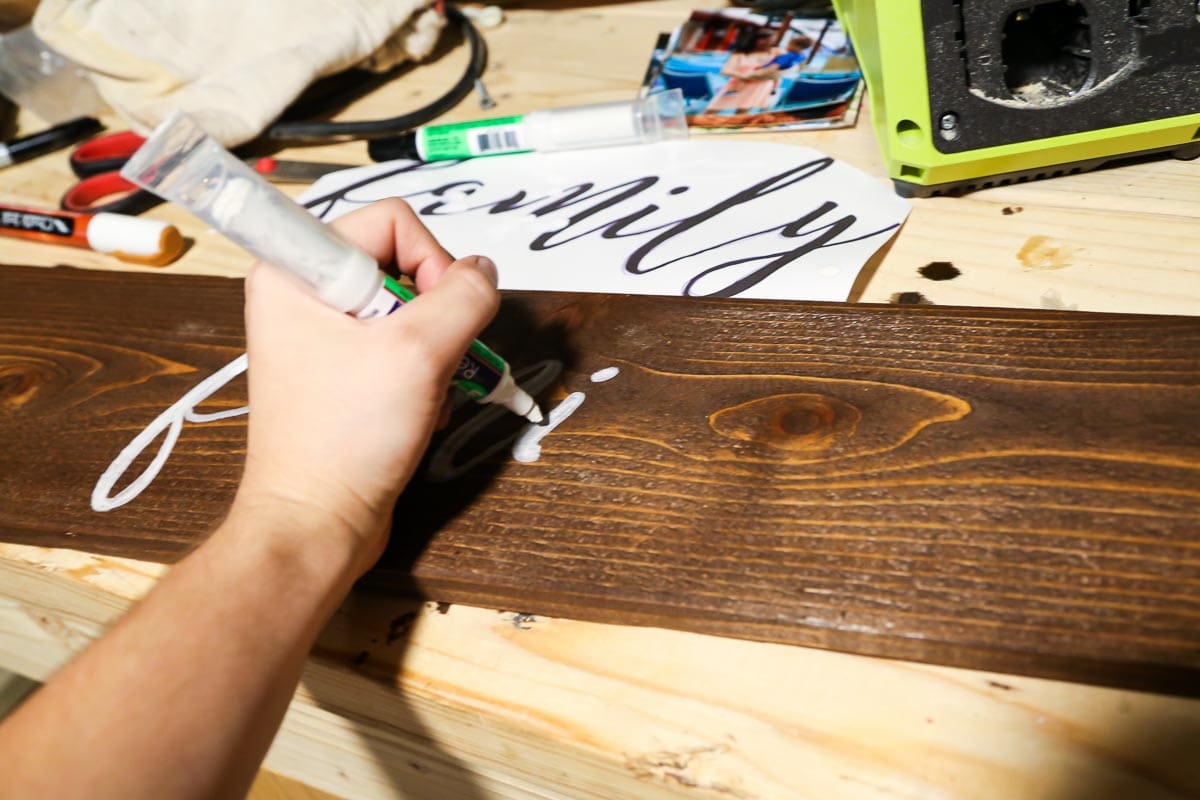
Decide on the design you want for your lettering. I used Remember Script and the same transfer technique that I used for this project to transfer the letters over. I didn’t have a white paint pen so I actually used this furniture touch-up pen (which I wrote about here) – definitely not the intended purpose but it looks pretty darn good if you ask me. You could also hand-paint it on, but I’m a huge fan of paint pens for jobs like this – it’s much easier and faster, and you have a little more control.
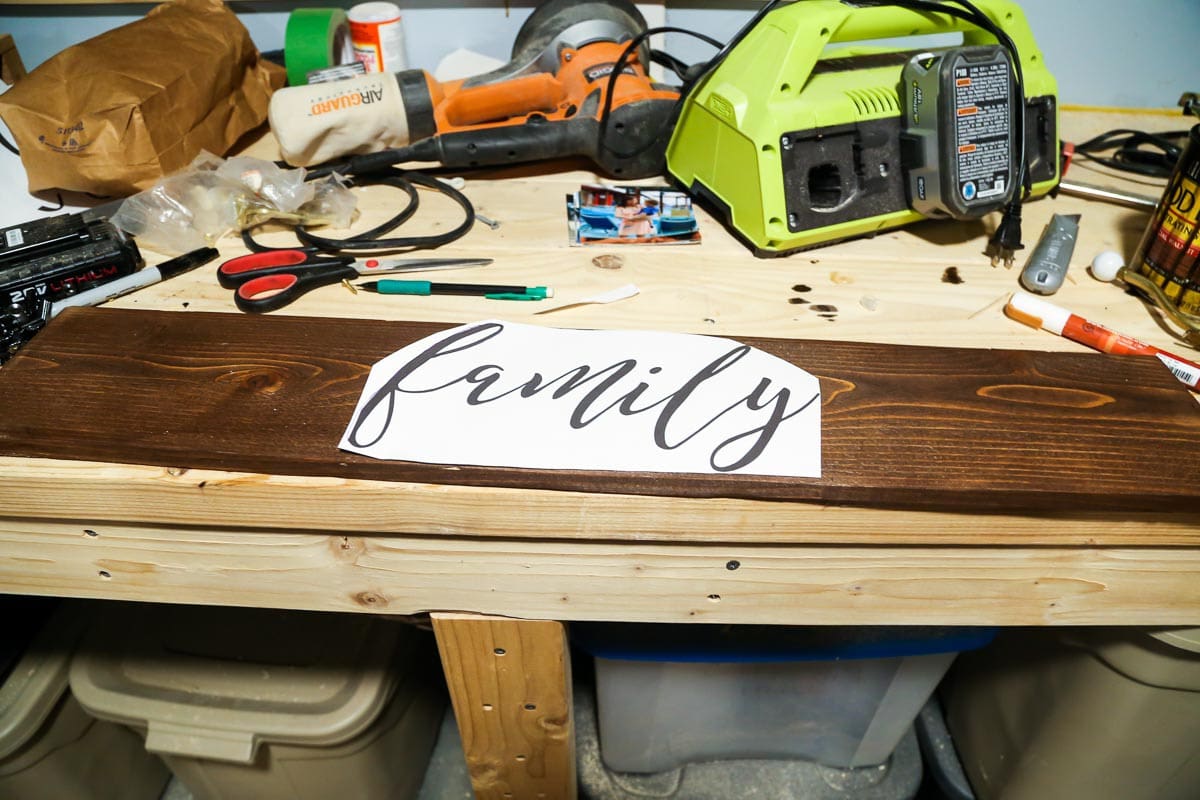
Once I finished my lettering, I hand-drew a quick little design on either side.
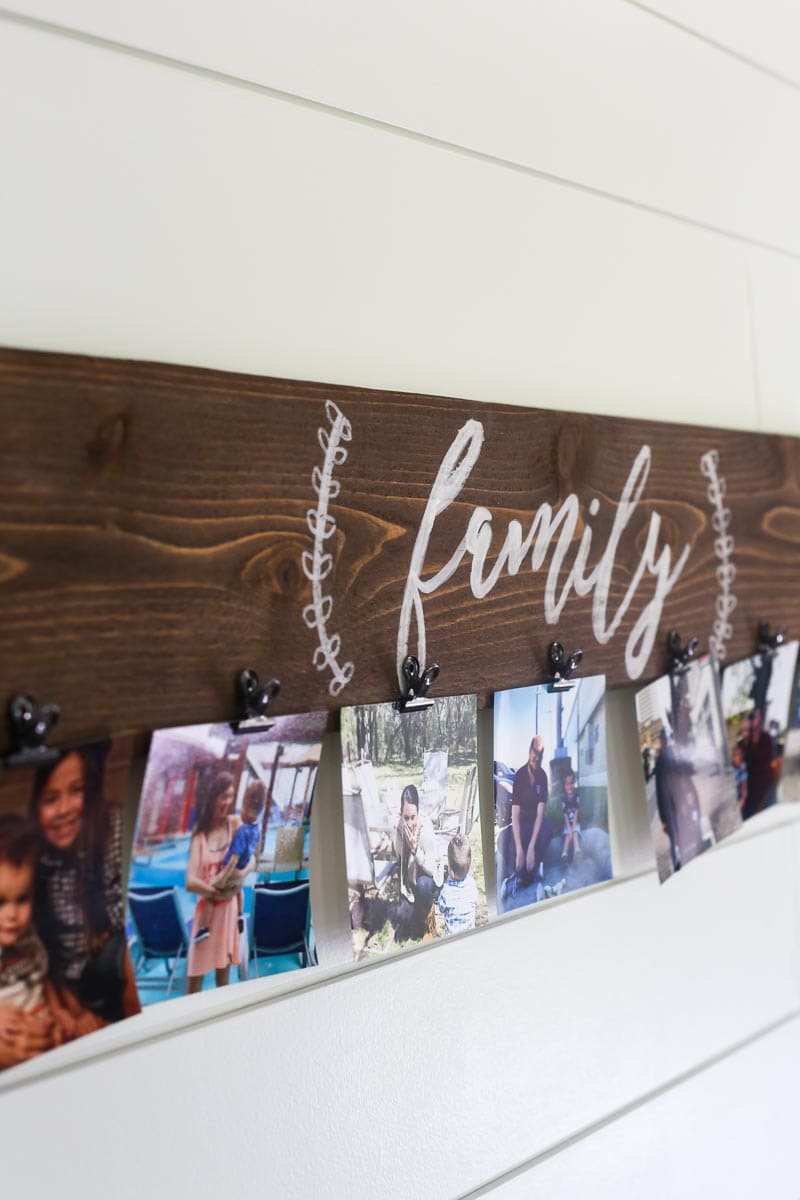
Believe it or not, you’re almost done. Now, grab your binder clips and attach them to the bottom with some hot glue (I used this hot glue gun and I’m obsessed with it because it’s cordless and gets extra hot!). Then, once it dries you can clip your pictures in and you’re good to go.
Seriously, it’s that simple.

As far as hanging it, you could use a french cleat (which is generally my favorite method for hanging these sorts of things), but this is also light enough that plain old Command Strips will probably work just fine as well. In fact, that’s what I used to temporarily hang this on the back of our fireplace for these photos, and it worked great.
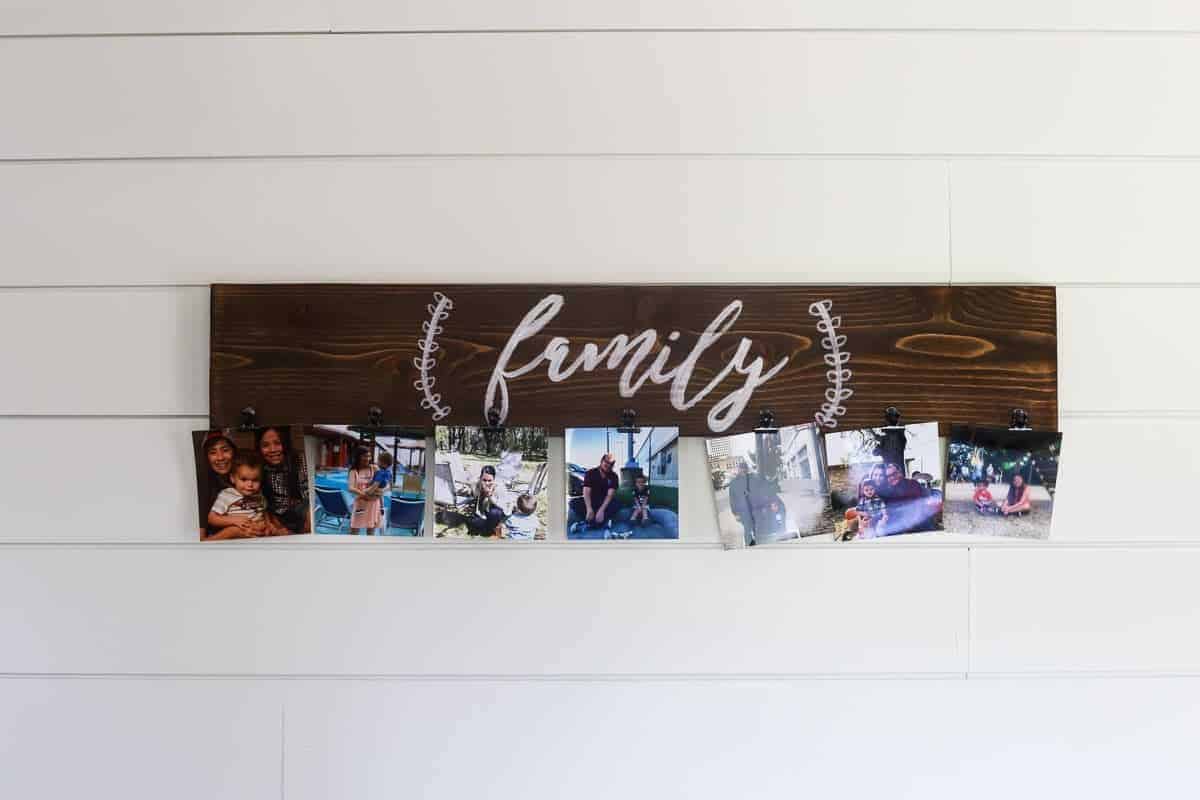
I love this idea for an easy and stylish way to display a few photos without taking up a lot of room on your walls. I also love how easy it is to swap out the photos. We’ve had a (much) larger version of this in our dining room for years and we adore it. We took it down to list the house and it’s a bit too large to deal with moving it, but we’ll probably build a new one once we get settled in the new house!
How do you display family photos in your house?
Defiantly going to make this this weekend! We have tons of pictures we could use and the best thing is that my hubby has a best friend who has lots of scrap pieces of wood! Cant wait!
So cute! I love simple projects like this!
Omgosh this would make an awesome gift idea! I totally want to make one for everyone. Thanks for sharing your tutorial with us at Merry Monday this week!
What a cute idea and it looks so, so easy!
Best,
Kelly