Nursery Gallery Wall (Plus a DIY Poster Frame!)
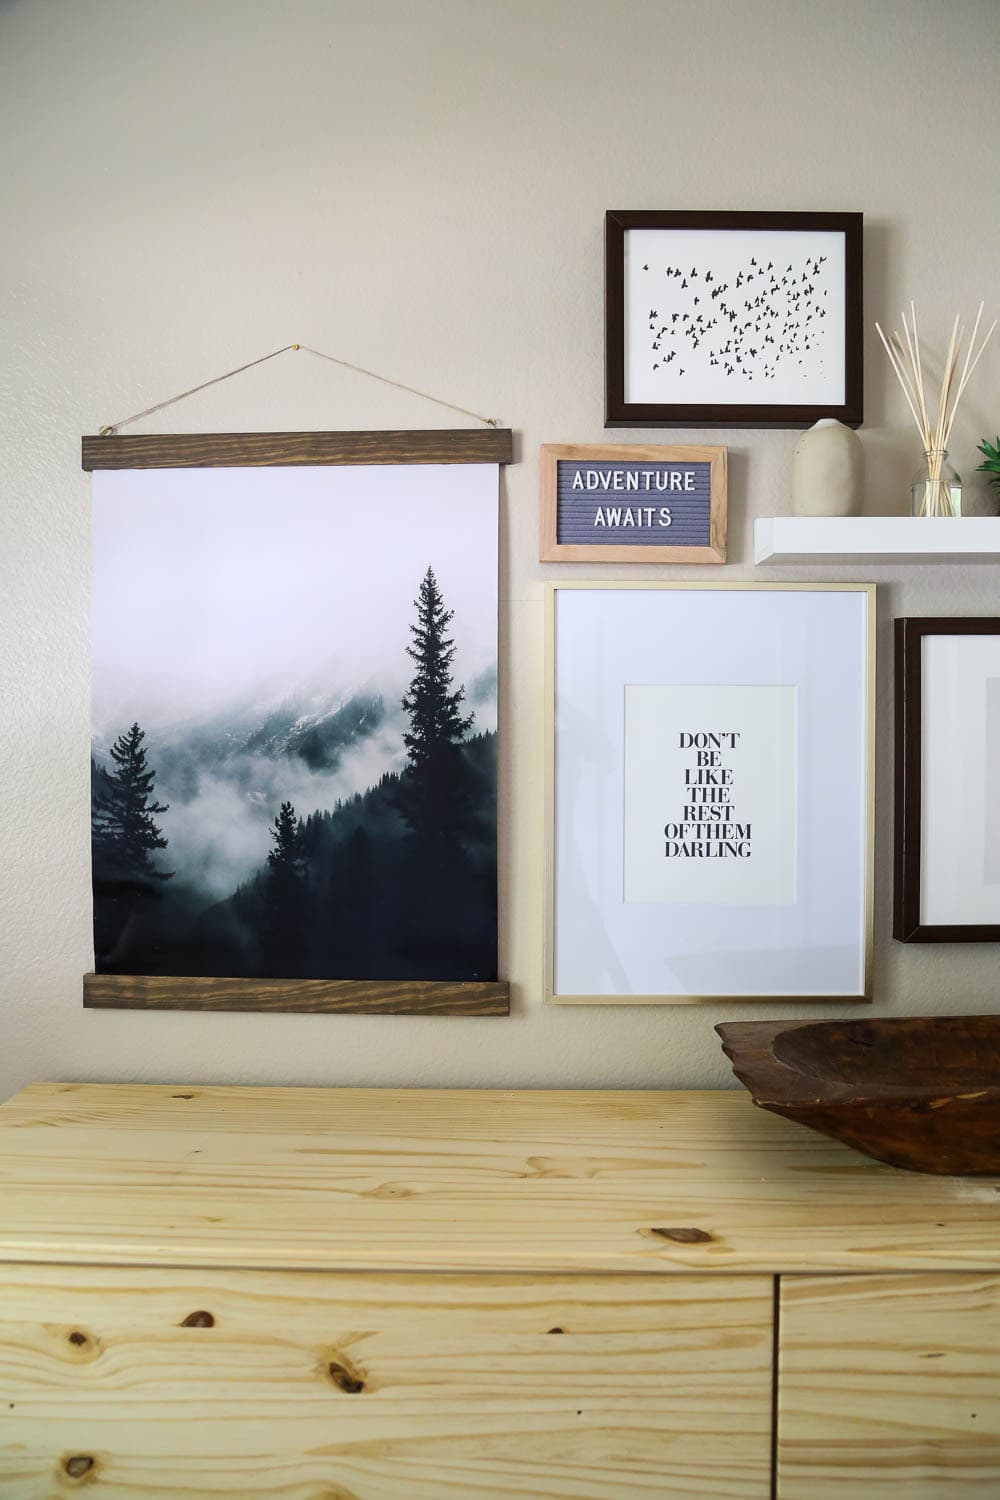
We’ve finally begun working on the nursery and today I’m sharing an adorable gallery wall, along with a simple tutorial for a DIY poster frame I made with a $6 piece of wood!
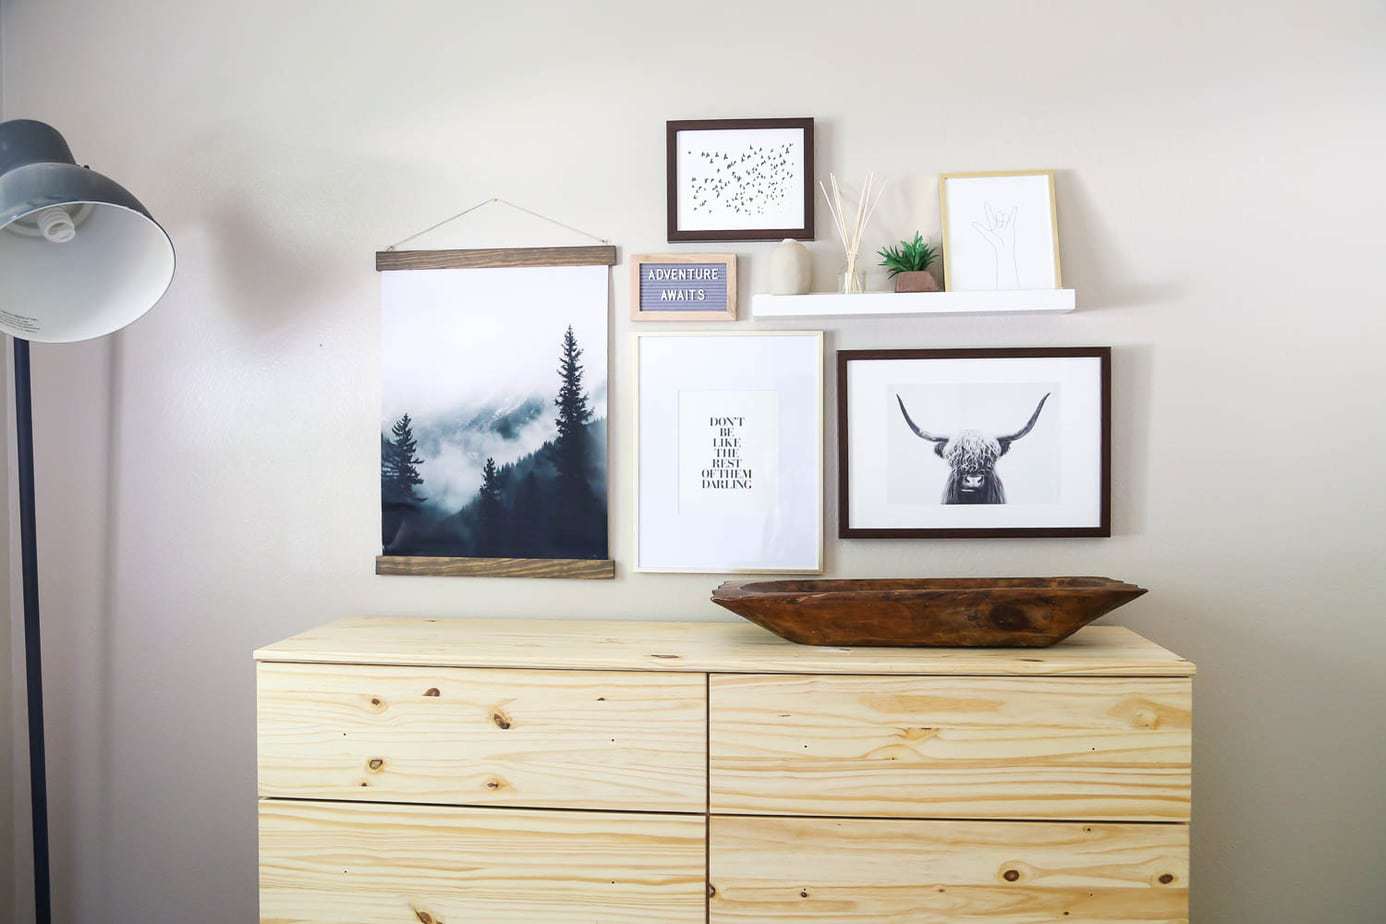
With just about two months to go until Baby Boy #2 joins our family, I figured it was high time I actually get started on the nursery.
Let’s not even talk about the fact that Jackson’s nursery was completed long before I even reached the third trimester. I think it’s a second child thing – get used to it, kid.
We’ve got quite a bit on our to-do list for this little room, and we literally hadn’t touched the room since the day we moved in back in November! I found out I was pregnant just over a month after moving in, so we knew from the beginning that this would soon be a nursery and didn’t really feel a need to do anything else with it in the meantime. You might remember that before we dove into this project, the room had become quite a dumping ground for random things that hadn’t found a spot in our new home yet (even though we can hardly call it our “new” home now that we’ve been here more than 6 months).
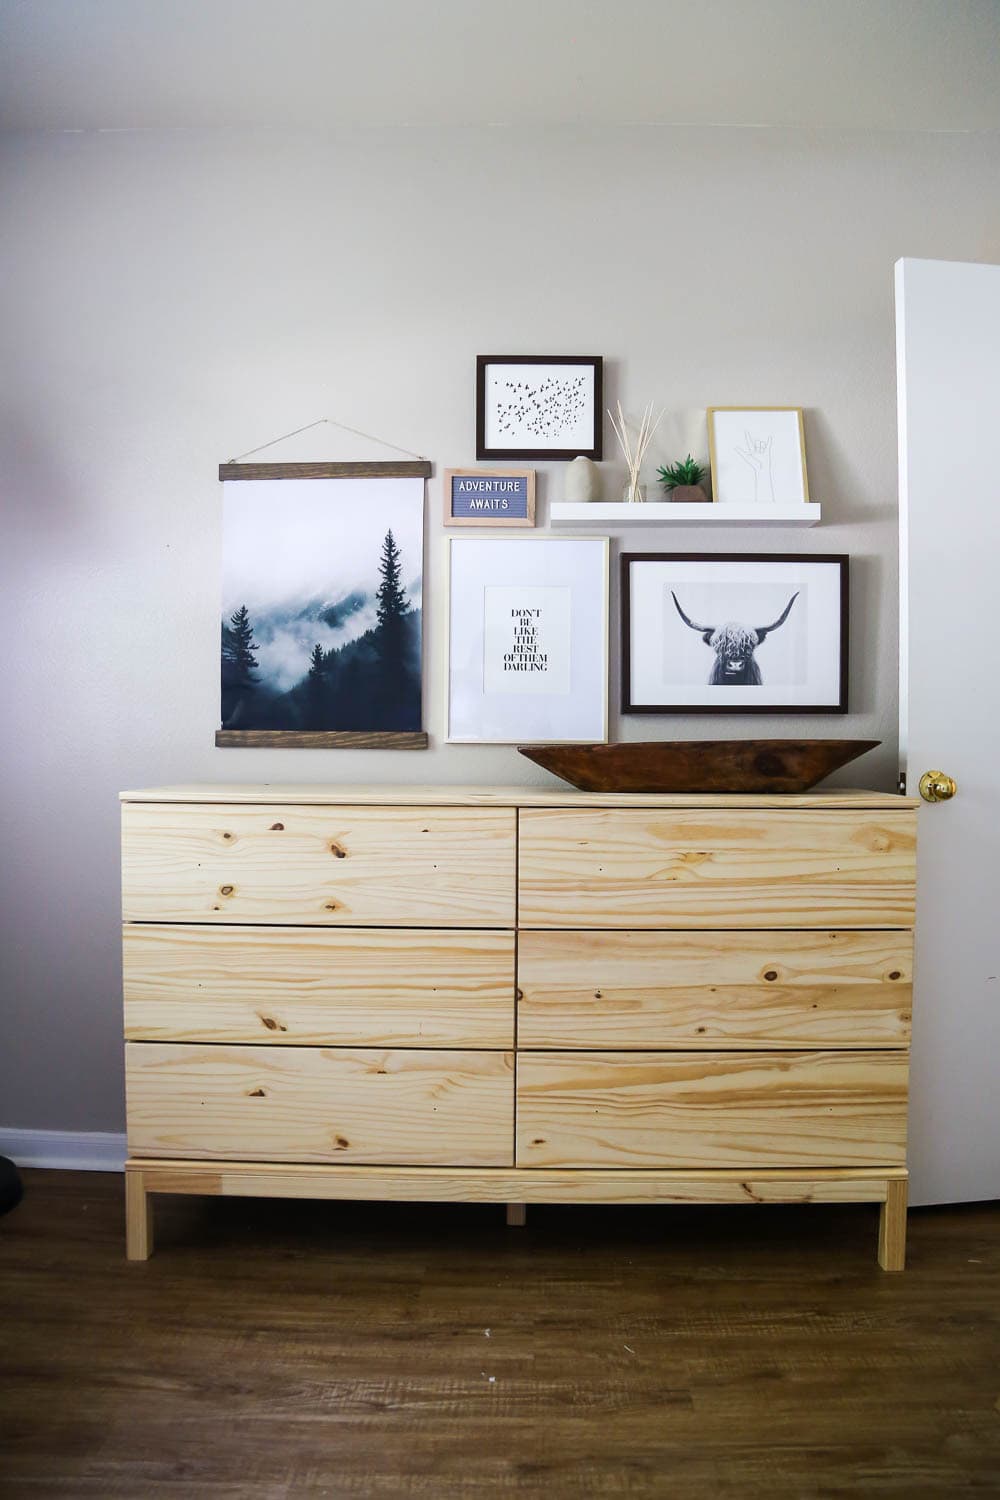
Once we got the room cleaned out and I painted the walls (more on that later this week!), we were ready to start tackling a few projects – starting with an easy gallery wall that I’m head over heels in love with.
This post is sponsored by Society6, but all opinions and obsession with art are 100% me. Thanks for supporting the brands that support Love & Renovations!
We had the opportunity to work with Society6 for this project and I’m so, so, so excited about the art we got for this space. I’ve known for a while that I wanted to hang a gallery wall above the dresser in here (which still needs a major makeover, but we’ll chat about that later), but I have such a hard time picking out art – I knew it would be quite a project to get it all done. Plus, art can be so pricey, I was a little worried that we’d spend half our nursery budget just on this one thing.
Thankfully, that’s not a concern with Society6. They have (quite literally) thousands of options, which means it’s a one-stop-shop for just about any art you need. I was able to purchase the large poster, plus a few smaller prints, and I was able to get some of the art framed for me so I didn’t even have to worry about tracking down the perfect frames. I love that pretty much all of their art comes in multiple different options, so you can get exactly what you need without checking a zillion stores.
Here are my top 4 tips for choosing art for your gallery wall from Society6 (because I know I’m not the only one who can spend countless hours just trying to narrow the options down!)
Tips for Choosing Gallery Wall Art
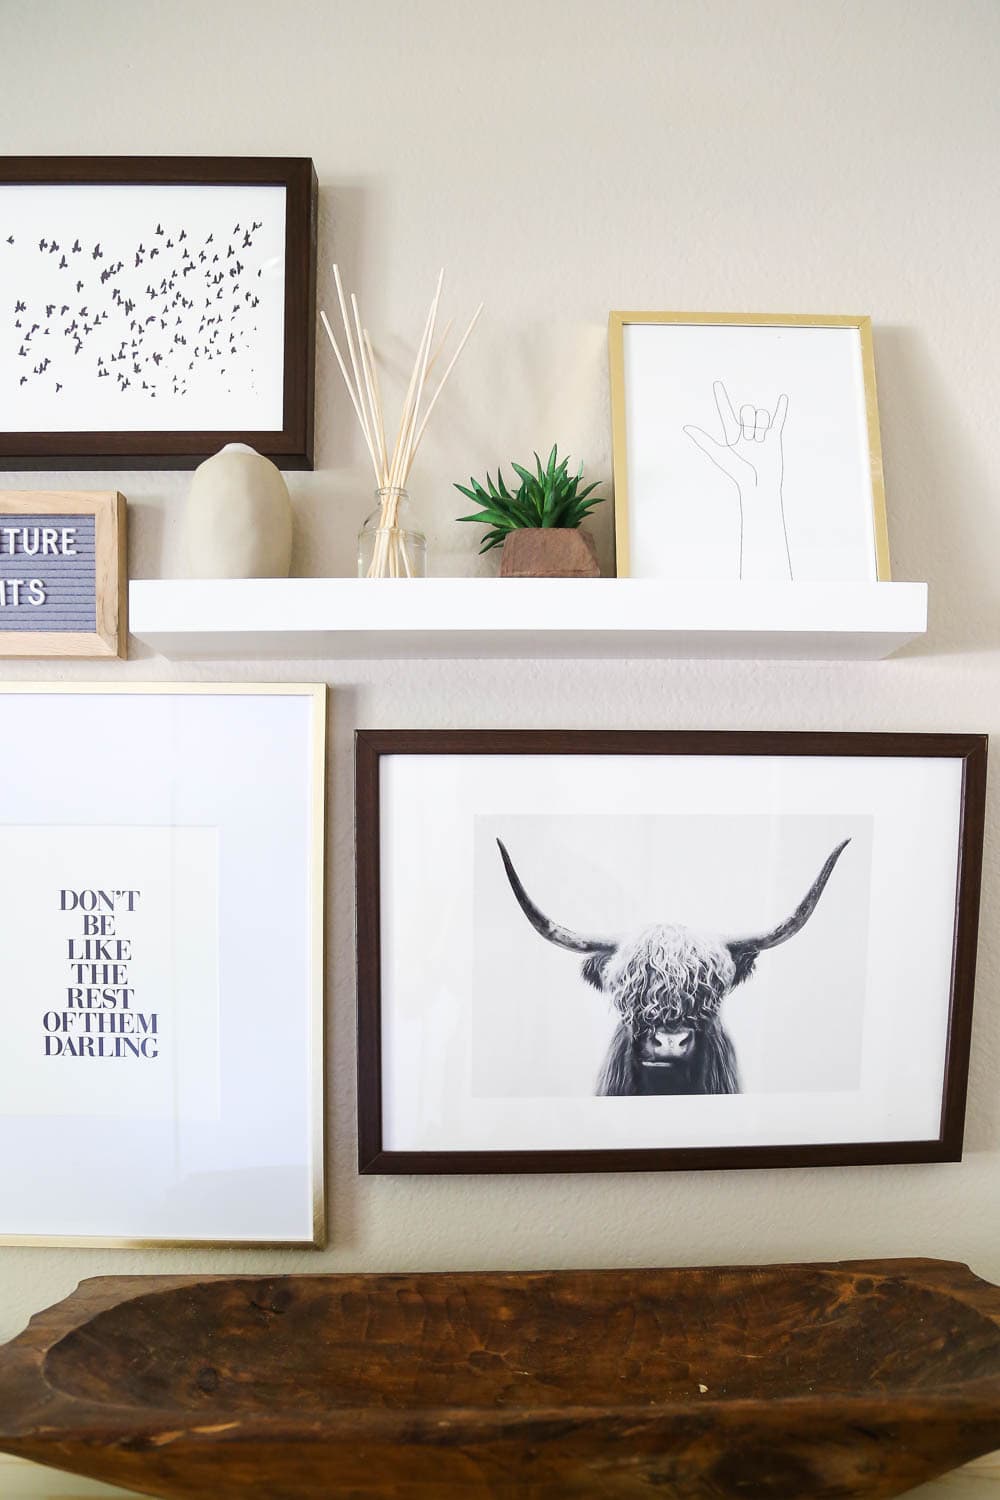
- Decide on a theme or color scheme and try to stick to that for all of your art. I wanted something a little moody and neutral, so I went with all black and white artwork. I also have kind of a loose “organic/nature” theme happening between the trees, the birds, the cow, and the super organic feel of the hand line drawing.
- If you’re feeling overwhelmed, choose a couple of keywords to search within. I tried searching for “nursery” but ended up with a lot of very baby-ish prints (obviously!), so instead, I searched for things like “mountains,” “line drawing,” and “cattle”. That gave me quite a few different options within some pretty general categories and helped me not feel like I had to wade through a ton of prints that weren’t right for my space.
- Don’t forget to check what options your art can come in! Most of the prints that I found were available as posters, smaller prints, framed prints, and even canvases! I chose to order a mix of the options so that my gallery wall would feel eclectic but still cohesive. The walnut frames I chose look beautiful with the dark colors of the gallery wall, and then I picked up a couple of those ubiquitous gold frames from Target to pair with them.
- Finally, if you find a print you really love, check out the artist’s shop for more like it. Society6 is a collection of artwork from thousands of different artists, which means you’re going to find a wide range of styles. But, if you see something that you know is just right for your gallery wall, check out the artist’s shop to see more art like it!
I’m so in love with the collection of art I ended up with for the nursery, and I’m hoping that having a gallery wall this cute above the changing table will help those late-night dirty diapers not feel quite so terrible.
A girl can dream, right?!
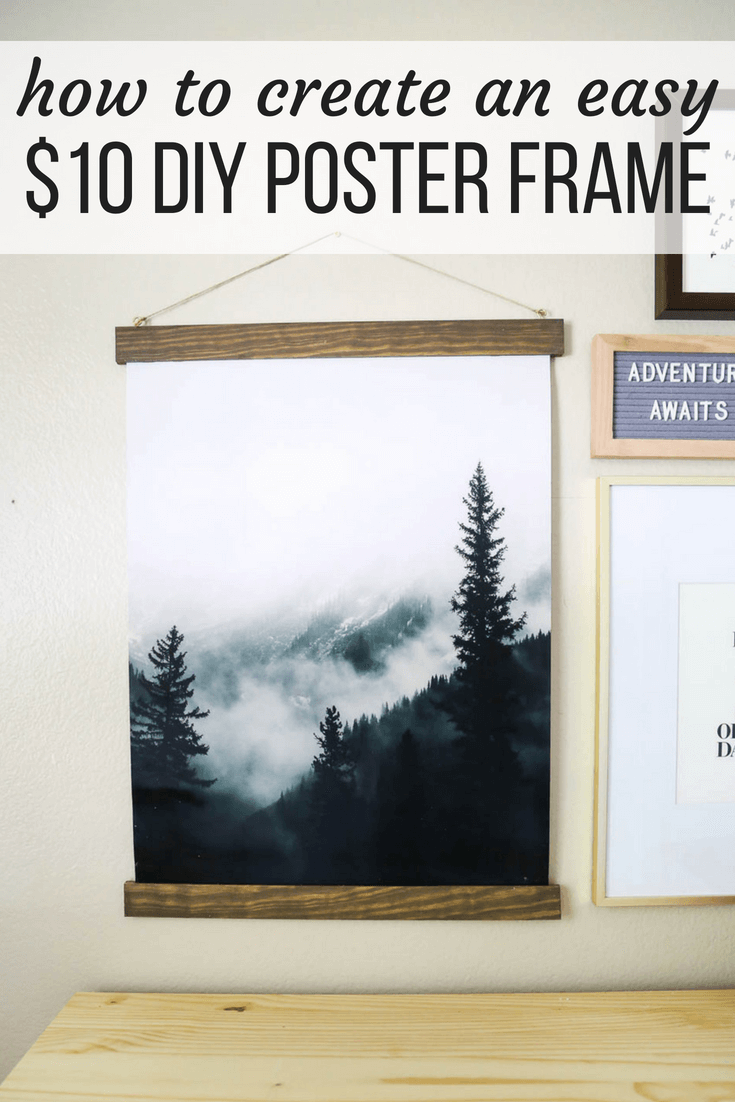
Of course, one of my very favorite features of the wall is the poster – I love how much of an impact a large scale piece of art can have! But, if you know anything about frames you’ll know that the downfall of posters is that it can be expensive to find a good way to frame them without spending an arm and a leg. I wanted something simple and more unique than a regular old frame (so it would stand out a bit and help the gallery wall feel a little more eclectic), so I decided to create my own DIY poster frame. It was so easy to do and cost me less than $10 – it doesn’t get much better than that!
How to Make a DIY Poster Frame
Materials Needed:
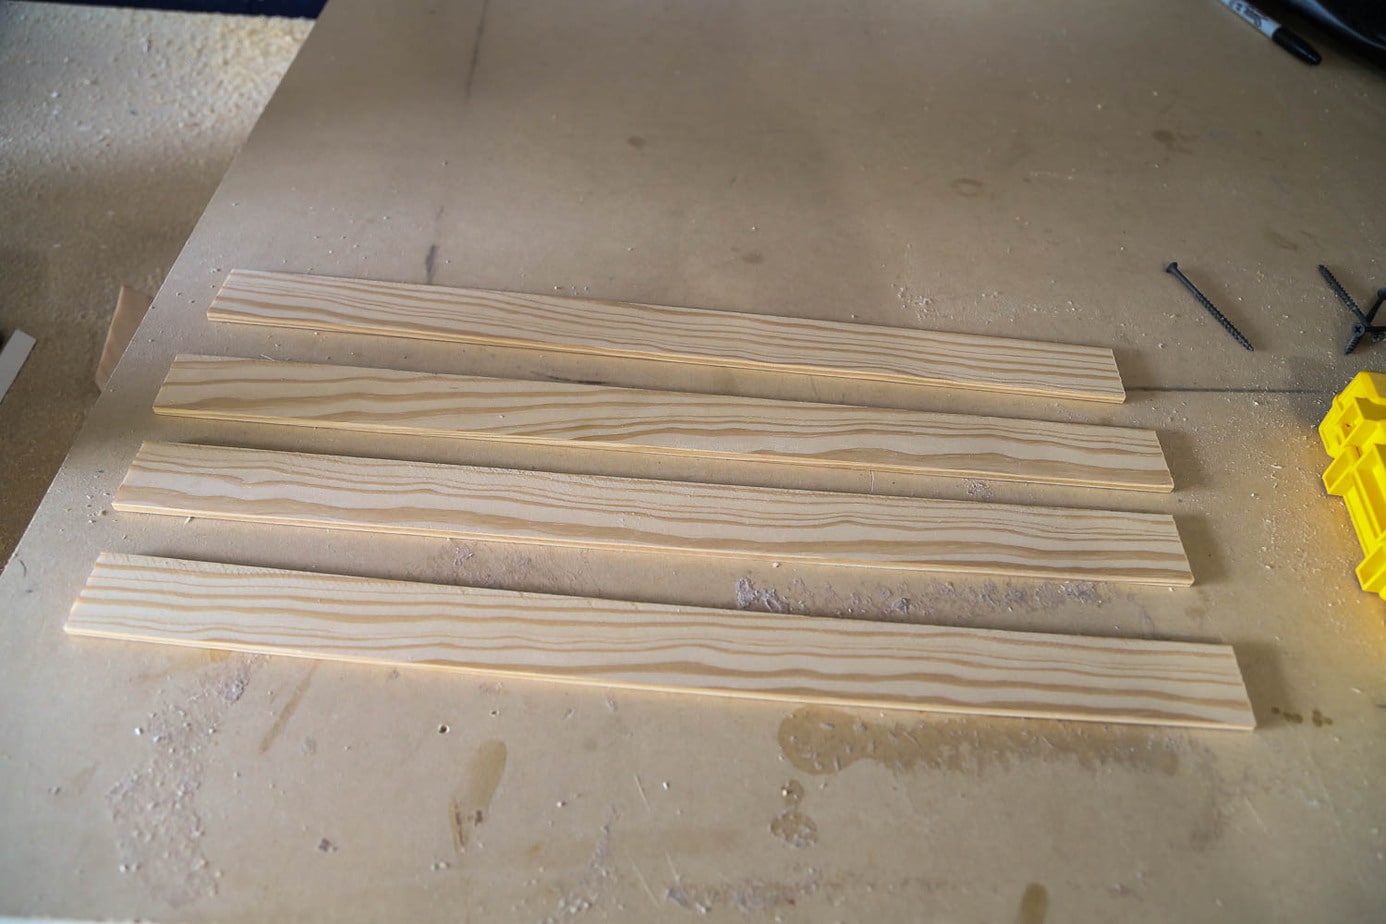
- 1 8-foot piece of pine lattice
- Stain
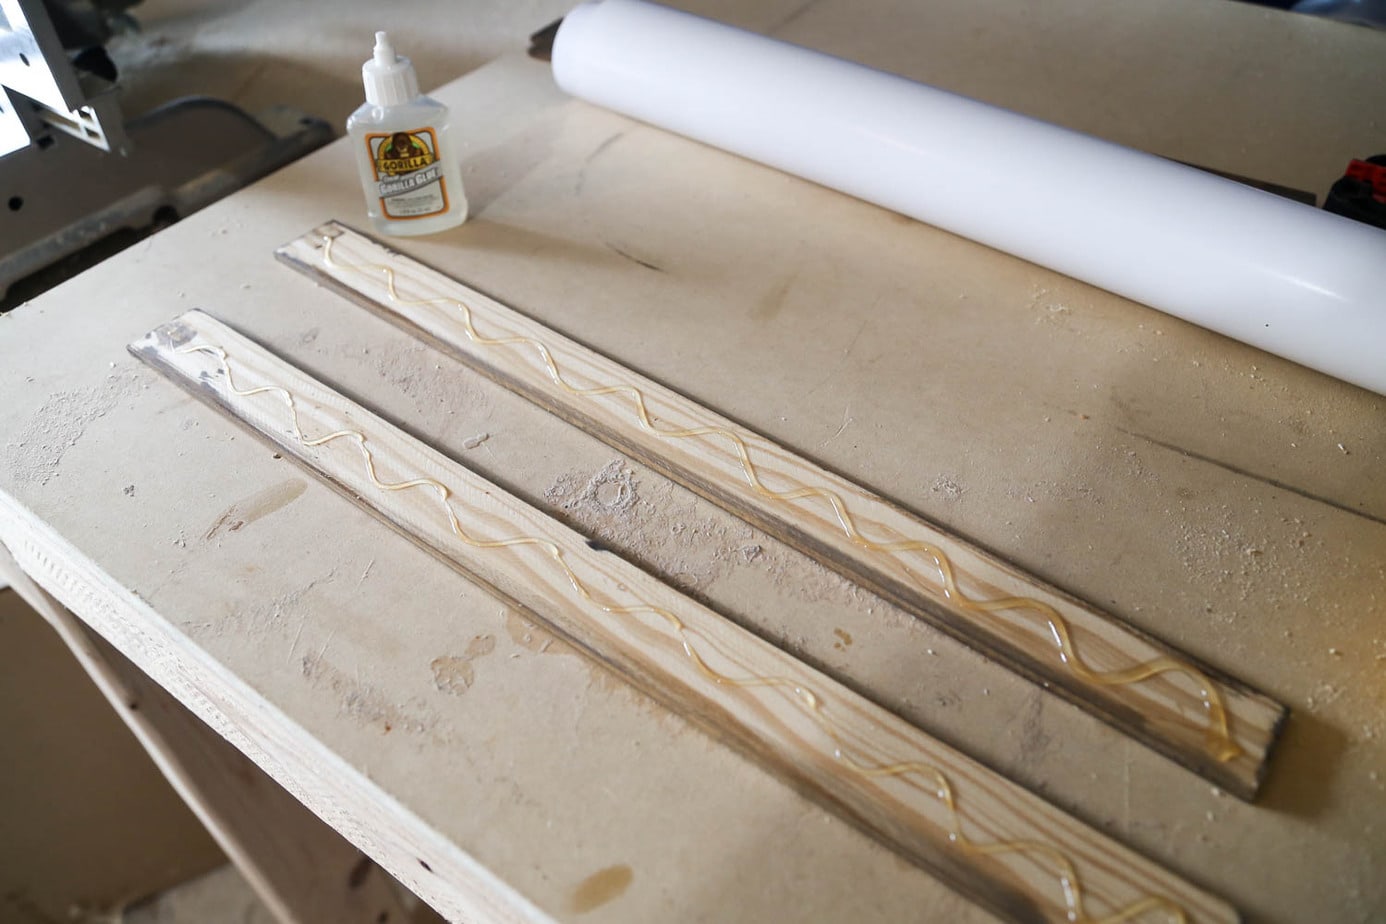
- Wood glue
- Small hooks
- Twine
- Packing tape (optional)
Instructions:
Start by measuring your poster and cutting your lattice into 4 pieces that are 1″ wider than the poster. My poster was 18″ wide, so I cut my 4 pieces at 19″ each.
Once you’ve cut them, stain (or paint!) them your favorite color. I used Varathane’s Briarsmoke stain, which is a really great gray-ish brown that fits right in with the feel of the rest of my gallery wall.
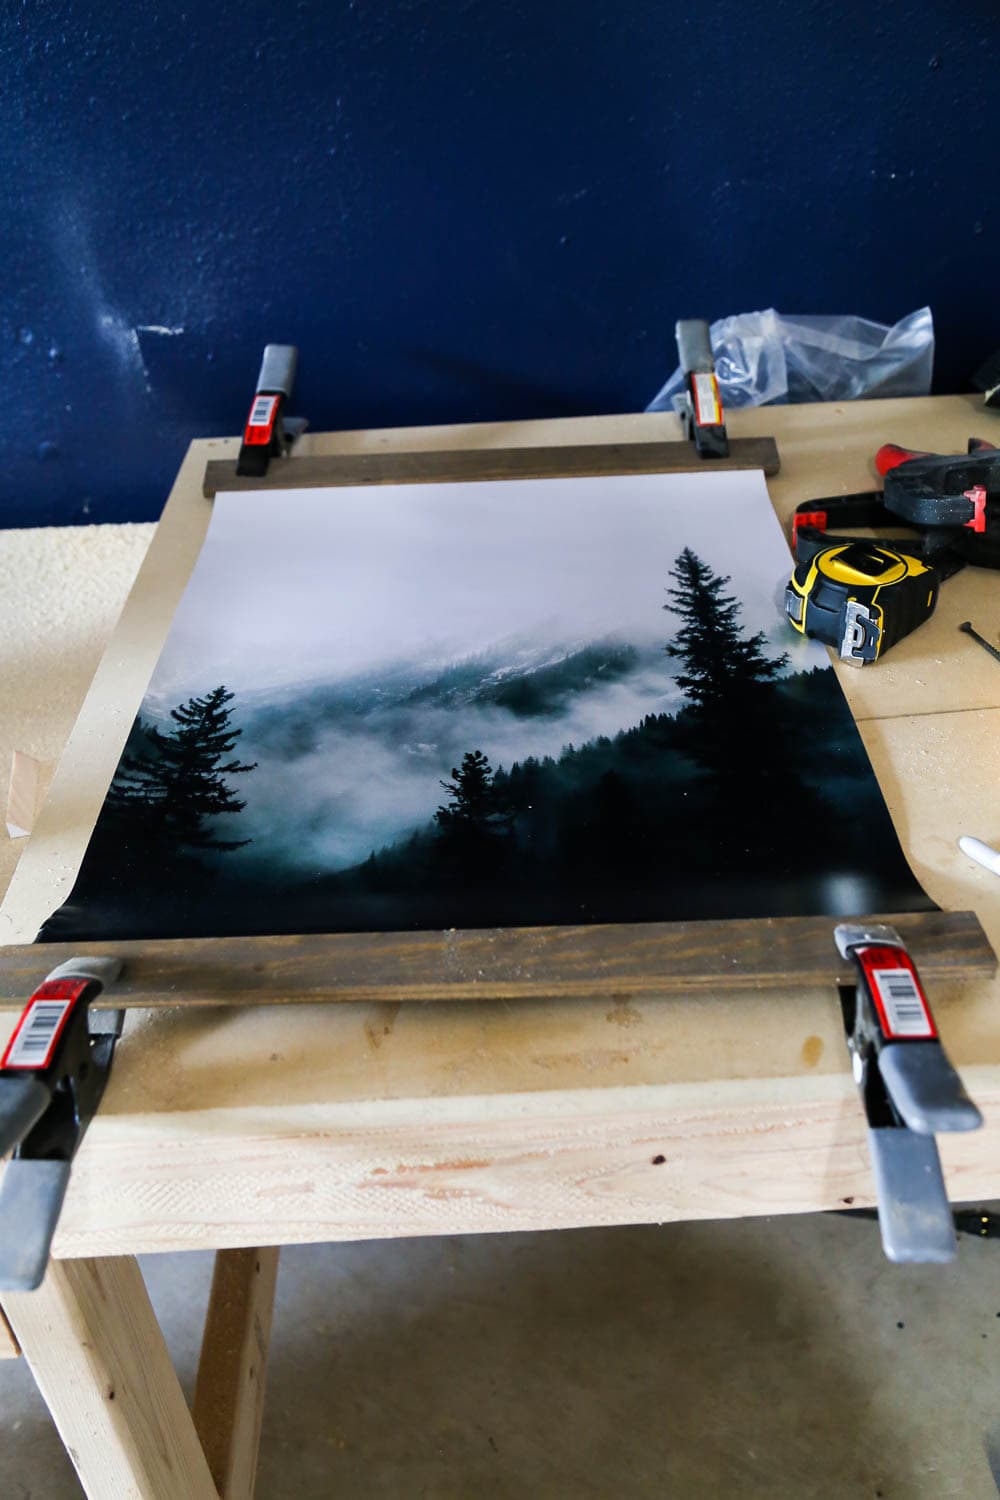
Now, you’re ready to assemble it. Grab some glue and apply it to the back side of two of your strips of wood. Lay the top edge of the poster on top of the first piece, then use the second piece of wood to sandwich the poster into place. Add clamps to help hold everything in place while the glue dries. Repeat on the bottom side of the poster.
(Note: If you want to have the option of switching out the poster down the road, use magnets instead of glue. Since this is going above a changing table where a wiggly baby will be hanging out often, I wanted something that couldn’t come apart easily!)
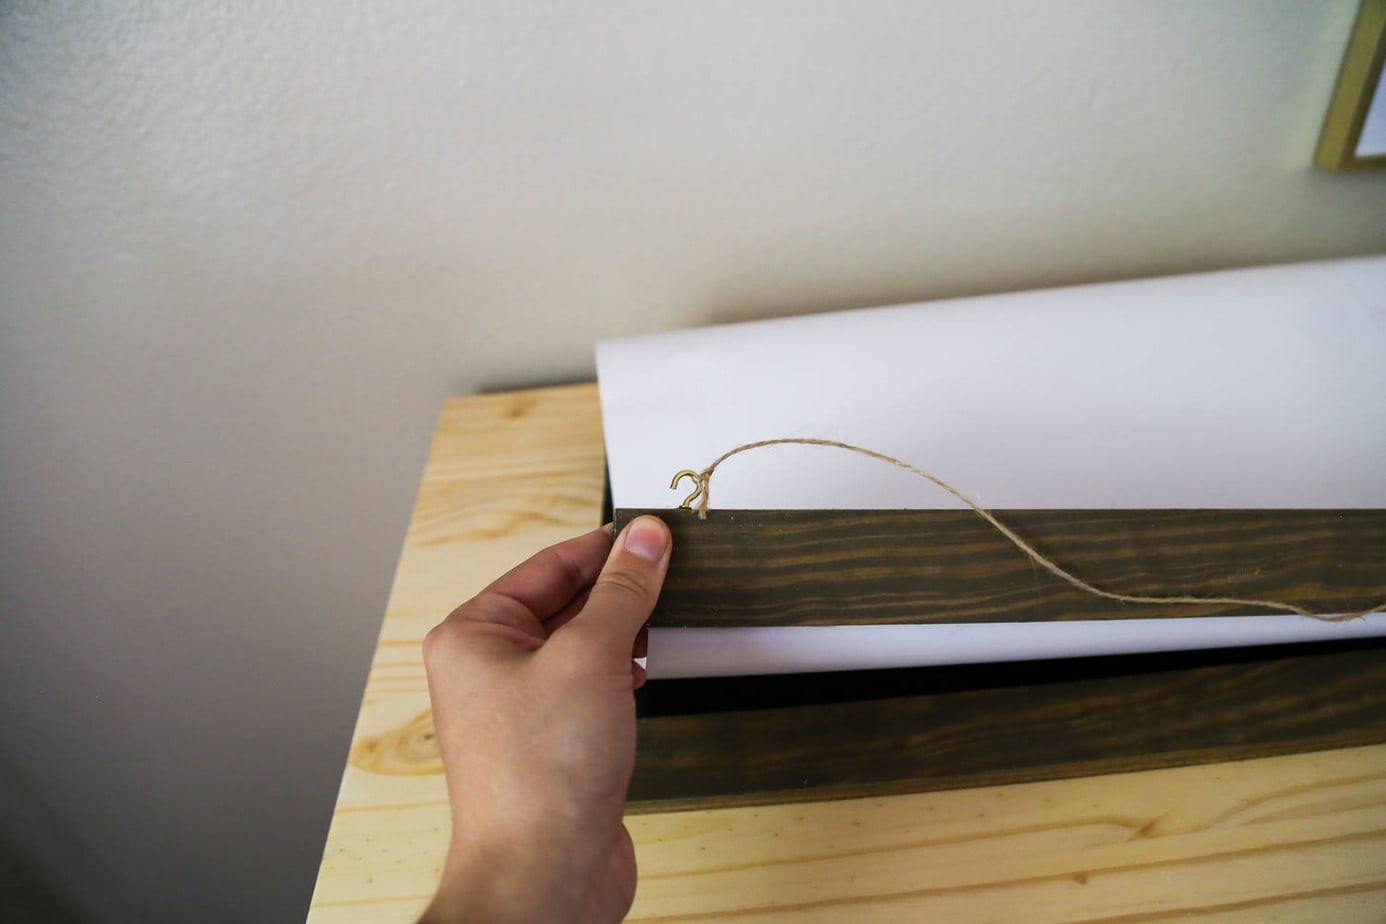
Once your glue is dry, grab your small hooks and screw them into the top part of the frame. Tie your twine onto the hooks, and then you’re ready to hang your poster! I just used a plain ol’ gold screw to hang mine.
Optional: Since this poster will be in a nursery with little hands and wiggly feet, I decided to take one extra step to help ensure my poster doesn’t immediately get ripped in half (since there isn’t any glass to protect it). I took two strips of packing tape and placed one on each exposed edge on the back of the poster. This helps reinforce the sides of the poster and makes it less susceptible to ripping. Of course, if the baby decided he wants to grab a big fistful of the poster there won’t be much I can do to help it, but since he’ll never be left on top of the changing table unattended, I don’t foresee it being a huge issue.
And that’s all it takes to create a gorgeous, simple DIY poster frame for less than $10!
If you’ve got a gallery wall planned in your home, or if you’re just looking to freshen up your art a bit, I highly suggest you check out Society6 for some options. It’s honestly been one of my go-to spots for art for years, and I just love browsing their selection (they also have wallpaper, wood wall art, and so much more).
And, of course, here are the sources for all of the art pictured above:
- Mountains Poster
- Birds Framed Print
- Don’t Be Like the Rest of Them, Darling Print
- “I Love You” Hand Line Drawing
- Scottish Highland Cow Framed Print
What are your favorite sources for great (affordable) art?

Turned out so cute!! Can’t wait to see how the rest of the nursery turns out.