
Painted Faux Pumpkins
Last updated on July 18th, 2024 at 08:13 am
Looking for fun fall crafts to spruce up the fall decor in your house? These easy DIY faux pumpkins are a really great fall DIY . And, they’re made with dollar store pumpkins! This post is sponsored by Rust-Oleum, but all opinions are mine.
I’ve lamented a bit here and there on the blog lately about how Corey and I didn’t really get a chance to decorate for fall this year. We’re prepping for a big move, and between staging, organizing, and getting projects done we just didn’t have the time or energy to do a lot of decorating. Plus, a fall explosion doesn’t exactly lend itself to neutral decor for house showings, now does it?
But, thankfully, all of that is over and we’re now officially in the “waiting zone” of moving. We move in just a few shorts weeks and are in the midst of packing up everything we own.
And the waiting zone? Well, it’s the perfect time to do a little decorating. And when my friends at Rust-Oleum told me that they were looking for some fun mantel projects for the holidays, I knew pretty much immediately what I wanted to do.
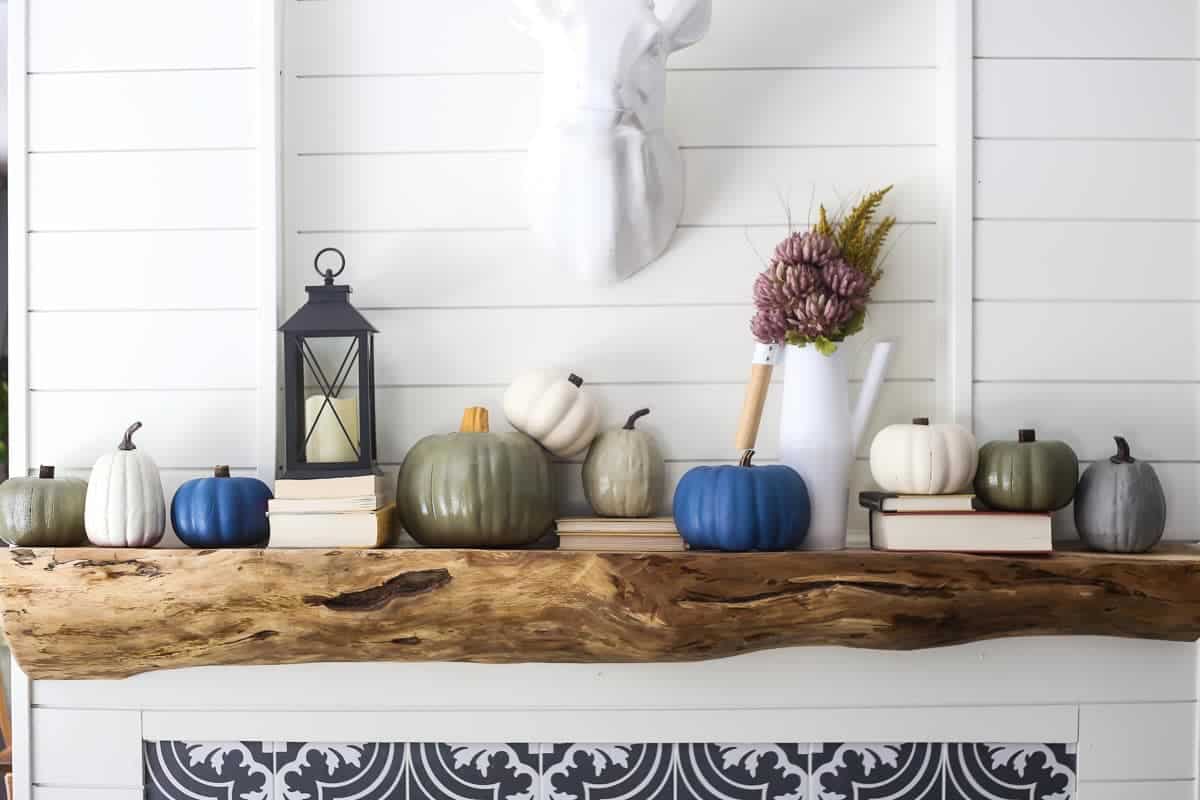
Because my gorgeous, brand new mantel was just begging to be stuffed full of pumpkins.
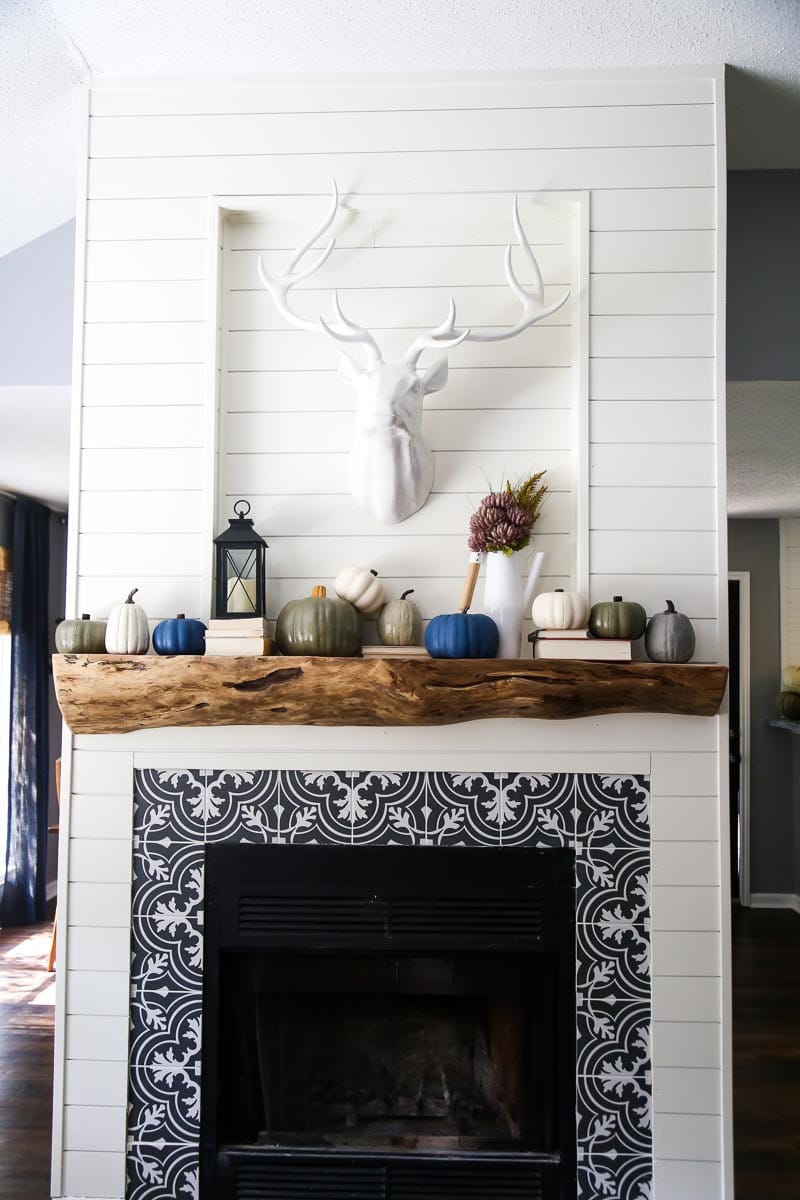
Easy DIY Painted Faux Pumpkins
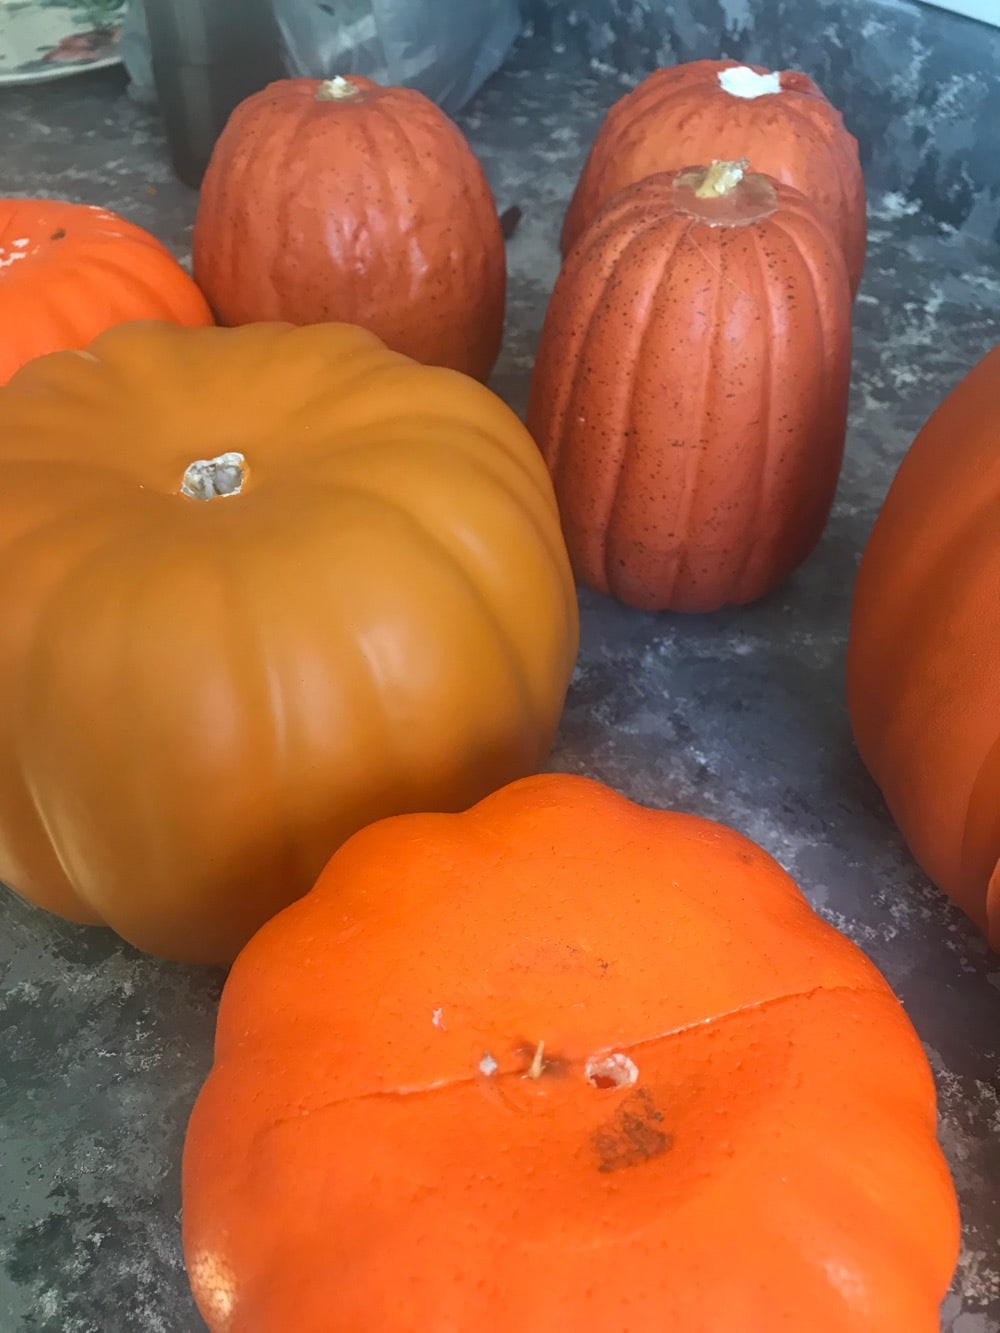
And, these aren’t just any pumpkins. They’re the dollar store kind. You know, the ones that make you cringe a little when you see them at the store because they’re so ugly. The kind that look like this when you bring them home:
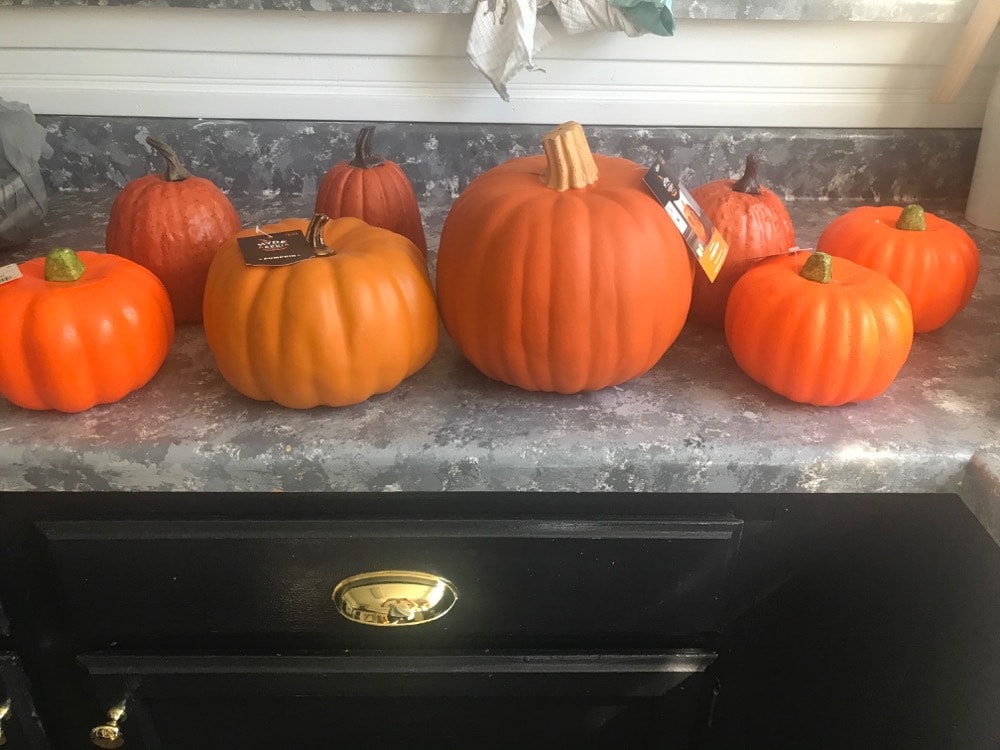
I’ll admit, when I first got started I wasn’t totally sure how this would turn out. I was a little concerned that they’d still look cheap even with the paint.
Thankfully, there was nothing to worry about. Because they look amazing.
I was pretty surprised at how difficult it was to track down affordable faux pumpkins. The first dollar store I checked didn’t have any pumpkins at all. So, I hit up the craft store. They had faux pumpkins, but they were at least $10 each. At the second dollar store, I finally managed to track down some small faux pumpkins for just $1 each. I headed to Target last, and I found the rest of the pumpkins for anywhere from $3 (for the smaller ones) to $8 (for the largest one). Once all was said and done, I spent a total of about $35 on all of the pumpkins. I’d say is a pretty amazing deal for a mantel full of pumpkins.
The Paint: Rust-Oleum Chalked Spray Paint
To paint the pumpkins, I used a variety of colors of Rust-Oleum spray paint.
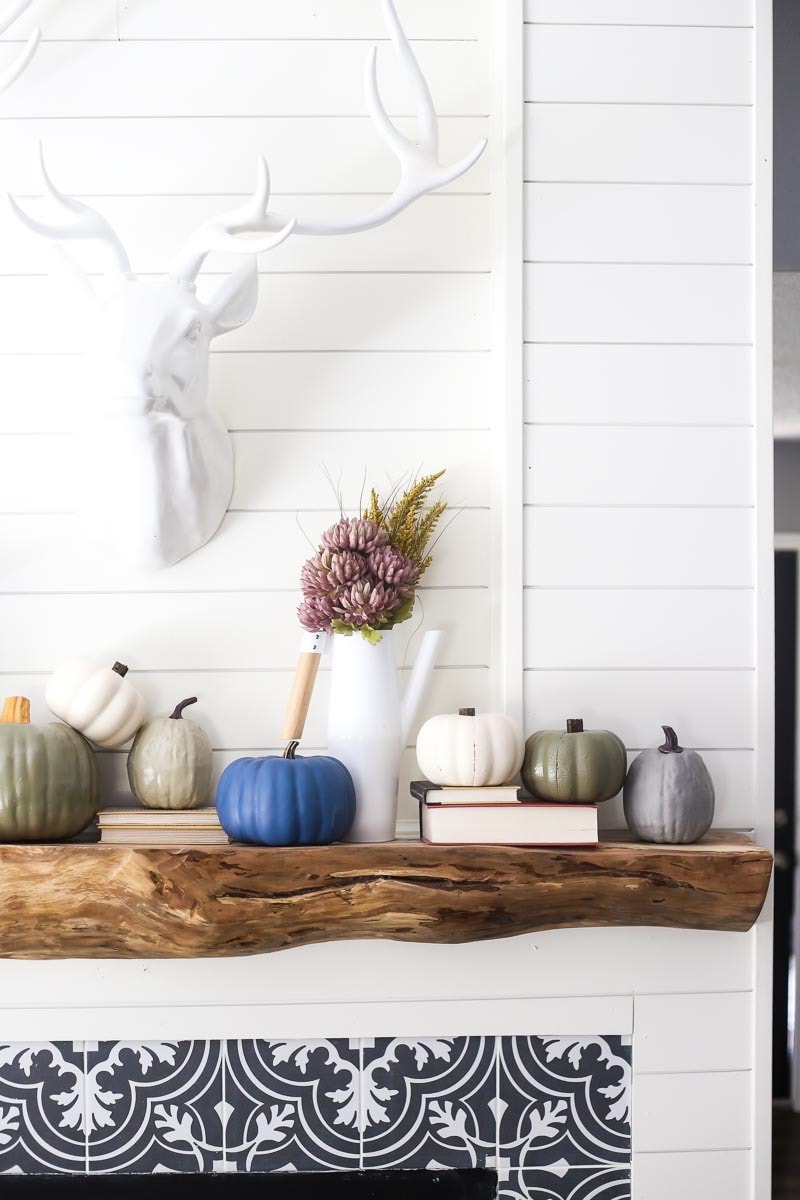
I wanted to go with a more neutral color scheme (kind of like I did for our fall tablescape) for the mantel this year. I’m not a big fan of the “traditional” fall colors. But, these blues, greens, and greys flow right into our normal decor! They feel like they actually belong in our house. This is a color scheme I’ve really been gravitating to all season long. And, I think it’s one I can live with for many falls to come.
Here’s a quick list of all the colors I used for these.
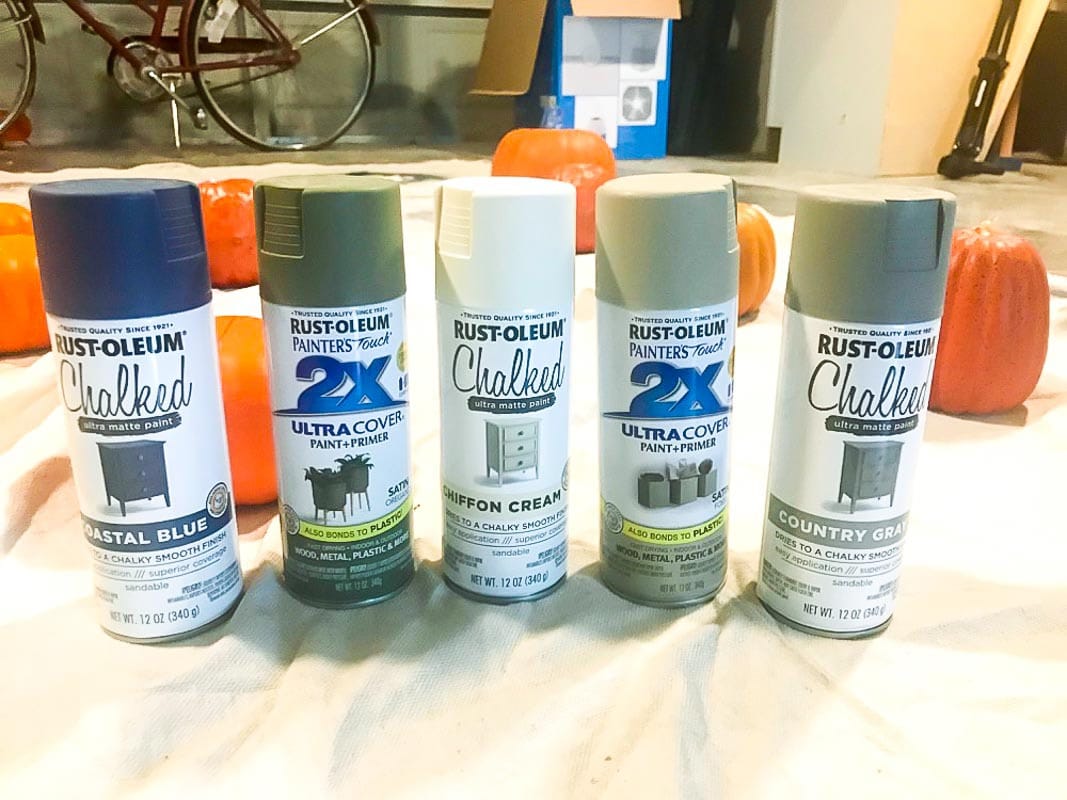
- Rust-Oleum Coastal Blue Chalked Spray Paint
- Rust-Oleum Oregano Satin Spray Paint
- Rust-Oleum Chiffon Cream Chalked Spray Paint
- Rust-Oleum Fossil Satin Spray Paint
- Rust-Oleum Country Gray Chalked Spray Paint
How to Paint Faux Pumpkins
So, what all did I actually do?
Well, I started off by pulling off the stems from each of the pumpkins that I could. For the one that was fully attached, I just taped it off so it wouldn’t get paint on it.
Then, I grabbed my spray paint and got to work. There’s no special technique here – I just spray painted them like I would anything else. I didn’t want any particular texture or aging. I just wanted some pretty, non-shiny pumpkins that might look like they were pulled straight from the pages of a magazine.
I did two coats on each pumpkin. I flipped them over in-between each coat so the bottom would be painted as well. Once they were all nice and dried, it was time to re-attach the stems.
Re-Attaching the Stems
The pumpkins I got from Target actually had some good, realistic-looking stems. So, I decided to leave them alone. I just shoved them back into place with a little hot glue to keep them in place. The dollar store pumpkins, however, had stems that just couldn’t be saved. So instead, I went into the yard and grabbed some sticks.
Yes, sticks.
I used my miter saw to cut them down into roughly 1″ sections, then I used my hot glue gun to attach them. They look much better with the “real” stems, and you’d never guess these were only $1.
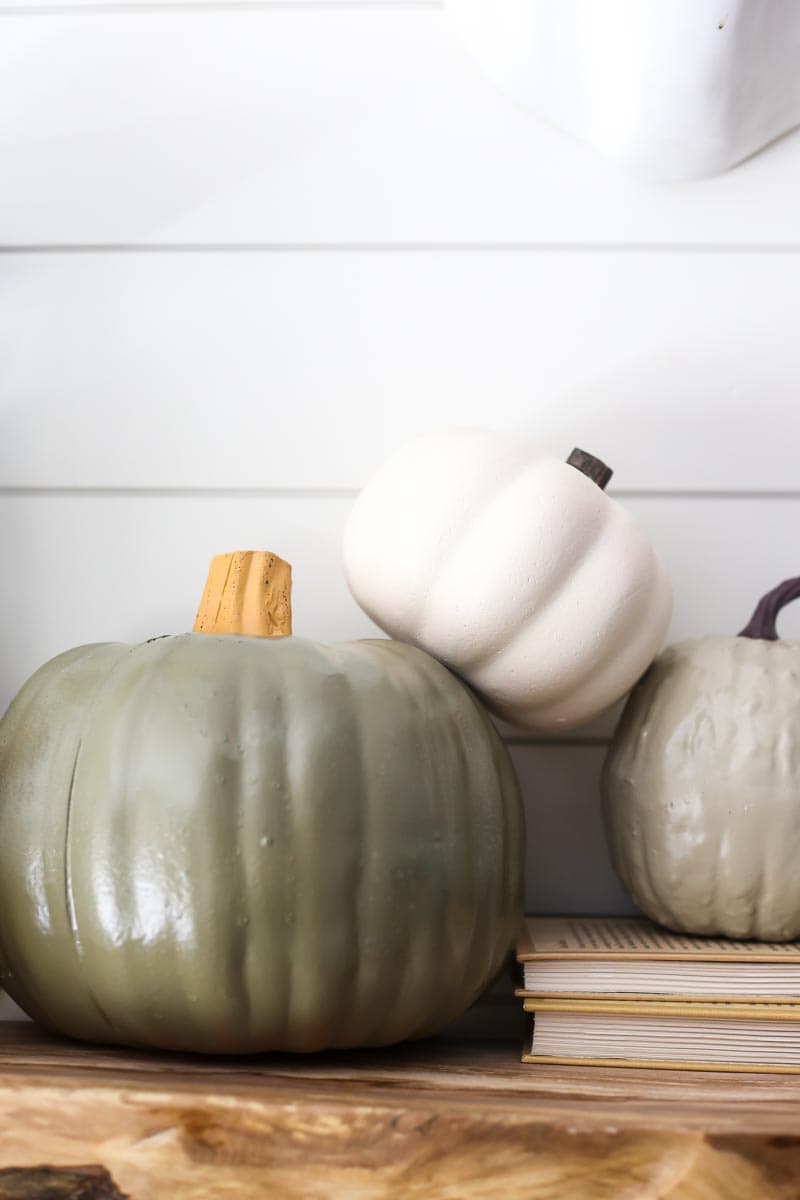
I haven’t played around much with different types of spray paint prior to this project. Most of the time, when I’m spray painting something I want a nice glossy finish. But, I definitely didn’t want glossy pumpkins for this project. So, I branched out a little and tried some satin and chalked paint. I’m so impressed with the finish on them, and I think it makes all the difference.
I’ve also never used chalk paint before. It’s just not something I’ve ever gravitated to, but this project was the absolute perfect time to try it out. I’m obsessed with the matte finish!
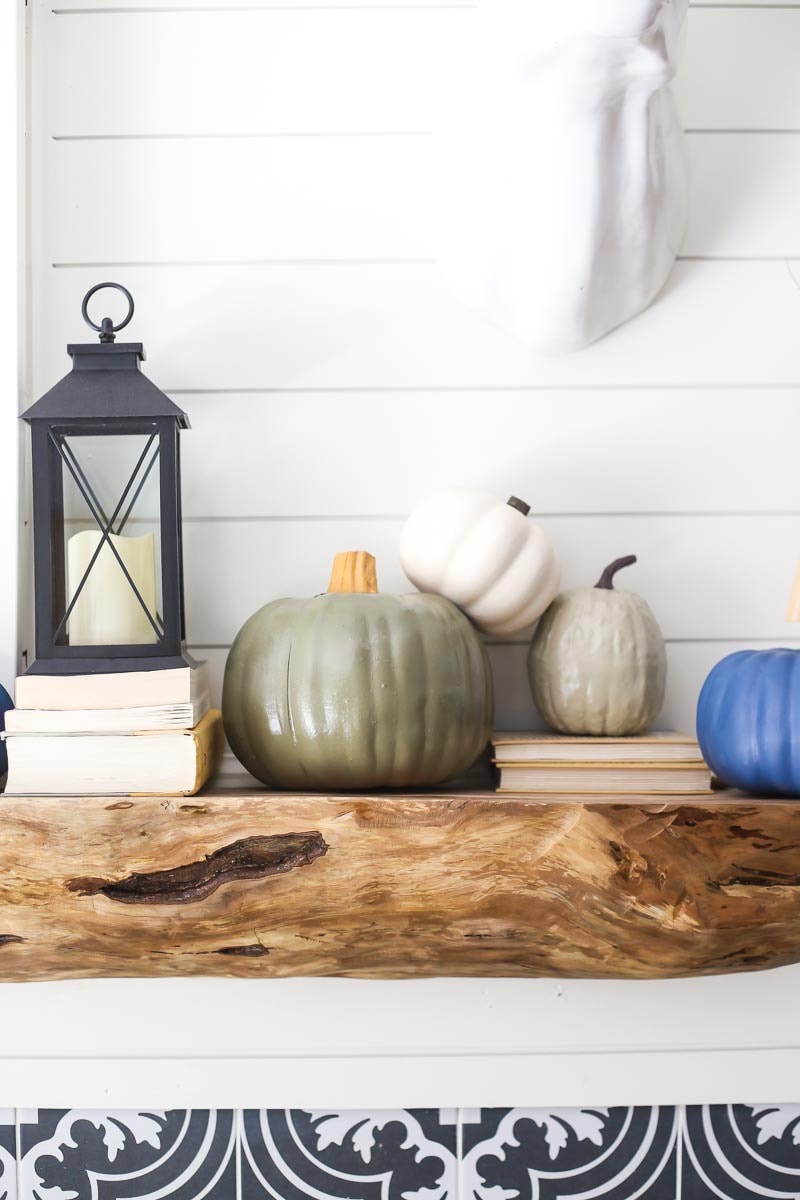
I’m so in love with how these turned out. It’s really got my brain churning for other ways I could use dollar store pumpkins.
How have you decorated your home for fall this year? Be sure to check out Rust-Oleum’s amazing spray paint if you want to try to make some easy DIY pumpkins of your own!
What was the material of the pumpkins you purchased? Are they foam or ceramic ?
They’re foam!
Did you ever end up using the chalk spray paint on something bigger? I love the blue!!!!
I love those colors and the way you styled your mantle. Happy Thanksgiving!
Thank you!
Such a different use of pumpkins but nonetheless, I approve!! Wish you could send some my way darling! Loving your website by the way!!!! xxxxx