
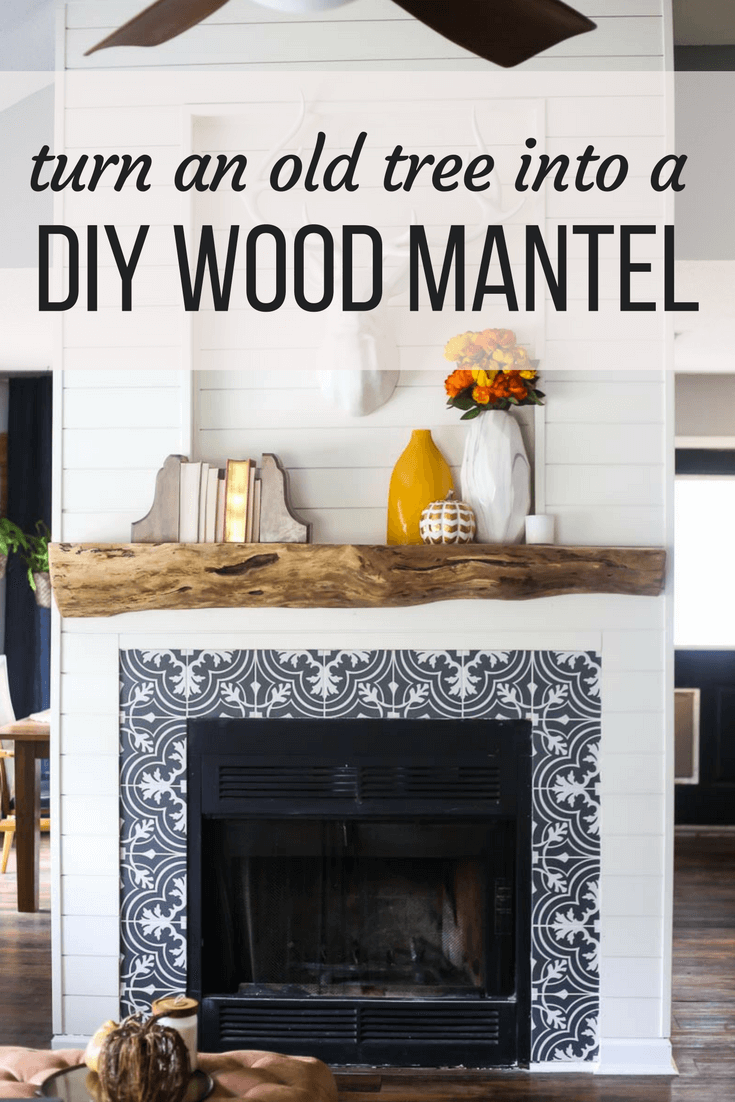
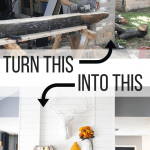
Our Rustic, Gorgeous DIY Wood Mantel
Last updated on January 27th, 2024 at 07:38 pm
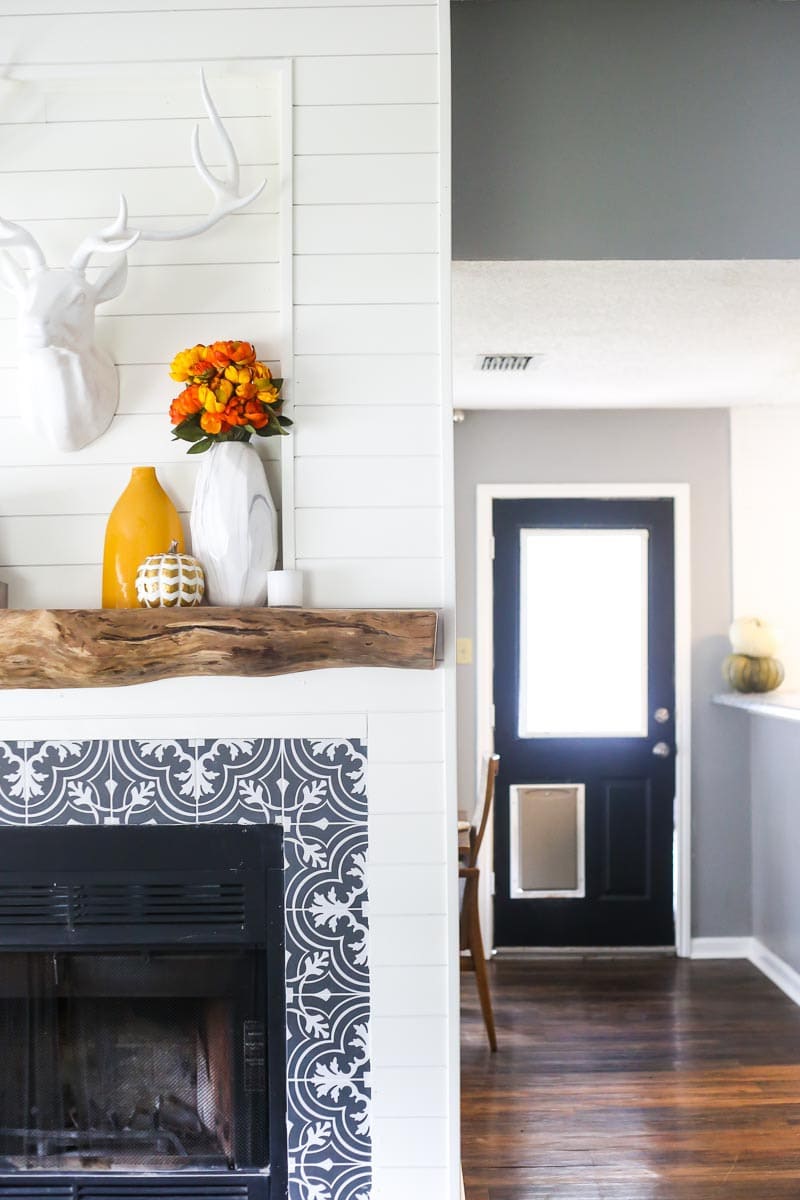
Our fireplace renovation is finally complete – we built a DIY mantel for our fireplace and the end resuls is stunning! I love a good rustic wood mantel, and this DIY fireplace mantel is my new favorite thing in our house! This post is sponsored by Rust-Oleum, but all opinions are 100% mine. Thanks for supporting the brands that support Love & Renovations!
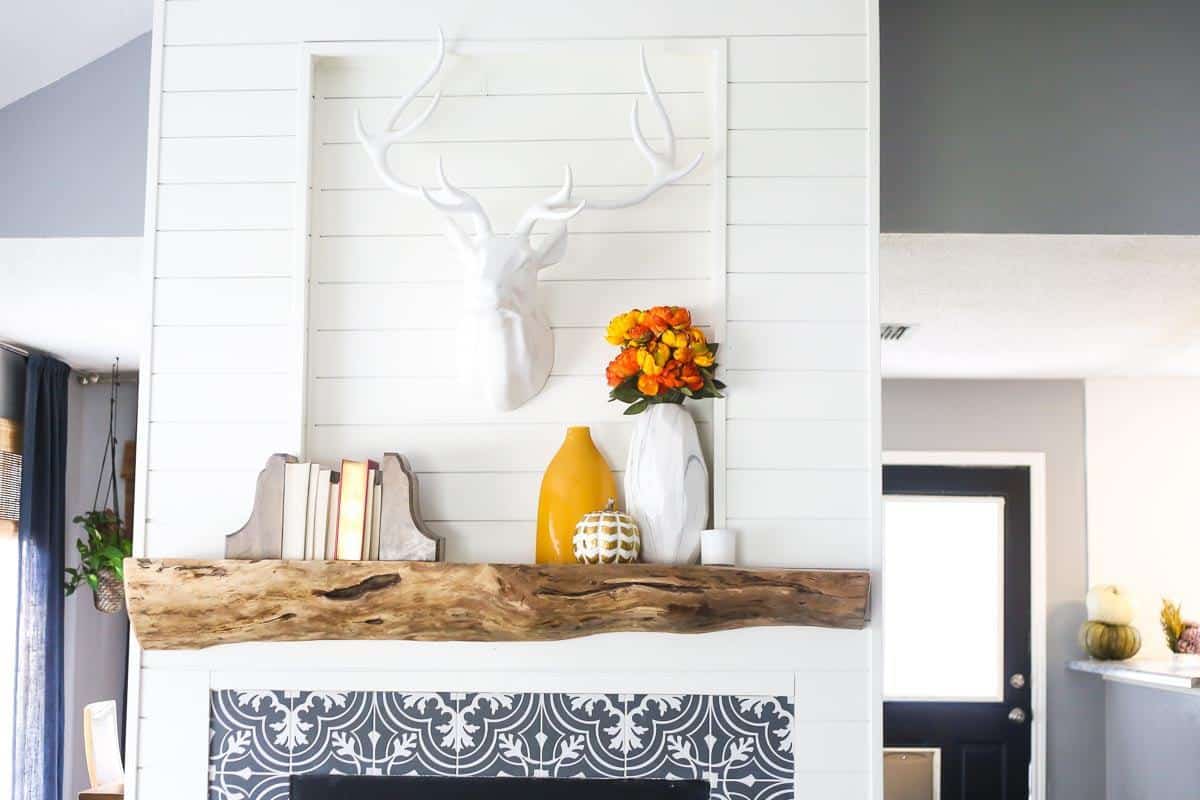
Last week, I (finally) shared the big reveal of our DIY fireplace makeover. Y’all, I can’t even tell you how much I love it and how happy it makes me. But, we recently finished creating a rustic DIY mantel for it and now it’s really wrapped up .
And, well, I’m swooning. Are you swooning?
This is basically the mantel of my dreams. Corey and I have been talking about building a large, rustic DIY wood mantel for years and years, and I’m so glad we were able to make it a reality before we left this house. I don’t know if I could have handled leaving this house without letting this gorgeous fireplace see its full potential.
How We Got the Idea
This project got started when Corey noticed that there were a few old oak trees being cut down outside of his office. He texted me and asked how annoyed I would be if he rented a U-Haul truck to bring some of it home.
The answer was very. I was very annoyed.
But, as usual, that didn’t stop him and he brought it home anyway. Typical.
How the Mantel Was Created
Of course, I shouldn’t complain – he had a vision for this old tree. He started by splitting one of the longer logs in half using a chainsaw. He then took off another side of it, so that we essentially had one-quarter of the original log.
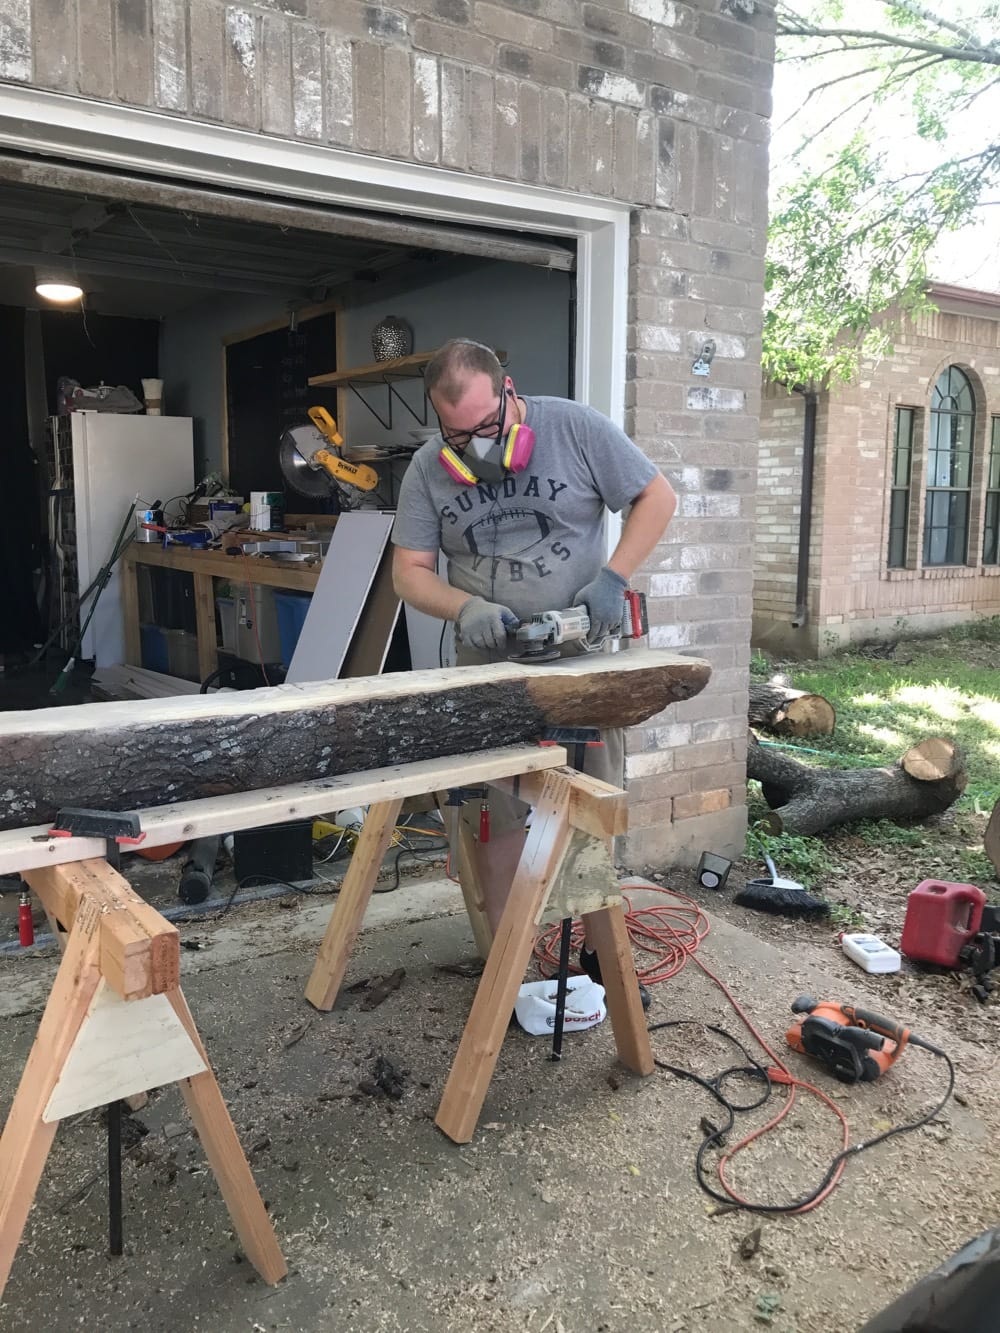
Next up is a lot of planing and sanding. Corey used an electric planer (he used this one) to get each side level. Then he sanded (and sanded and sanded) until it was all perfectly smooth. He also removed the bark from the outer portion of the mantel and sanded that smooth as well.
I realize this is all sounding very quick and easy. It is not. There were hours upon hours of sanding, and every inch of the garage was coated in a thick layer of debris when all was said and done.
But, trust me, it’s worth it.
Hanging Our Rustic Wood Mantel
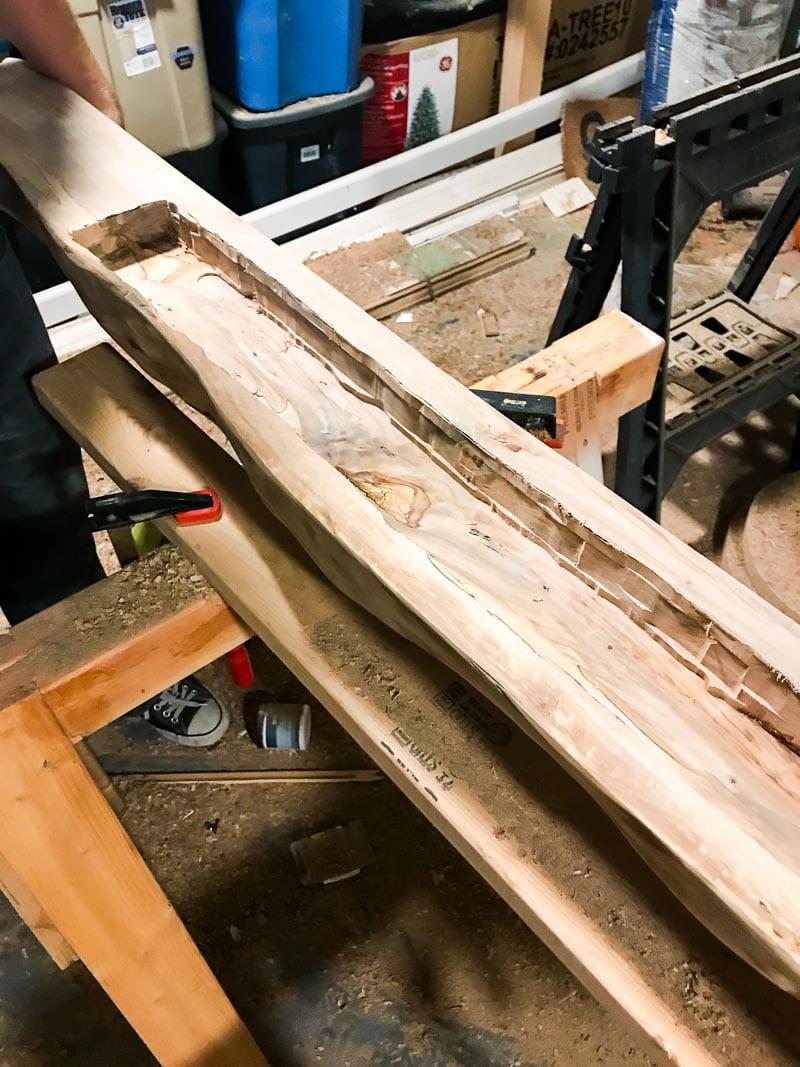
Once the mantel was completely smooth and cut down to the length we wanted it to be, it was time to prep it to hang. Corey cut out a groove in the back of the mantel that would perfectly fit a 2×4 board that the mantel would hang on.
Then, we mounted the 2×4 to the mantel. Be sure to drill directly into the studs – this thing is heavy! We used some the heaviest-duty screws we could find for this part!
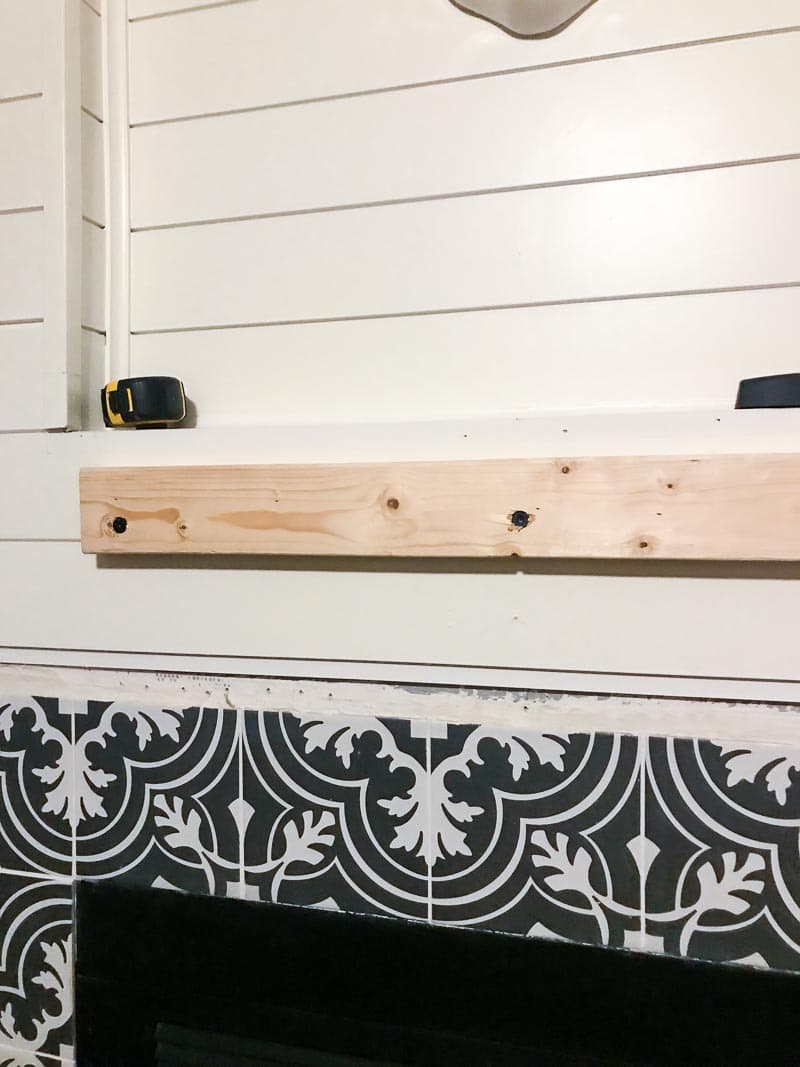
From there, all we had to do was lift the mantel up and fit it over the mounting board. Then, we used some more heavy duty screws to drill the top of the mantel into the top of the 2×4.
Again, I’ll admit that all of this isn’t quite as simple as it sounds. Creating that groove in the back of the mantel took Corey literal hours. But, I think it’s safe to say the finished product is well worth the effort.
Finishing the Mantel
And with that, it was finally time to seal it. I used Varathane Triple Thick Polyurethane in Clear Matte for the finish. I just used a foam brush to apply one coat, then allowed it to dry fully before placing anything on the mantel. You can see how much of a difference it makes in the photo below!
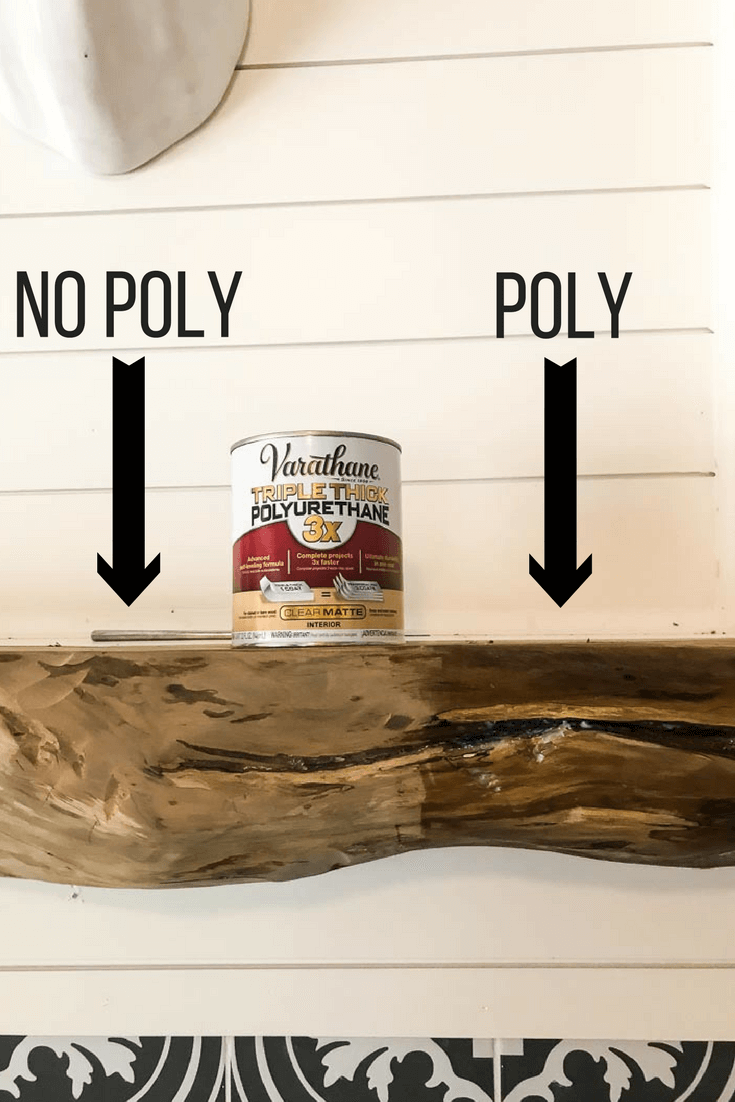
Gorgeous, no?
I’m so proud of how this fireplace turned out, and so grateful to Rust-Oleum for partnering with us on this!
Mmmm. Still swooning a bit.
Could you tell me what heavy duty screws you used? We’re about to do the same thing and I want to get that part right for sure!! Thanks so much in advance.
I can’t remember the exact length, but these were the type of screws we used!
Did you have to kiln dry the wood before hanging it in your house? We recently had a friend cut us a beautiful oak mantle piece but we didn’t know if we should have dried by a kiln before setting it. It takes about 3 yrs to dry out naturally. Help! We want to hang it but aren’t sure if we should w/o having it dried or not.
No, we did not kiln dry the wood. We left it outside to dry out for several weeks before starting the project, though.
Can you tell me how you cut the hole in the middle of the log to fit over the 2×4?
This is AWESOME! Just what we have been looking for to update our fireplace to use the cut down trees from our property!!!
Thank you so very much!
Glad it helps! Hope your project goes well!
Are those black and white tiles or stenciled painting on the front? Love the whole thing!
Hi Diane – they’re ceramic tiles from Home Depot! 🙂
Looks great and I am redoing my fireplace ….great idea!!!!
Also
What is that around your fireplace? Tile? the black and white pattern…..??
Thanks, Chad! It’s ceramic tile from Home Depot. 🙂
I would never have thought about such thing! This website has really blown my mind! BRILLIANT! JUST BRILLIANT x
Wow! This is freaking beautiful! I can’t believe it is DIY! Thanks so much for sharing your tutorial with us at Merry Monday this week. This project is definitely going on the to-do list.
Love this mantel Amanda. I’m inspired to do something similar since I like scratching up new territory but right now, I don’t have the resources to start. For now, I’ll just bookmark this page! Keep up the good job.
Thanks!
That’s a really cool mantel! I have several pieces of trunk and some branches from an oak tree that fell at my parents’ house during Hurricane Harvey – I actually planted the tree myself about 25 years ago, so I wasn’t about to let it get hauled away! Now I’m trying to come up with some projects for it – I predict a lot of people will be getting DIY coasters from me for Christmas! Haha. What tool did you use to cut the ridge in the back? I’m wondering what tool to turn to for more precise cuts like that.
Thanks, Jamie!! And wow – it’s sad the tree is gone but how cool to have the wood! He used a plunge router for the back of the mantel!