DIY Tree Swing
We recently added a DIY tree swing to the large tree in our front yard, and our son is loving it! This wooden tree swing is incredibly easy to put together, and your kids will love swinging on it all summer long!
Jackson loves to swing (what three-year-old doesn’t?) and a couple of years back we got him one of those ugly, plastic swings to hang on the tree in our front yard. I didn’t mind that it was an eyesore – it made him happy! But, I did mind that we did kind of an awkward job of hanging it and it sat really high off the ground.
It looked ridiculous. And we never fixed it. For years. It still functioned (kind of) and Jack never complained, so we just rolled with it.
But now, he’s really getting to a point where he’s outgrowing the blue monstrosity. He really prefers to use a “big kid” swing when we go to the playground. So, we decided it was high time to make a DIY tree swing that would grow with him a little better. It’s a really easy DIY project and it gives us the added bonus of not making our front yard look like a toddler playground. Let’s get to the tutorial, shall we?
A disclaimer: Obviously, like any DIY project, you should take this on at your own risk! We are super comfortable with the safety of this swing, but are not pros. Do what feels comfortable for your family.

Ugh, how adorable is that?
The best part about this project? It cost about $10 (all you need is some rope and a piece of wood from your scrap wood pile). Plus, it takes less than an hour to build, and looks incredibly cute.
So, let’s get to it.
How to Build a DIY Tree Swing
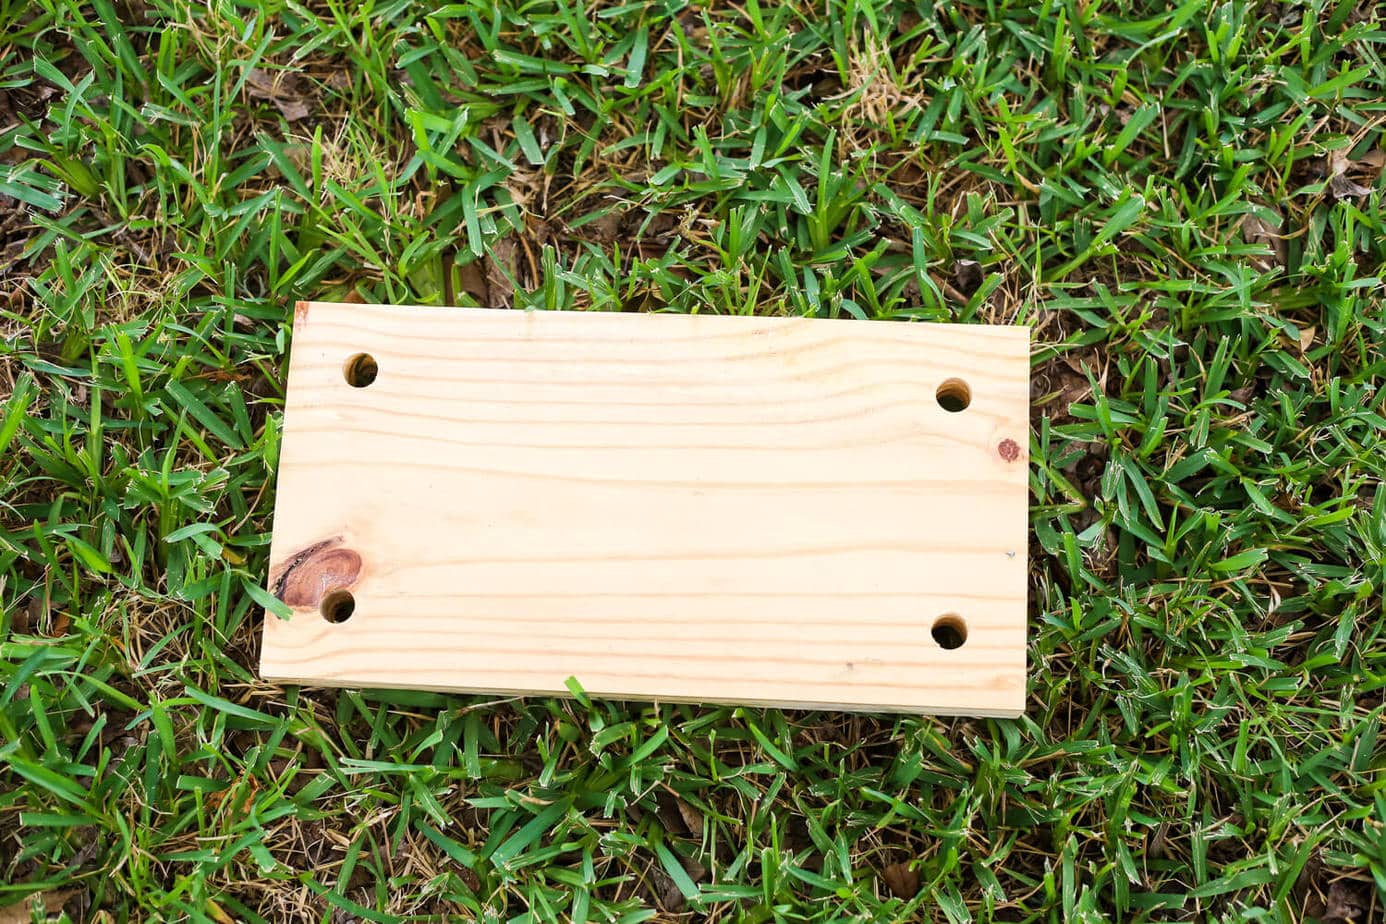
Step 1: Cut Your Wood to Size
Start with a piece of scrap wood cut to the size you want. My research told me that a “standard” size for a wood swing is about 7″ deep by 16″ long, so that’s what we went with. You can make it a little longer for a more rustic look (and to fit a bigger butt), but this was the perfect size for Jack.
Use a 3/4″ drill bit to drill a hole near each corner of the wood. Then, use a sander to sand all of the edges down a bit so they aren’t too sharp. I recommend starting with 80-grit sand paper and working slowly up to at least 220 grit or even 400 grit. Little fingers and lets will be all over this, so we don’t want splinters! If you want to stain, paint, or seal your board, this is a great time to do it. We left ours natural for now, but I may go back later and at least seal it.
Step 2: Tie Rope Around Tree Branch
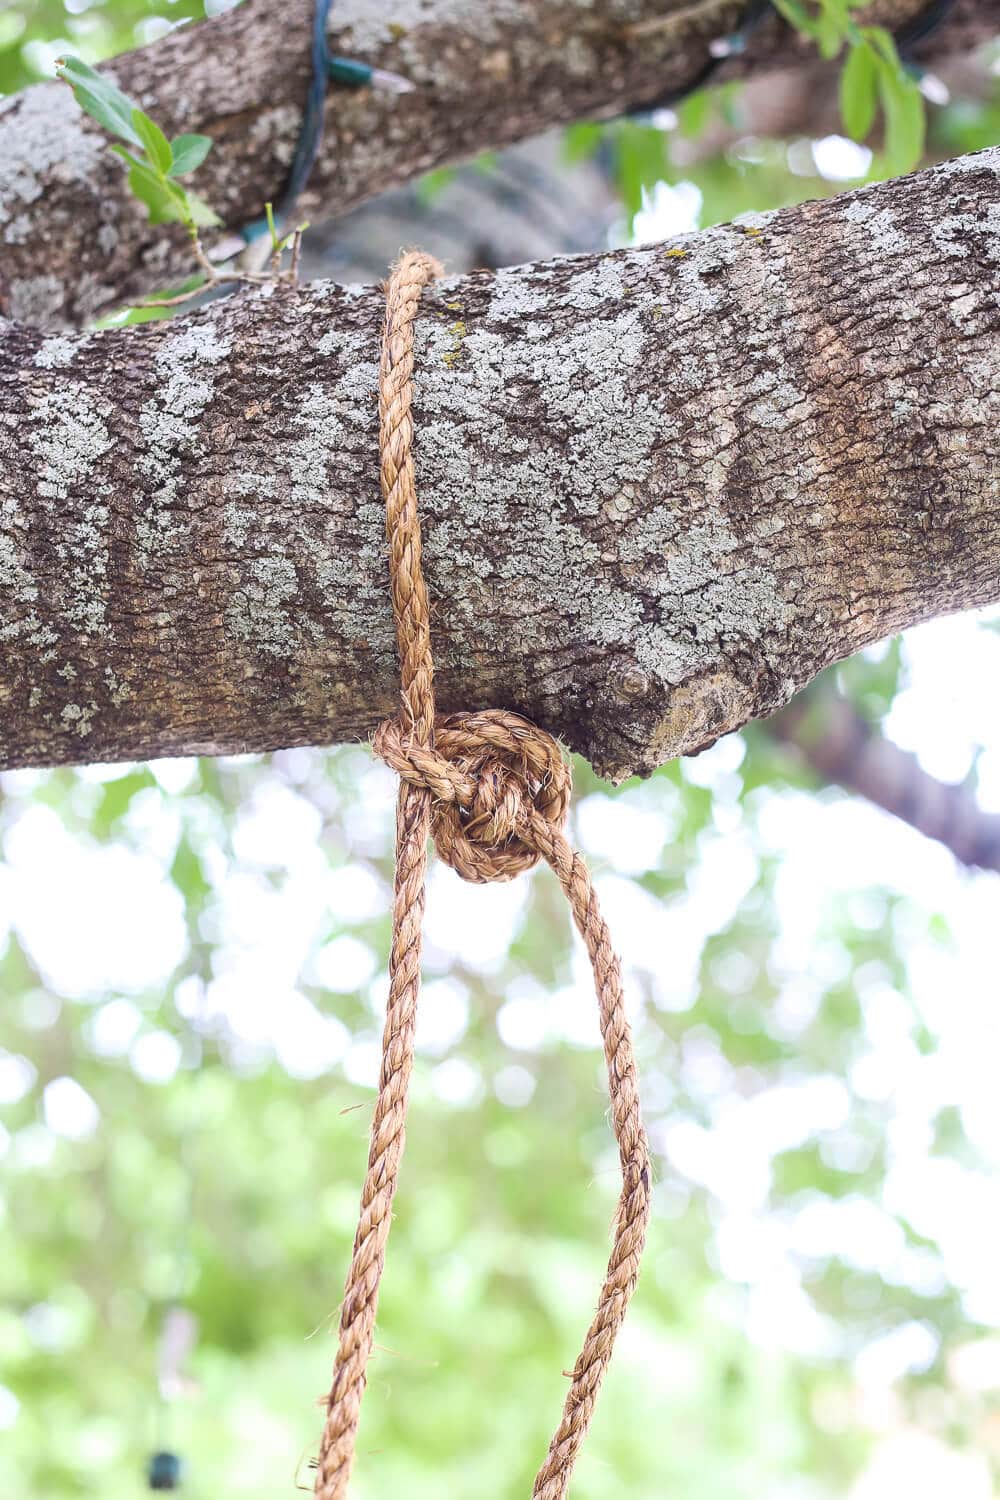
Next up, choose the perfect tree limb for your swing. You want a nice, sturdy lumb that can handle some weight. Grab your rope and tie it around the branch of your tree using a double running bowline knot. We used jute rope, but I’d recommend polypropylene rope for this. Nylon rope isn’t an ideal option, as it stretches to absorb shock and won’t be a good fit. You can grab your rope from Amazon or at your local hardware store.
If you’d prefer, you can also use a tree strap to attach the swing to your tree.
Step 3: Attach Rope to Swing Seat
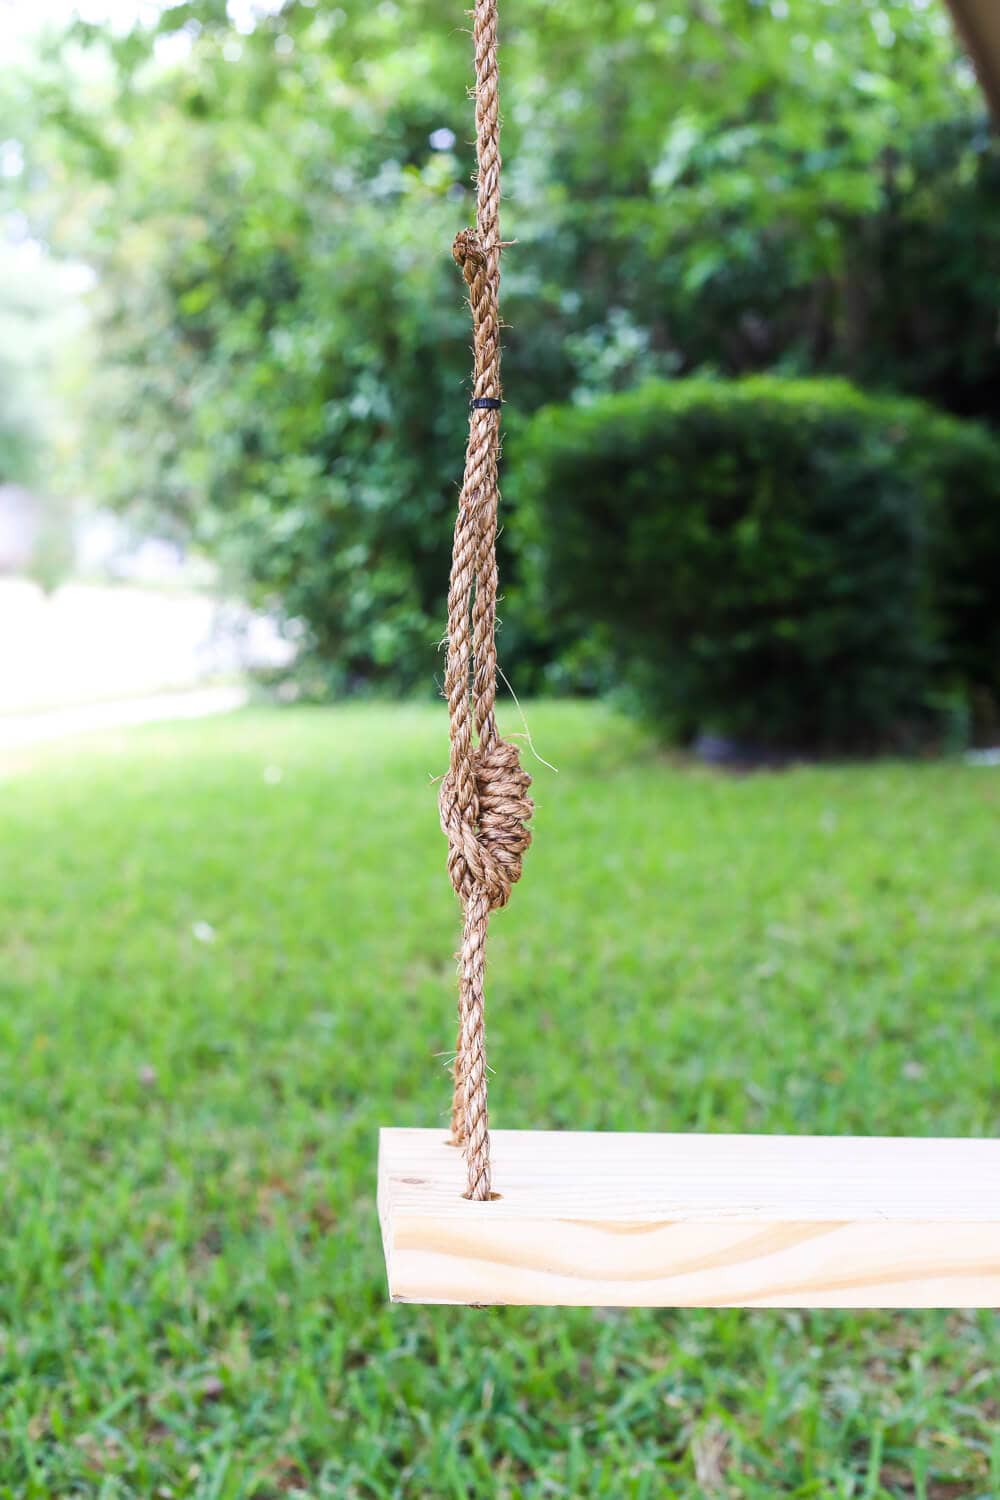
Grab the other end of the rope, thread it down through one hole in a side of the swing and up through the other, then tie a fisherman’s knot with five loops. Meaning, you’ll loop the rope around five times before doing the knot, and have the end of it come up through all five loops.
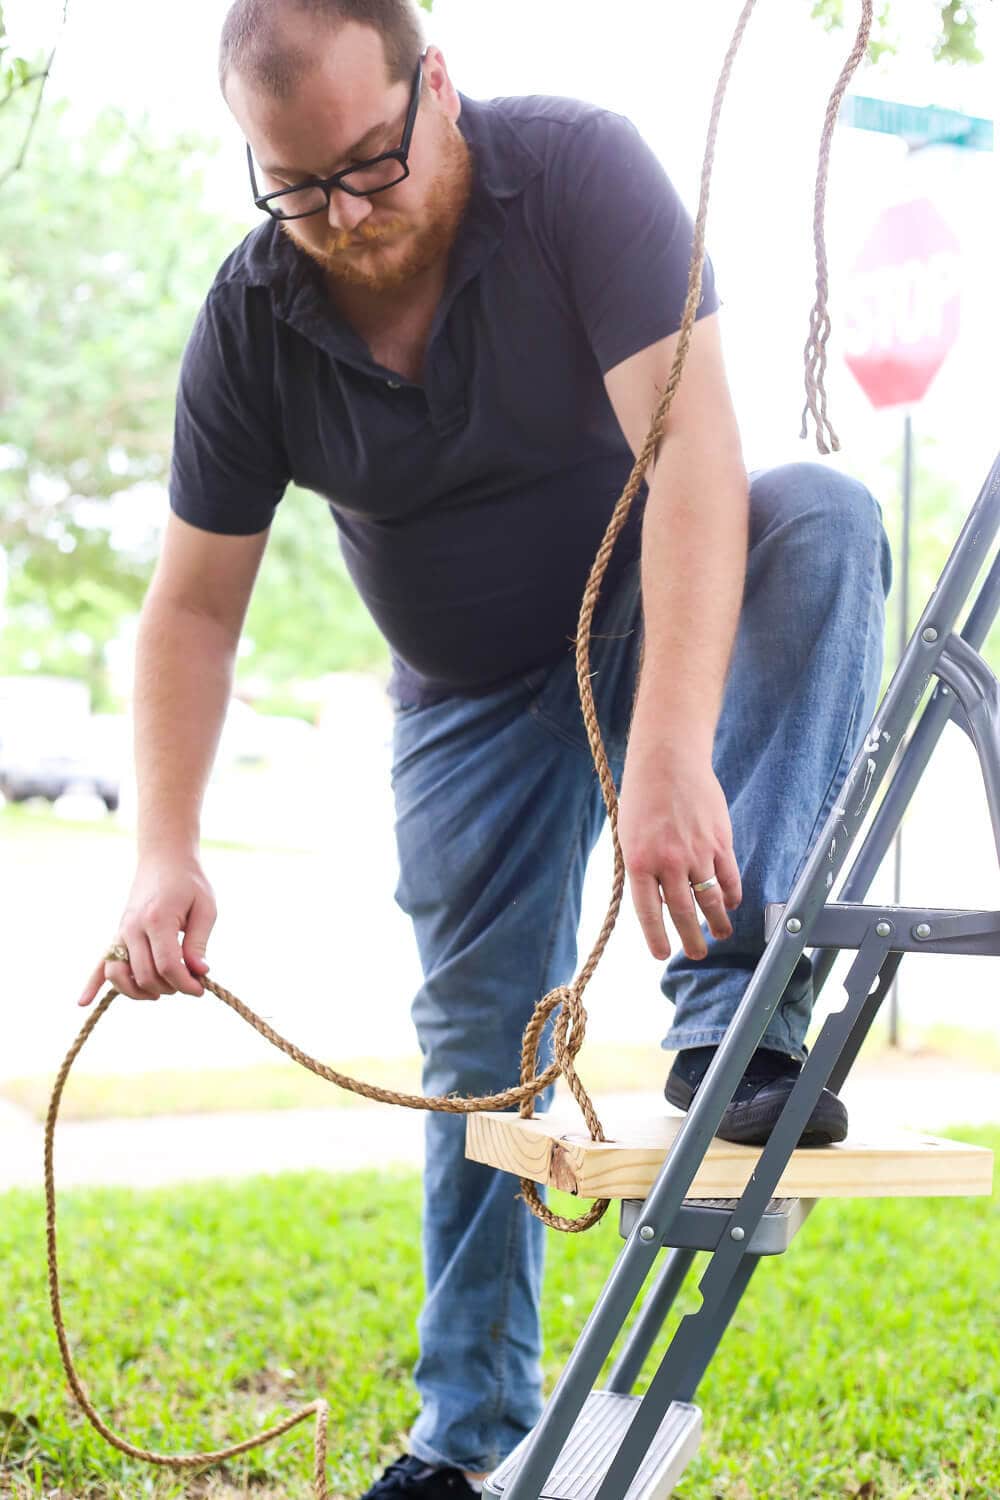
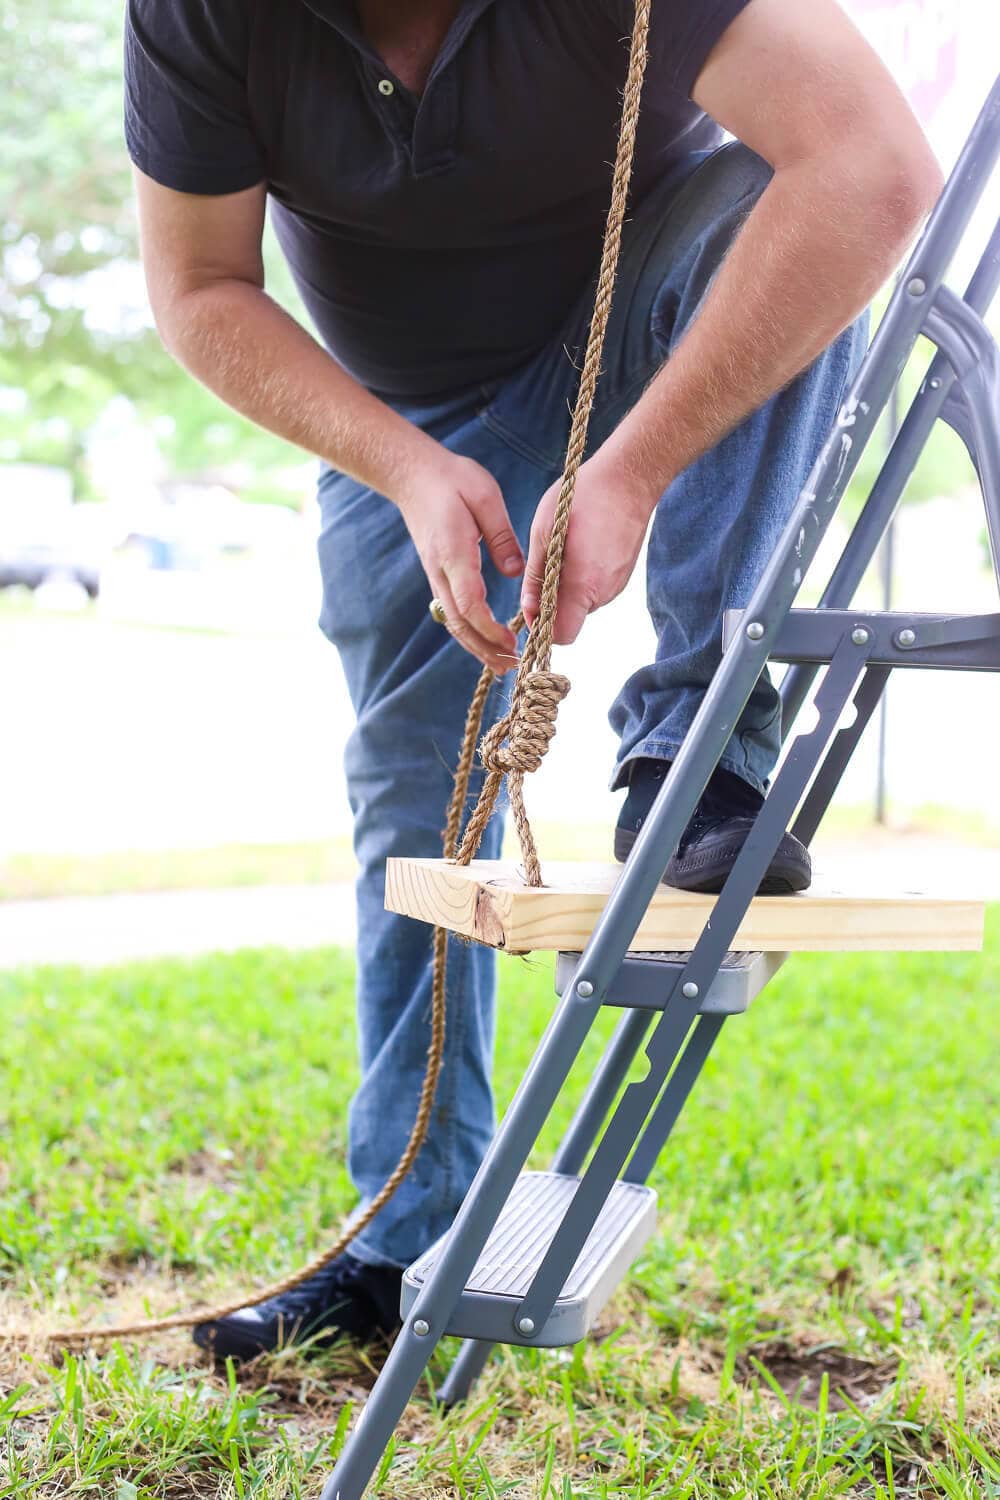
We got one side done, then used a level on the other side to make sure the swing didn’t hang crooked.
Use some rope clamps or zip ties to tie up the excess rope, so it doesn’t just flap around….
And then, get to swinging.
This is a seriously easy project, but I can’t even tell you how much joy it has brought Jackson already. We just finished hanging it yesterday and I swear he would spend every waking second out there if we let him. I have a feeling we’ll get a lot of use out of it this summer!
And I’m feeling pretty happy to have that ugly blue swing out of my life.

Thanks for posting! I want to add some outdoor fun for my grandkids and I will try this!
I made several wood tree swings before that my kids really enjoy. It’s fun to do it specially with your kids and Family. We are also planning to purchase one from treeswingstore.com as a gift for my wife.
Not uncommon though here in India, the knot fixing would be a little bit tricky here. Good thing to do.
What kind of wood did you use?
I believe we used some pressure treated lumber! It was just some scrap wood we had out in our garage!
How long approximately was the rope you used?
Tha k you form the great idea…made one for or maybe my daughter’s 7th birthday. No store bought gift can compare!!
I’m so glad to hear it!!
What size rope did you use?
Hi Jenna! I linked to the exact rope we used in the post – it was 1/4″. 🙂
I think you mean 3/4″ rope judging by the pictures.
Nice! Gonna give this a shot.
I love the change! Those plastic swings are great, but they don’t have any real character or craftsmanship to them. I like the look of the new swing in your pics enough that I just found one to hang in my tree for my wife. Yep, I actually found a place that sells swings big enough for adults – http://www.treeswingstore.com/adulttreeswings/ – and I didn’t have to build it myself! In a couple days my wife will have a grin as big as your sons! Thanks for the idea.
As they say when life gives you lemon, make lemonade out of it, though not an exact and a stupid analogy but can’t resist, when you have got a tree, then not make a swing and hang on it. Nice and very easy steps, completely DIY.