DIY Entry Closet Makeover {Finally!!!!}
Our entry closet has given us nothing but trouble since we moved into this house, and it was time to finally take care of things. Read on to see how I whipped it into shape with some DIY entry organization and the small details I added that make a huge difference! This post is sponsored by Wagner.
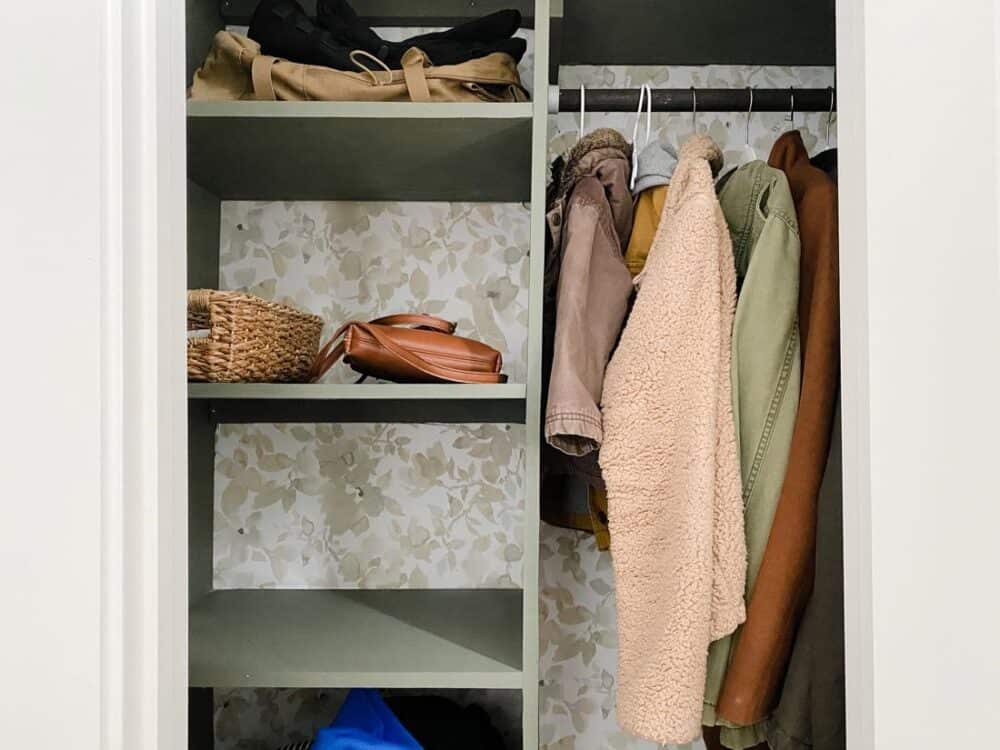
Do you have any spaces in your home that you’ve tried to organize over and over to no avail?
We have a little closet in our entry that, like most builder-basic closets, started off pretty boring. Just a rod for hanging clothes, one shelf, and that’s it.
I don’t know about your family, but a closet like that just does not cut it for us. It was chaos – all the time. The kids keep all of their shoes in there to make things easier when walking out the door, I keep my purse and Grant’s diaper bag in there, and it quickly also became a bit of a catch-all for tons of other things (dog leashes, hats and scarves, school backpack, etc).
It. Was. A. Mess.
Proof?
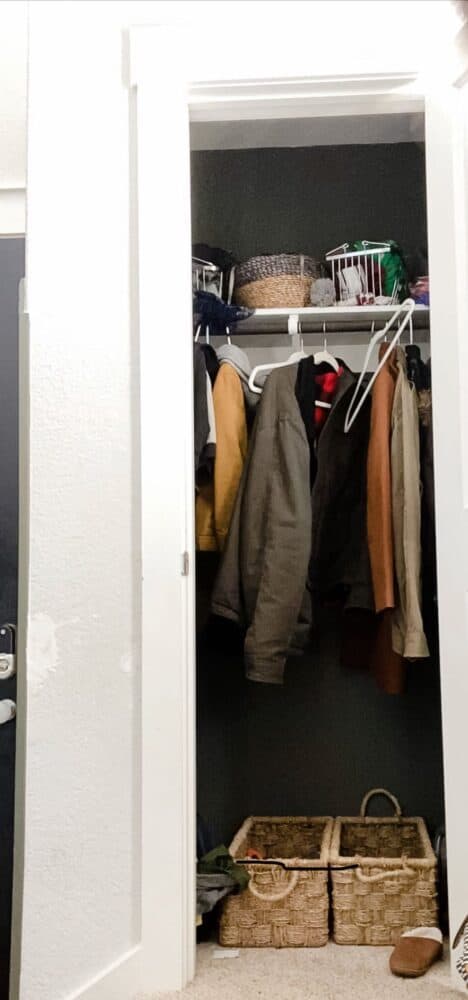
Yeeesh.
I tried to make it cute a while back with some fresh paint, wallpaper, hooks for bags, and some baskets for shoes.
It didn’t last.
So then, I tried building a shoe cubby to help keep things a little more in order.
But, I built it too big for the closet (insert face-palm emoji here).
This closet has been absolutely nothing but trouble since day one, and I decided it was finally time to make it work for us.
With any project like this, I like to start by thinking about the issues we have with the space, along with our needs. For this closet, here’s what that list looked like:
- We don’t need much hanging space, because we don’t have many coats.
- We need better shoe organization that people will actually stick to
- Hanging bags and purses on hooks on the side wall wasn’t a good system. I need something faster and more organized.
- And, as always, making it as cute as possible is always a bonus
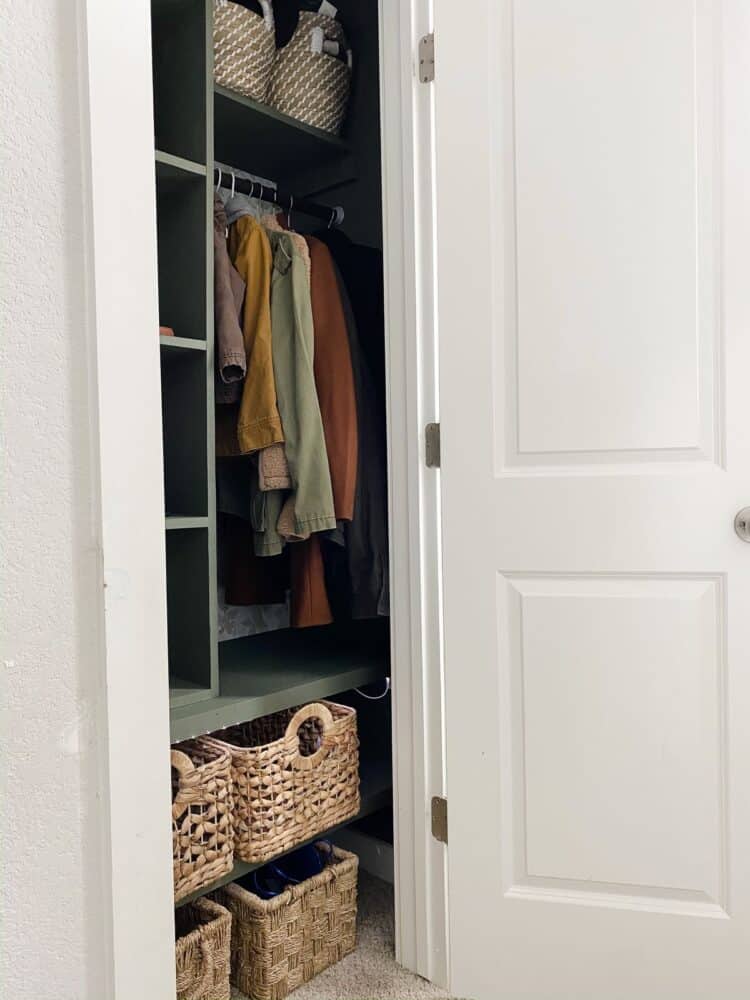
I drew up a plan and got to building. It took me about four days of work during Grant’s naptime, but pretty soon we landed here:
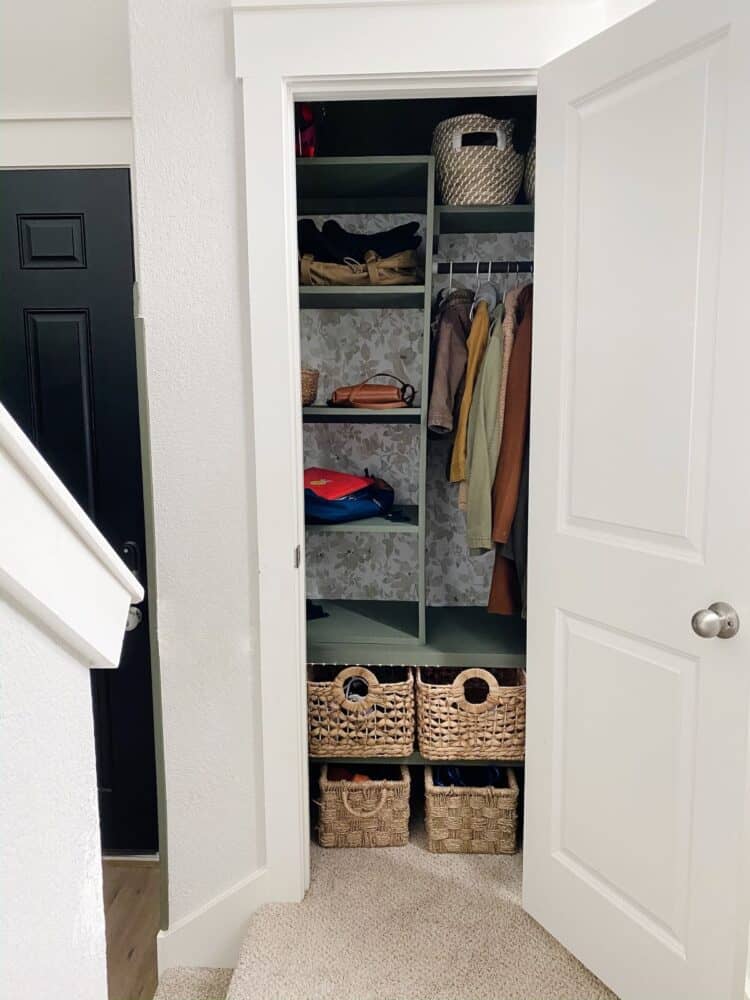
SO! MUCH! BETTER!
Ready to hear how I did it? Let’s dive into the details!
DIY Entry closet makeover
Tools, Materials , + Sources
- 2 sheets of 3/4″ plywood
- (2) 8′ 2×2 boards (you can also use a 2×4 ripped in half!)
- Kreg Jig pocket hole jig
- Drill + pocket hole screws
- Wood glue
- Nail gun + nails (if you don’t have one, you can just screw the shelves in place!)
- Wagner FLEXiO 3000 paint sprayer
- Closet pole sockets (I re-used the hanging rod that was already in here)
- Wallpaper
- Paint color: Bonsai Trunk by Behr
- Motion-activated lighting
Step one: build and install bottom shelving
I knew that, in general, a basket system would be best for our shoes, so I decided to give us a little more of a robust system – one basket per person in the family.
I created two shelves, each about 11″ in height. To install them, I just drilled a 2×2 support board into the studs on either side of the closet, then cut a piece of 3/4″ plywood to fit on top and nailed it into place.
Each shelf is about 18″ deep and runs the entire width of the closet.
Step Two: build and install cubbies
Once my two shelves were in place, it was time for the cubbies! This is, I hope, the part of this system that will really do the job of keeping us organized.
We each have one cubby in the closet that’s about 16″ deep, 22″ wide, and 12″ tall. It’s big enough to comfortably fit all of Jackson’s school gear with a little room to spare, and Corey and I both have more than enough room in our cubbies.
I built this set-up using my Kreg pocket hole jig – I cut all of my plywood to size first, then used wood glue and pocket holes to build a basic box with three dividers, to create four cubbies.
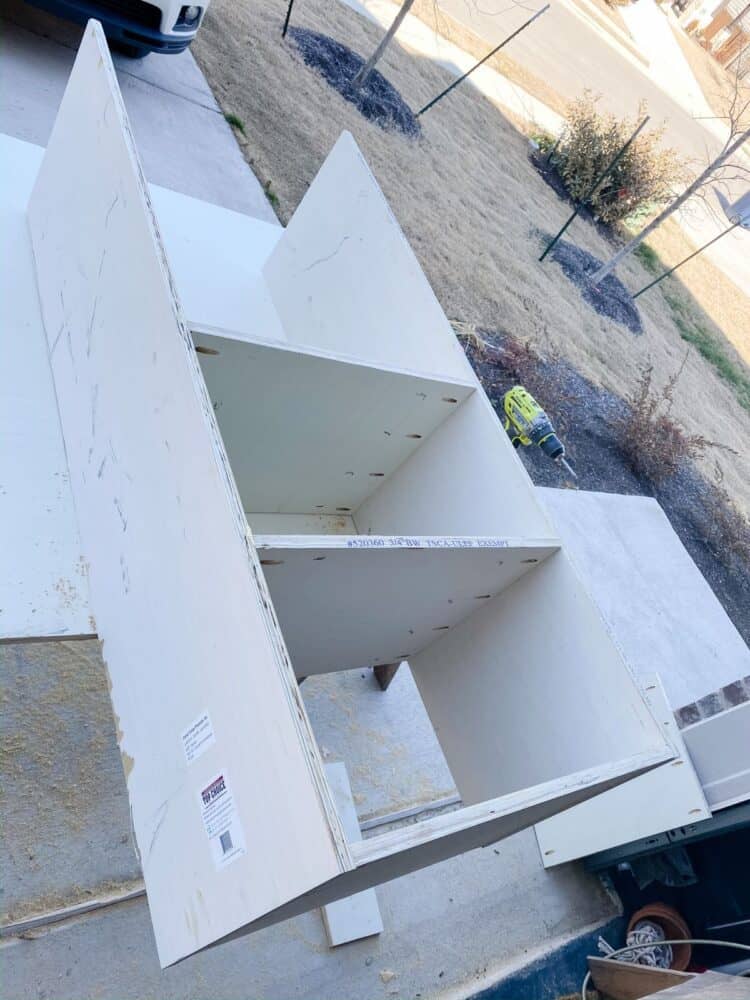
Once the box was built, one of the keys that made this project much easier on me was painting the cubbies (and all of the other shelves) before I installed them in the closet!
Closets are small and awkward to work in – painting any shelving while it’s inside the closet is just asking for a sore back (and neck, and shoulders) the next day. Instead, I used my Wagner FLEXiO 3000 to spray paint everything before I even brought it inside. I still had some touch-ups to do after all was said and done, but that was so much easier than painting it all in place would have been!
Anytime I talk about my sprayer I get questions about which one I recommend, what I use it for, and how to use it. I’ve used Wagner’s paint sprayers exclusively for years, and they’re hands down the best if you ask me. They’re reliable, easy to use, and they come with a really thorough and helpful instruction manual that ensures you’ve got answers to all of your questions at your fingertips (I don’t ever save instruction manuals, but I always keep my Wagner ones!).
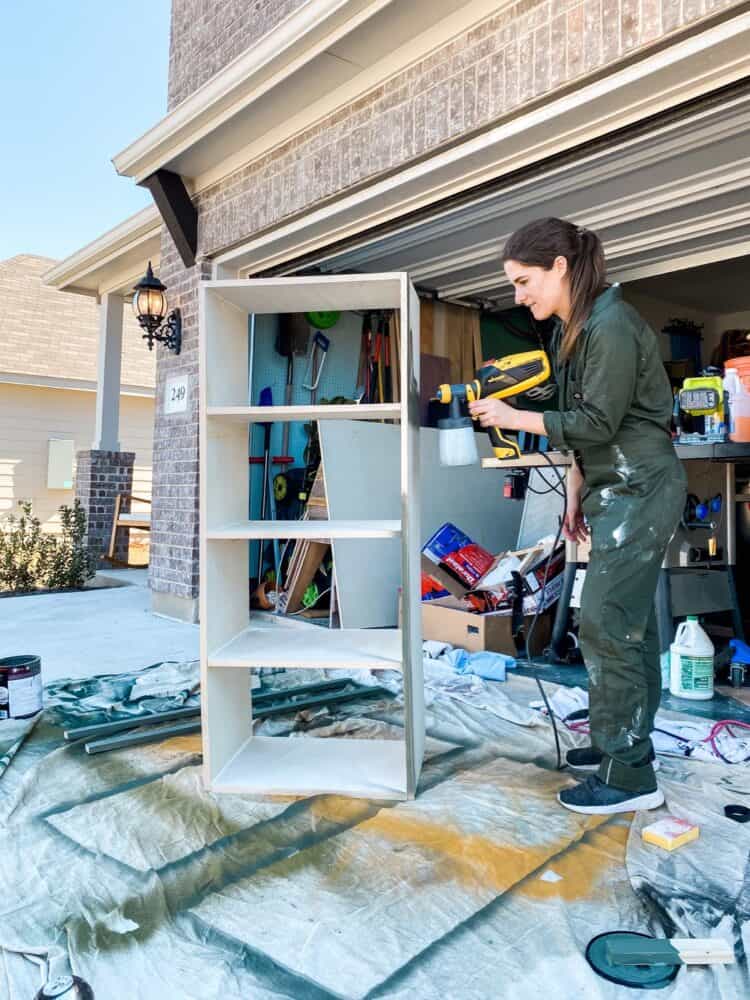
You can click here to learn more about how to use a paint sprayer – including how to clean it when you’re done. It’s a really easy-to-use tool that I believe every DIYer should have at their disposal!
After the cubbies were painted and dry, I brought them into the closet, set them on top of the top shelf I had installed, attached them to the studs in the walls so they won’t shift around while we’re using them!
Step three: add top shelf and hanging rod
With the cubbies and bottom shelf in place, the whole thing is almost done!
I added another shelf up towards the top for less-often-used things (we have two baskets with winter hats and other gear) and installed it the same way I did the others – but with one of the support boards in the cubby and one in the wall!
Don’t forget to paint it before you bring it in!
I cut down the wood hanging rod that was in there before to fit the new length, and I bought a new set of sockets to hold it – because we have such a limited need for coats, this new reduced hanging space is actually so much more functional for us, and it’s more than enough room!
Step four: make it cute!
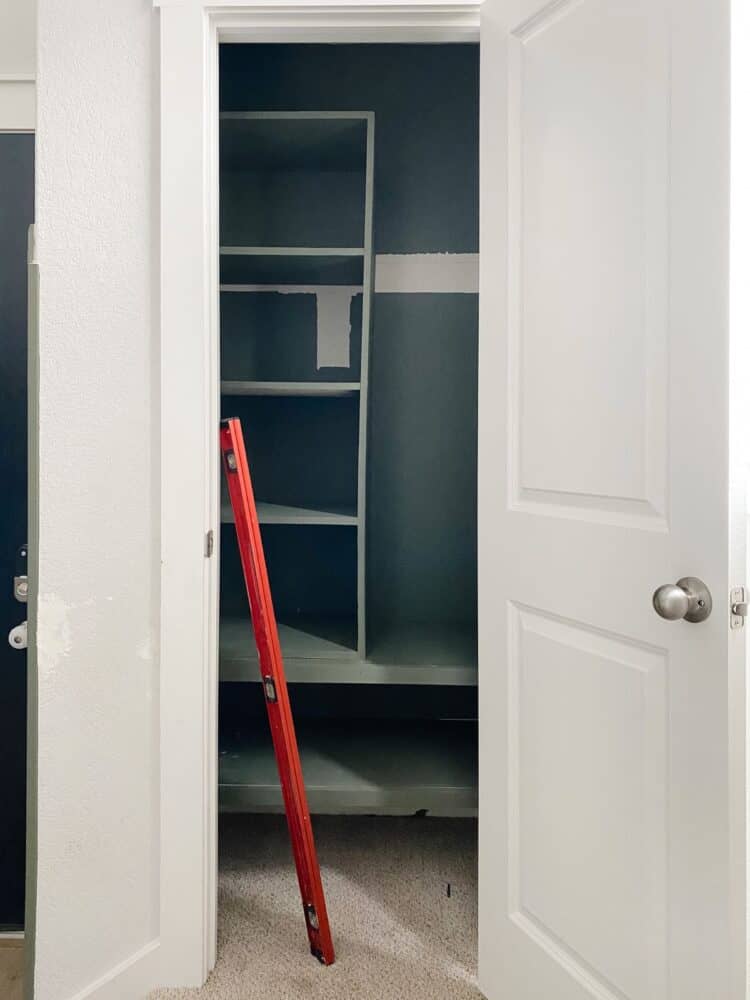
And finally, with all the basics in place, I got to make it cute!
Thanks to my paint sprayer giving me a hand with getting all of the shelving painted, I just had a few minor touch-ups to do after I caulked all of the gaps and seams.
Then, I added some peel and stick wallpaper to the entire back wall of the closet. I’ll note that if I was doing this project again, I probably would have installed the wallpaper before I installed the cubbies. I hadn’t originally planned on it going behind the cubbies, but once I got started I knew that just doing it behind the coats wouldn’t be enough!
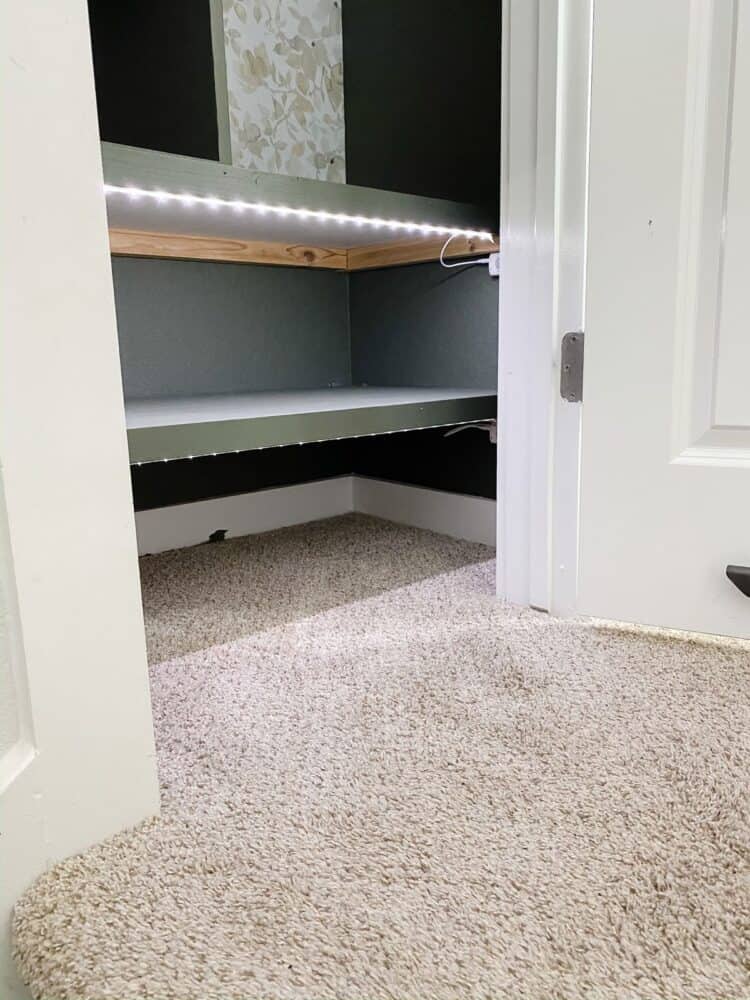
And, one of my favorite touches in the entire closet is the motion-activated lighting – it’s powered by a rechargeable battery, so no plug is required, and the strips give the perfect amount of light for this dark little space! I put one under each of the shoe shelves, and we love them so much that I immediately ordered another light strip to add a little higher up in the closet for even more light.
You can see a closer look at how the light strips work (and the entire process of building this DIY closet organization) right here on this IG highlight if you missed it live!
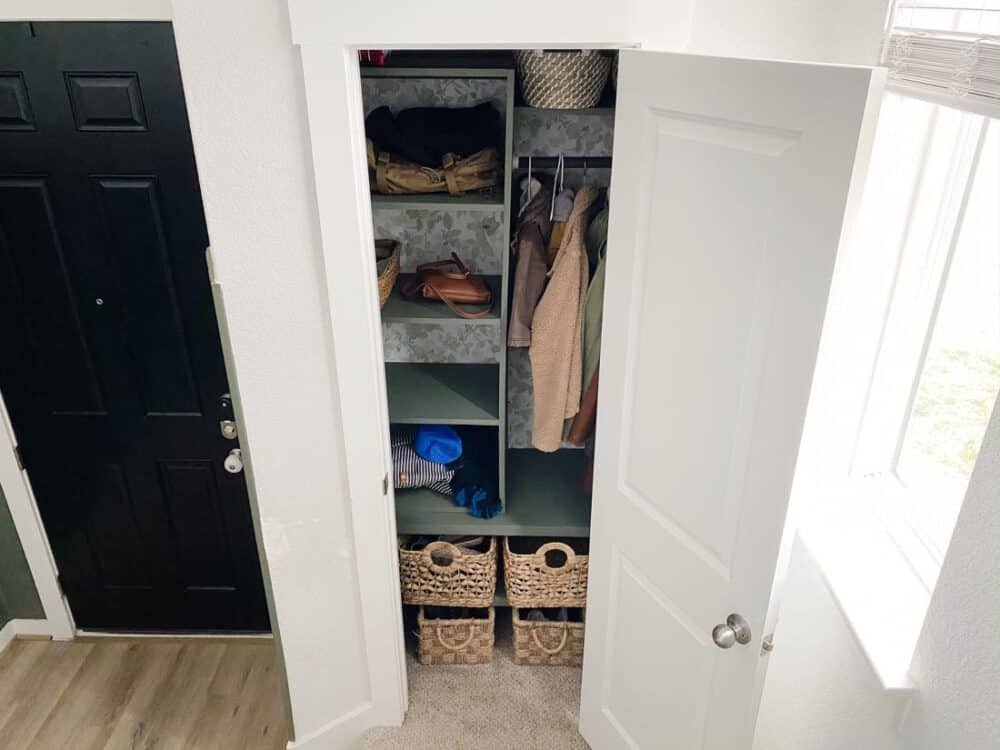
And, of course, if you haven’t gotten yourself a paint sprayer yet – what are you waiting for?! Click here to learn more about my favorite paint sprayer and snag yourself one for your next painting project.

Hi Amanda,
It must be a true joy every time you open up the closet!! Can you share where are the cute baskets are from? Thanks!
They’re from At Home!
Oh wow! That’s is beautiful, I hope it solves all your problems! Pinning so I can show my husband! Thank you!