
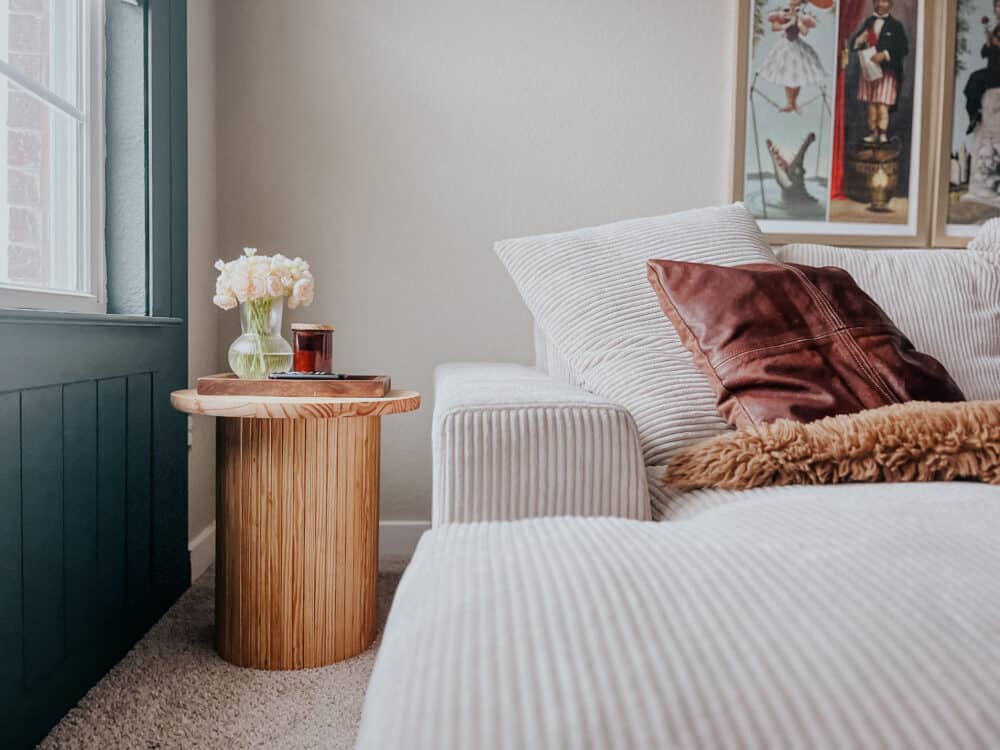
Easy DIY Fluted Side Table {Under $100!}
Lately, I’ve been feeling really motivated and excited to work on projects for our upstairs bonus room. I’ve been shiplapping and shopping and dreaming up a storm. One thing that has been missing from this space for quite a while now is any sort of table surface. We got rid of the coffee table when the boys were little because they needed the room to play, but it left us without anywhere to set drinks or anything else! So, I got a wild hair last week and decided to build a little fluted side table to go next to the couch.
To be honest, I wasn’t sure if it would work at all. I figured it would either be epic or a total disaster. Thankfully, I think we’re leaning on the side of epic!
This post is in partnership with DAP.
Today I’m going to give you a full tutorial for how to build this adorable little table. Fluted tables are so popular right now, but they can be so pricey. Going the DIY route here is so easy (seriously, SO EASY!), and only took me a few hours from start to finish. Oh, and the total cost was less than $100 for all of the supplies. It doesn’t get much better than that!
Video Tutorial
First up, here’s a quick video that will walk you through the entire process. Much of this is what I shared on Instagram, but I know sometimes it’s easier to understand these things if you watch them happen! So, I’ve compiled it all here to help you out.
How to Build a Fluted Side Table
Materials Needed
Step One: Cut Concrete Form Tubing
I know what you’re thinking. Aren’t those things used for cement? Yes, they are. And the guy who helped me find them at Lowe’s definitely thought I had lost my mind when I told him I was using mine to create a side table! But, it’s honestly the perfect choice for a base for this table, I swear.
To cut the concrete tubing, I marked 18″ down all the way around the tube. Then, I used a saw to get the cut started. Once I had gone all the way around, I used my utility knife to finish making the cut. You could do it with just the utility knife (with a little more elbow grease) if you prefer. You could also probably use an oscillating multi tool to cut it, but I worried it would create really jagged edges on the concrete form.
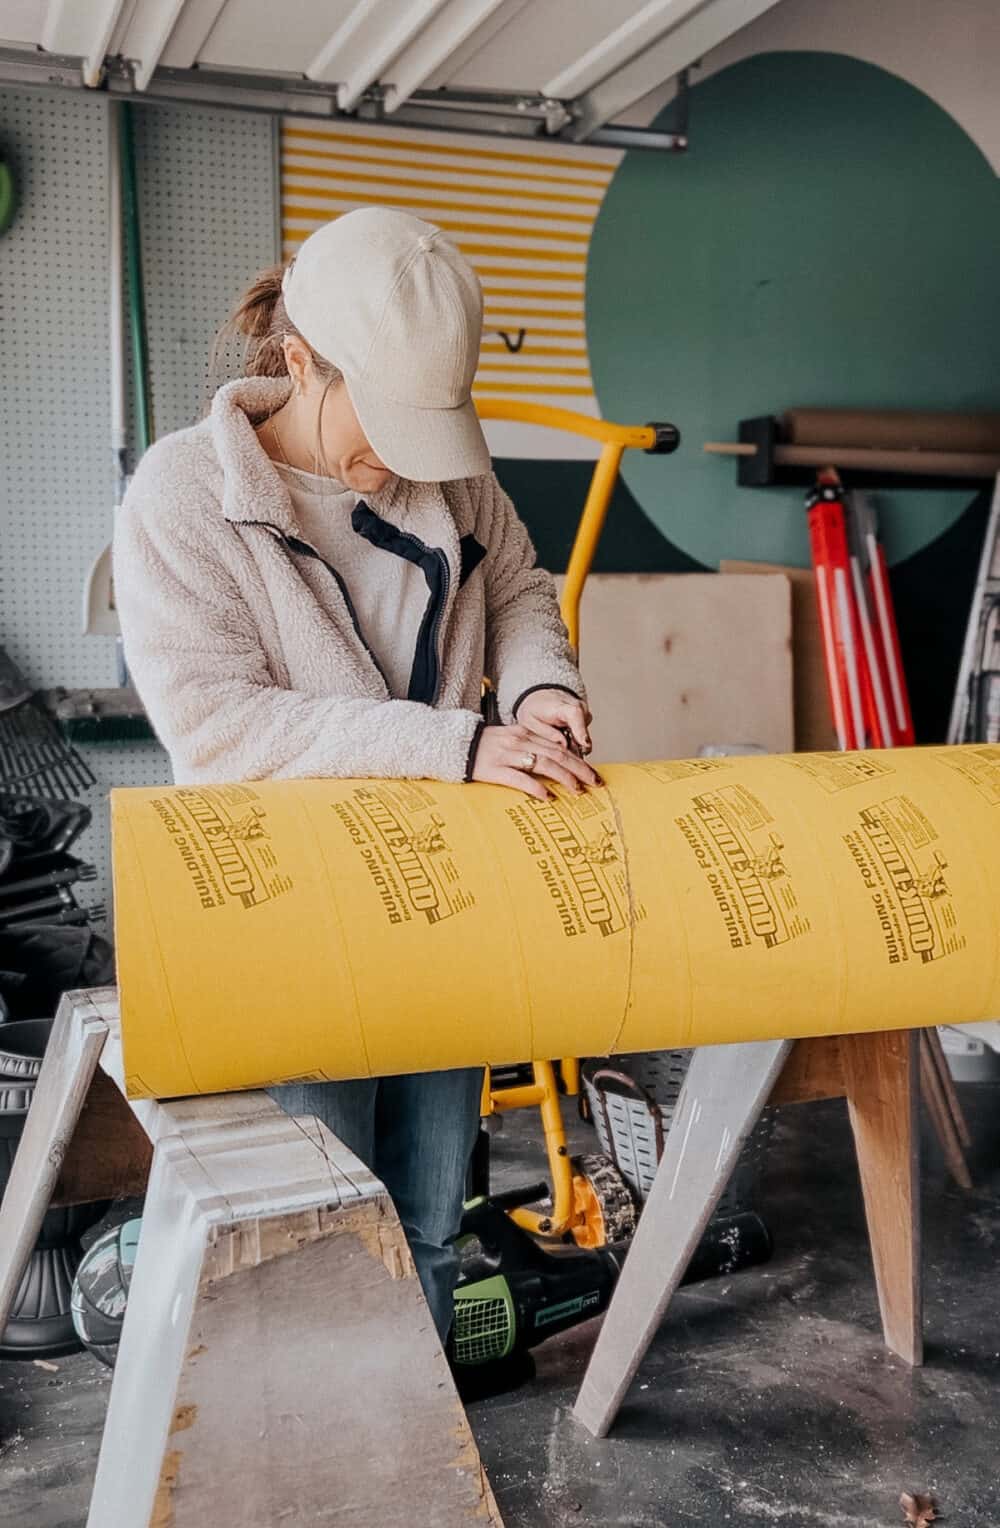
I went with an 18″ height for my table because that’s what works best with the height of our sofa. If you have a taller sofa, you could do 20″ or even 22″! Just measure the arm of your sofa and try to have it be no more than 1-2 inches difference in either direction.
Step Two: Add Supports (Optional)
I decided to add some supports inside my concrete form at both the top and bottom. I don’t think this was entirely necessary, but this is going into a kids’ space. I didn’t want it being too top heavy and constantly falling over!
To add supports, I cut two pieces of scrap 2×4 lumber to fit inside the form. Then, I added wood glue and screwed one into each side of the form. The screws do slightly alter the shape of the form when you tighten them, but you can’t tell at all once you add in the trim. I promise.
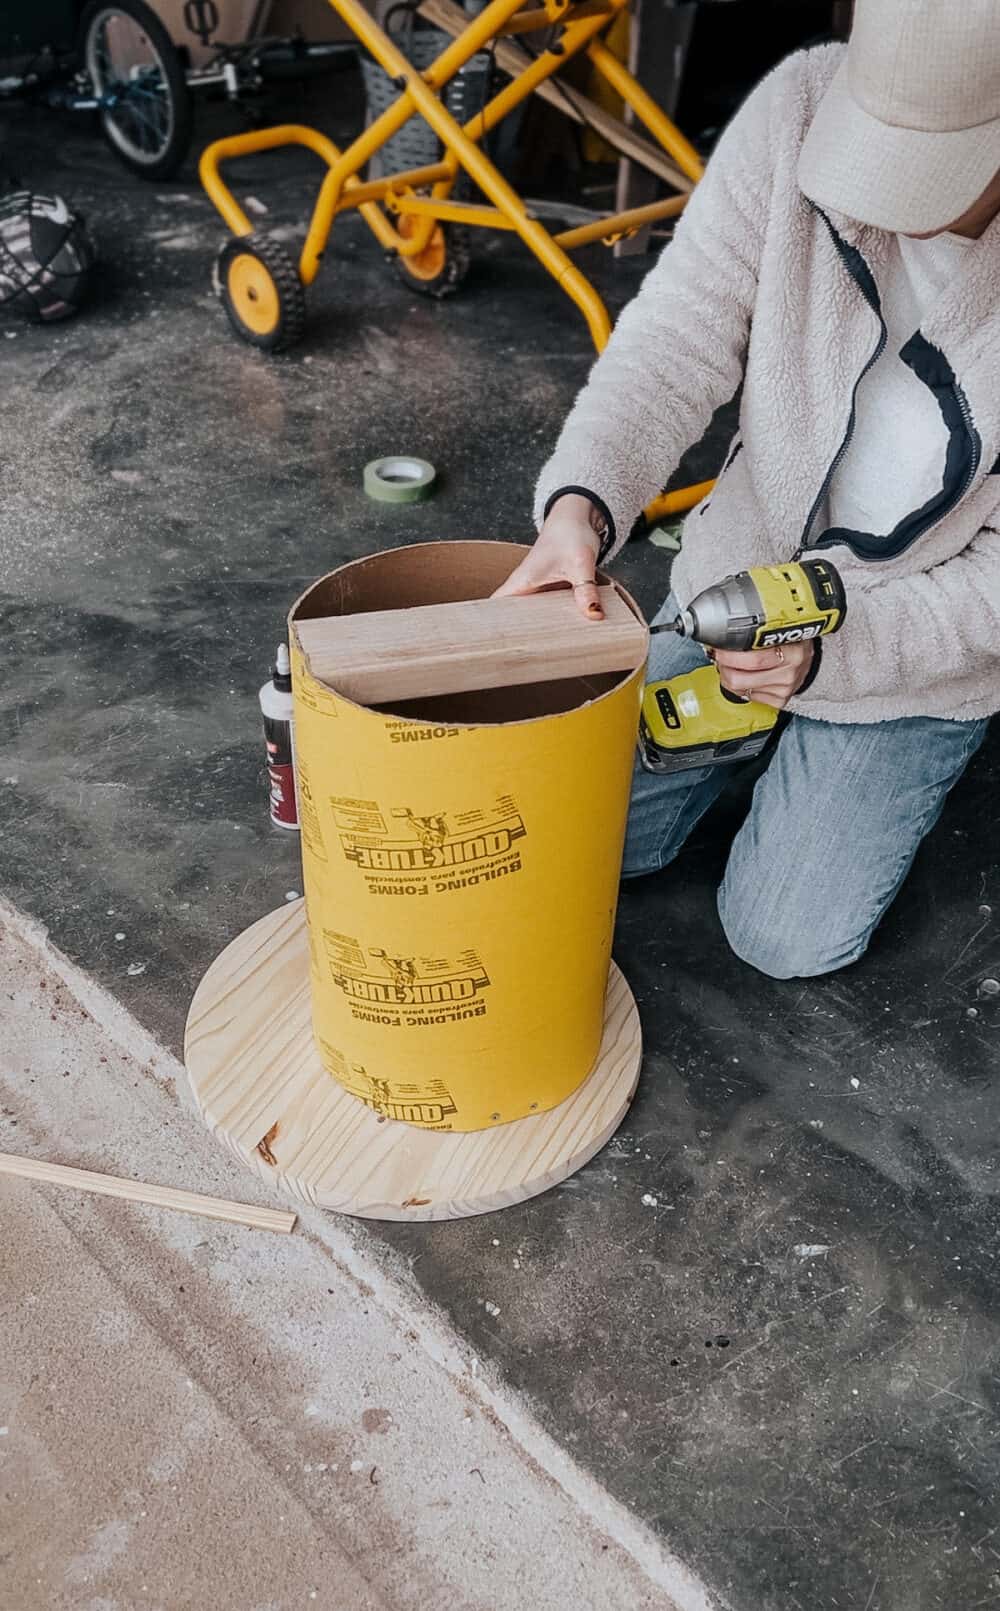
Adding these supports also makes it a little easier to add the tabletop, since you have more than just the edges of the concrete tubing for it to attach to!
Step Three: Cut Wood Trim
Now the fun part starts – you can add your wood trim! I used screen trim (linked in the materials list above), because it was more affordable than the half round dowels. If you don’t mind spending a little extra, you can use half rounds. They are a lot more rounded and will create a slightly different look in the finished product, though. So, keep that in mind when shopping!
Alternatively, if you’re wanting to paint your table and want to spend less, you can use this vinyl lattice molding. It’s half the price of the wood trim, and after a few coats of paint you’ll never know the difference!
Whatever trim you plan on using, you’ll need to cut a bunch of pieces. I found that for my 18″ side table, I could get 5 pieces out of each board and I needed exactly 50 pieces to cover my 12″ concrete form.
I used my miter saw to cut the pieces down and it only took a few minutes. You can use a hand saw or other cutting tool if you don’t have one already, but the miter saw is easily my most-used tool after my drill, so I’d recommend getting one!
Don’t know how to use a miter saw? This blog post will give you a full tutorial!
Step Four: Attach Trim
To attach the trim, I used my trusty DAP Weldwood Professional Wood Glue. It’s my go-to for any project that requires wood glue because it never seems to get stopped up, it always works, and the consistency is so easy to work with. Trust me when I tell you I’ve used a lot of different wood glues. This one is by far my favorite.
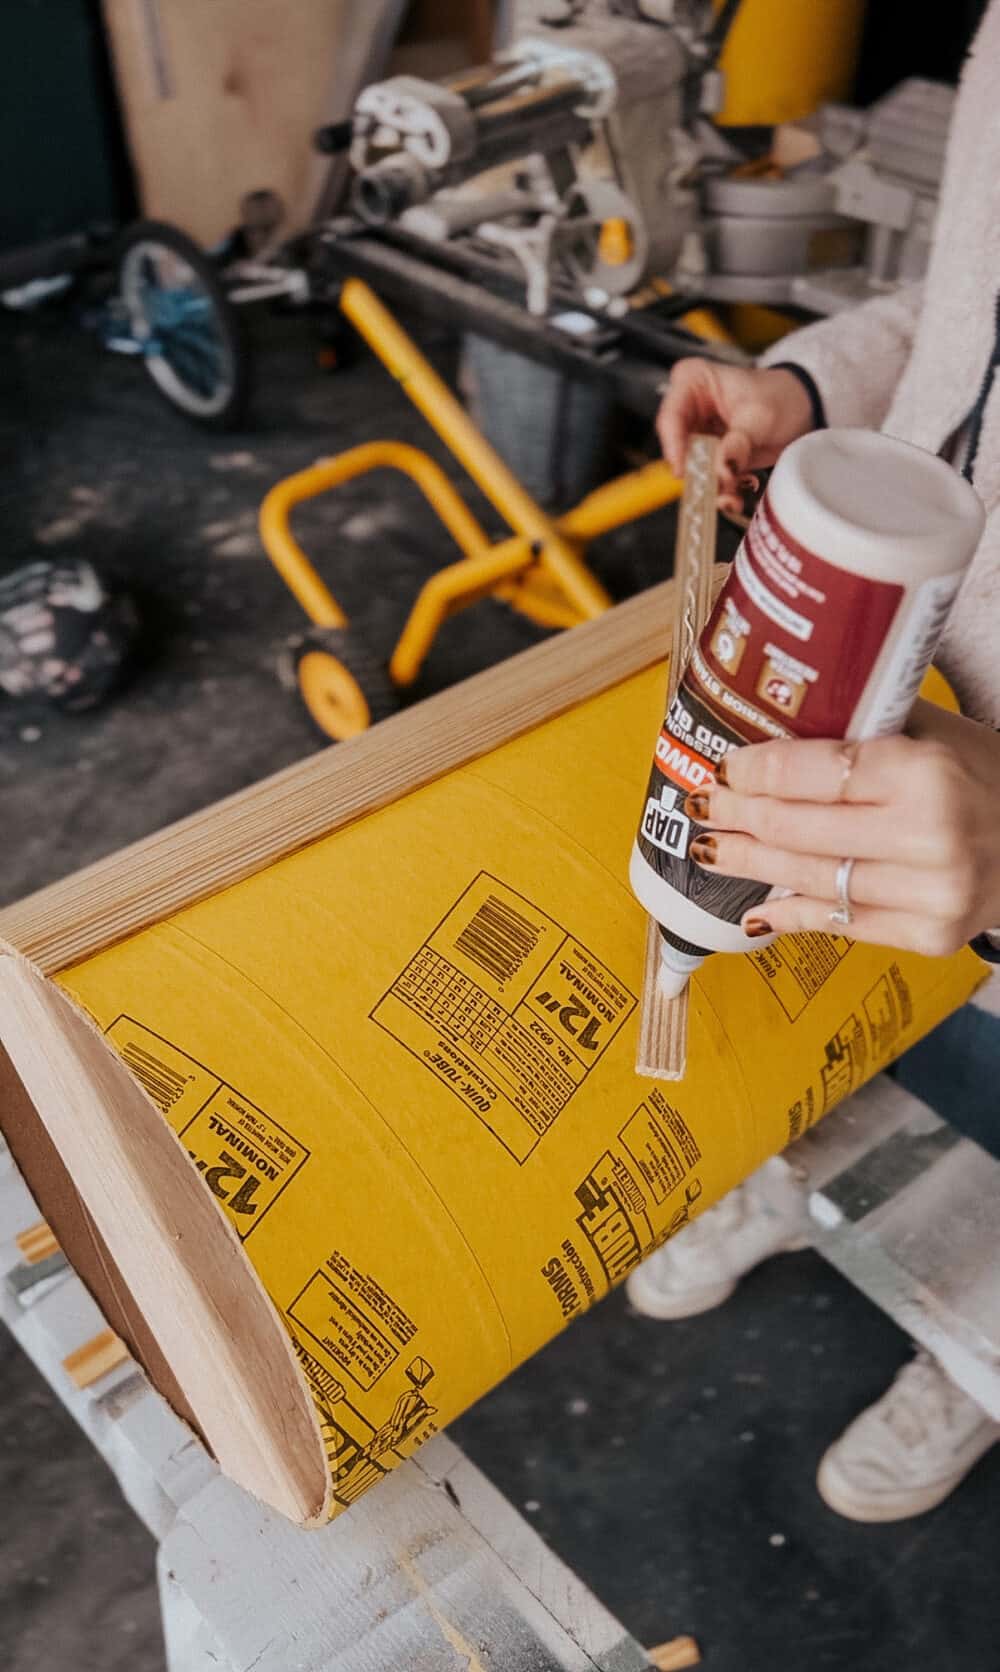
Apply a generous amount of wood glue to the back of each trim piece, then attach to the concrete form. For my first piece, I really wanted to make sure things were straight. So, I used a speed square to help line everything up, and it worked pretty well!
To help hold the trim in place while the glue dried, I used my pin nail gun to add three small pin nails in each board. If you want to skip this step, the wood glue is very strong and should hold up just fine. But, since it’s a round table base, I was worried things would shift while the glue was still drying. Or, you know, while I was trying to apply all the trim! Adding in some small nails to hold it steady helped a ton and didn’t take any extra time. Continue working aaaaall the way around your concrete form until it’s fully covered.
a note on the trim:
I ended up with a small sliver at the end that wouldn’t quite fit a full piece. I could have ripped down one of the trim pieces to fit perfectly in there, but they’re small and i knew it would be hard. So instead, I just layered one piece of trim on top of the gap. It sits on top of the two pieces on either side of it, but our table will be going in a corner. So, I can easily just make sure that section is always facing the wall. If your table isn’t in the corner, you could just have the side face your couch! It’s barely noticeable, and bothers me zero percent.
Step Five: Attach Table Top
Once you’ve finished attaching your trim, the table is almost done! All that’s left to do is grab your wood round and attach it to the top. I applied my Weldwood Pro Wood Glue to the support piece inside the form, as well as all around the form. Then, I carefully placed the wood round on top so that it was centered. I put a couple of nails through the top and into the support piece to hold everything in place.
And just like that, I had a little table!

Step Six: Finishing + Staining
It’s not entirely necessary, but I decided to take the time to use wood filler on all of the small nail holes around the table. The pin nails leave behind very small holes that are barely noticeable, but I knew they’d bother me. So, I used my favorite DAP Professional Wood Filler to quickly fill in each hole. Once it dried, I sanded it down with 120-grit and 220-grit sandpaper and was ready to stain!
Click here for the complete guide to how to use wood filler!
I went with Ipswich Pine by Minwax to stain my table. I wanted something light to contrast with the really dark walls, and I think it was the perfect color. Since this is in our bonus room and will constantly have kids touching it and moving it around, I also went ahead and sealed it with this spray lacquer. It only takes a few minutes to apply that sealing coat with a spray lacquer, and it’s worth it for the peace of mind!
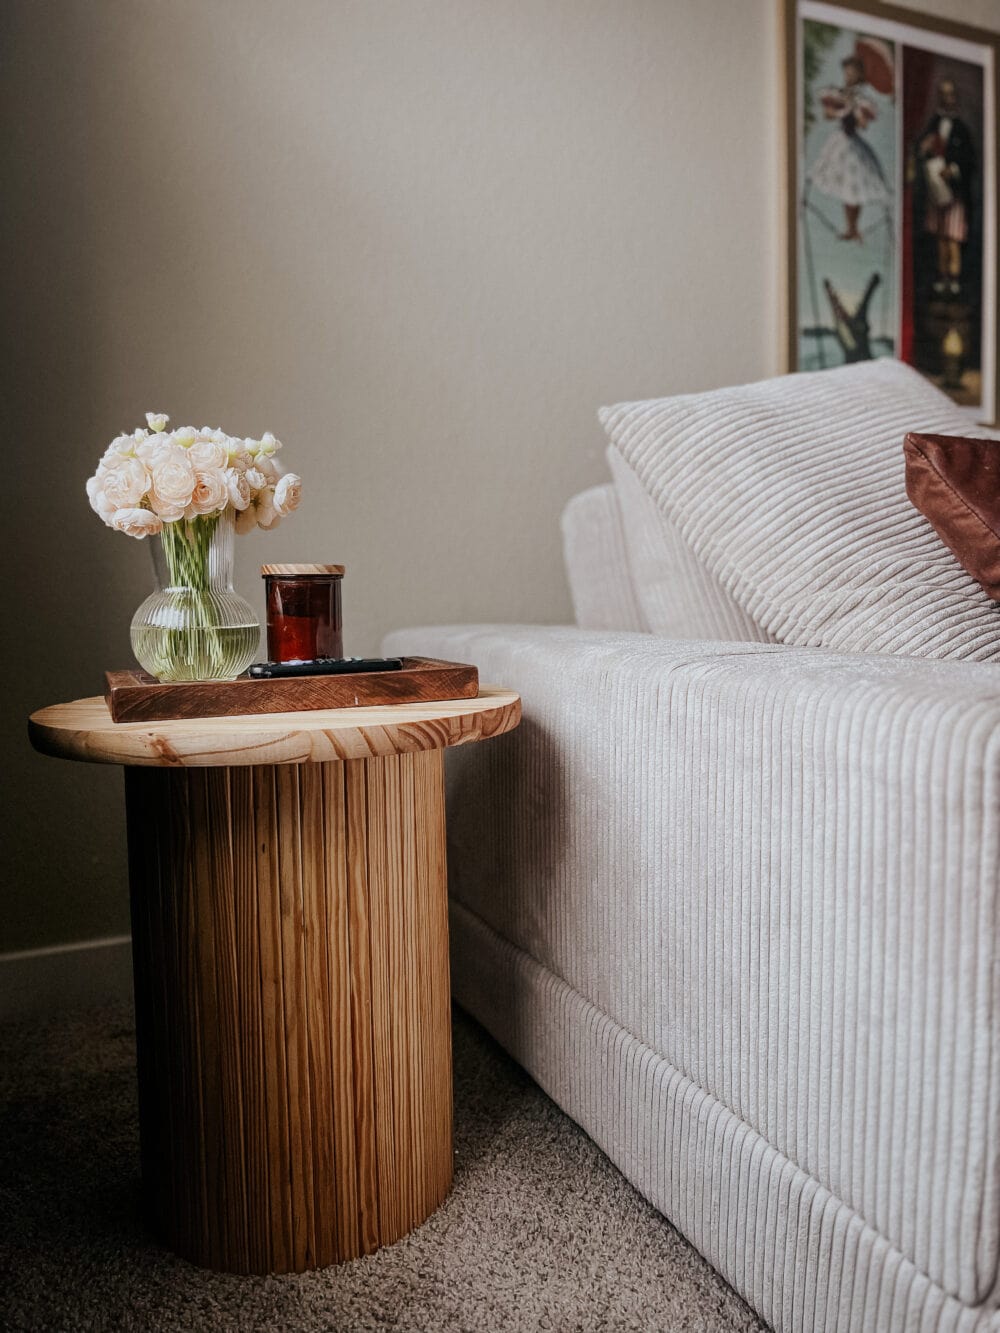
And there you have it. The cutest little DIY fluted side table around. It fits perfectly into the corner of the bonus room, and things are starting to feel way more functional up here! I’m feeling so much inspiration for the next few projects up here, so keep your eyes peeled for more coming soon!
