Our New ELFA Entertainment Center
Our upstairs bonus room has historically been one of the most frustrating spaces in our house for me. A few years ago, we gave it a “phase one” makeover, and it helped a lot, but the storage and organization systems have just never really been enough. As a result, the room is almost always a complete disaster. I don’t love hanging out in super chaotic spaces, so it’s more or less a room we’ve given over to the kids. And…it looked like it, too.
But, Corey and I have long been dreaming of making some more permanent changes in here that would make it easier to keep up with the cleaning and (hopefully) more likely we’d actually like being in there. I’m not exaggerating when I tell you that today’s post is a solid three and a half YEARS in the making. Three and a half years of plotting and dreaming and thinking and planning… and we finally get to dive into phase two of the bonus room makeover!
Today, I’m taking you along on the journey of designing and installing our new wall-to-wall ELFA entertainment center in the bonus room. As a full disclosure, The Container Store provided the products for this post as part of my partnership with them over on Instagram this year. But, I’m under no requirement to share it with you on here… I just wanted to take the time to do a deep dive on why we went with this system, what we think so far, and how it’s working for us!
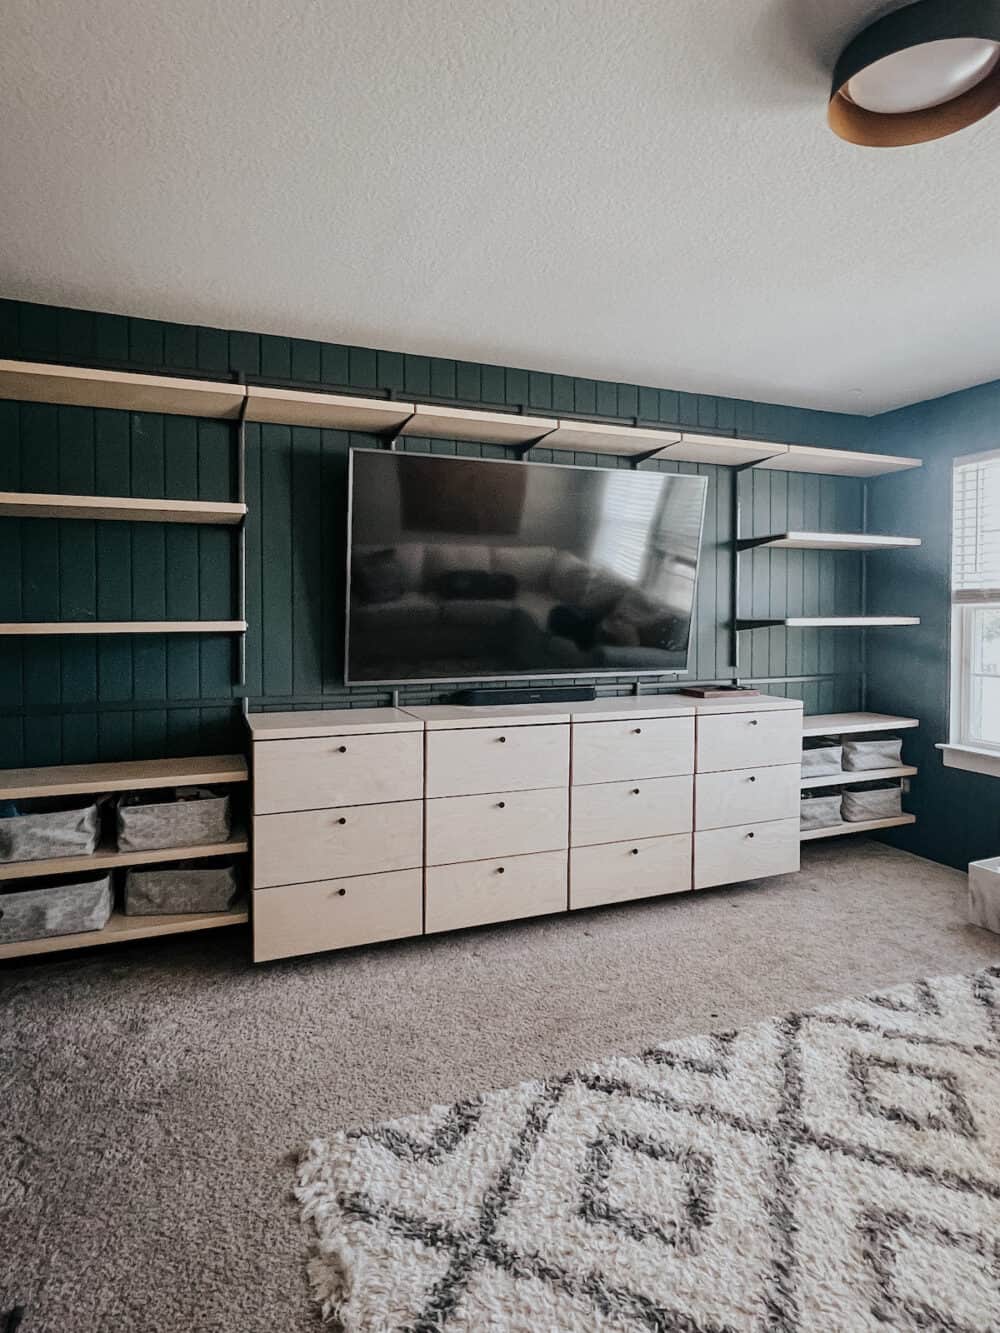
Using ELFA As an Entertainment Center
Typically speaking, when you think of Container Store’s ELFA system I imagine you’re like I used to be and think only of closets and pantries. But, turns out, it is so much more versatile than that! I wanted a budget-friendly system that I could install on my own for this space. The Container Store has lots of gorgeous high-end built-in options, but they’re all on the pricier end and have to be installed by a pro. And that’s not really how we roll around here. So, I decided to see what we could do with the more budget-conscious ELFA system. And, I was so pleasantly surprised with the result!
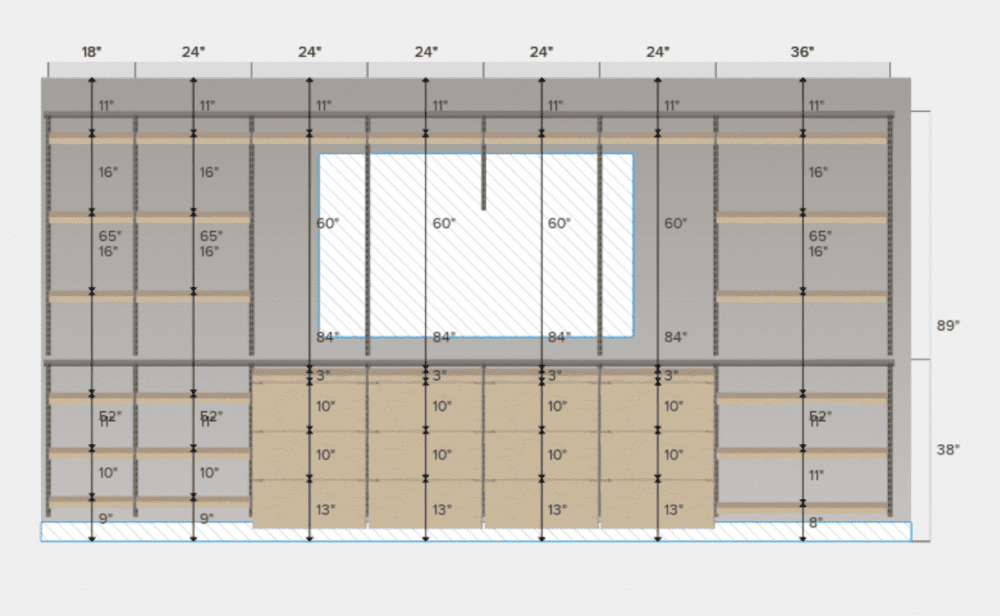
Above, you can see the rendering that I got from the designer I worked with. It’s a free service they have that allows you to work with someone who really knows the system and products to make sure you get exactly what you need.
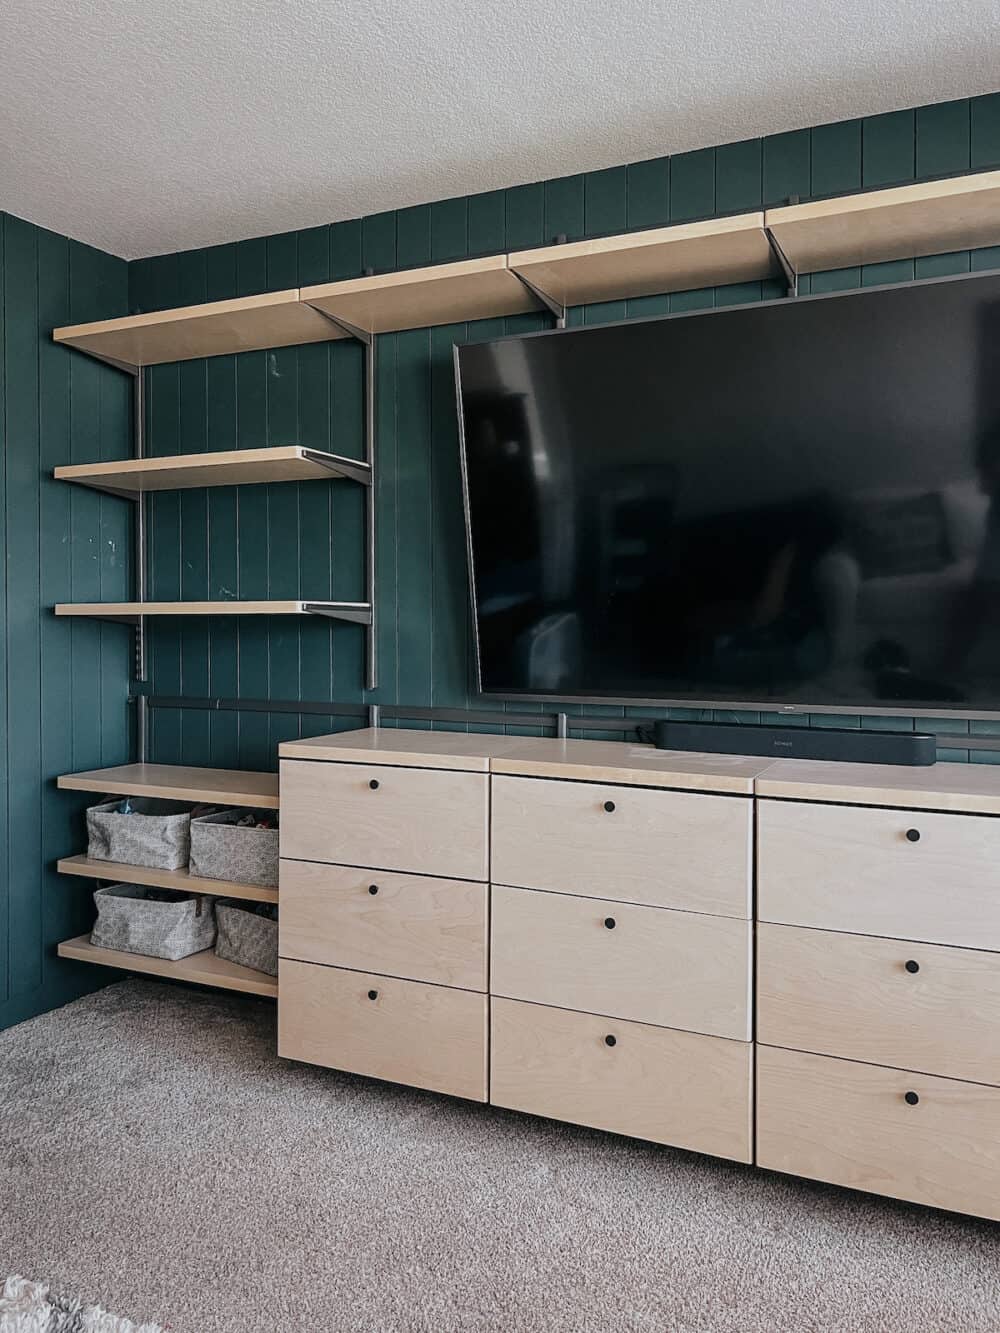
I spent a lot of time browsing the different colors and setups of the ELFA system. We decided to go with a steel gray track system with birch shelving. I loved that it felt a little different than the norm, and the light wood contrasts so nicely with our dark green walls.
My biggest desire for this space was plenty of closed storage (hence the drawers), and LOTS of shelf space. We store 90% of the kids’ toys in here, so I need a system that will actually hold them all. And, Corey and I have been dying for a place to display some grown-up LEGO sets. So, shelves are a must. This setup gives us plenty of both, and there’s actually lots of room to grow. Exactly how I like it!
Installing Our ELFA Entertainment Center
So, how does it work? I know something like this can be really intimidating if you aren’t a big DIYer. But, I’m here to tell you this is SO SIMPLE. Literally anyone can install this system. I promise.
The one thing I ran into that made it slightly more complex for me is that I was installing it on shiplap that’s on top of drywall. It was basically impossible to find the studs under the walls, and adding anchors to shiplap isn’t super fun. I ended up using some toggle bolt anchors anywhere I didn’t hit a stud. And then, I had to pre-drill each hole to check for studs before I went. It wasn’t too big of a deal, but it definitely slowed me down!
The Track System
The ELFA system runs on tracks, which makes the installation process really simple. You start with horizontal tracks that need to be drilled into studs (or into anchors). Once those are fully in place, all you have to do is hang the vertical tracks on them. Then, add your shelving! It’s recommended to drill the longer vertical tracks in place using a screw. But, the shorter ones just get hung right on the horizontal track.
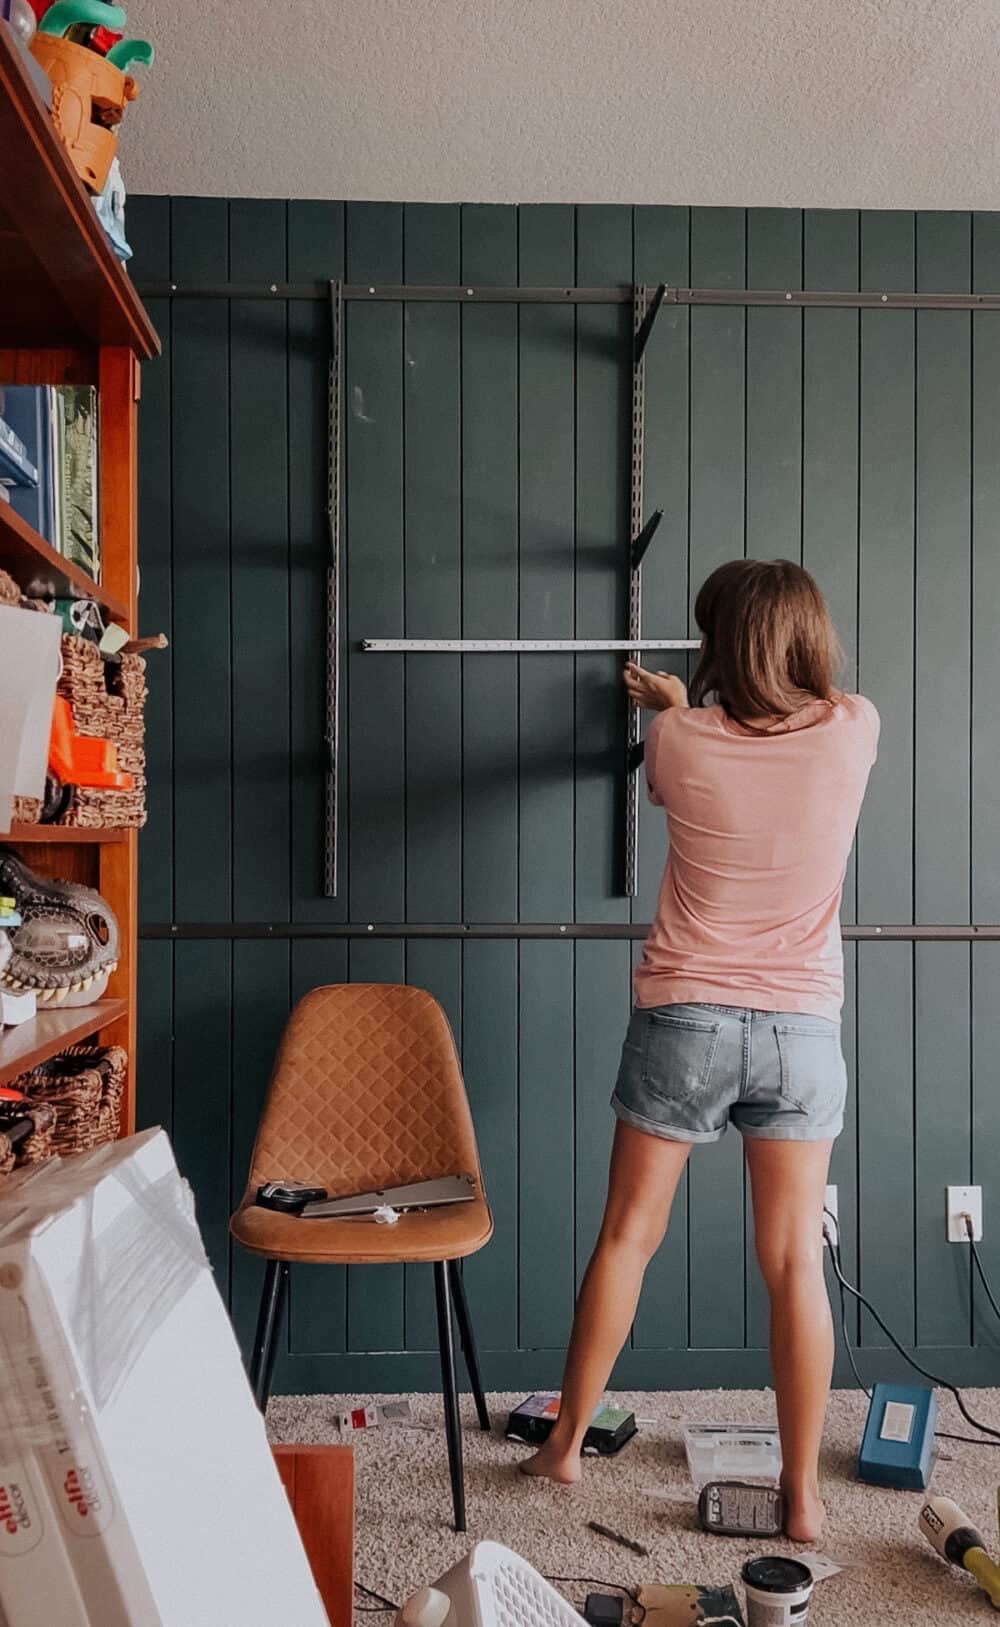
This system makes it so that once you have those vertical tracks up, the rest goes really quickly. I also love that the track system means it’s really easy to change things up. As our kids get older, if our needs change, it’ll be really easy to totally transform this setup without a lot of work. I love a system that can grow with us, especially in a space that’s dominately used by our kids.
Finishing Details
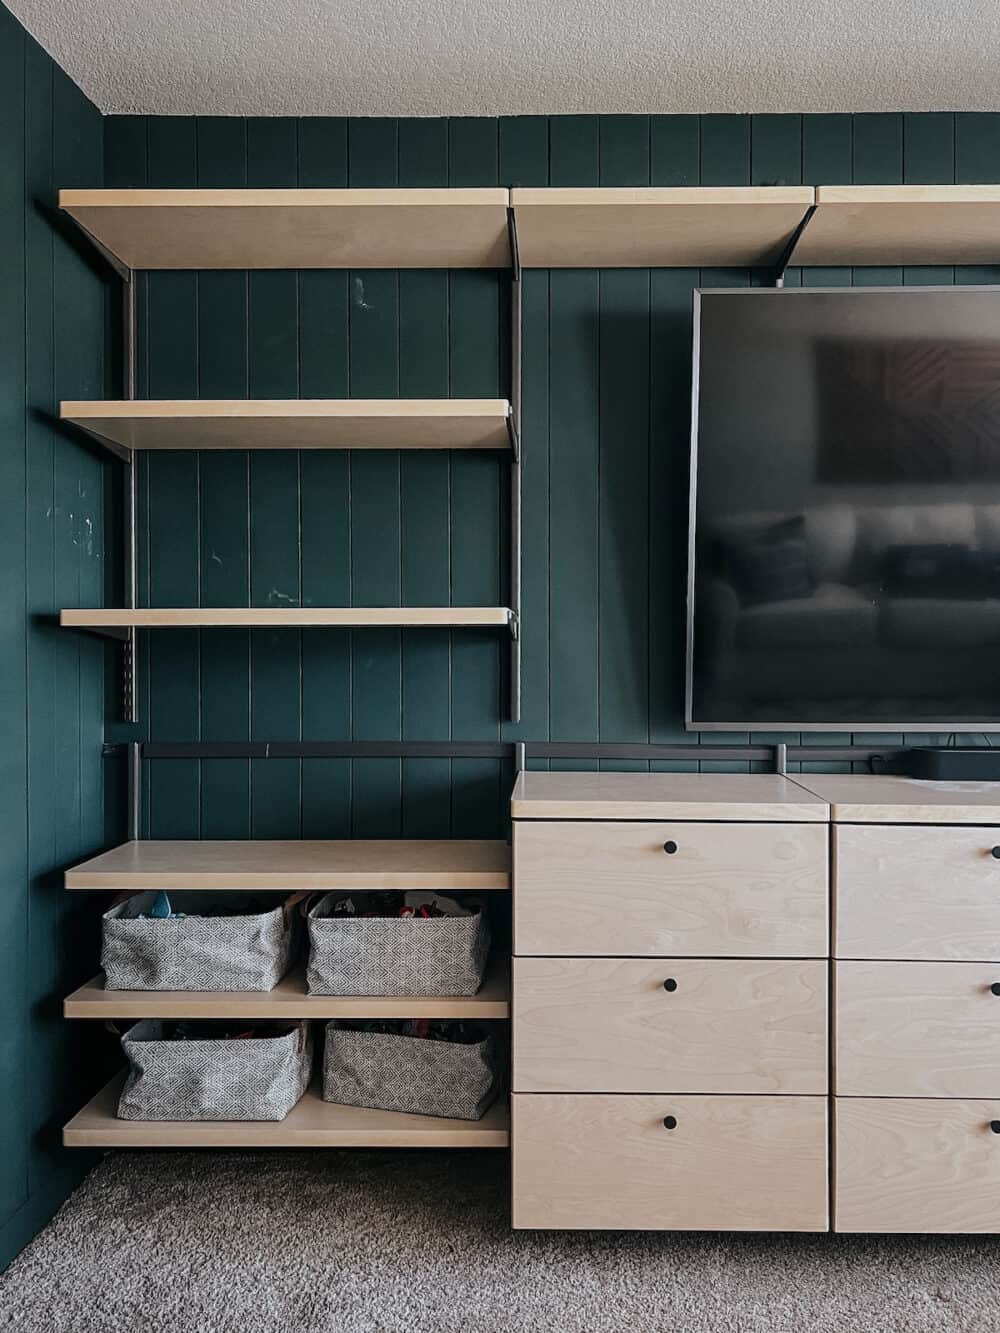
I think it’s also worth taking a second to point out all of the finishing details that really make this feel special. Without some of these finishes, it might feel like a closet system being used in a bonus room. But, with these thoughtful little touches, it feels like it was made for this exact space. And it was!
All of the hardware has coverings that you can use to hide the “ugly parts”. Everything from the brackets to the track system has something you can use to cover it up. This means you aren’t seeing the bracket holes, the screws, or anything unsightly. And, if you ask me, that’s the KEY to having this look really custom and special!
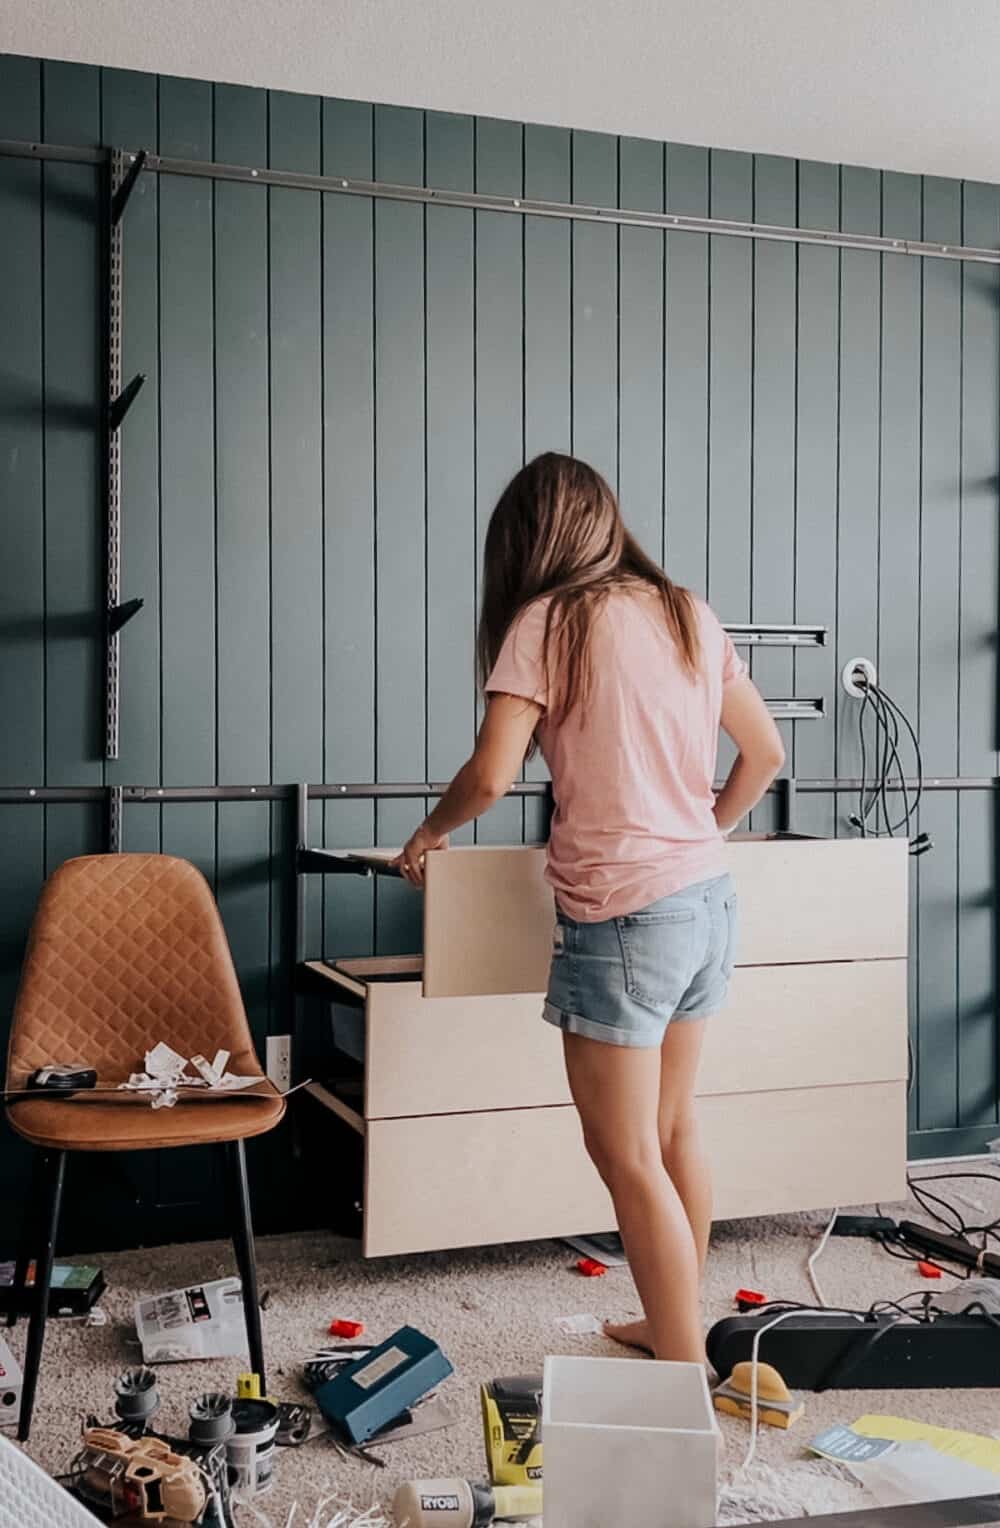
Another really special feature that surprised me was the drawer fronts! I thought the ELFA system only had mesh drawers, so when I saw you could make them look like wood drawers, I was blown away. It only takes a couple of minutes to install these little drawer fronts, and they make the biggest difference!
I’ve been slooooowly working on organizing things and filling it up. I’ll be back later this week to show you the nitty gritty of how I’m organizing our ELFA entertainment center. Because, it’s a beast!
What Did it Cost?!
As I mentioned before, I received this system as part of our ongoing partnership with The Container Store. But, I fully believe in sharing prices whenever possible, so here’s a rundown of what this would have cost us if we hadn’t been working with them.
- DIY Installation: $5,388.50
- Professional Installation: $7,005.05
I think that number is slighly inflated because we had to make some changes to shelving, so this cost is before returns. I believe it was under $5,000 once you factor that in.
Is it cheap? Absolutely not. But, it’s far more affordable than other professional built-in options, and you can’t beat how easy it was to install! I’m so so happy with the finished product, and I’m really excited to see how it grows with us over time.
Sources
Looking to build something like this for your home? I’ve got you covered! I’d recommend starting right here and talking to a designer. But, here’s the links for most of the pieces we used, so you can browse and get an idea of what you like!
- Birch Shelves
- Drawers
- Drawer Fronts
- Graphite Hanging Track
- Hanging Track Cover
- Graphite Horizontal Track
- Track Cover
- Graphite Brackets
- Bracket Covers
