
DIY Floating Shelves
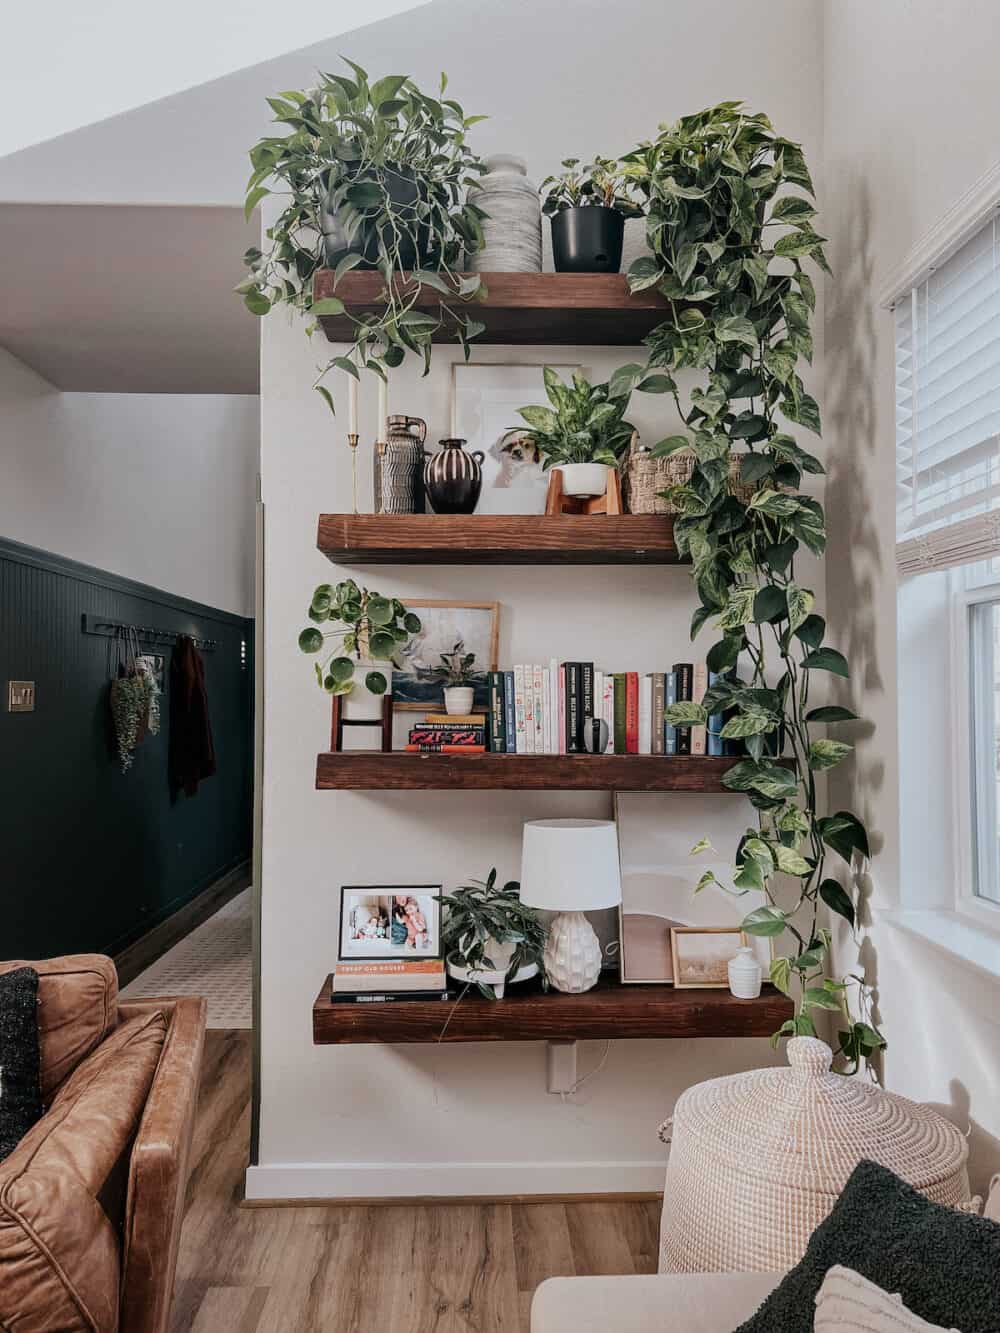
When I’m doing a renovation in my home or adding something to it, my goal is always to make it feel like whatever I’m adding has always been there. I have a newer home, so it’s not about maintaining any sort of historical accuracy. I just want things to feel natural. I want people to say, “I can’t even imagine this space without it”! The project I’m sharing with you today is one of the projects that I think most fits into that category, out of everything we’ve done in our house. It’s also one of the things I get asked about more than anything else – our DIY floating shelves in the living room!
I often have people ask where I purchased them, only to be shocked I actually built them myself. And, the best part of the whole thing is these DIY floating shelves are incredibly easy to build!
You might remember that this is a project I’ve tackled more than once. I first built these in the living room of our second home. They worked so well for us that as soon as we started brainstorming things for our current home, we knew we had to do it again.
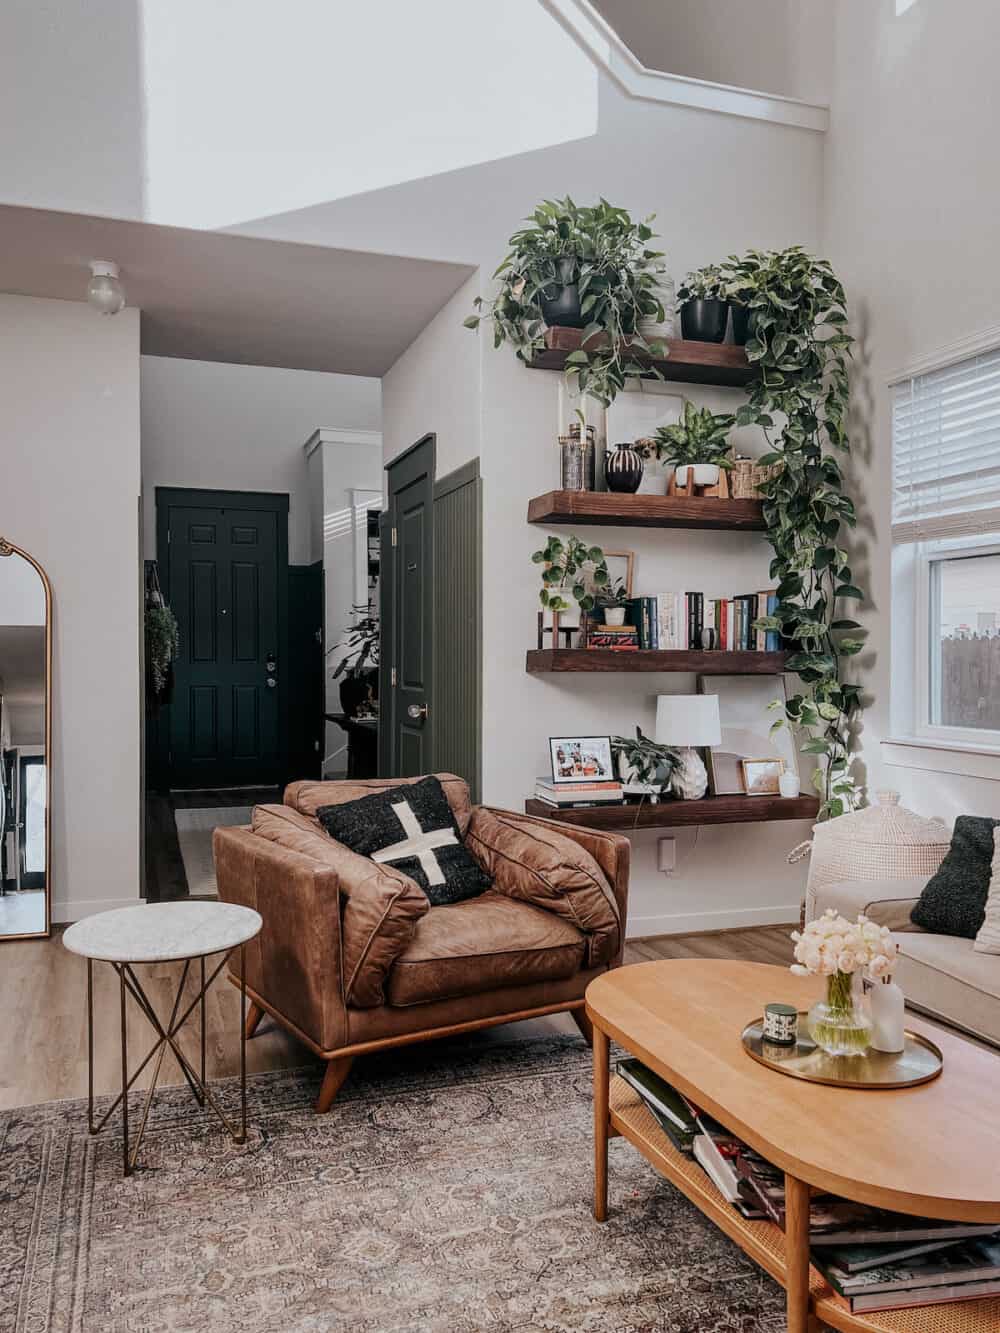
We’ve had these shelves in our living room for almost four years now, and they’ve held up beautifully. This little expanse of wall would feel so empty without them, and I have the best time styling them!
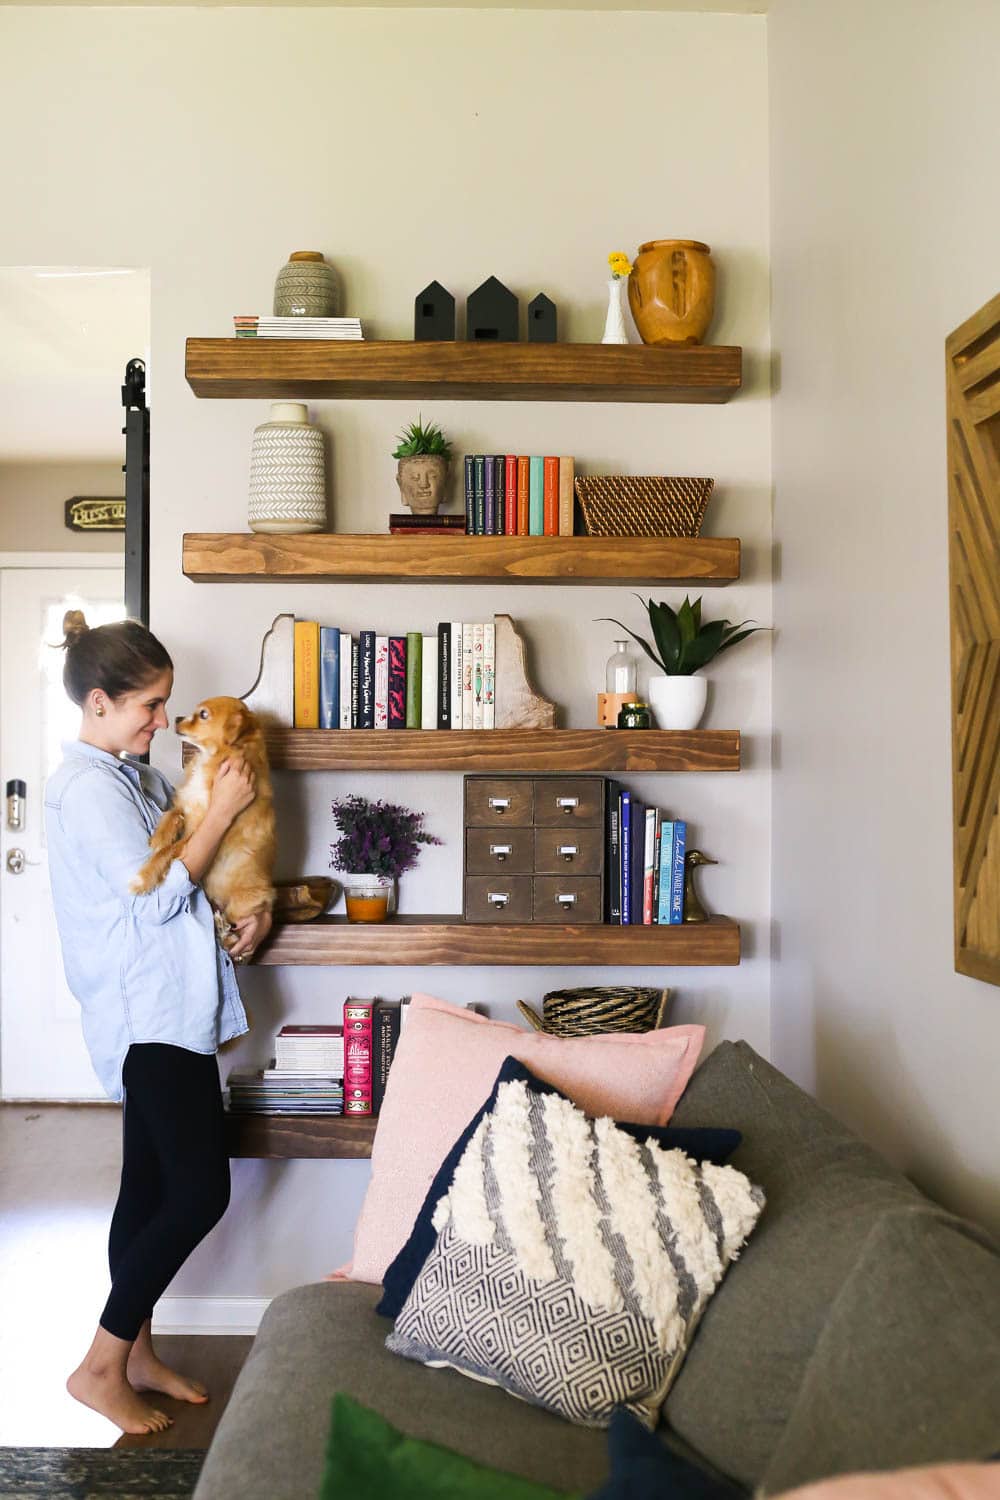
Here’s how they looked in our second home’s living room!
If you want to try this project yourself – and you should! – I’ve got all the details for you here today.
How to Build DIY Floating Shelves
Tools + Materials Needed
The amount of wood you’ll need to purchase will depend on sizing for your shelves! Do the math before heading to the store to determine how much you’ll need.
Video Tutorial
I know some of us learn better through a video format, so I’ve compiled my Instagram stories from this project into a video from you. It’s not the most thorough or comprehensive video around, but it gives you some visuals you can’t get through images! Feel free to watch this before reading on to help you picture how it all fits together before you dive into the tutorial.
Preparation & Planning
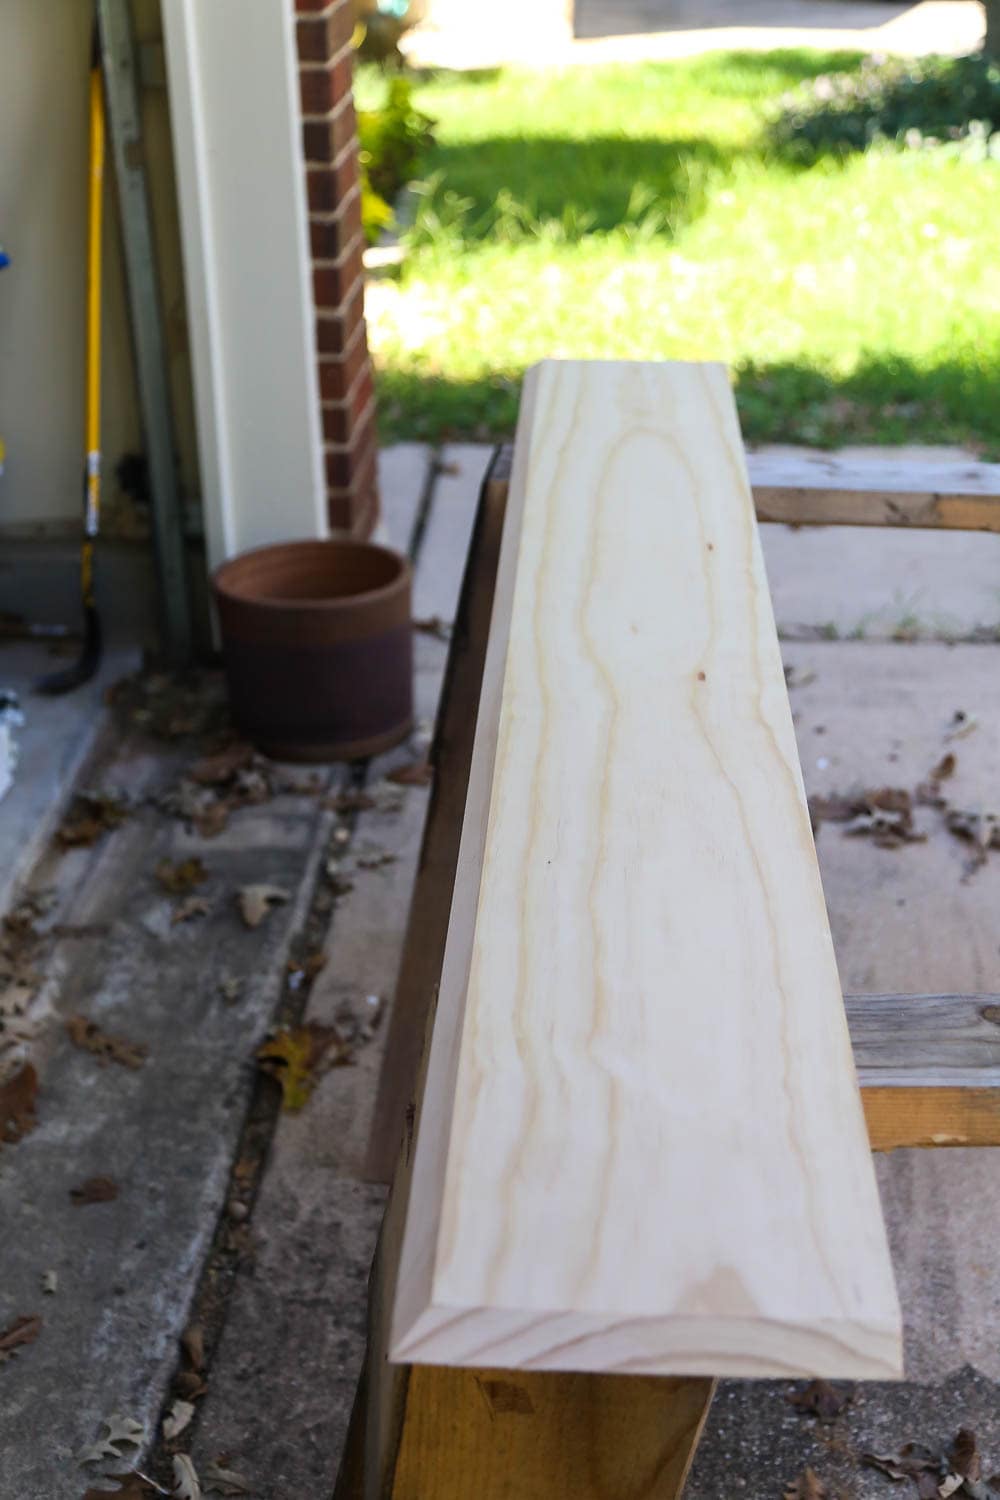
Your first step to adding DIY floating shelves to your home is to figure out how large you want them to be. I’ve seen similar tutorial all over the place that use 2x4s for the supports and then build the entire shelf around them. This means that the finished shelf ends up being close to 6″ thick. I really wanted something a little less chunky, so we decided to rip 2×4 boards in half (using the table saw) for our supports, which allows the shelves to be about 4″ thick instead.
Note: An alternative to using a table saw to ripping down the boards is to simply buy 2×2 wood to start with. The only potential issue there is that 2×2 wood is often warped. It can be really hard to find a good piece that is straight, so if you choose to go this route just make sure you’re picky when you’re shopping!
If you choose to use 2×4 boards for the supports, just know that you’ll want to use a 1×6 for the front and side supports rather than a 1×4.
Once we decided how thick the shelves would be, we measured our space to figure out exactly how long we wanted them. Our shelves ended up being 48″ long. And, to keep things simple we planned to just use a 1X12 board, which ends up making them approximately 11.5″ deep.
Making Your Cuts
Once you have all of your measurements, cut your shelf boards to size.
Here’s your official cut list of each shelf. You’ll need:
- Two 1×12 boards to your desired shelf length
- One 1×4 board to your desired shelf length (this will become the front of the shelf)
- Two 1×4 boards to the depth of your shelf (should be about 11 1/4″)
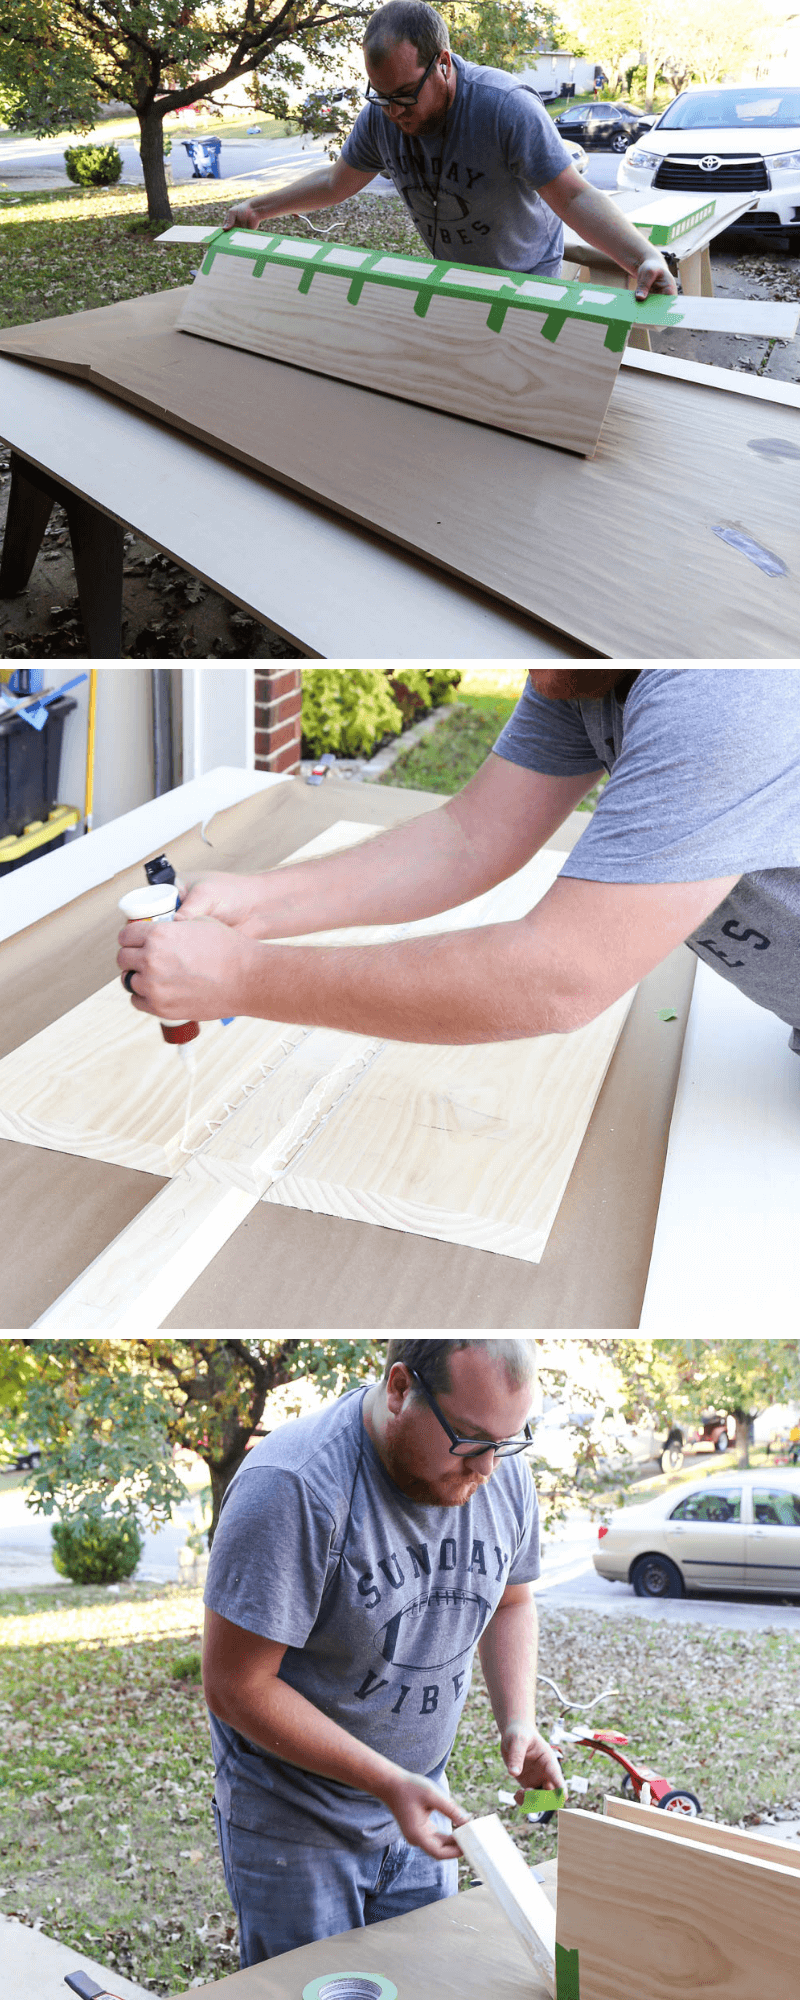
Once our boards were cut, we angled our table saw to a 45-degree angle and mitered the edges of our boards, as you see in the photo above. This isn’t a vital step, but it will create a much more finished look in the end! If you choose to do this, you’ll miter:
- All four sides of the front 1×4 piece
- Three sides of the top
- Three sides of the bottom
- Three sides from the side pieces
Note: Don’t want to miter your edges or don’t have a table saw? No problem! You can create what’s called a butt joint, where you’ll simply push the two ends of the board together. Just know that with this method, you’ll be able to see the end grain of one board, versus not seeing any end grain with the mitering method.
Assembling the Floating Shelves
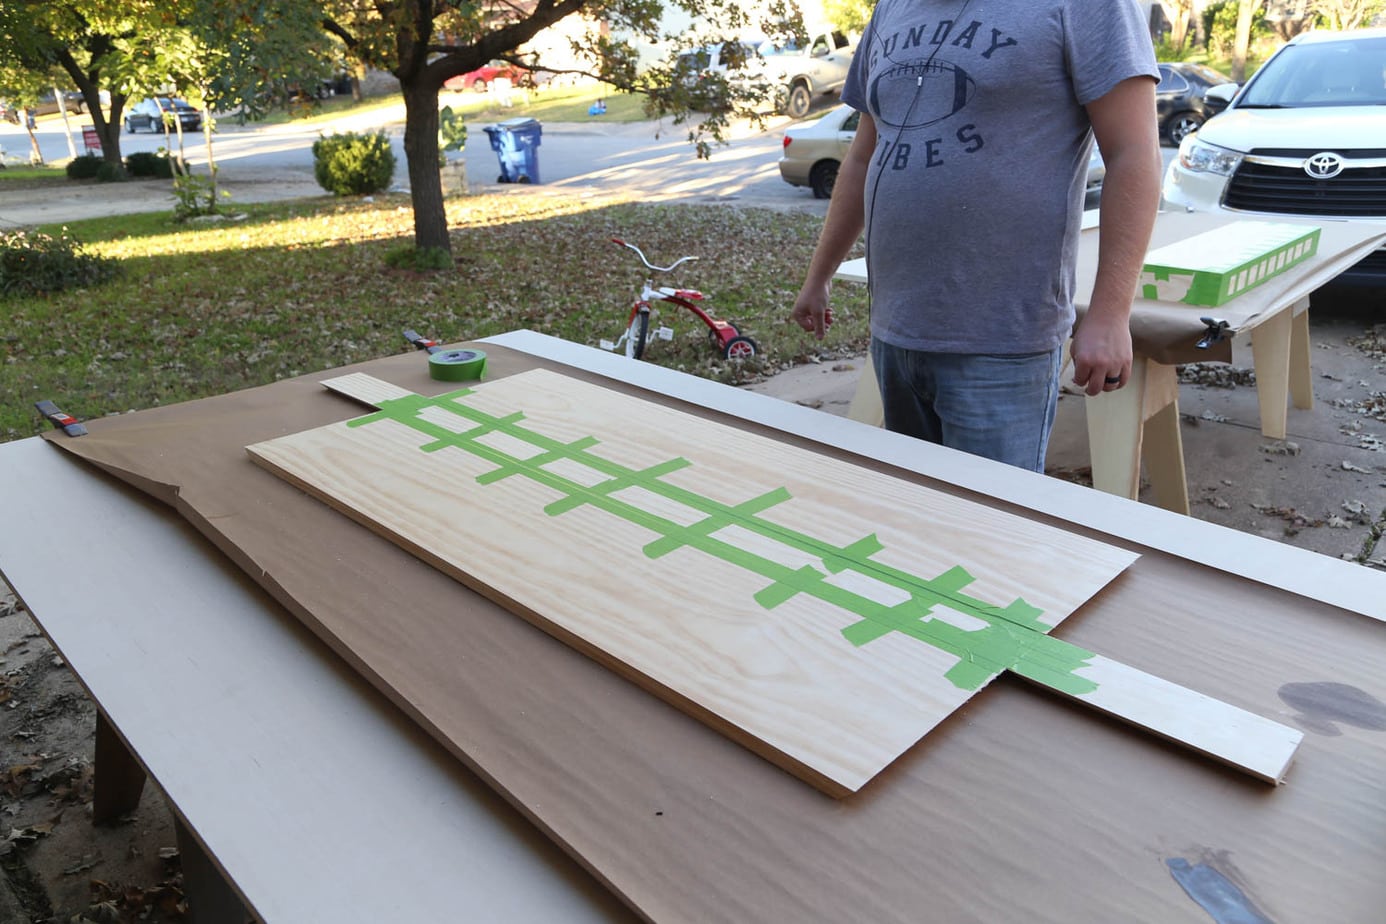
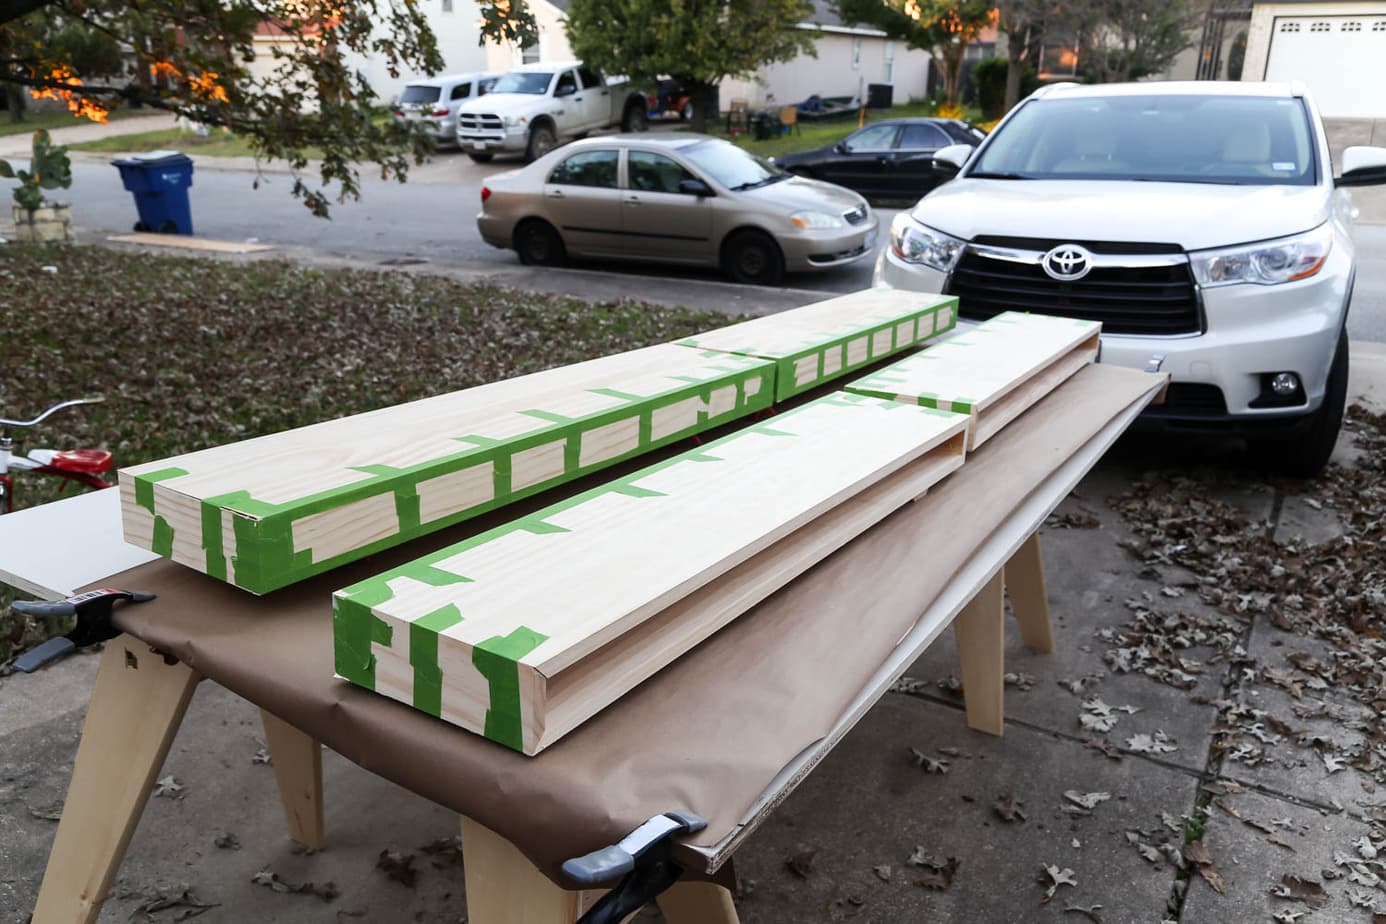
To assemble the shelves, start by laying out your side and front pieces all in a row with the mitered side facing down. Take a minute to line them all up perfectly so that they’ll fit together without any gaps. But, don’t stress too much if there are some imperfections! Wood filler will help with that. Once you’ve lined those up, grab the top and bottom pieces and line them up with the front piece, like so:

Once you’ve ensured everything is as lined up as it can be, you’re ready to begin taping. Grab your painter’s tape and tape all of the boards together. This will basically act as your clamps to hold everything together as the glue dries. It should look something like this when you’re done:
After you’ve got it all taped up, it’s time to flip the entire thing over so you can begin gluing. Carefully grab the boards and slowly flip it so that the mitered side is facing up. Then, add your wood glue and use a small glue brush to spread it to all of the seams.
Once you’ve applied your wood glue, you can carefully lift each of the sides and fit them together like a puzzle. Use strips of tape on each of the corners to help hold the sides and top together while it dries. Here’s a quick visual of what that sequence of events looks like, from flipping it over to the final taping:
Patch, Sand, & Stain The Shelves
Once your glue has fully dried, you’re ready for the final touches! Use wood filler to fill in any small gaps, sand the shelves thoroughly (be sure to pay special attention to the corners and edges!), and choose your paint or stain color. I chose to go with a mix of 1 part Golden Oak stain and 1 part Dark Walnut stain.
I applied polyurethane after the stain dried. Afterwards, I let the shelves dry overnight.
Next up? It was (finally) time to hang them!
How to Hang Your DIY Floating Shelves
The basic principle of hanging the shelves is very simple: build a frame to support the shelves, then mount it to the wall.
The first time we did this project, we used a slightly different method that we weren’t thrilled with. For our second go-round, we updated our technique and were much happier with the outcome! Below is how we built and installed the supports the second time around.
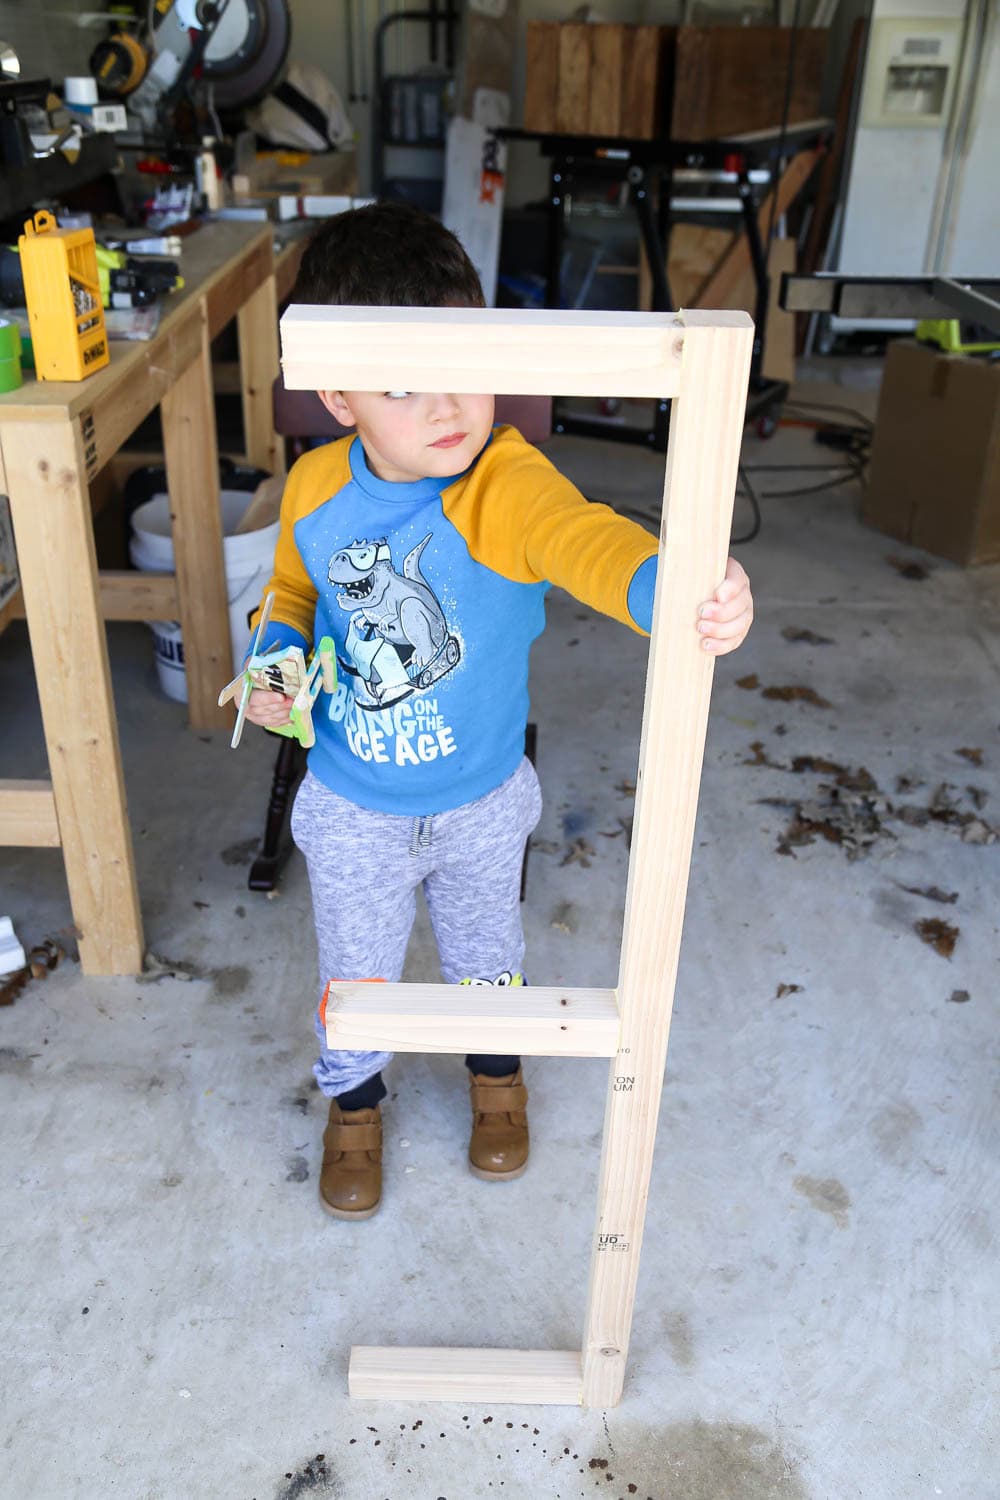
Build E-Shaped Frame
Remember how we talked about ripping 2x4s in half for the supports? Here’s where they come into play.
Start with one long piece of 2×4 that’s roughly 2-3 inches shorter than the length of your shelf. Then, cut three pieces that are 2-3 inches shorter than the depth. These four pieces will make an E shape that will act as the support for your shelf.
We used pocket holes to attach the pieces together. We just used our Kreg Jig system to drill a pocket hole in each of the shorter pieces, then used wood glue and a pocket hole screw to attach it to the longer piece.
Here’s a visual of what it will look like:
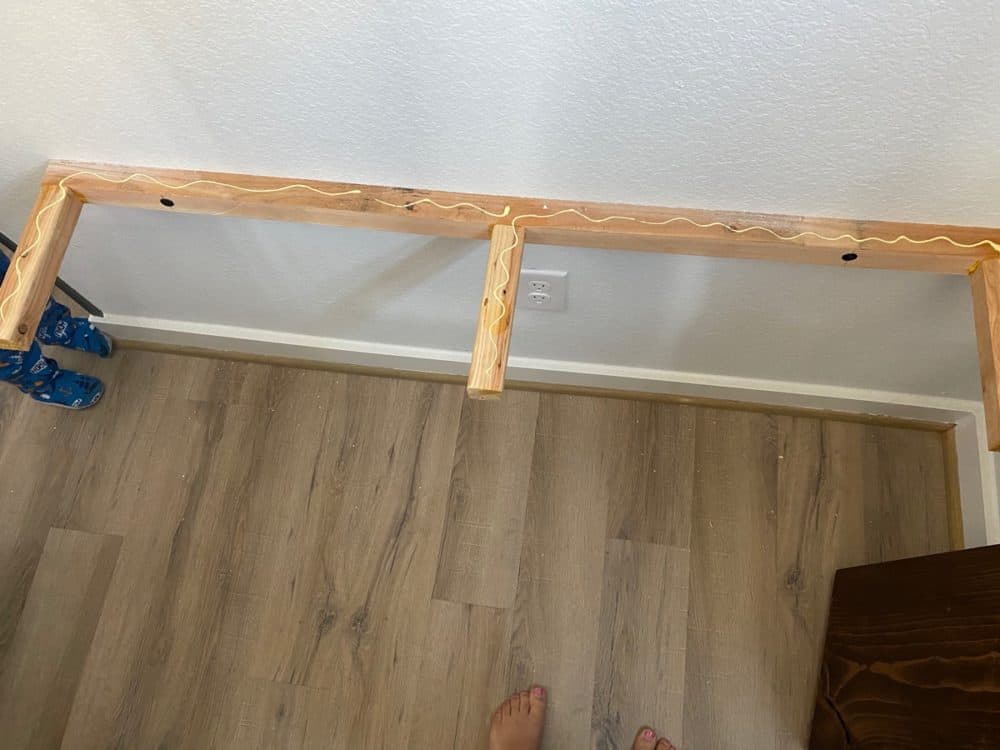
Hanging the Shelves
If you’re having a hard time wrapping your brain around how this all fits together, basically, the shelves act like a sleeve that fits around the support boards. The opening in the back of the shelves is slightly larger than the supports (to allow for some wiggle room when you’re installing them) and the support simply slides right into the hole.
To hang it, you just locate the studs in your wall (here’s my favorite wall stud finder) and use extra long screws (we really like these heavy duty screws) to drill the support directly into the wall.
Note: the image below shows the original supports we made, not the ones we used the second time around (and liked better). I’m just including it to give you a visual of how they fit together!
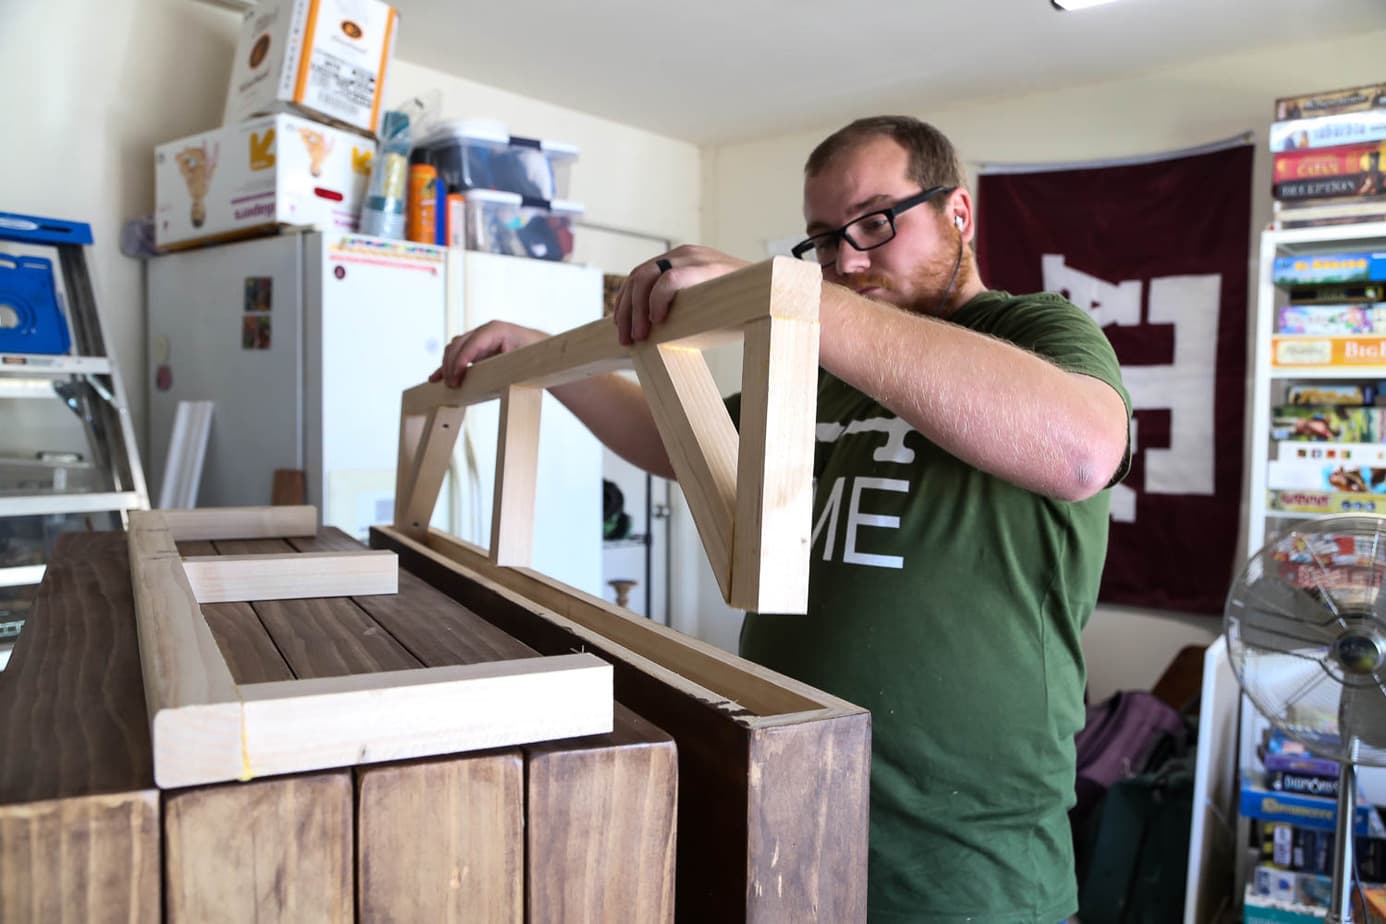
Once you have your supports on the wall, add wood glue all around the top of the support, slide your shelf into place, and use your pin nailer to add some nails along the back and sides to hold it all steady while the glue dries. If you don’t have a pin nailer, you can screw the shelves into place instead.
And then, you’re ready to fill ’em up! If you need some tips and tricks, I’ve got a post. all about shelf styling and the best shelf decor to get. you started!
Frequently Asked Questions
How Far Apart Are Your Shelves Spaced?
- The first shelf sits about 23″ from the floor. This was a pretty arbitrary number that we chose based on the placement of the outlet, our desire to eventually find some baskets to put underneath it, and pure aesthetics.
- The top shelf sits at just over 8′. Again – totally arbitrary. I had Corey hold a tape measure up at various heights until I found something that looked good.
- The spacing for the other two shelves was just determined with some basic math – we took the total height we had remaining (8′ minus 23″ for the bottom shelf), subtracted the total height of all of the shelves (they’re each 3.5″ tall, so a total of 14″), and divided the number that remained by three (the number of spaces between shelves). That gave us about 20″ between each shelf.
Shelf spacing definitely is an art, not a science. Don’t be afraid to break the “rules” here. I chose to space my shelving quite a bit more than normal (typical shelf spacing is about 12-15″) because I wanted the freedom to store tall vases, books, and even a lamp on my shelf. We have crazy tall ceilings in this room (18 feet!), and I think it’s important to use that space as much as possible so the room doesn’t feel off-balance. If you have shorter ceilings, you may want to hang your shelves a little closer together.
Is There A Simpler Way To Build DIY Floating Shelves?
Sure! You can also purchase floating shelf brackets that make it appear that your shelves are floating without all of the building. They’re really easy to install and just need a piece of wood to be attached to them.
And, like I mentioned earlier, if you don’t want to deal with making the miter cuts, you can always cut your pine boards to length and simply drill them together with butt joints for a really similar look with less effort!
What Type of Wood Should I Use?
This is totally up to you and how much you’d like to spend on your DIY floating shelves.
I used select pine for my shelves, and that’s what I use for the majority of my builing projects. It’s pretty affordable as far as wood goes, and it looks beautiful when sanded and stained properly. If you want something a little nicer, poplar or white oak would also be beautiful – but more expensive – options.
I hope these shelf plans have been helpful for you, and I can’t wait to hear all the details if you decide to try it yourself! This is one of those projects that might look intimidating but I promise it’s easy enough for even beginners to tackle.
Clever design, and well executed!
Gorgeous! I also love those pillows! Can you share where they are from?
Hi! Some are from World Market, some are from At Home!
Hi! These look great! I’m just curious if these shelves can be removed?
Hi! If you screw them into the supporting brackets rather than nail them, then yes, you could easily remove them.
Couldn’t you just use 2×2 I stead of ripping a 2×4? It’s the same width. I am going to build some of these so just wanted to ask
Yes, you can. It’s generally harder to find straight, unwarped 2×2 boards, so it can be easier to rip them down. I just did it this way because it was what I already had on hand, though!
Ballpark for how much this cost? I’m debating between buying “good enough” shelves and making my own, but I know wood can get expensive quickly… (Looks amazing by the way! Great work)
Depends on how many shelves and the size of them, but this wall was less than $150!
Any idea on how much weight these can hold?!
They’re attached to the studs, so they’re incredibly sturdy. I don’t have an exact weight for you, but I haven’t found anything too heavy for them yet!
They look beautiful! Do you have an extra tall ceiling? Lol it looks huge, love it!
I was wondering how much space you left between the shelves? I have a hard time gauging what to do for my own. Thanks!
Our ceilings in this room were 10-feet at the highest point, I believe! And, I detailed a good way to determined spacing in this post right here.
Looks great! I made one and messed up, so I had to build a second. Used walnut for top and ends and front. Pine for supports and 1/2″ OSB for the bottom. Made Cedar plugs to cover screw holes. Spar urethane finish.Sold it for $90.
Now that I know how to do it, gonna build some shorter after Christmas. First was 60″ x 16″ wide, next ones will be 48″ and 36″. Some walnut, some cedar, some hickory and some some cedar, and pine fence pickets – not planed’ smooth Probably make two of each.
I had no plans is why I messed up.
Great idea to decor wall with these floating shelves. I like it 😉