
DIY Vertical Shiplap
One of the coziest makeovers we’ve done in this house in the vertical shiplap in our bonus room. Here’s a full tutorial on how we got this shiplap accent wall done, and how I turned it into a whole room of vertical shiplap!
About 6 months after we moved into this house, we decided to tackle a “phase one” makeover of our bonus room. We spent a lot of time debating what it would consist of, but one thing we knew for sure was that we eventually wanted to wrap the entire room in vertical shiplap.
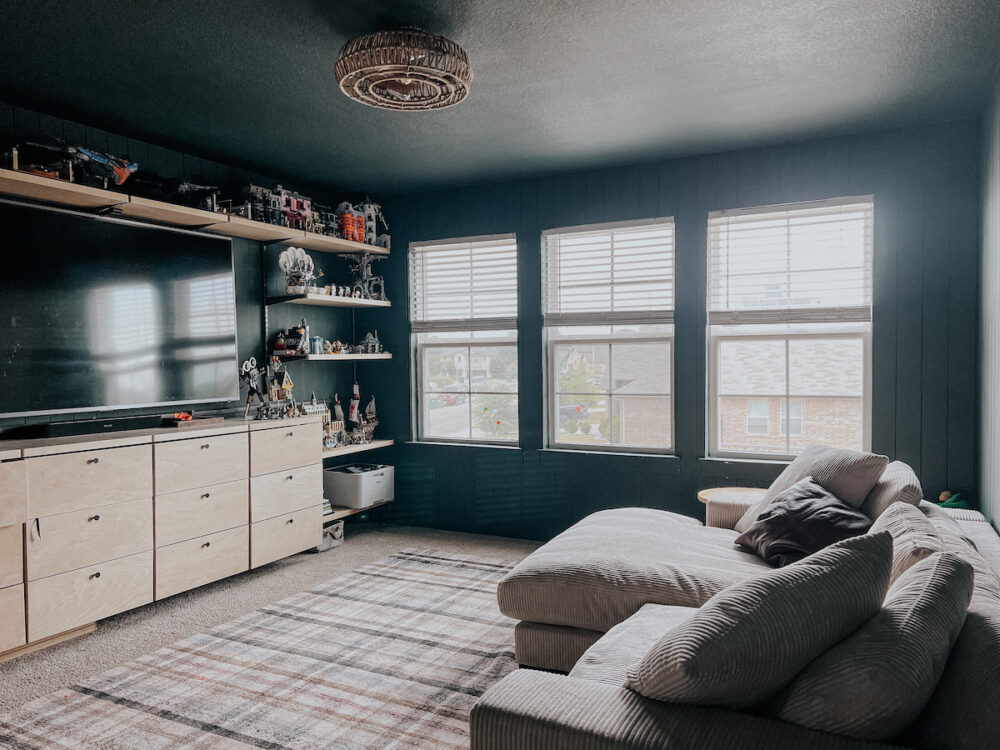
We started small – just one accent wall behind the television. And, over the next few years we slowly added more and more vertical shiplap. And today? The entire room is fully wrapped in gorgeous, dark green shiplap and it brings me SO MUCH JOY!
Installing shiplap is a pretty simple project, and I’ve tackled shiplap on the blog a few times before. But, this was my first time doing vertical shiplap so I figured it deserved its own tutorial. This DIY shiplap accent wall created so much texture in this space, and added so much life. This was my first time shiplapping an entire room, and I’m just so glad I decided to go for it.
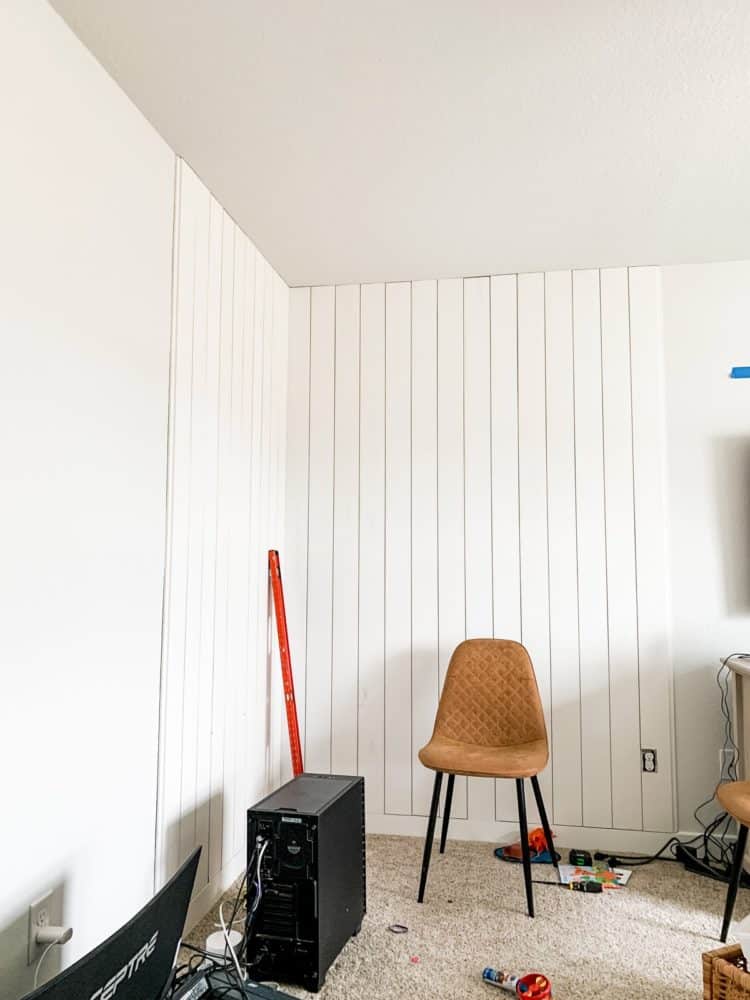
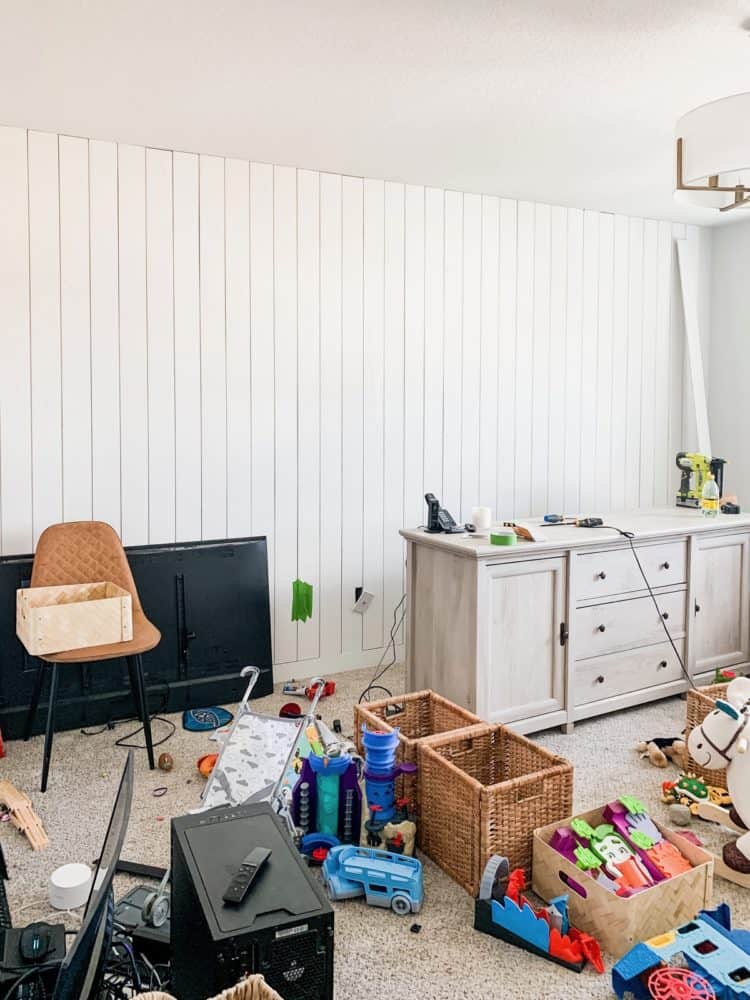
The Before
I had to dig deep for some before photos of this space – apparently I really avoided photographing this space because I had a hard time finding any! But, here’s what I’ve got:
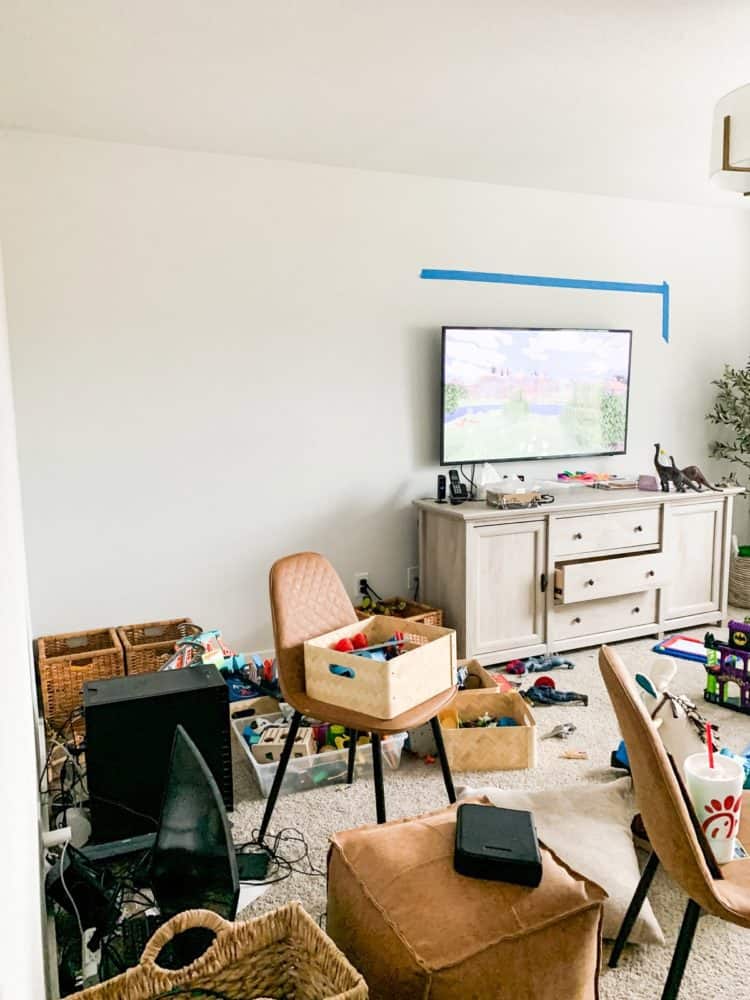
You get the general idea – basically a total blank slate, white box of a room!
Let’s add some shiplap, shall we?
DIY Vertical Shiplap Accent Wall
Video Tutorial
If you like to watch things come together in video form, I’ve got you covered. Here’s a video of my Instagram highlights from this project – it’ll show you an overview of every step of the process. Then, keep reading for the details!
Tools & Materials
I’m not listing exact amounts for the shiplap, as that’ll depend on your room! For the best estimation, measure the length of the accent wall, then divide it by the width of the planks. Then, add on a few extra just in case!
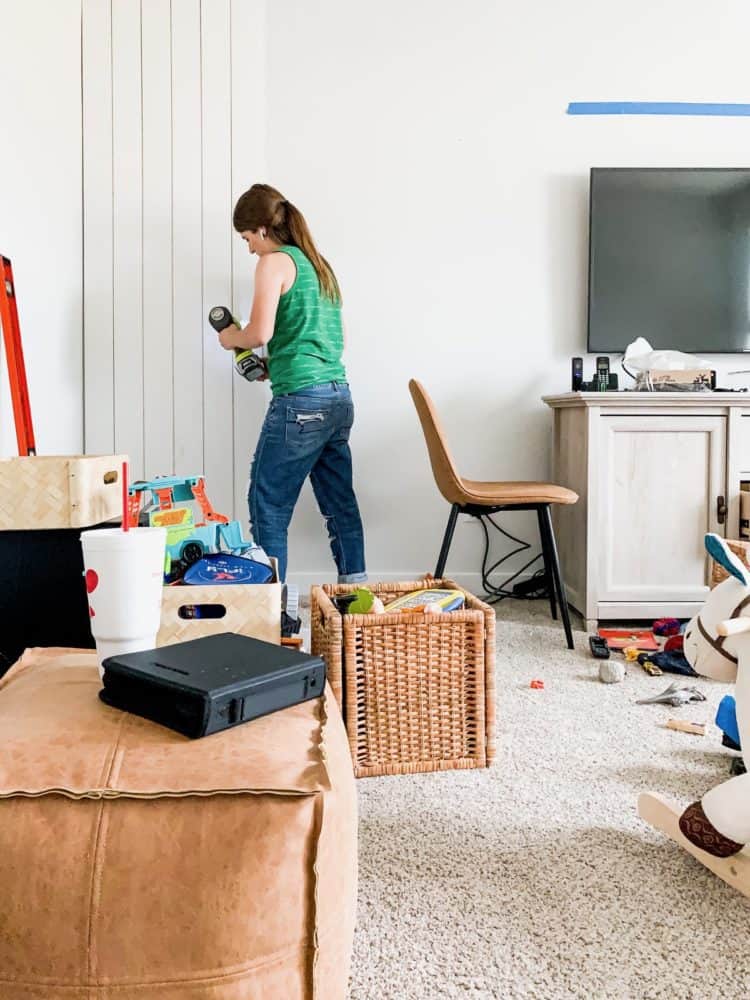
Prep Work
The first thing I’ll note is that this project is gonna be a lot easier for you if you pre-paint your shiplap!
I didn’t this time around, but if I was doing this again, I’d 100% pre-paint using my Wagner spray gun. You could just paint with a brush and roller, making sure to paint the front and sides of the shiplap slats. Just trust me when I say you’ll save hours of your life (and prevent a hand cramp or two) if you get it painted before you get it up on the wall.
If you’re working with real shiplap, which are tongue and groove boards that have spacing built in, you won’t need primer. They come pre-primed, so you can go straight to painting. Sometimes people wonder if they need to paint if they want white shiplap – the answer is yes! While the boards are white, it’s just primer and it will not hold up well if you leave it.
Note: You also have the option of creating your own faux shiplap wall. This is done by ripping a plywood sheet down, then using nickels as spacers to create the “nickel gap” look of shiplap. This is a more time-intensive option, but it is more affordable! If you go this route, I highly recommend priming before painting!
They also sell shiplap paneling, which has the same look but comes in a panel. I recommend doing your research to determine which product is best for you!
Another prep work step that you can choose to do is measure the entire length of the wall to figure out if you should start on a full board or a partial board. I didn’t do this, so I can’t speak to exactly how well it would work, but we ended up with a tiny sliver of a board over on the end of our wall. If I had measured the entire wall and divided that by the width of my boards, I would have seen that there was a tiny fraction of a board at the end. Then, I would have ripped my first board in half before installing it so that the end fraction was a little bigger.
Do as I say, not as I do, my friends!
A Note on Baseboards
Generally speaking, it’s recommended to go ahead and remove your baseboards prior to installing a shiplap wall. If you don’t, the edges of the boards may hang over the baseboards and create a weird look.
However, our baseboards are just plain 1×4 boards, so for us it worked well to leave them on.
A final preparation step you can take is to use a stud finder to find and mark all of the wall studs with a pencil. This is more important if you’re installing the shiplap horizontally, as you’ll be able to hit studs with every board. For vertical shiplap, you definitely won’t – just read on for the trick I used to keep mine in place!
How to Install Vertical Shiplap Boards
Once you’ve got everything prepped, it’s time to install the boards! Installing shiplap wainscoting is really simple and straightforward, so don’t be intimidated here.
1. Measure + Cut Boards
Your first step is to measure the height of the wall for the first board. You may be tempted to take one measurement and cut all of your boards to that length (after all, the ceiling is the same height all the way around, right?), but don’t do that! Your ceiling (and likely your flooring) isn’t perfectly straight or level and there will be variations.
I don’t recommend cutting more than about 3 boards from a measurement. After that, take a fresh measurement before cutting any more. I found that mine had about a 1/4″ variance throughout the wall – and my house is literally brand new! So, I promise just about every house is going to have some waviness to the ceiling.
2. Install Shiplap Boards
Once you have your board cut, you can install the first vertical board. When you’re installing horizontal shiplap, it’s easy to ensure pretty much every board hits a stud. But vertical shiplap is tricky since most of the boards won’t! One way to combat this is to use Liquid Nails or some other construction adhesive to glue the boards to the wall before nailing them in. But, I chose not to use it for this! I don’t like that adhesive will destroy the drywall if removed, so I tend to avoid it when I can.
Instead of using Liquid Nails, when I was nailing the boards in place I angled one nail downwards and placed another nail underneath it angled up. These nails should criss-cross behind the drywall and help hold the board in place. I also took the time to angle some of the other nails at varying degrees so they are less likely to pull out of the wall. Between that and every third or fourth board naturally going into studs, I feel really good about this standing the test of time. It’s been three years since I installed it, and everything is still perfectly in place.
You can see a photo of what I’m talking about below, or you can click here and watch my Instagram highlight with a closer look at how I installed all of this!
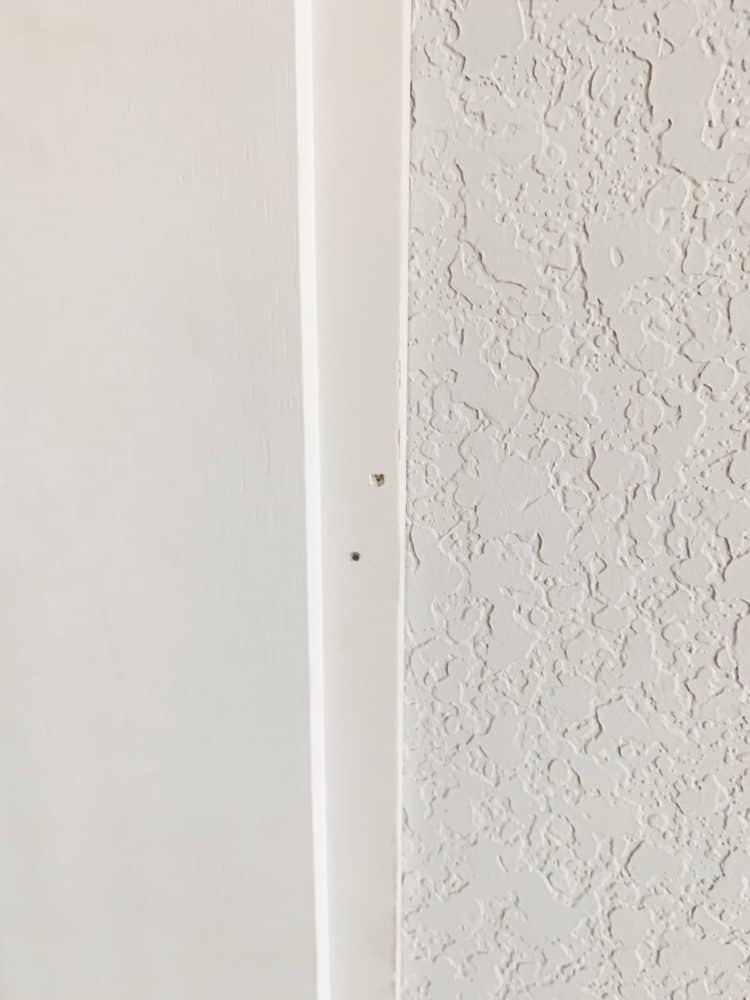
When I’m nailing shiplap into place, I put the majority of my nails in the lip of the board so that they’re hidden when the next board slides on top. But if you only put nails there, the back part of the board will pop right up! So I always put a few nails along the other side of the board and just fill them in later.
3. Dealing With Corners
When it comes to corners, you can just add trim (that’s what I’ve done in the past). But this time around I decided to see if I could skip it. And, I’m so glad I did! For the pieces that meet in the corner, I simply butted them up next to each other and caulked the cap so it’s basically seamless.
In the corner where the shiplap ends, we just cut a small sliver to meet the wall, then caulked between the board and the wall. I think it’s a really clean and more modern look, which is exactly what I was shooting for.
4. Working Around Light Switches and Outlets
Chances are, you’re going to have some sort of light switch, outlet, or other obstruction to work around.
When you come up against this, simply measure the location and mark it on the back of the board. Then, use either a jig saw or a Dremel-type multi-tool to cut out the hole for it! Take your time, and you’ll be surprised at how simple it is.
Also, remember that outlet covers hide a world of mistakes, wink wink.
Pro tip? I like this paintable outlet covers, which blend right into the wall!
5. Re-Install Baseboard and/or Crown Moldings
After you’ve finished installing your shiplap accent wall, it’s time to re-install the baseboards you removed. Click here for my tips for installing baseboards!
If you have crown molding in the room, now is also the time to deal with that.
Finishing Work
After you’ve installed your shiplap, it’s time for the finishing work. This part is the most tedious (and honestly boring) part of the process, but it’s also the most important part for a really seamless and professional-looking finished product!
I used a putty knife to apply wood filler to fill all of the nail holes in the shiplap. Be sure to overfill the hole a bit so that when you sand it down it’s perfectly smooth! If you don’t overfill it, there will be a little divot where the nail is and you may as well have not filled it at all. Click here for everything you need to know about wood filler.
I also caulked all along the top and bottom of the boards, and in the corners. Caulking vertical shiplap is a little annoying because of the gaps. I just kept a flathead screwdriver nearby and caulked each board one at a time. If any caulk got into the gaps, I gently pulled it out with the screwdriver. It was slow-going but not as bad as you might expect. Click here for all of my tips on using caulk!
After you’ve caulked and filled the holes and everything is dry, it’s time to sand! This is key in making your nail holes totally disappear. You can do this by hand with a sanding sponge, but if you have an orbital sander, that will make it a lot faster. I attached my sander to our shop vac to help reduce the dust, and it left virtually zero mess!
Sand aaaaaaaaall of your wood putty spots until they’re smooth, then wipe down the shiplap with a damp rag and let it dry fully before painting it.
Painting Vertical Shiplap
Once everything is dry it’s finally time to paint! Because I skipped the step of pre-painting, I had to use a paintbrush to paint inside each individual gap in the shiplap. It was not fun and it took me hours and hours to paint it all. But, of course, it was worth all of the effort in the end!
In later shiplapping sessions, I pre-painted the shiplap. I think this streamlines the process quite a bit, and is definitely my preferred method. But, it’s not always possible, so just know that either way is totally fine!
And, I think the finished product speaks for itself, don’t you?!

This trim treatment would be such a great think to try out anywhere in your home. It would look great in a living room, the laundry room, bathrooms, or a bedroom! Shiplap adds so much character to any space, and it’s one of my favorite ways to really transform a room.


Gorgeous job! and selection of paint color as well…it looks like you mantion the green being ‘Black Evergreen by Behr’ and mention elsewhere it being matte – it seems to have some sheen, can you confirm that what you used is matte? Thank you!
Yes, it’s the “matte” texture. It does have some sheen – “flat” would be the one that has basically none!
We are deciding on paint color for our vertical shiplap wall. Can you share what color this is?
Hi! It’s Black Evergreen by Behr!
Any update on how the boards are hanging in with out liquid nails?
Absolutely zero issues! Still looks just as good as the day I finished installing them. 🙌🏻
looks great!!
Can i ask where the TV console is from and the finish color? thanks
Hi! It’s from Home Depot – you can find a link to it on the Shop Our House page!
may I ask if the boards nailed into dry wall and not studs are just as sturdy? i’m hoping to do this in my dining room!
So far, yes! I addressed the technique I used with angled nails to help keep them in place in the post – so far it’s working like a charm.
How did you finish along the ceiling? It looks so good!
Thanks! I just caulked along the ceiling line!
What paint sheen did you use for this project? I am debating between the eggshell and the sating enamel in this color. Would it change the color and how it changes in the light?
Hi! I use matte for almost all of my interior painting! A higher sheen will definitely affect how a color looks when the light hits it, but not too dramatically.
This looks amazing. Great job!!
Wow, It looks good. Thanks for sharing this tutorial.
Hi, did you install directly above the baseboard or did you remove the baseboard before install?
Our baseboards are simple 1×3 boards, so we left them! You can do either way, though.