
How to Make a Bag Out of Wrapping Paper
Have a hard-to-wrap gift and looking for an easy way to wrap it without buying a gift bag? Let me show you how to make a bag out of wrapping paper in just a few minutes!
We’ve all been there, right? You’re all settled in to wrap some Christmas gifts and suddenly you realize you’re out of gift bags. And the next gift you need to wrap is oddly-shaped and almost impossible to wrap normally. So, you spend 20 minutes trying to make it work, only to end up with a lumpy, messy-looking gift that looks like a toddler wrapped it.
It can’t just be me.
Thankfully, there’s an easier way. I recently learned how to make a bag out of wrapping paper, and it’s a skill I think everyone should have in their back pocket! It takes just a couple of minutes and requires just a few easy steps. Let me show you how it’s done!
How to Make a Gift Bag Out of Wrapping Paper
You’ll need…
- Some gift wrap (high quality gift wrap that doesn’t tear easily is ideal!)
- Scissors (I like to use this rotary cutter for wrapping paper)
- Tape
- A hole punch (optional, I made it work without one)
- Ribbon
Video Tutorial
This is one of those projects that can be a little easier to understand if you watch it happen, so I put together a quick video to help you out. You can find the step-by-step instructions below, if you prefer to read!
Step One: Cut Wrapping Paper to Size
First, you’ll want to cut your wrapping paper to a size that will fit your gift. I just loosely wrapped the paper around the gift to double-check the sizing.
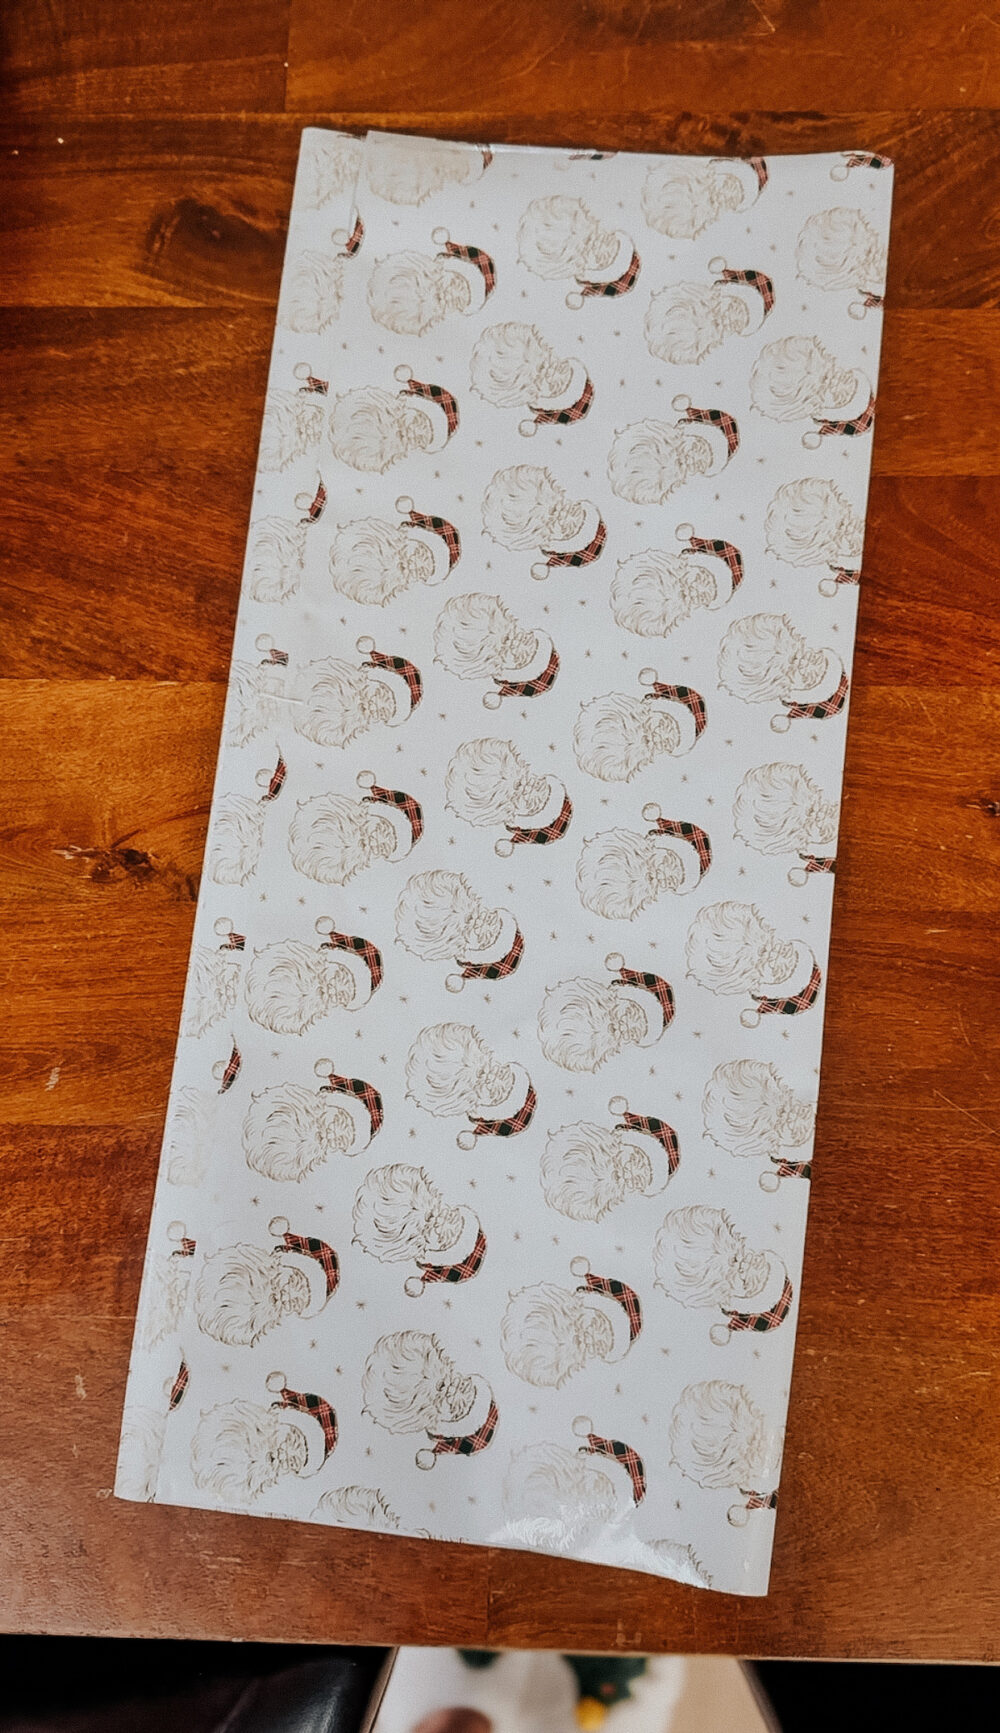
Step Two: Fold Into Thirds
Grab the left side and the right side of your wrapping paper and fold them into the middle (making sure they overlap) so you’ve folded the paper approximately into thirds. Tape the seam so that you essentially have a loop of wrapping paper. If you want to use double-sided tape or a glue stick so you can’t see it, that would create a cleaner look! I just used regular tape, though.
Step Three: Fold Up the Bottom Section
Grab the bottom edge of your folded paper and fold it up to start creating the bottom of the bag. This will determine the width of your bag, so make sure to fold far enough to ensure the bag will be able to hold your gift.
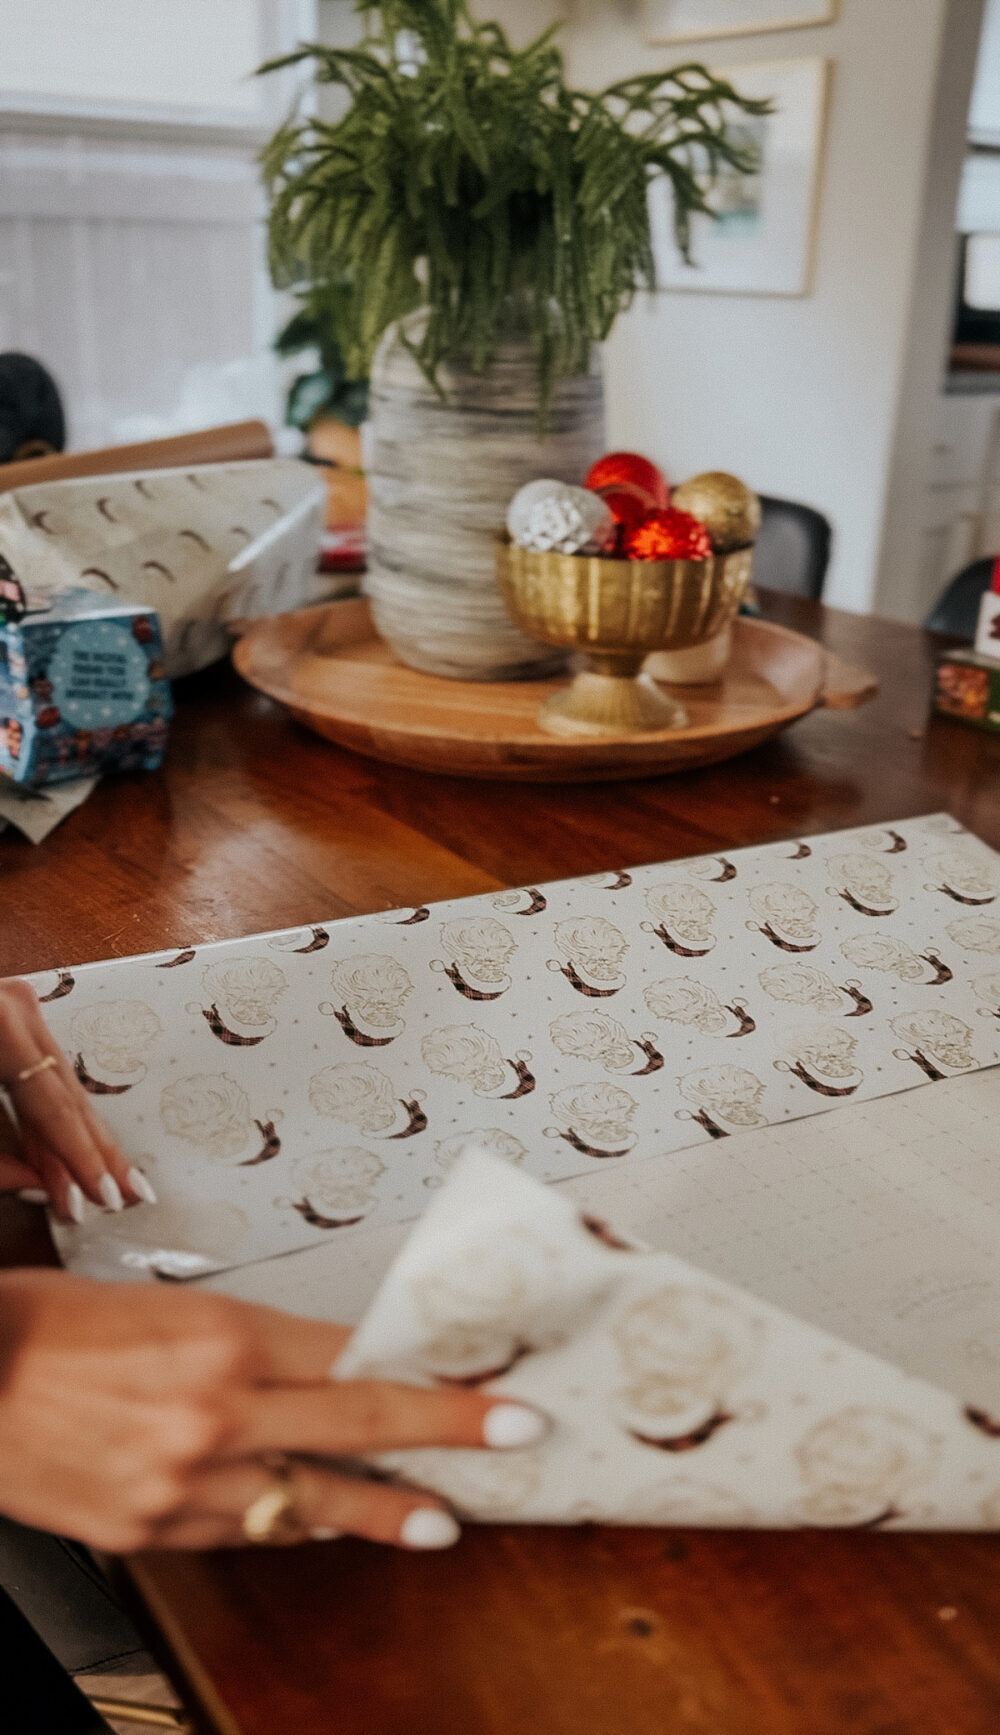
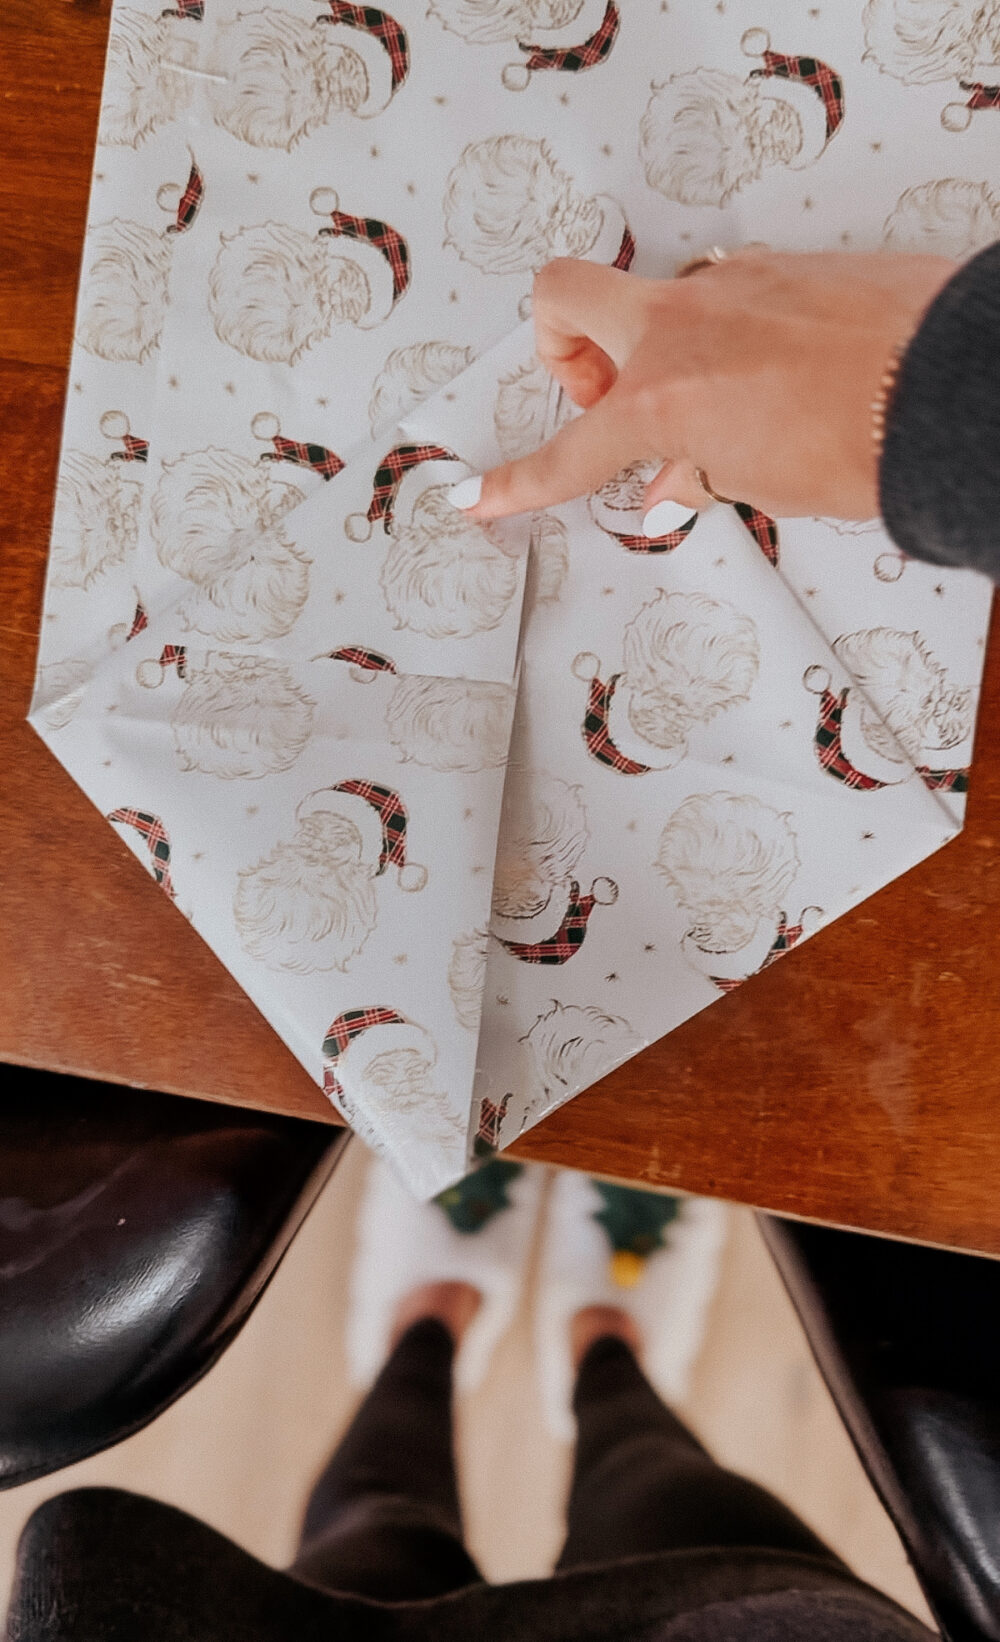
Step Four: Fold the Bottom Into a Diamond
Now, grab each side of your folded bottom and fold it in towards each other so that you end up with a diamond shape. Crease the seams.
Step Five: Fold In the Ends to Finish the Base
Now, grab the top and bottom of the diamond and fold them in towards the middle. Crease the seams and tape everything. With this, you’ve created the base of your bag!

Step Six: Open the Bag & Insert Your Gift!
Now, open up your bag and flatten the bottom of it against a table or other flat surface. You’re ready to fill it up! Slip your gift inside and double-check that all of your seams are properly taped. If you want to add some tissue paper to fill in the bag, you can!
Step Seven: Finish the Top!
Now, you’re ready for the final step of your little wrapping paper bag – finishing up the top of the bag. You can do this in a variety of ways, but I kept it simple. Just fold down the top of your gift bag, then use a hole punch to create two holes in the top flap (confession: I actually used scissors because I down own a hole punch). Slip a pretty ribbon through the holes and tie it in a bow (or just a simple knot)!

If you want, you can even make the ribbon extra long to create a little handle for your gift bag!
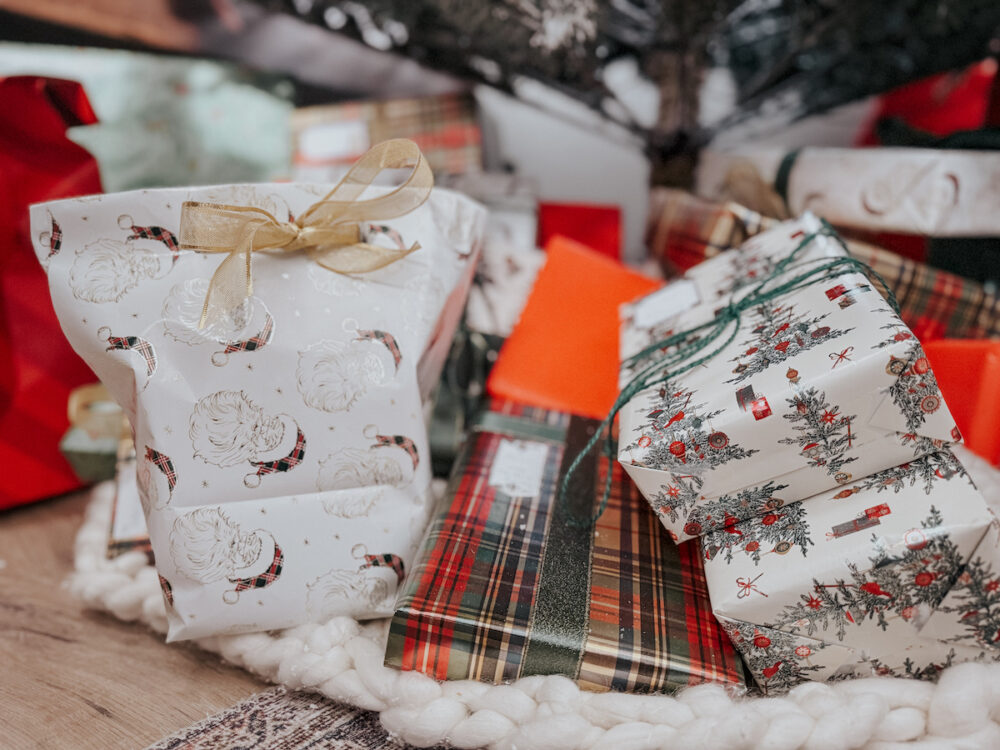
Add a gift tag so you don’t forget who it’s for, and tuck your gift bag under the tree. Done!
Is it the most beautifully-wrapped gift on the planet? No. But, it’s a great way to add a personal touch to a hard-to-wrap gift, and it’s the perfect use for leftover wrapping paper! Creating a homemade gift bag is so simple, and works for any gift-giving occasion.