How to Paint a Ceiling
Last updated on May 30th, 2023 at 11:45 am
I love a painted ceiling. Ceilings are often ignored when it comes to room renovations, but why not have a little fun with it?! Painting your ceiling or adding a treatment to it can go a long way in any space…so let’s chat about how to do it!
I’ve painted quite a few ceilings in my time – mostly in my kids’ rooms! It’s a bit of a pain in the neck (quite literally), but it’s honestly so worth the effort. Here’s everything you need to know about how to make it happen.

Examples of Painted Ceilings
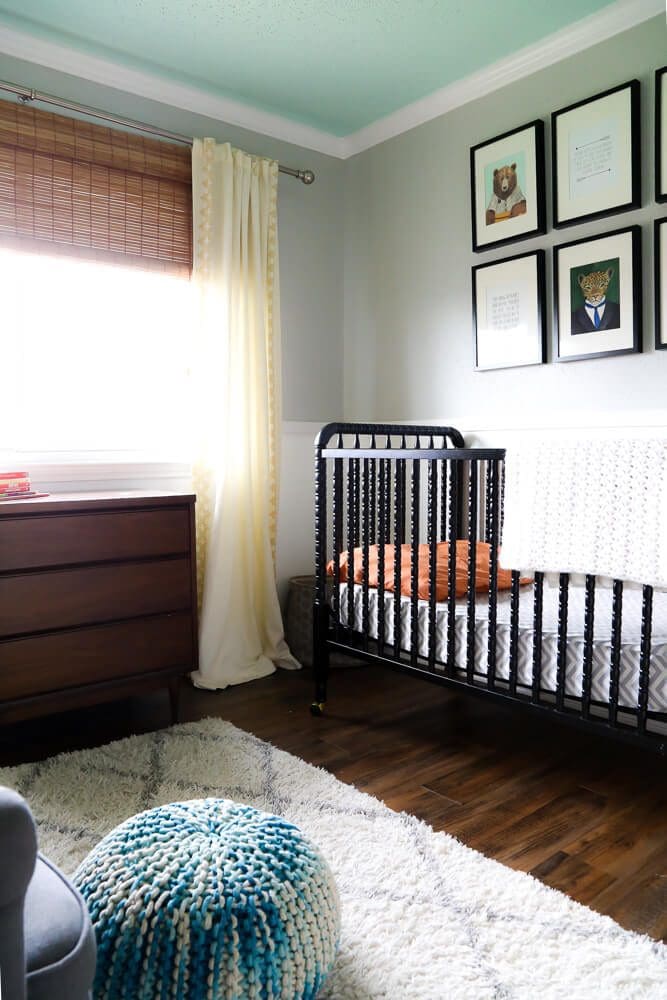
In Jackson’s nursery in our very first house, we painted his ceiling a pale blue. It was a really calming, soothing color and that little pop of fun on the ceiling was exactly the playful touch the room needed. It was 100% my favorite room in that house – it even made the popcorn ceilings feel less obnoxious!
That’s right – if you have a textured ceiling, painting it is a great way to hide that! It will obviously make it harder to remove the popcorn if you decide to do it down the road, though. So, if you don’t plan to remove them, paint it! If you do plan to someday remove the popcorn, I recommend just leaving it alone.
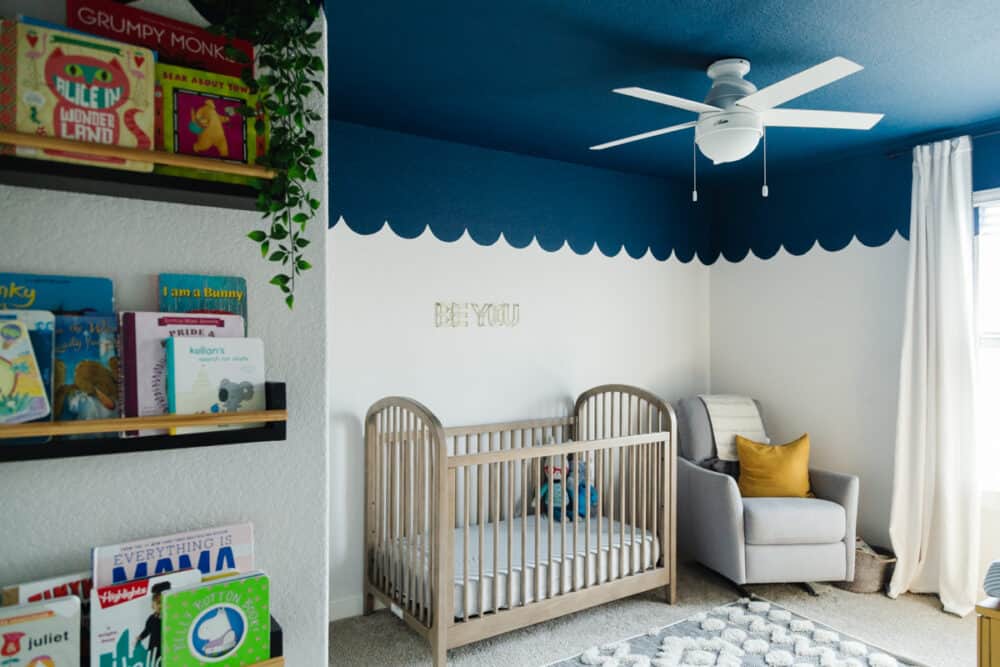
And, of course, in Grant’s room in our current home we also painted the ceiling! Funny enough, it’s basically the same color as Jackson’s ceiling is now. We left the walls white, and just painted the ceiling. It was a really fun take on the concept of an “accent wall”! It’s a unique paint job and it was one of my very favorite things I’ve done.
In this room, we added a fun detail of doing scallops about 18″ down the wall all the way around the room. I loved it so much, and I would 100% do this treatment again someday.
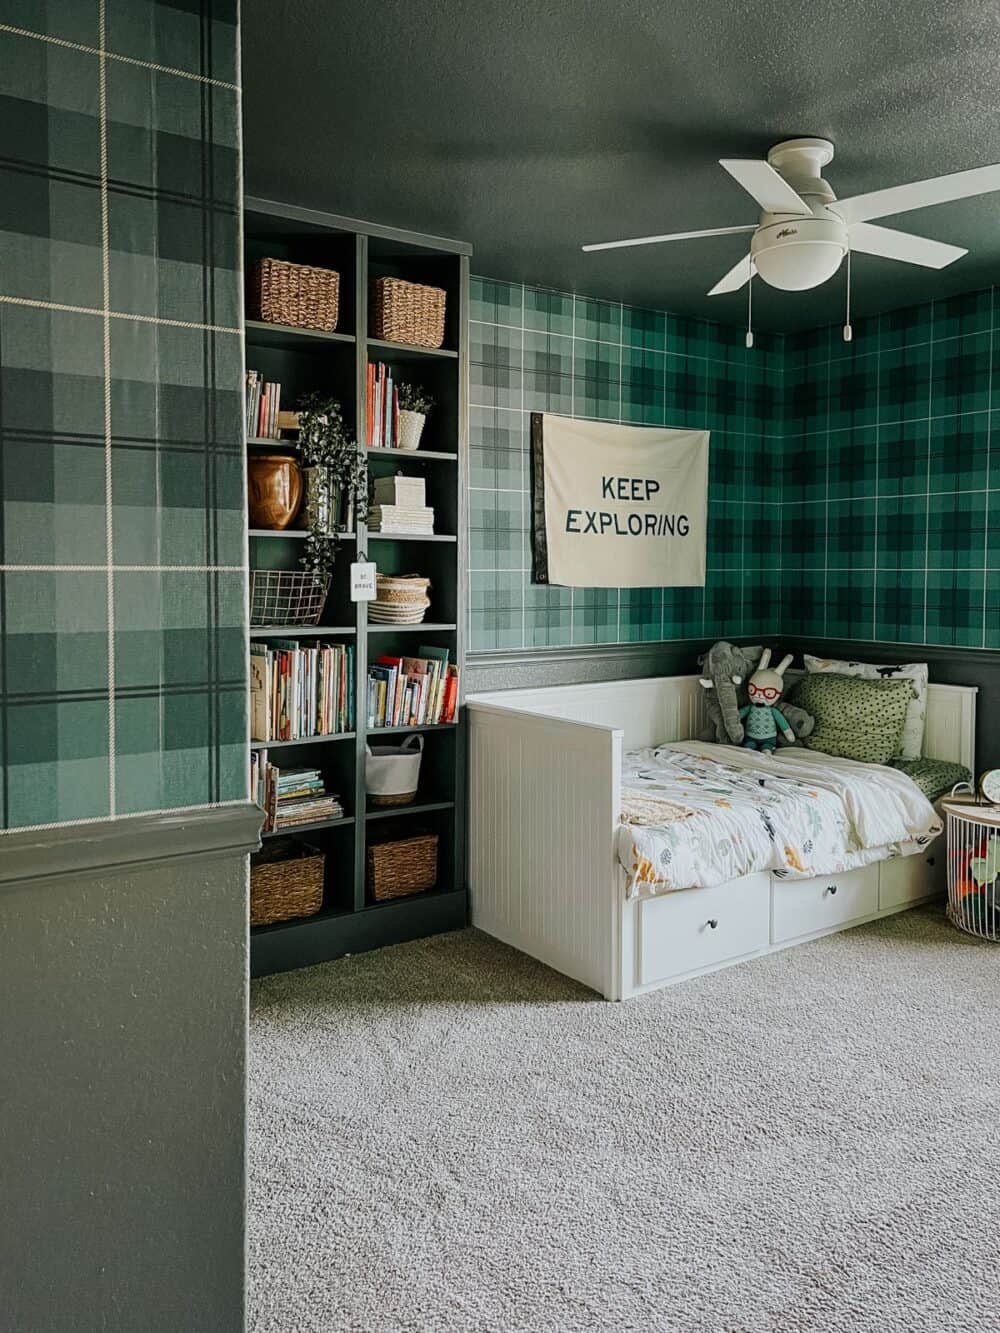
And then, when we gave Grant a “big boy” room makeover, we also painted the ceiling. This time, it’s green! His room has wallpaper on half the walls, and the rest is all painted one color. It feels so cozy and welcoming in there. It’s another example where painting the ceiling was 100% the right choice.
Of course, you may be looking into painting your ceiling simply because your ceiling needs a fresh coat of paint! Even if you’re looking to stick with plain white, these tips will help you paint your ceiling as quickly and painlessly as possible.
So, let’s dive into the details, shall we? Everything you need to know about how to paint a ceiling. I promise, it’s incredibly simple!
How to Paint a Ceiling: The Complete Guide
Choosing Paint
You can purchase specially formulated white ceiling paint from the hardware store for the best possible results. It’s flat, which helps hide imperfections. It’s also designed to be a bit less drippy than regular paint. I’d recommend not skimping – choose a high-quality brand (I’d go with this one) to ensure the best coverage.
Of course, if you have a unique situation like mine where you’re painting the entire room the same color, you can use regular interior latex paint on your ceiling as well. I used the same paint on both the walls and the ceiling, and it turned out perfectly fine.
There are no official rules about what paint you have to use. But, if you’re only painting the ceiling, I’d recommend going with a special ceiling paint for the best results!
Prep the Ceiling + Room
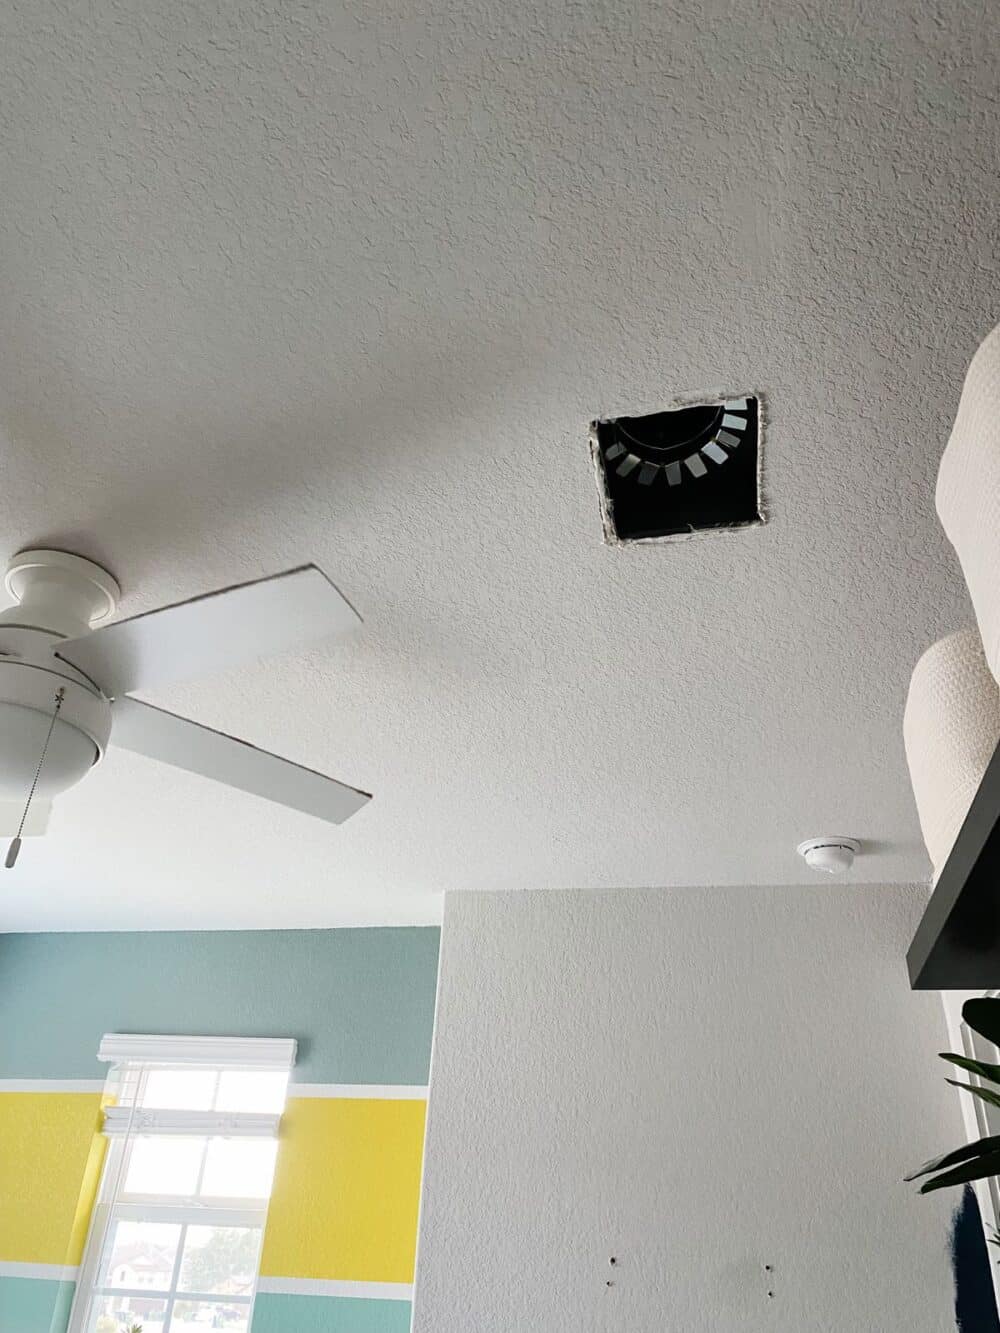
You’ll want to start by removing anything from the ceiling that you can (I removed the A/C vent). Then, lightly dust the ceiling,and make sure that nothing is going to be in your way. You can remove the light fixtures if you need to, or you can just cover them.
You should also plan on removing any furniture from the room that you can. Or, at least cover anything you’re worried about dripping paint on!
Finally, grab a canvas drop cloth and cover the floor as much as you can. You can use a smaller drop cloth and move it around the room as you work, or a bigger one that will cover the entire space. I personally find it easier to work with a smaller one.
Patch Holes, Prime Any Stains
If there are any holes, cracks, or imperfections, go ahead and patch those. You should also use a stain-blocking primer on any stains that you have on the ceiling. Hopefully this isn’t a necessary step for you, but it could be!
If your ceiling is in particularly rough shape, you may need to prime the entire thing. This is especially necessary if you have stains on the ceiling or are painting over a dark color. Otherwise, you should be okay just using a high-quality paint + primer combo.
Tape Off the Top of your Walls
I’d highly recommend using painter’s tape along the tops of your walls to ensure you don’t end up with ceiling paint on your walls or trim.
A quick note, though – don’t rely fully on the painter’s tape to prevent any issues. You should still be careful when cutting in and just use the tape as a failsafe in case your paint brush slips.
You’ll notice I didn’t use tape in Jackson’s room. The only reason I skipped it is because I was painting the entire room the same color, so it didn’t matter. In any other scenario, I definitely would have taped!
Cut In Around the Edges
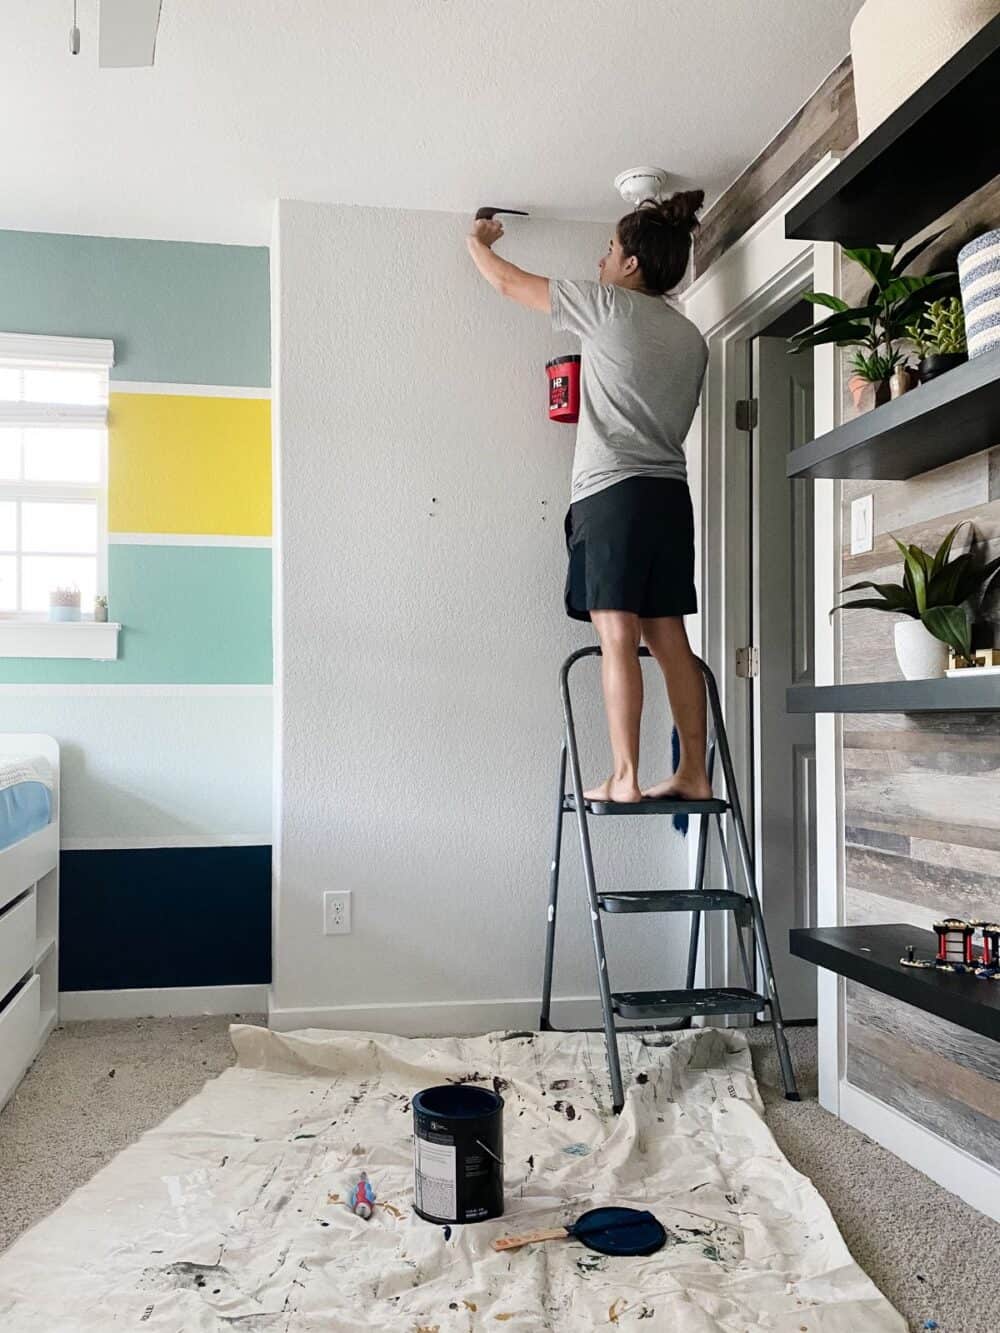
Now that all the prep work is done, you’re ready to cut in! You’ll want to use a high quality paintbrush and go around the entire ceiling. Be careful not to use too much paint, or you’ll end up with drips!
You can use this tutorial to help you cut in like a pro and make sure you get the best results. Go all the way around the room and paint all of the edges. Make sure to use long, continuous strokes and feather it out a bit so that you can reach the paint line with your roller.
Roll in Sections
Once you’ve cut in all around the edge of the ceiling, it’s time to start rolling!
I highly recommend using a power roller (here’s the one I love) for this project. It will eliminate the constant up and down of refilling your paint roller and paint tray. A 1/2 or 3/4 inch nap roller cover is great for a texture ceiling, and you can use a low nap roller for smooth ceilings.
The job is also much easier with an extension pole (which you can combine with your power roller!). I didn’t use one this time because they’re 8′ ceilings and it was easy to reach with a step ladder. But, for a larger space it would have been worth it to bust it out!
The best way to work is in sections that are about 5′ square. That will help keep the edges wet as you work and prevent lines. You’ll also get the best coverage if you backroll each section in the opposite direction immediately after painting it.
Try not to paint directly over your head. It’s not comfortable, you won’t do as good of a job, and you’re more likely to get paint in your hair. Instead, try to paint slightly in front of your body so that you can apply an appropriate amount of pressure as you work.
Alternate Option:
You can also paint a ceiling with your paint sprayer! Click the link below for the one I like to use in my spaces!
Allow to Fully Dry Before Doing a Second Coat
Follow the instructions on your paint can to allow the first coat of paint to fully dry (usually for 2-3 hours) before applying a second coat. In most cases, you will need two coats of paint for really solid coverage. However, I’ve found that if I’m using a really high-quality paint and my power roller, I’m often able to get away with just one coat and a few light touch ups.
And that’s it, my friends! Painting a ceiling is honestly not all that different from painting any other wall or space in your home, it’s just a different (and more awkward) angle.
With a little practice, you’ll be a ceiling painting pro, and you’ll be amazed at what a huge difference it can make in any room in your house!