
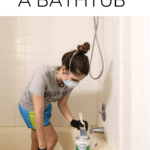
How to Paint a Bathtub
Have an ugly bathtub or shower surround? What if I told you you can use bathtub paint to refinish your tub and shower surround to make it look fresh, clean, and beautiful?! Read on to learn how to paint a bathtub!
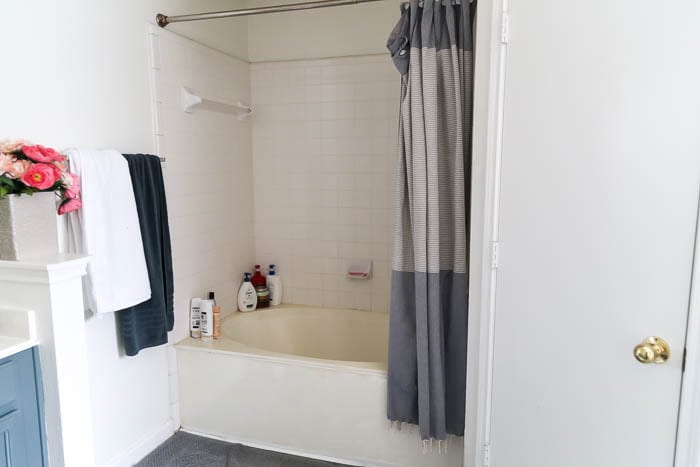
Ugly bathtubs are the worst.
When my husband and I lived in our first apartment together, we had a mustard yellow bathtub and surround – and not in a cute, vintage way. It was so bad, and I cringed a little every time I had to use it!
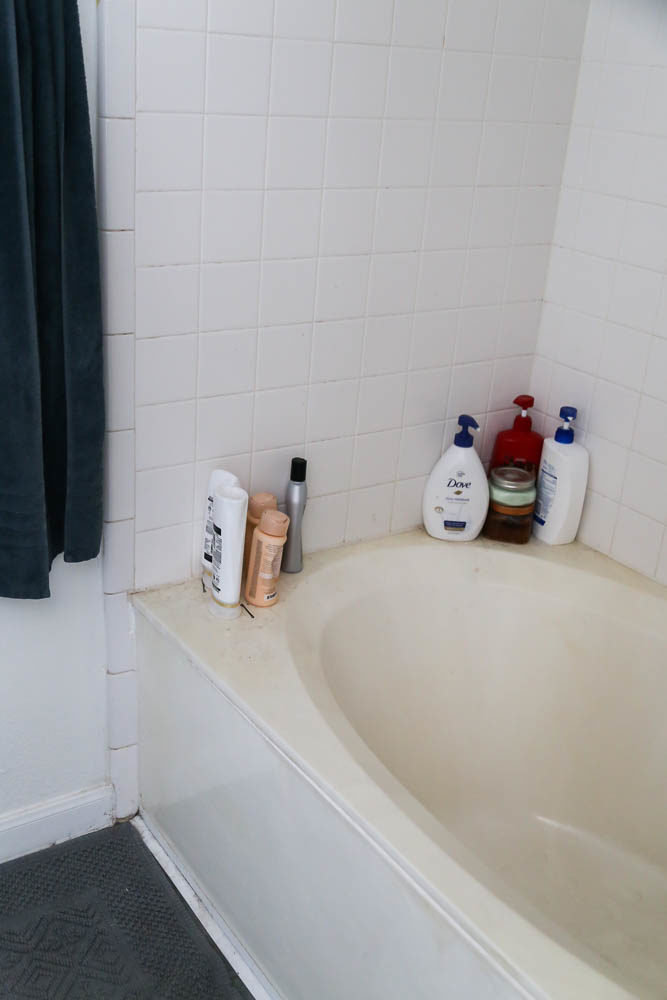
In our second home, our bathtub wasn’t quite as horrifying but it was pretty darn ugly. The tub was a marbled off-white that always felt dirty, and the tiles were a different color of off-white that had seen better years.
I knew there had to be an affordable way to fix it, so I did some research and decided to try out Rust-Oleum’s Tub & Tile Refinishing Kit. It brightened the entire room up significantly. Plus, once it was done, the bathtub actually felt clean when I cleaned it.
What a novel concept!
You don’t need professional refinishers for a bathtub reglazing. You can get a whole new look with this tub and tile kit, and you’ll be amazed at how simple it is to use bathtub paint!
Using Bathtub Paint: The Overview
Refinishing your bathtub is one of those projects that seems incredibly intimidating if you aren’t super comfortable with DIY. I want to take a moment to assure you that it’s not that hard. As long as you follow the directions and take your time, you will end up with a gorgeous result that will fool everyone into thinking your tub has always been bright and shiny.
My favorite thing about this project is how absolutely affordable it is to completely change the look of your bathtub. The kit is about $50, and you should be able to tackle a garden-sized tub and surround like mine with two kits. So, for about $100, you can say goodbye to your ugly colored bathtub. Forever.
Thank. Goodness.

This project took me about three days to complete. If you don’t have a five-year-old and a teething baby in your house, you could probably knock it out in just one. I’ll detail the timeline below (along with a couple of mistakes I made, so you can avoid them).
The kit requires that you allow it to dry for a full three days before you shower in it again, so be aware of that before you start this project! If you don’t have a secondary bathroom, plan on borrowing a friend’s shower or heading to the gym to clean up.
Or, you know, just embrace the stink. It’ll make your first shower in your newly-refinished tub that much sweeter.
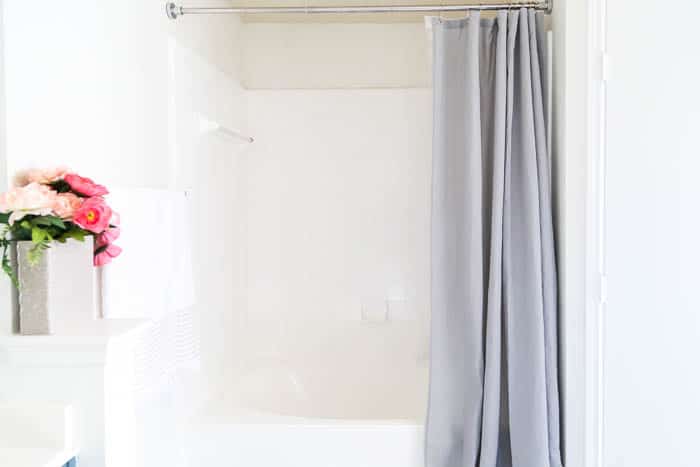
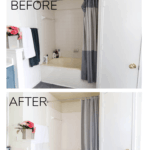
Okay, let’s do this. Here’s a reminder of what our tub looked like BEFORE I got started.
How to Paint a Bathtub Using RustOleum Tub & Tile Refinishing Kit
Note: Please feel free to use this as a reference, but please do NOT attempt this project without fully reading the manufacturer’s instructions!
Supplies you’ll need
Click on any of the items below to be taken directly to purchase!
Step One: Remove Caulk, Repair if Needed
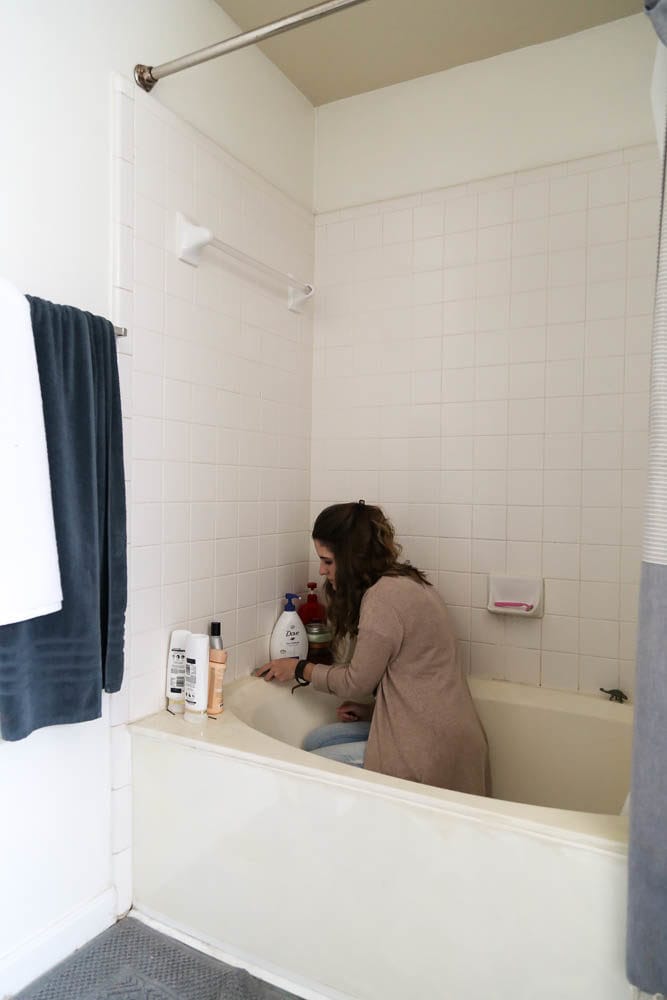
The directions state that you should clean the tub before removing the caulk, but I knew I was going to make a giant mess removing the caulk anyways, so I decided to tackle that first.
To remove the caulk, I just used a sharp razor blade and ran it along either side of the caulk, then peeled it up. If you have a caulk removal tool, that will make the job a lot easier. A spackling knife can even help in a pinch!
This sounds incredibly simple and quick, and it’s not difficult (at all!), but it will definitely require some elbow grease! I’d estimate that it took me about 40 minutes to remove all of the caulk around the bathtub. Just put on a good podcast and tell yourself that you’re getting your strength training workout in for the day.
This is also a good time to use epoxy putty or a tub repair product to repair any chips or issues with your bathtub.
Step Two: Clean + Prep Tub
Now, you’ll need to thoroughly clean your tub. Rust-Oleum recommends using a bleach and water solution, but you can use any tub cleaner. Make sure to get up any mildew or soap scum!
After your first round of cleaning is finished, sand the entire tub and tile area with 400 (or 600) grit sandpaper. This improves the bonding of the paint, so don’t skip it!
After sanding, rinse everything off and clean it again. You want the tub to be the cleanest you’ve ever seen it, because you don’t want to paint any dirt or hair into the bathtub. If you do, it’ll be stuck there forever! I recommend finishing up the cleaning by using some acetone and a tack cloth to remove any final traces of cleaner or dust from the tub.
Allow the bathtub to fully dry before painting it (I wiped mine down with a towel once I finished cleaning to speed up the drying process).
Step Three: Cover Tub Fixtures
If you can, go ahead and remove the faucet and drain hardware so you don’t even have to worry about it. If not, use painters tape to thoroughly cover it. You’ll want to remove the tape before the epoxy dries, but it’ll do a good job of keeping it safe while you work.
Step Four: Mix the Epoxy Bathtub Paint
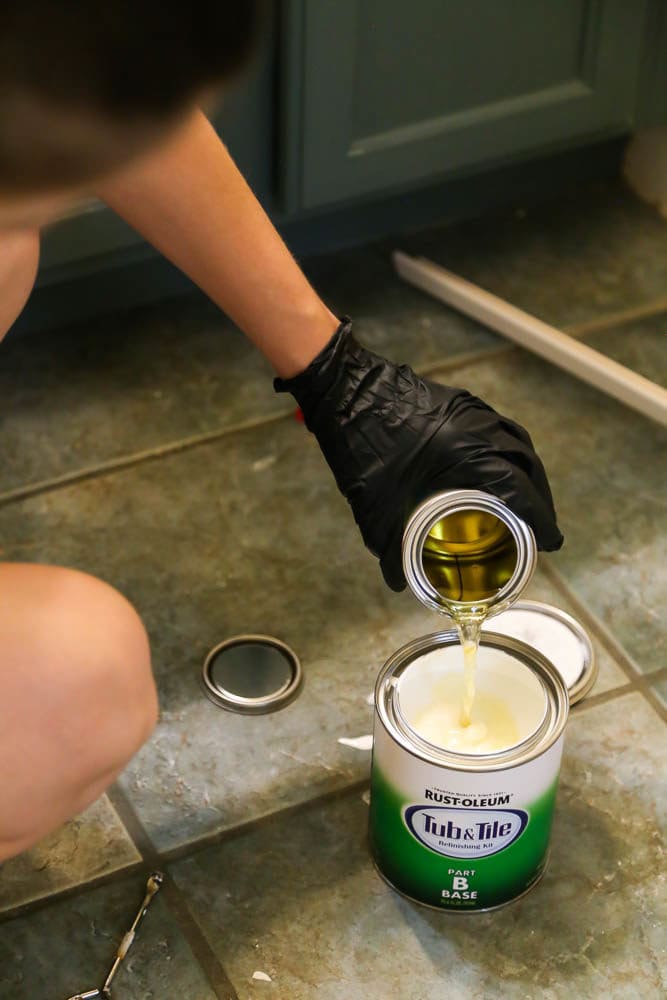
Here’s where I’ll make a note about the smell of this epoxy paint: It’s strong!
Be sure that you’re wearing a mask while you work, and I would even recommend some protective eyewear if you’re sensitive to this stuff. You’ll also want to turn on the bathroom exhaust fan, open a window in the bathroom, and if you’ve got a standing fan, place it in front of the window to help the fumes escape the room.
I kept the bathroom door closed while I worked, but of course some of the smell did escape to the rest of the house. We found that the best way to keep it from bothering us was to open the windows throughout the house and light a few candles. After about an hour or so, it wasn’t even noticeable! Even better? Do your painting first thing in the morning, then have the whole family head out for some errands. Leave a couple of windows open while you’re gone and let the house air out.
The tub and tile refinishing kit comes with a two-part epoxy. You’ll open both of them, stir them, and then mix them together into the larger paint bucket.
You’ll probably notice that the mixture is much thinner than regular paint. The key is that you have to stir the epoxy for a minimum of two full minutes before you try to paint with it! The box isn’t specific about how long to stir for, and it technically doesn’t require any wait time before painting, but I found that stirring for a good 2-3 minutes was the best way to get the mixture to thicken up enough that it didn’t leave drips while I was painting. Don’t skip this step!
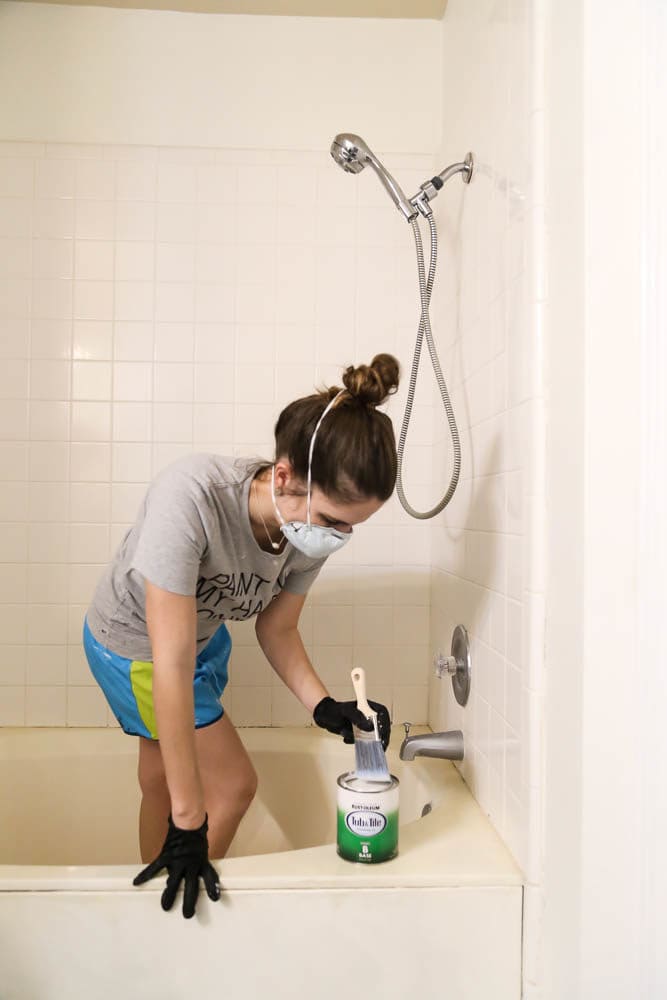
Step Five: Paint the First Coat
This is the part where, if you’re anything like me, you’ll start having panic attacks right before you start.
I mean, this is a big project. Tubs aren’t easy to replace. Projects like this can be intimidating – I get it. The best way to get over that fear is to just dip your brush in the paint and DO IT. Once you’ve brushed a bit on, it’s too late to go back so you might as well move forward.
I give you permission to even close your eyes for that first brushstroke. But please open them up afterwards so you don’t make a mess.
You’ll want to use a foam paint roller or a really high-quality paintbrush to paint your tub. You could use a paint sprayer (it’s honestly probably the best way to get a totally smooth finish) but I didn’t quite trust myself with spraying epoxy in my bathroom. I’m just a bit too accident prone and the fine particles of epoxy make me nervous. I used a combination of a small foam roller and a paintbrush, and it worked great.
Remember – be sure to cover up or remove and drains or metal pieces that you don’t want to accidentally get epoxy on. As you can see, I skipped this step. I now have a bit of paint on my drain. Whoops!
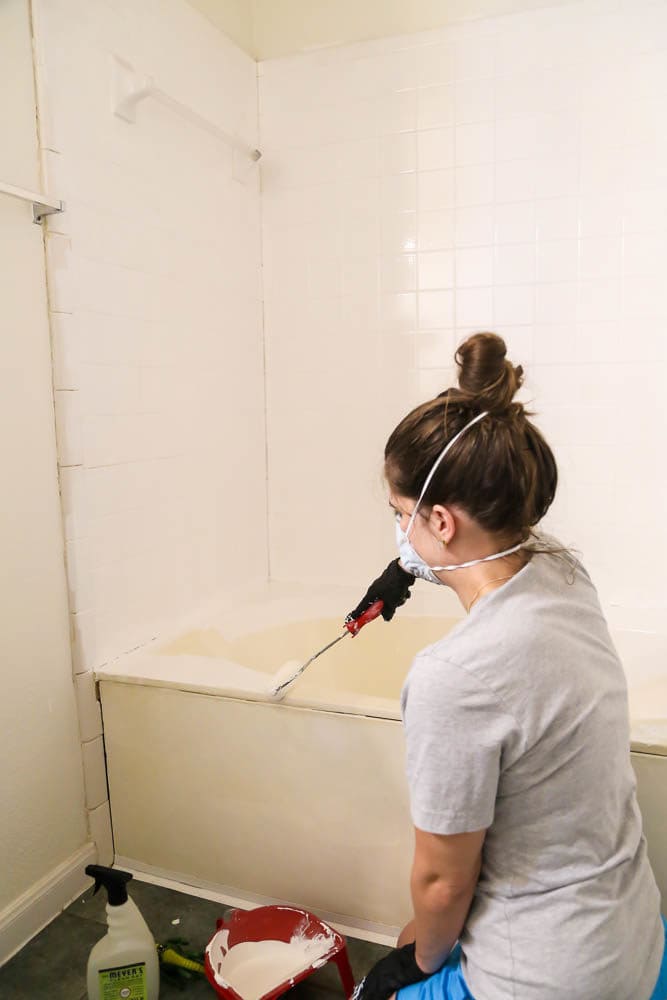
Step Six: Paint the Second Coat
The box recommends you wait an hour before doing the second coat of paint. I found that an hour was great for the tile and the outside of the tub, but when I stepped in the tub to reach the top of the tile, I smudged the epoxy a bit. I think a lot of it has to do with the temperature and climate that you’re working in. I’d recommend giving it two hours before doing the second coat, just to be on the safe side! The epoxy has a working time of 6 hours before you need to toss it, so you don’t have to rush. Just put the lid back on the paint while you’re waiting.
Because of my smudging, I did have to do a third coat on the tub – if you need a third coat, you have to wait 24 hours before adding it.
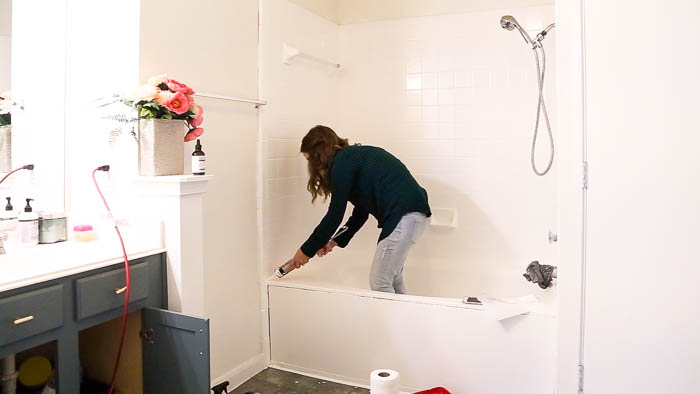
Step Seven: Re-Caulk
The directions actually don’t note exactly how long to wait before re-caulking. You have to wait three days after painting before exposing the bathtub to water, but it says that the epoxy is cured after 18 hours. So, I split the difference and waited two days between finishing my last coat of paint and re-caulking the tub.
Here’s how the breakdown of my schedule went:
- Thursday: Remove caulk
- Friday evening: Paint coats 1-2
- Sunday morning: Paint coat 3
- Tuesday: Re-caulk around tile and tub
- Thursday: First shower in the newly painted tub!
If you’re able to just work without distractions (and without smudging the paint), I’d recommend removing caulk and cleaning the bathtub the evening before painting. Then, spend the next morning painting. It should be pretty simple to knock out in one day, as long as you give a little extra dry time between coats!
We had to use our kids’ bathroom for a few days while everything cured. Let me tell you, it felt good to be back in our bathroom when all was said and done!
I know some of you still have questions. Here are the answers to a few of the most-frequently-asked questions I get about this project. If you have one I missed, just drop it in the comments and I’ll be sure to address it!
Frequently Asked Questions
What type of tub does this work on?
Can you paint a plastic bathtub? Can you paint a fiberglass bathtub? What about porcelain tile?
Yes, yes, yes! This product works on porcelain, fiberglass, and and ceramic, acrylic, cast iron, and steel which means it’s good for just about any tub and shower surround out there!
How does it hold up?
Epoxy is incredibly sturdy so you should have absolutely no issues with your tub over time. We moved out of this house about 10 months after painting it. But, after daily use for 10 months it still looked just as good as it did the day we painted it! No chips, no streaks, no issues!
What kind of caulk should I use?
For bathtub surrounds, I recommend DAP’s QuikSeal Ultra Caulk. If you aren’t familiar with caulking or find it a little intimidating, check out this guide to how to use caulk!
Does it leave brush marks or a texture?
No, the epoxy is pretty self-leveling and I didn’t notice any brush or roller marks once it was all try!
If you have any issues with things still feeling a little rough, I would lightly sand it with a high-grit (600+) sandpaper to help buff out any imperfections!
How do you clean a painted bathtub?
I didn’t change my cleaning methods or tools at all after painting our bathtub! You can clean with anything you would feel comfortable cleaning porcelain tile with, and it should hold up perfectly fine.
I’m so, so incredibly pleased with how this turned out, and I am so glad we did it. Until I started researching this, I had no idea it was even possible to paint a bathtub at home. Now I know that not only is it possible, it’s totally affordable and not all that difficult!
Let me know if you have any questions about Rust-Oleum’s Tub & Tile Refinishing kit. Be sure to check out their website for more information (and a how-to video).
What color did you pick for white? White or New White?
I believe they only had White bak when I did this!
This has been so helpful, thank you! About to order everything. I’ve seen some blogs or comments about using a primer first, do you think that is necessary? Also, would 1 kit cover the tub & tile surround with 2 coats or do I need 2 kits?
No, I would only use what comes in the kit. 1 kit should be fine for most standard tubs!
Just wanted to drop a quick thank-you for your blog post about using Rust-Oleum’s Tub & Tile Refinishing Kit. Your instructions and tips were super helpful, and I successfully refinished my bathtub following your guide. It looks so much better now, and I couldn’t be happier with the outcome. Thanks for sharing your experience and making it seem doable for someone like me who’s not that handy. Keep up the good work!
Your tub looks terrific! I’ve been thinking about redoing my 70s style baby blue tub/shower and sink. I know your tub was originally off white, but do you think the product would cover a colored tub in 2 coats? Just wondering how much product I need to buy.
Yes, I would think so!
It’s interesting to know that bathtub can be painted. Refinishing kit will save us a lot money because of its cheap price that will fix our bathtub. Thank you for sharing this informative article!
I’m getting ready to start painting my tub and surround. This is a very old house and the tile on the floor is disgusting, grout is dirty and the tile has several small cracks. When I finish the tub and sink, I am going to paint the floor. Will the epoxy cover the small cracks or is there another process I should do before doing the epoxy?
Very small cracks should be covered. Larger cracks may need to be repaired!
I have an old rv that is about 30 years old. It looks like it might be plastic but it will allow a man 250 lbs to use.
I need to paint it. Can I paint over it?
I used the rust oleum floor paint on my half bath floor. It’s only been a week but so far I am really pleased. I have a full bath I want to tackle next. It has tile half way up the walls all around the bathroom. I plan to use the epoxy product in the shower stall but what about wall tile in the main part of the bathroom? Which product would you recommend for the wall tile outside the shower area?
Hi! You can use the epoxy paint on that part as well!
I love your finished project! I just bought an older home and I’m not sure if the tub and surround is fiberglass or vinyl. It’s all one piece. Would this work on vinyl as well and would you know how to tell what the material is? Thank you for sharing this, I hate this tiny bathroom.
Yes, it should work great on a fiberglass/vinyl surround!
This looks great! Thank you for sharing your experience. We have an 80’s mauve walk in shower with tall shower walls and a built in seat–I think the shower frame material is acrylic. Do you think this product and overall process will work on that rather than a tub? What is the consistency of the material? Do you think it will drip much?
It’s meant for showers as well, yes! It’s a big thinner than regular paint – I recommend stirring really, really thoroughly before painting!
What kind of caulk did you use around the tub? I repainted my tub as well but it started peeling around the caulk areas. I just touched it up and was wondering if you had the same problem or maybe you used a better caulk 🙂
Hi Maria! I have a whole post with tips on caulk and choosing the right one for your project. You can find it here!
Hi Amanda!
We just refinished our bath with tub and tile! Yours looks great! I have a question – when you re-caulked did you use tape to get a nice clean line? If so did you have any issues like pulling up the epoxy when removing the tape? Thanks!
Hi! Yes, I used tape, and no there’s no issues – I’d recommend using a delicate surfaces tape to be extra careful, but as long as it has had a day or two to cure, you should be fine!
Hi Amanda! Your tub and vanity look amazing! You mentioned that you wanted to paint your tile floor in the bathroom too. I was wondering if you did. Thank you for your inspiration!
I did! You can see it here: https://www.loveandrenovations.com/paint-tile-floor/
I just fiMnished my tub and it looks real good. Problem is the finish is a tad rough. Can this be smoothed out using 2000 gritwet/dry sandpaper and if so how long after the paint has set? It has been 24hrs now.
Yes, I would try sanding after 24-48 hours.
Hi, did you have to dand the tile surround as well before painting?
Yes, I sanded everything before starting!
Just curious as I’m in the process of redoing ours. Did you paint the outside panel also? I have a white tub already and really just need to get the black off the bottom on the inside so didn’t know if that iutside part needed painted too. Thanks
Yes! I painted the entire thing.
Good Job! You’ve laid out your steps for everyone in great detail! I too had one of those 60’s colored tubs, mine was the pink! Yikes… The tub was still in great condition so I decided to also paint it. I researched the epoxy paints because I had heard that was the only way to go. I however, used Klass Kote Bathtub Epoxy because they were able to make a custom color for me which I wanted. (klasskote.com/epoxy_bathtub_paint) The process was pretty much the same with a few minor exceptions. Results were great! It was such fun…really! Thanks for sharing the possibilities to other brave souls.
It’s wild how big of a difference it makes!
I’m not sure how I even found this, but I’m so tickled! I didn’t know this was possible but I have 2 bathtubs that need it. One just needs a freshening up, the other is harvest gold from the 70’s! It’s a corner garden tub so a royal pain to replace, but I’m really excited to try this! Thanks!!
Amanda! It looks amazing!! I’ve often thought about doing this. However, in a previous home, someone painted the tub and left brush marks. These collected dirt & soap scum & became very difficult to clean. Does the epoxy self level, or did it leave brush marks/ roller texture? Thanks for sharing!!
Thank you!! It does a good job of self-leveling – I don’t see any brush strokes or roller marks on ours!
I’m so grateful for this information! My fixer-upper was last remodeled in the 70s 👀….I have so much to do with my tiny budget! The bathtub is ugly and stained. The tile color isn’t hideous but definitely not what I want. I’d decided I had no choice but to replace the tub 💰💰💰, and due to that expense, I’d simply have to live with the tile. Thank you so much for this information!
It’s SUCH a satisfying project, and surprisingly easy! I highly recommend it!
How about durability when cleaning? What do you use to clean now that you’ve painted it?
It holds up great! I use all of the same cleaners I used before painting it – I haven’t changed a thing about my routine!
I wish I had read this about five hours ago. As you pointed out they don’t have a recommended stir time on the can and the first portion of our tile countertops ended up with really runny paint before it thickened up. Your bathtub looks great! I can’t wait to do our ugly tub and tile surround as well.
Yes, I had the same problem at first! Once you stir it more, it works great!
Can you use this paint to paint over the non-slip strips that are in the bottom of the tub? These don’t look like they come off (ie the non slip strips are not stickers), so I’m hoping to just paint right over them.
If they’re a part of the tub, then yes, it should be fine!
You had to paint over a few days but said it had to be tossed in 6 hours. Could you clarify this, please? TY…your project looks amazing!
Hi Judi – Sorry if that wasn’t clear in my explanation in the post. Once opened, the paint needs to be thrown out after 6 hours. You should be able to paint one coat, wait 1-2 hours, then paint the second and be good. I needed a third coat, and you have to wait 24 hours to do a third coat, so I had to get a fresh batch. Most tubs should be fine with just two coats – I only had issues with mine because I was a bit rushed and distracted (which often happens with the kids around!)
I did my tub and tile about 2 1/2 years ago with this product and it looks as good as the day I finished. I’m really happy with the durability.
That’s awesome to hear!
Hi so I have a tub that has been destroyed by some kind of chemical my husband used to clean the drain. It is really rough ( the texture of the tub is like sand paper) there is no shine or smoothness to the tub. Can I use this product to restore the shine and smoothness of the tub.
Hi, Dee! I’d imagine the tub would need to be sanded down to remove the rough texture, but after that, yes this will absolutely restore the color and shine!
Looks so good! Did you paint over the grout between the tiles, too? Or how did you handle that?
Thanks, Jessica! Yes, I painted right over the grout. It basically just looks like white tile with white grout now, and since it’s epoxy it’ll be a lot easier to clean!
Will this work on enamel tubs, like a claw foot tub?
Yes, it should definitely work!
It looks great! That’s an easy way to spruce up a bathroom. I would like the paint my bathrooms walls and now you’ve got me thinking I should paint me tub as well. I saw an article related to choosing bathroom colors for walls and cabinets that was quiet interesting too https://blog.mykukun.com/choosing-bathroom-colors-for-walls-and-cabinets/ Really well done, your tub looks brand new 🙂 thanks for the inspiration!
Will this work for fiberglass tubs and surrounds? We’ve been here 28 yrs and would like to give this a try.
Yes, it will absolutely work for fiberglass!
The revamped bathroom looks truly gorgeous, Amanda! Plus, I like how you use the negative space in a small area. The vanity goes really well with the decor. Thanks for sharing!
It looks SO much better!!!! I’m dying to know how this holds up! We bought a house that was “updated” by a flipper whose style was distinctly from 1998. So our bathrooms have a faux-travertine tile that is sooooo dated. I talked to my husband about possibly painting it because we can’t afford a re-tile at the moment, but he was concerned about longevity. If this holds up even a few months of regular use, it would be totally worth it to try on our guest bathroom that hardly gets any use.